
How to Fold the Kindersense Crib Tent in Under 30 Seconds
This post contains affiliate links. As an Amazon Associate, we earn from qualifying purchases.
Folding the Kindersense Crib Safety Tent requires flipping it upside down first, then performing a specific diagonal fold and twist to collapse its spring-steel frame into two overlapping circles. Missing the initial flip is why most people struggle, as the frame fights any other folding path.
The universal mistake is trying to fold it like a bedsheet or a camping tent. You grab corners and pull, the rods spring back, and you end up in a frustrated standoff with a dome of mesh. The frame has a memory, and you have to work with it, not against it.
This guide walks through the manufacturer’s verified method, explains why it works, and covers what to do when the standard steps still feel wrong. We’ll also tackle real owner issues like washing this non-removable fabric and getting a clear baby monitor view through the mesh.
Key Takeaways
- Flip it first. The single most important step is turning the fully assembled tent upside down before any folding begins. Skip this, and the frame will not collapse correctly.
- Follow the diagonal. The fold path is corner-to-opposite-corner, not side-to-side. This aligns the flexible rods so they can coil.
- It’s a frame collapse, not a fabric fold. You are manipulating the spring-steel rods into two circles; the mesh just follows. Focus on the rods.
- Washing is an outdoor project. The fabric is not removable. The official advice is to scrub and rinse the entire tent outdoors and let it air dry.
- Monitor visibility requires angling. The mesh can blur a monitor image. Place the camera about 24 inches away and adjust the angle until you get a clear view of the child.
Why This Tent Folds Differently (And Why It Matters)
The Kindersense isn’t a simple net. It’s a pop-up shelter with a full perimeter frame of flexible, spring-steel rods that slot into channels at the mattress level and arch over the top. This is the same basic engineering as many instant compact backpacking tents, where the frame wants to spring into its set shape. Folding it is the process of overcoming that spring tension in the correct sequence.
The design is also a direct response to safety history. In 2010, a “Tots in Mind” crib canopy was recalled because it could create dangerous gaps or collapse. The Kindersense tent differs fundamentally: its frame extends down to the mattress bottom, creating a complete, gap-free enclosure. That full-frame structure is also what makes folding it counterintuitive. You’re not just taking down a canopy; you’re collapsing a miniature geodesic dome.
Common mistake: Trying to fold the tent right-side-up — the arched rods are under tension and will snap back, making it impossible to form the final circles. Flip it first, and the rods are pre-loaded to collapse inward.
TL;DR: The tent’s full pop-up frame requires a specific collapse sequence. Folding it like a simpler product will fail every time.
The 5-Step Folding Method (No Magic Required)
Clear a space on the floor about the size of a bath mat. You need a firm, flat surface. The whole process takes about 30 seconds once you know the moves.
Step 1: Stand and Flip.
Take the fully assembled tent and stand it upright on the floor. Then, in one motion, flip it completely upside down. The arched top should now be on the ground, and the flat base (where it sits on the crib rails) should be facing up. This is non-negotiable. The frame is now positioned so the rods will buckle inward when folded.
Step 2: The Diagonal Fold.
Identify one corner of the now-upside-down tent. Grab that corner and pull it directly across to the diagonally opposite corner. The tent will collapse into a long, somewhat flat diamond or oval shape. You’re not making a perfect crease; you’re aligning the rods.
Step 3: Create the First Circle.
With the tent in this flattened diamond, use one hand to push down on the center where the rods cross. At the same time, use your other hand to guide one end of the rod bundle into a small, tight circle. This is the trickiest part. You’re physically forcing the spring steel to coil. It will resist, then suddenly give way.
Step 4: Twist and Lock the Second Circle.
Once the first circle is formed, you’ll have a tail of rods and fabric. Twist this tail behind the first circle to form a second, overlapping circle. The two circles should lock together, somewhat like a figure-eight. Tuck any loose mesh fabric into the center of the bundle.
Step 5: Bag It.
Slide the compact, double-circle bundle into the included carry bag. If it doesn’t slide easily, don’t force it. Pull the bundle out, ensure no fabric is snagged on the rods, and try again. A clean coil makes storage simple.
Missing a step has consequences. Skip the flip, and you’ll fight the rods until you give up. Rush the diagonal fold, and the rods won’t align to coil, leaving you with a bulky, unstable bundle that won’t fit in the bag.
What to Do When the Basic Steps Fail
Even following the guide, you might hit a snag. The frame is resilient, and small deviations cause big problems. This table diagnoses the most common issues.
| What’s Happening | Likely Cause | The Fix |
|---|---|---|
| The tent springs back open | You didn’t flip it upside down first. | Turn it over and restart from Step 1. The rods must be loaded correctly. |
| It won’t form a neat circle | The diagonal fold wasn’t clean or was off-center. | Unfold, lay it flat upside-down again, and ensure you’re pulling corner-to-corner. |
| The bundle is huge and won’t bag | You didn’t push the first circle tight enough. | Squeeze the first circle smaller before twisting the second one around it. |
| Fabric is caught and bulging | Mesh got tangled in the rods during the twist. | Untwist, smooth the fabric flat against the rods, and re-coil. |
If you’ve lost the carry bag, the coiled tent can be secured with a large rubber band or stored in any similar-sized fabric bag. The goal is to keep it compressed so the rods don’t slowly try to reform during storage.
I watched the official video a dozen times before my hands understood the “push and guide” motion for Step 3. My first three attempts produced a lopsided clump that looked nothing like the video. The moment I used more downward pressure in the center, the rods clicked into place. It’s a firm press, not a gentle nudge.
Washing and Maintaining the Tent (The Real-World Limits)
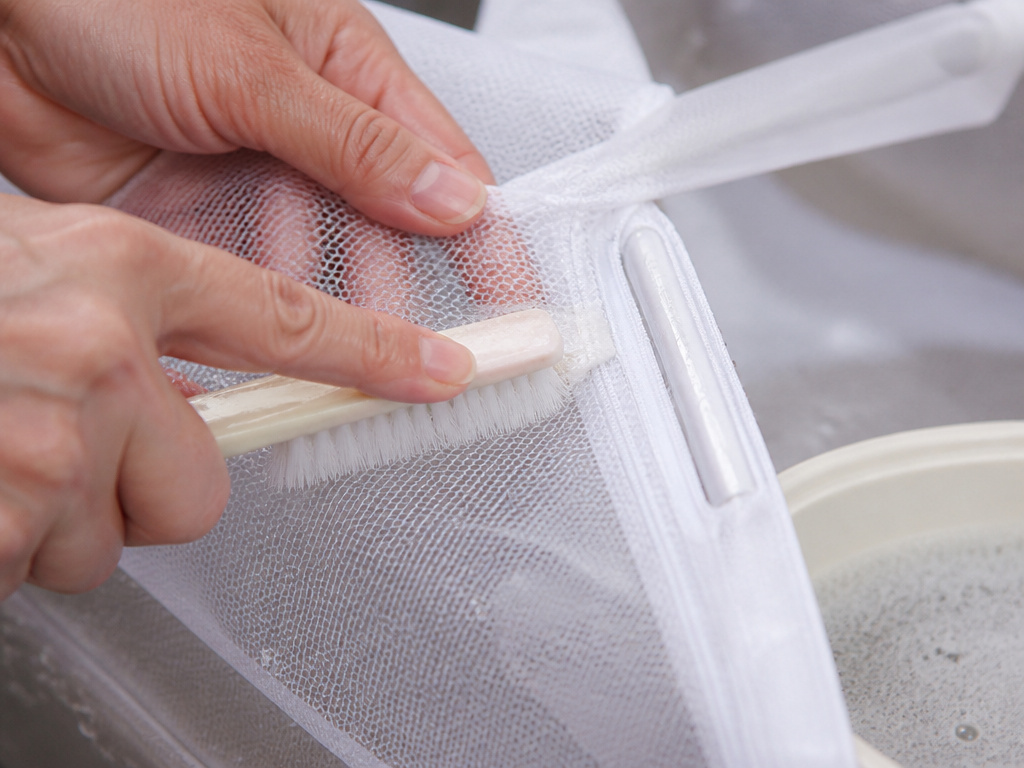
The product FAQ states the tent is hand washable. Here’s what that actually means: the fabric is sewn onto the rod channels. You cannot remove it. You will be washing the entire frame-and-mesh structure.
The manufacturer-recommended method is to take it outside, scrub it with a soft brush and mild soap, rinse it with a hose or bucket, and let it air dry completely in the sun. Do not submerge it in a bathtub or put it in a washing machine. The water weight on the suspended mesh can strain the seams, and the rods can rust if water is trapped in the channels.
For spot cleaning, a damp cloth with a bit of baby-safe detergent works. Focus on the interior straps, which are 100% cotton and can absorb spills. Always ensure the tent is bone dry before placing it back over the crib. Damp mesh in a poorly ventilated room can develop mildew.
This maintenance reality is a key differentiator from simpler, less expensive durable play tents or canopies that might have removable covers. The Kindersense is a single, integrated unit.
Solving the Baby Monitor Problem
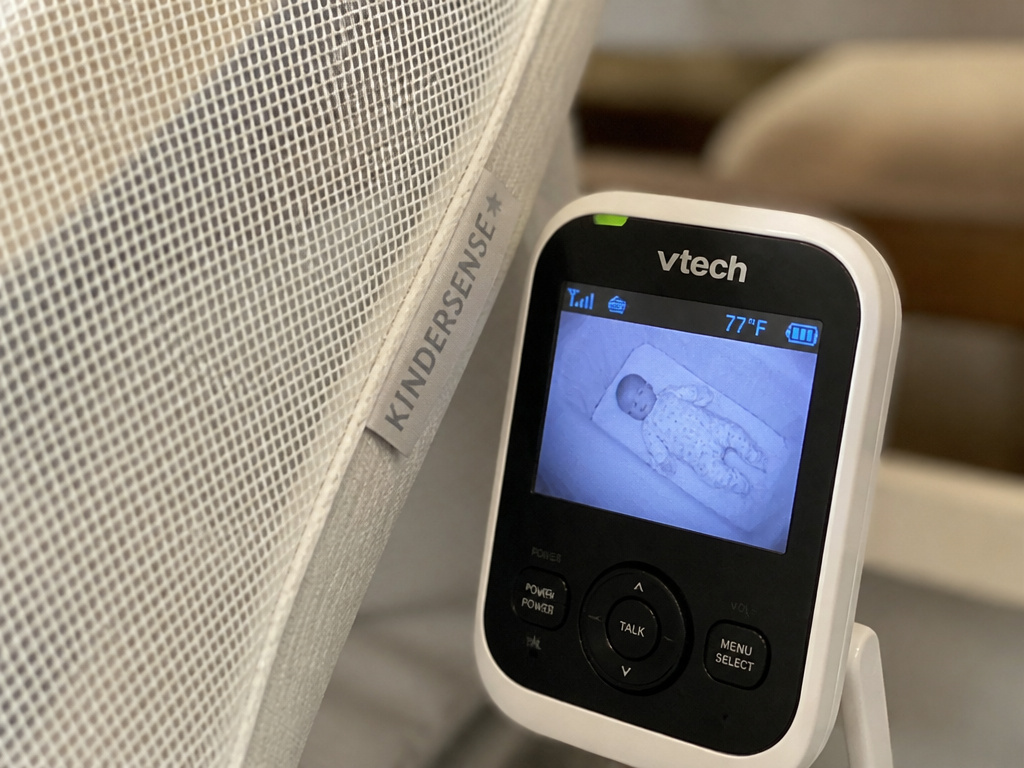
A frequent user report is that the mesh, while breathable, can blur the camera image on a baby monitor. The child is visible, but details are soft unless they move.
The manufacturer suggests placing the monitor camera approximately 24 inches away from the mesh for an optimal view. In practice, you’ll need to angle it. The mesh acts like a soft-focus screen; a direct, head-on shot often works less well than a slightly angled view looking through a single layer. Test this during the day without the child present. Move the monitor around until you find the sweet spot where the image sharpens.
This is a minor trade-off for the safety benefit. That same dense mesh keeps out insects and contains small toys. If monitor clarity is your top priority, consider models designed with a clear panel, though they may not offer the same full-enclosure safety.
Frequently Asked Questions
Does the Kindersense tent fit all cribs?
It fits standard full-size cribs. It will not fit mini-cribs or playpens. Kindersense sells a separate, smaller version specifically designed for those products.
Is a crib tent safe for my baby?
The Kindersense Crib Safety Tent is designed as a climbing-out prevention device. It has been tested to CPSC standards for durable baby products and features breathable mesh on all sides. However, always follow all manufacturer instructions, ensure it is securely installed with no gaps, and discontinue use if your child shows signs of attempting to dismantle it or if they exceed the 3-year age or 35-inch height recommendation.
Why is folding this tent so difficult?
The difficulty usually stems from missing the first step: flipping it upside down. The pop-up frame has a specific mechanical collapse path. Following the correct diagonal fold and coil sequence is simple, but deviating from it causes frustration.
Can I machine wash the Kindersense crib tent?
No. The fabric is not removable from the frame. Machine washing can damage the spring-steel rods and the seams. The only recommended cleaning method is outdoor hand washing and air drying.
Before You Go
Folding the Kindersense crib tent is a mechanical skill, not an arcane art. Flip it, fold it corner-to-corner, coil the rods into two circles, and store it. The process feels foreign because you’re working against a spring-loaded frame, but the correct sequence makes it straightforward.
Remember the two biggest pitfalls: skipping the initial flip and not pushing firmly enough to form that first tight circle. If you get stuck, lay it flat and start over—it’s faster than fighting a half-folded tangle.
This tent’s design, from its full-frame safety to its non-removable fabric, prioritizes security over convenience. Knowing how to properly collapse and care for it means you can use it confidently throughout your child’s crib years, ensuring their safety without sacrificing your own sanity every time you need to put it away.
