
How To Tent Windows: A Step-By-Step Guide For Perfect Seals
This post contains affiliate links. As an Amazon Associate, we earn from qualifying purchases.
To tent a window, you create a watertight seal by compressing a gasket or butyl tape between the window flange and the wall, using a specific screw-tightening pattern to achieve 50-75% seal compression without distorting the frame. The critical failure point is uneven pressure, which creates gaps that leak within the first heavy rain.
Most guides talk about “tightening screws” but skip the measurable compression target. They also ignore the wall-thickness check. You crank the screws until the frame feels firm, miss the 50-75% compression sweet spot, and get a slow drip at the top corner after two seasons. The leak traces back to one over-tightened screw that bottomed out and left the opposite side under-compressed.
This guide walks through the two main methods, flange and clamp ring installation, using specs pulled directly from OEM manuals for Arctic Tern and Lippert windows. We will cover the tools you actually need, the mandatory prep for curved van walls, and the exact screw patterns that prevent leaks from day one.
Key Takeaways
- The main seal must compress to 50-75% of its original thickness. Less than 50% leaks; over 75% deforms the frame and cracks the seal within a year.
- Never use power tools on the frame screws. The Arctic Tern manual explicitly bans them because they over-torque, strip threads, and prevent consistent seal compression.
- Check your wall thickness before cutting. If it’s under 24mm (15/16”), you must build or buy a spacer frame, installing directly on thin or curved sheet metal guarantees a leak path.
- Butyl tape is the sealant, not silicone. Apply a continuous, unstretched 1/8-inch bead to the flange. Silicone only seals the exterior edge after the window is seated and screwed.
- Follow the cross-pattern tightening sequence. Tighten corner screws hand-tight first, then work diagonally in multiple passes. Single-pass circular tightening warps the frame.
Before you start: This process involves sharp metal edges, drilling, and working at height. Wear cut-resistant gloves and safety glasses. Ensure your ladder or platform is stable. A dropped window can shatter, sending glass shards in all directions. If you are installing on a vehicle, disconnect the battery to avoid shorting any wires behind the panel.
Tools and Materials You Must Have
Gather everything before the window unit comes out of the box. Missing the right screw length or sealant type means a trip to the store with a gaping hole in your wall.
You need a Phillips screwdriver, not a drill. The Arctic Tern Awning Window manual prohibits power tools for final screw installation because they over-torque instantly. A tape measure that reads in both inches and millimeters is non-negotiable for checking rough openings and wall thickness against the 24mm minimum. A utility knife trims butyl tape. A silicone sealant gun applies the exterior bead.
For materials, you need the window-specific screws. For an Arctic Tern window, that’s M4 x 14mm and M4 x 20mm screws. Using the wrong length can bottom out in the frame or fail to engage enough threads. You need a roll of 1/8-inch butyl tape. Do not substitute closed-cell foam or adhesive-backed weatherstrip; butyl remains pliable and self-seals under compression. A tube of exterior-grade silicone sealant finishes the exterior flange.
A shop vacuum is critical for cleaning debris from the rough opening. A single wood chip under the flange creates a high spot that breaks the seal compression.
The 50-75% Seal Compression Rule That Stops Leaks
This is the single most important spec and the one most amateur installers guess wrong. The primary rubber seal around the window unit must compress between 50% and 75% of its original, relaxed thickness.
The Arctic Tern Awning Window Installation Guide specifies “50% – 75% compression” of the main window seal, achieved by tightening the inner frame ring screws. This range balances water intrusion resistance with frame longevity.
Compress it less than 50%, and the seal cannot bridge microscopic gaps in the wall or flange. Water wicks through by capillary action. Compress it more than 75%, and you overstress the rubber. It takes a permanent set, loses its rebound, and cracks within 12 months of thermal cycles. You will see fine hairline cracks in the seal where it meets the frame.
How do you measure 50-75% compression? You don’t need a caliper. The visual cue is the seal’s lip. It should bulge out evenly around the entire perimeter, looking like a consistent, plump bead. If the seal disappears flush with the frame, you have over-tightened. If it looks barely touched, it is under-compressed.
The mechanism is simple. Rubber is incompressible, it has to go somewhere. Even compression forces it to flow outward against the mating surface, filling imperfections. Uneven compression lets it flow toward the path of least resistance, leaving a low-pressure channel for water.
TL;DR: Tighten screws in a cross pattern until the window’s rubber seal bulges evenly, filling about two-thirds of its original space. If it flattens completely, you have gone too far.
Awning vs. Slider: Does Window Type Change the Process?
The basic sealing principle, compress a gasket between two surfaces, is universal. The differences lie in the mechanical mounting and the consequences of getting it wrong.
| Window Type | Mounting Method | Critical Watch Point | Failure Timeline if Wrong |
|---|---|---|---|
| Awning/Casement (e.g., Arctic Tern) | Inner frame ring with M4 screws | Cross-pattern screw tightening to avoid hinge bind | Hinge binds within 50 open/close cycles; top corner leaks in first storm |
| Horizontal Slider (e.g., Lippert RV) | Exterior clamp ring with #8 screws | Clamp ring evenness and radius block fit | Slider sticks or rattles after 500 miles of road vibration; wind whistle at highway speed |
| Direct Glaze/Factory | Bonded adhesive setting block | Surface prep and adhesive cure time | Bond fails under thermal stress, often within 2-3 years; entire unit can loosen |
For awning windows, the frame is under more torsional stress when the window is open. Uneven compression warps the frame slightly, which binds the hinge mechanism. You will feel increasing resistance when opening until the hinge fatigues and cracks.
For slider windows, the clamp ring must apply even pressure around the entire perimeter. A low spot lets the inner panel vibrate. That vibration translates to a high-pitched whistle at 55 mph and accelerates wear on the slider tracks. The Lippert manual calls for a specific radius corner block, 3 5/16″ for a 3 1/8″ radius window, to maintain this even pressure.
The sealing target remains 50-75% compression. The path to get there changes with the hardware.
Your Wall Thickness and Shape Are the First Decision
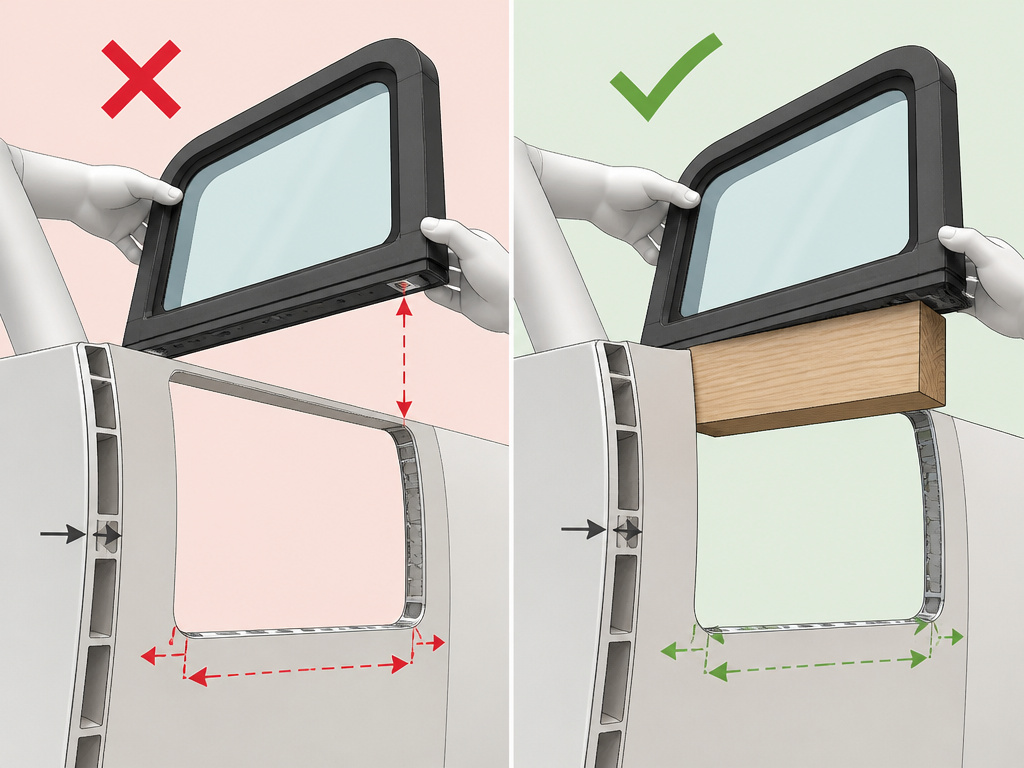
Do not cut a hole until you measure your wall thickness and assess flatness. This step catches the most common van conversion mistake.
The Arctic Tern manual states a minimum wall thickness of 24mm (15/16 inch) for direct installation. If your wall is thinner, common in fiberglass van panels or aluminum trailers, you must fabricate or purchase a spacer frame. The spacer brings the mounting surface out to the required thickness, giving the screws enough material to bite into and the seal a flat plane to compress against.
For curved sheet metal, like the sides of a van, you have an additional rule. You need 76mm (3 inches) of unsupported sheet metal on all four sides of the cut hole. This allows the metal to flex and be pulled flat against the window frame or spacer during installation. If the metal is braced too close to the hole, it cannot flatten. You will have a gap at the center of each side that no amount of butyl tape can fill.
Common mistake: Installing directly onto curved, thin van wall without a spacer, the center of the window flange never makes contact, creating a leak path that drips inside after one car wash or heavy rain.
If you are building a cabin or shed, this usually is not an issue. Standard wood-framed walls with sheeting are thick and flat. The problem is almost exclusive to vehicle and tiny home conversions where every millimeter and curve matters. Ignoring it voids any manufacturer warranty and guarantees a callback.
Step-by-Step Installation for a Flange Window
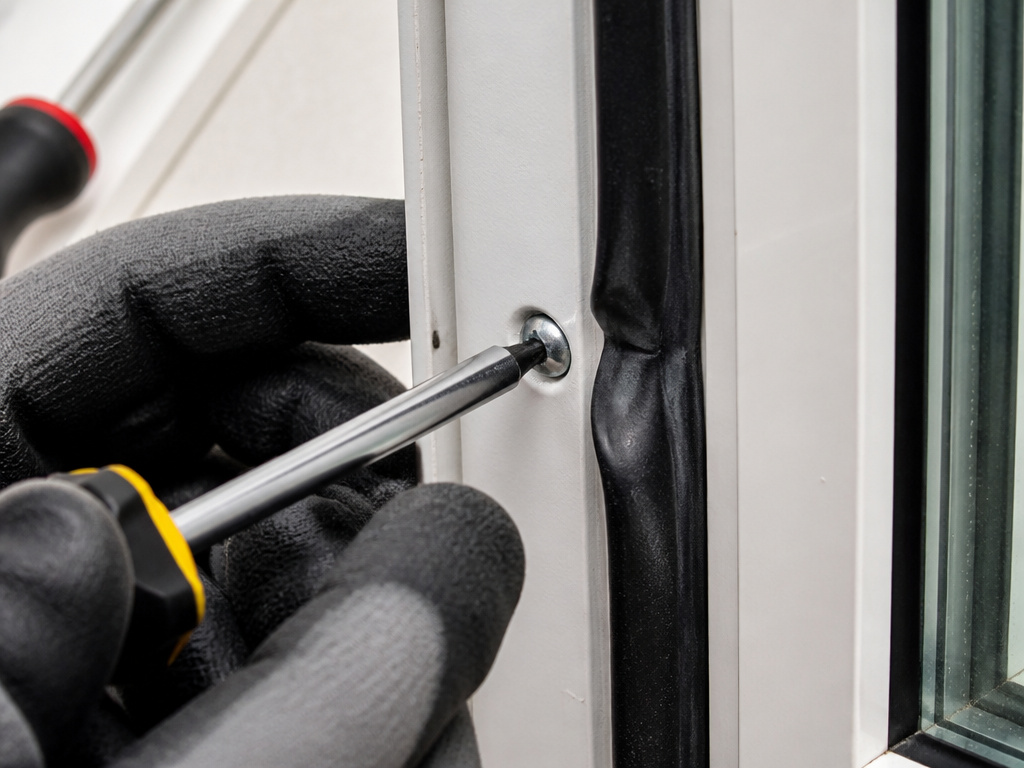
This sequence assumes a standard flange-mount awning or casement window, like the Arctic Tern, going into a prepared rough opening.
-
Dry-Fit and Verify the Opening
Place the window unit into the hole without any sealant. It should sit flush with the exterior wall surface. Check for even gaps around the perimeter. The Lippert manual allows a rough opening tolerance of +/- 1/8 inch. More than that is a “Critical Fail.” Use a shop vacuum to remove all sawdust, insulation, and debris from the opening and the wall surface. A single pebble under the flange is a leak point. -
Apply Butyl Tape to the Flange
Run a continuous, unstretched bead of 1/8-inch butyl tape around the entire mounting flange. Press it firmly into place. Do not join the ends, overlap them by an inch and press together. Butyl is your primary water barrier; silicone later is just a secondary weatherproof cap. -
Set the Window and Hand-Start Screws
Lift the window into place. From the inside, start the four corner screws by hand. Turn them until they just grab the frame, do not tighten. This holds the window without compressing the seal. Check the window’s alignment and squareness from outside one last time. -
Tighten in a Cross Pattern to 50-75% Compression
This is the critical phase. Using your Phillips screwdriver, begin tightening the screws in a diagonal cross pattern. Start at the top left, then go to bottom right, then top right, then bottom left. After all screws are snug, make a second pass in the same pattern, increasing tension slightly. You may need three or four passes.- Why the cross pattern? It distributes clamping force evenly across the frame. Tightening in a circle stresses one side, warping the frame and creating a high spot on the opposite side where the seal cannot compress.
Stop when the rubber seal bulges consistently, as described earlier. The window frame should feel solid with no flex or creaking.
- Why the cross pattern? It distributes clamping force evenly across the frame. Tightening in a circle stresses one side, warping the frame and creating a high spot on the opposite side where the seal cannot compress.
-
Seal the Exterior and Trim Interior Excess
From the outside, run a smooth, continuous bead of silicone sealant over the edge where the window flange meets the wall. This protects the butyl tape from UV degradation and provides a drip edge. From inside, use a utility knife to cleanly trim any butyl tape that squeezed out around the interior frame.
TL;DR: Clean opening, butyl tape on flange, cross-pattern screw tightening until the seal bulges, then silicone outside and trim inside.
Step-by-Step Installation for a Clamp Ring Window
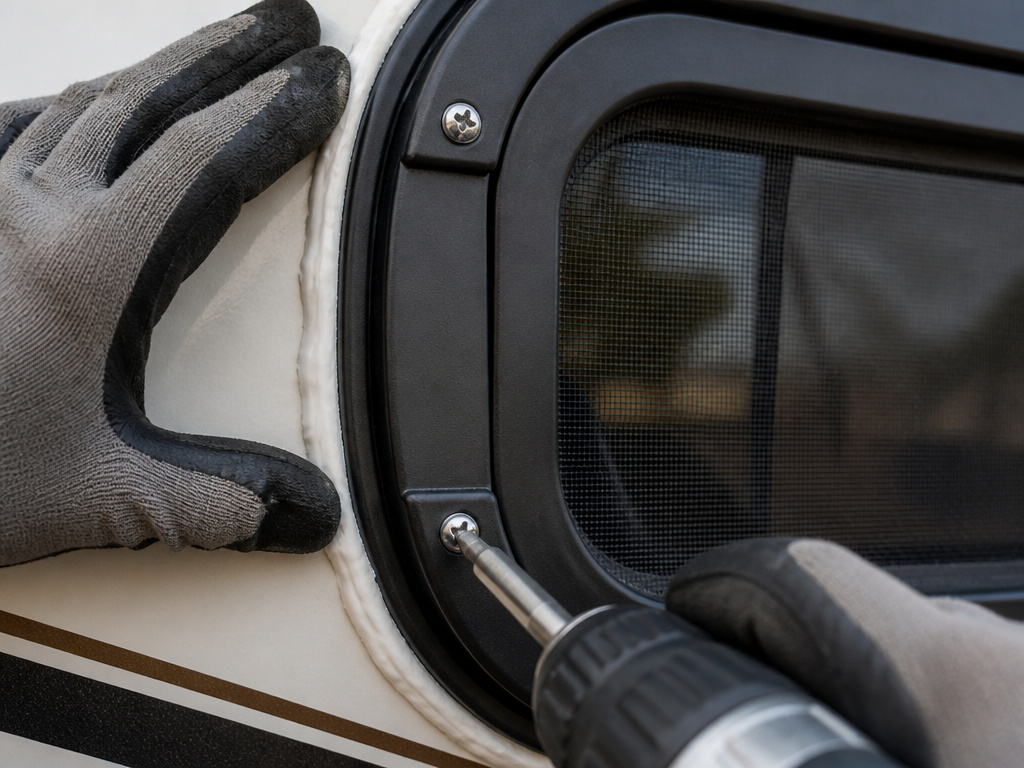
This method is standard for many RV and trailer slider windows, using an exterior clamp ring secured with #8 screws.
-
Install the Radius Corner Blocks
Before the window goes in, glue or screw the radius corner blocks into the four corners of the rough opening. The Lippert manual specifies exact sizes: a 3 5/16″ block for a 3 1/8″ radius window. These blocks prevent the clamp ring from distorting when tightened and ensure even pressure on the curved corners of the window gasket. -
Apply Butyl Tape to the Window Channel
Run a bead of butyl tape in the channel on the backside of the window unit where it will contact the wall. Some models have a groove for this. This tape seals the interface between the window and the exterior wall surface. -
Set Window and Place Clamp Ring
Position the window in the opening from the outside. Have a helper inside hold it steady. Place the clamp ring over the window, aligning its screw holes with those in the window frame. -
Tighten #8 Screws in a Star Pattern
Begin threading the #8 screws by hand. Once all are started, tighten them in a star pattern, top, bottom, left, right, then move between those points. The goal is the same 50-75% gasket compression. The clamp ring should pull down evenly, with no section lifting away from the wall. -
Seal the Clamp Ring Perimeter
Apply a bead of silicone sealant around the entire outer edge of the clamp ring where it meets the wall. This is mandatory. It prevents water from getting behind the ring and finding its way to the butyl tape seam.
The interior trim piece or finisher then snaps or screws into place over the clamp ring screws, covering the mechanics.
The Three Things You Should Never Do
The OEM manuals are very clear on these points. Violating them causes immediate or near-term failure.
Never use adhesives on the window unit or seal surfaces. The Arctic Tern guide explicitly prohibits this. Adhesives can chemically degrade the rubber seal, causing it to swell, harden, or lose elasticity. They also prevent the seal from compressing and flowing as designed. Your sealant is the butyl tape and the exterior silicone.
Never use power tools (drivers/impacts) to tighten the frame screws. This is the fastest way to ruin a window. A drill delivers torque instantly, stripping the soft aluminum threads or bottoming out the screw before the seal is half-compressed. You lose all feel for the compression. Hand-tightening with a screwdriver gives you the tactile feedback needed to achieve that 50-75% range evenly.
Never skip the cross or star tightening pattern. It feels slower than going around in a circle. It is. It also prevents a warped frame, a bound hinge, a stuck slider, and a leak. The pattern is not a suggestion. It is the physical solution to distributing clamp load across a rectangular surface. Every professional installer uses it.
Frequently Asked Questions
Can I tent a window by myself?
You can, but a second person is invaluable for holding the window unit in place from the outside while you start the interior screws. For larger windows, the weight and the need for perfect alignment make a helper almost essential.
What is the best sealant for tenting windows?
Butyl tape is the primary sealant for the flange-to-wall interface because it remains permanently flexible and self-heals. Exterior-grade silicone sealant is used secondarily to weatherproof the exposed edge. Do not use silicone as the primary seal under the flange.
How long does a properly tented window last?
window installed with correct seal compression, the right screws, and proper exterior sealing should last the lifetime of the window unit itself, often 10-20 years, without developing leaks. The most common failure point is the exterior silicone bead, which may need reapplication every 5-8 years due to UV exposure.
My window leaks from the top corner after installation. What did I do wrong?
This is almost always caused by uneven screw tightening. The top corner on the leaky side is under-compressed because the opposite corner was over-tightened first, warping the frame. The fix is to slightly loosen all screws and re-tighten them in the correct cross pattern, aiming for even seal bulge.
Do I need special tools to tent windows?
No special tools are required beyond a good Phillips screwdriver, a tape measure, a utility knife, and a caulk gun. The specific requirement is to avoid a power tool for the final screw tightening.
Before You Go
Tenting a window is about controlled compression, not maximum torque. Hit that 50-75% seal compression target with a disciplined cross-pattern screw sequence. Remember the wall thickness rule, 24mm is the minimum. For vehicle walls, respect the 3-inch unsupported metal requirement for curved surfaces.
Skip the power drill. Use butyl tape as your primary seal. Finish with a clean silicone bead on the exterior. This process works for a backyard shed, a cabin, or a van conversion because the physics of sealing are the same. Get the compression even, and the window will stay dry for years.
