
How To Set Up A Tent Trailer & Avoid Costly Water Damage
This post contains affiliate links. As an Amazon Associate, we earn from qualifying purchases.
To set up a tent trailer, you need to level the frame, crank the roof until the tension cord is tight, install safety supports, pull out and support the bed ends, secure the door and canvas, then connect utilities and activate interior systems. The green tension cord on the roof crank system is your stop signal, cranking past it bends the frame. Natural cotton canvas must be sprayed with water before the first rain to seal the seams.
Most people get the sequence wrong. They crank the roof first, then fight a trailer that rocks on its suspension while they try to level it. The frame needs to be solid before anything extends.
This guide walks through the seven physical steps, then covers the utilities and the one mistake that floods your galley. We’ll pull specifics from the Combi-Camp 2025 manual, the Jumping Jack 2023 setup sheet, and a few hard lessons from wet weekends.
Key Takeaways
- Level and stabilize the trailer with wheel chocks and stabilizer jacks before touching the roof crank. A rocking frame strains every joint when the roof is up.
- The green tension cord on the roof crank is your absolute stop point. Cranking further bends the roof bows, and the repair bill starts at four figures.
- Spray natural cotton canvas with a garden hose before the first storm. The fibers need to swell and shrink to become waterproof.
- Never use the stabilizer jacks to lift the trailer off the ground. They are for stabilization only, and over-cranking strips the gears in two seasons.
- If your bed end won’t slide out, check that the support wings are in the closed position. An open wing blocks the tailgate and the bed’s travel path.
Before You Start: The Two Things That Wreck a Weekend
Before you start: A tent trailer on soft ground will sink its jacks and become un-level by morning, warping the door frame. Place a 2×8 plank under each jack foot. Second, never engage the trailer’s hand brake for winter storage, the mechanism corrodes shut, and you’ll shear the cable trying to release it in spring.
Grab the crank handle, four wheel chocks, a 2×8 plank cut into two 12-inch squares, your RV drinking water hose with a brass pressure regulator, and the 30-amp power cord. Wear gloves. The roof latch pins have sharp edges, and the bed-end slides love to collect splinters.
Is Your Trailer Level? The Answer Decides Your Door
Leveling isn’t a suggestion. An un-level trailer stresses the roof cranking mechanism, and the door will bind in its track. You’ll spend 20 minutes forcing it, then another 20 realigning it.
First, chock all four wheels front-to-back. Use the tongue jack to level the trailer side-to-side. Then adjust the jack again to level it front-to-back. Your phone’s level app works, but a small bubble level placed on the galley counter is more reliable.
Now lower the four corner stabilizer jacks. Turn the crank until the foot touches the ground and you feel solid resistance. Stop.
Common mistake: Cranking stabilizer jacks to lift the trailer, the gears are cast aluminum and strip within two seasons of weekend use. You’ll hear a grinding click on the third weekend, then the jack will spin freely.
If the ground is soft, place your 2×8 plank squares under each jack foot. The Combi-Camp 2025 manual calls this out specifically, without a jack plate, the leg sinks overnight and the door frame warps. By morning, the door won’t close.
TL;DR: Chock wheels, level with the tongue jack, then snug down stabilizer jacks onto firm ground (or planks). The roof comes next.
The 7-Step Roof Raise (and the One Step Nobody Skips)
Unlatch the four corner pins holding the roof down. Some models have lever latches, others have twist pins. Retrieve the crank handle, it’s usually in the front storage compartment.
Insert the handle and turn clockwise. Listen for a smooth, metallic winding sound. If you hear a plastic-on-plastic grind, stop. You’re cranking against a locked latch.
Watch the green tension cord near the crank mechanism. On electric winch models like the one in the Okconor RV YouTube walkthrough, this cord is your only visual stop signal. When it goes taut, take your finger off the switch. On manual crank models, you’ll feel a distinct resistance spike.
Cranking past that point bends the roof bows. The repair requires a full frame disassembly.
I cranked past the tension cord on a borrowed Jayco because I was talking and didn’t feel the resistance. The roof sat lopsided for the whole weekend, and the door scraped the track so hard it left aluminum shavings on the threshold. A dealer quoted $1,200 to straighten the bows.
Once the roof is up, immediately install one support arm into the bracket on a front corner. Then install the opposite rear corner arm. This creates an X-brace that prevents a collapse if a latch fails. Don’t wait until you’re inside.
Pulling Out the Bed Ends: Why Strength is the Wrong Tool
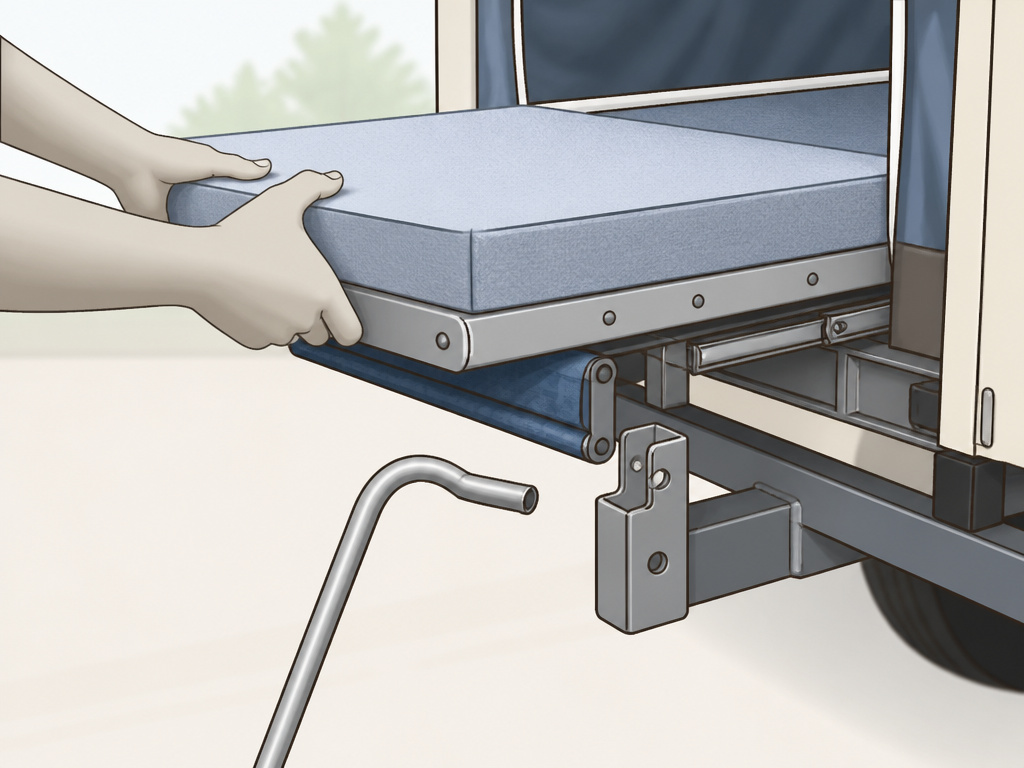
Grab the bed end and pull straight out. It should slide smoothly on its rails. If it sticks, don’t force it.
Check that the support wings, the folding panels under the bed, are in the closed position. The Jumping Jack 2023 manual notes that if these wings are open, the tailgate cannot lower to horizontal, blocking the bed’s travel path. Close them, then try again.
Once the bed is fully extended, locate the shepherd’s hook support poles. Insert the bottom end into the bracket on the bumper or trailer frame, then lift the bed slightly and slide the top hook into the receiver on the bed end. You’ll hear a click.
| Bed End Issue | Likely Cause | Immediate Fix |
|---|---|---|
| Won’t slide out | Support wings open | Close wings, ensure tailgate is down |
| Slides out but sags | Shepherd’s hook not seated | Lift bed, re-seat hook in receiver |
| Rough, grinding slide | Rails dry or dirty | Clean rails, apply dry silicone lubricant |
| One side extends further than the other | Roof not fully raised / uneven | Lower roof, re-crank watching tension cord |
TL;DR: Pull beds out straight. If they resist, check that support wings are closed and the tailgate is down. Shepherd’s hook supports go from the frame up into the bed.
Door and Canvas: Where Leaks Start
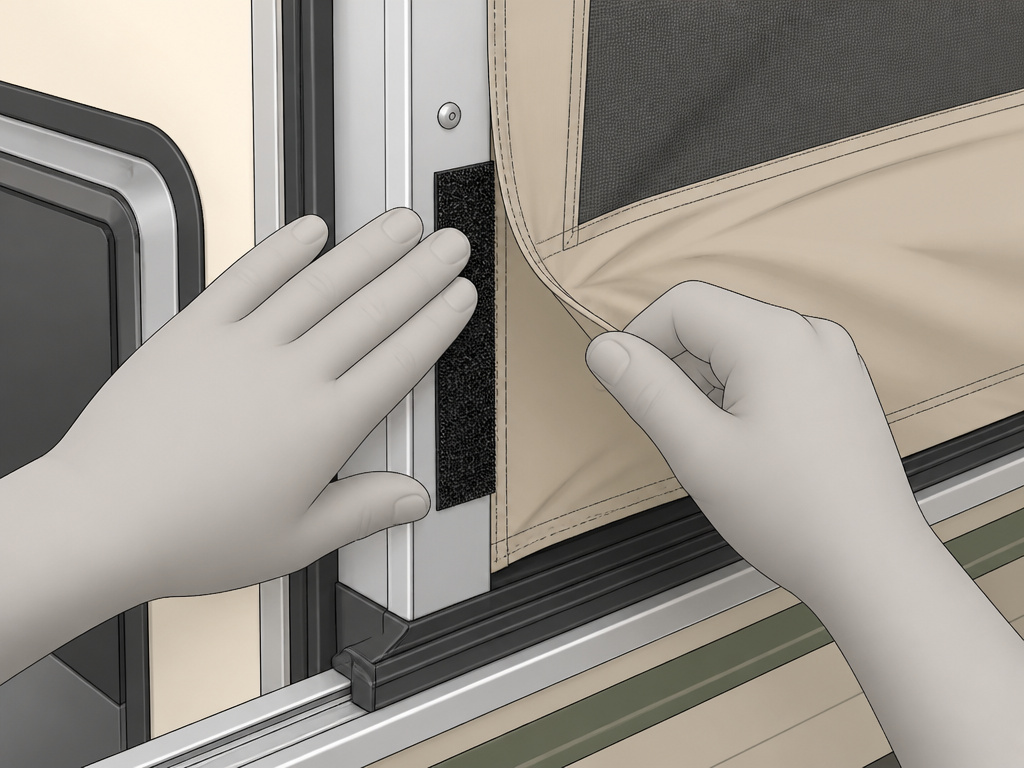
The transit door is held up by two buttons and a safety clasp. Unbuckle the clasp, press the buttons, and let the door slide down its external track. Lock the door into the frame by twisting the latches on the top and sides.
Now secure the canvas. Start at the door frame, velcro every flap of tent fabric snugly around the frame, inside and out. Miss one, and rain finds the gap.
Move to the bed ends. Pull the canvas down over the bed frame and mattress. Tuck the corner’s cuffed pocket over the frame edge, then fold the protective flap down. This prevents the canvas from chafing against the frame sharp edges. Finally, secure the velcro strips under the bed and thread the tension cord through its sleeve.
Natural cotton canvas isn’t waterproof out of the box. The Combi-Camp manual instructs you to spray the entire tent with a garden hose before the first rain. The fibers swell and shrink, sealing the stitching. Skip this, and a gentle rain will drip inside along every seam.
If you feel a draft or see a slight leak along a stitch line after the first storm, impregnate that seam with a silicone-based seam sealer. Don’t wait for the next downpour.
Connecting Power, Water, and Gas
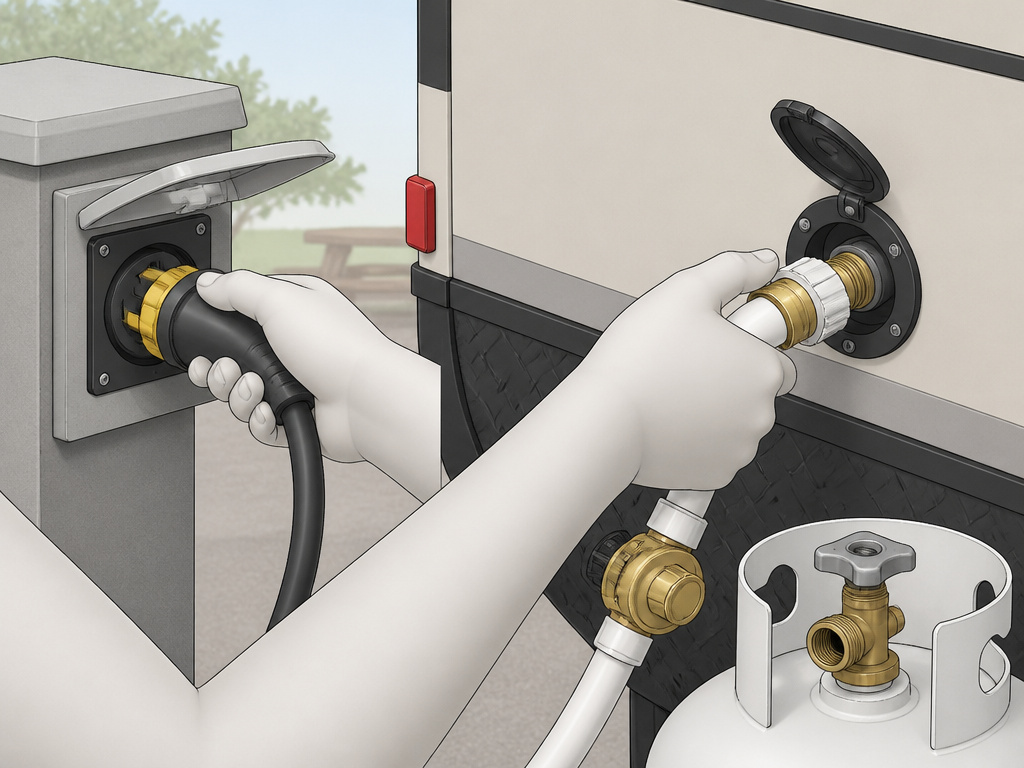
Your trailer has a 25-foot, 30-amp power cord. Uncoil only what you need to reach the campground pedestal. Plug it into the correct 30-amp receptacle, forcing it into a 15-amp outlet melts the plug.
For water, screw a white RV drinking water hose onto the city water inlet. Always use a brass pressure regulator on the spigot end. Campground water pressure can spike to 90 PSI, which blows the internal plastic fittings in your galley faucet. Turn the water on at the spigot.
The sink drains directly out of a hose underneath. There’s no gray water tank. Position the drain hose away from your site.
Turn the propane tank valve to open. You’ll now have fuel for the refrigerator, furnace, and stove.
Activating the Interior
Find the battery disconnect switch, usually near the entrance or under a bench. Flip it on. No interior lights will work until this switch is on.
Lift the galley into its upright position. On many models, this action physically connects the wiring harness for the interior lights. They should turn on.
Set the refrigerator. The control panel is often behind an exterior access door. Switch it to electric mode if you’re plugged in, or to propane if you’re not. It takes four hours to get cold from ambient temperature.
For the furnace, locate the thermostat inside and slide it to the desired temperature. You’ll hear the blower start.
If you have a water heater, find its exterior access panel. Turn the gas control knob to PILOT, press and hold the button, and light the pilot with a long match. Hold for 10 seconds after you see the blue flame, then turn the knob to ON.
Pack-Up: The Mid-Crank Fabric Tuck
Packing up is the reverse, with one critical pause. After you’ve loosened all the canvas, removed the safety poles and door, and pushed the beds in, start cranking the roof down. Stop when the roof is about halfway down.
Walk around the trailer and tuck every loose bit of fabric inward. Push it as far into the center as you can. If you leave a bunched-up sleeve near the edge, the roof will crush it when it closes, and you’ll hear a sharp rip. That’s a $300 canvas panel replacement.
Finish cranking the roof down until it seats. Secure all four corner latches. Double-check that the stabilizer jacks are fully raised, the power cord is disconnected and stowed, and the water hose is drained and packed.
Frequently Asked Questions
How long does it take to set up a tent trailer the first time?
Allow 45 minutes for your first setup. The process shortens to 20 minutes after three or four tries. The time sink is always the utilities, figuring out which hose goes where, finding the battery switch, and waiting for the refrigerator to light.
Can you leave a tent trailer set up all season?
You can, but you shouldn’t. UV rays degrade canvas and plastic windows after six weeks of continuous sun exposure. The tires also develop flat spots if left stationary on grass or dirt for more than a month. Fold it down between trips.
Why won’t my tent trailer door close?
An un-level trailer is the most common cause. The door track binds. Re-level the trailer using the tongue jack and the door should slide shut. If it’s still stuck, check for debris in the track or a warped frame from a sunk stabilizer jack.
Do I need to treat the canvas every year?
Natural cotton canvas needs re-treatment with a waterproofing spray every two to three seasons, depending on sun exposure. Synthetic canvas (polyester) lasts longer but still benefits from a UV-protectant spray to prevent fabric brittleness.
What’s the single biggest mistake new owners make?
Cranking the roof past the tension cord. It feels like you’re just getting it “good and tight,” but you’re over-stressing the roof bows. The green cord is the stop signal. Heed it.
The Bottom Line
Setting up a tent trailer is a physical sequence, not a puzzle. Level the frame first. Crank until the tension cord is tight, not a turn more. Pull the beds out straight, lock the shepherd’s hooks in, and seal the canvas at the door frame. Connect utilities in order: power, water, gas. The difference between a smooth weekend and a frustrating one is following the manual’s specifics, like spraying cotton canvas before rain and using jack plates on soft ground, instead of assuming all trailers work the same. Your back and your dry sleeping bags will thank you by Sunday night.
