
How to Make a Child’s Tent: 3 DIY Plans That Actually Last
This post contains affiliate links. As an Amazon Associate, we earn from qualifying purchases.
The fastest way to make a child’s tent is with four chairs and a sheet, but for a durable hideout, you’ll need a wooden frame and weather-resistant fabric. A successful build hinges on anticipating physics, like legs sliding on hardwood or one-way prints ending up sideways, that most tutorials miss.
Most online plans tell you to buy dowels and cut fabric. They skip the part where you learn about lateral stability the hard way, when the whole structure creeps apart on your polished floor. Or when the fabric you lovingly chose makes the dinosaurs on the teepee look like they’re climbing a cliff face.
I’ve built, slept in, and seen my fair share of tent failures. This guide walks you through three proven methods, each with a different finish and lifespan, and the specific, often-overlooked details that make them work.
Key Takeaways
- The chair-frame tent is a weekend wonder. I built one for my niece’s birthday party and learned a painful lesson: on laminate, the chair legs act like ice skates. By cake time, the ridge pole was on the floor and three frosting-covered toddlers were “helping” me rebuild. A two-foot strip of lattice wood screwed between the front and back legs fixes it.
- Drill a 7/16-inch hole, not 3/8, not 1/2. I used a 3/8-inch bit first, thinking a tighter fit was better. The dowel wouldn’t go through without splitting the pine. A 1/2-inch hole left it so loose the frame wobbled. 7/16 is the Goldilocks size: a firm, friction-fit that holds without glue.
- Outdoors? Skip the cute cotton sheets. I ruined a perfectly good dinosaur sheet in a weekend; it faded to a sad beige and grew mildew spots after one rain. A treated canvas drop cloth from the hardware store is my go-to: cheap, hemmed, and surprisingly tough.
- If you hate sewing, Peel n Stick fabric fuse tape bonded with an iron works. I used it on a play tent cover three years ago. The side seams are still intact, though the top sleeve started to peel after two years. I just stitched it by hand.
- A teepee is stable, but choose your fabric print carefully. A row of marching dinosaurs will end up marching vertically up the panel. Solid colors, small all-over prints, or stripes avoid this visual chaos.
What’s the Fastest Way to Build a Kids’ Tent?
If you need a magical space in under fifteen minutes, the chair-and-sheet method is your answer. It’s the ultimate in improvisation, perfect for a rainy afternoon or a surprise fort. But its lifespan is measured in play sessions, not years, and it has one critical flaw on smooth floors.
Four dining chairs arranged back-to-back form the posts. Two broom handles or 48-inch dowels taped together create the ridge pole. A queen-sized flat sheet draped over the top and secured with binder clips completes the shelter. This no-tools build occupies a five-foot square floor space and supports light play.
Before you start: Broom handles can have rough, splintered ends. Run your hand down the length and wrap any sharp spots with duct tape. Also, a twin sheet is often too small, leaving gaps at the corners that collapse the tent. A queen sheet provides the necessary overhang.
- Clear a space and set up your chairs. Place two chairs back-to-back, about three feet apart. Repeat with the other two chairs opposite them, forming a rough square.
- Create the ridge pole. Lay one broom handle across the backs of two opposite chairs. Lay the second handle across the other two chairs so they cross in the center. Overlap them by a foot and wrap the junction tightly with duct tape.
- Drape and secure the sheet. Center your queen sheet over the ridge pole. Use binder clips or safety pins to secure the fabric to the top of each chair back. Don’t just let it hang, unsecured fabric slides down within an hour.
- Create an entrance. Clip one side of the sheet up to the ridge pole to form a door flap a child can duck under.
- Anchor the base. Tuck the excess fabric under the chair seats or weigh down the corners with books.
Common mistake: Assuming chairs stay put on smooth floors, they don’t. The legs slide a quarter-inch every time a child ducks in or out. Within a day, the tent is six inches wider and the ridge pole is on the ground.
The fix is simple but non-negotiable. Cut a two-foot piece of 1×2 lattice or use a length of rope. Tie or screw it between the front and back legs on each side of the tent. This tension brace stops the spread cold. It’s the single difference between a tent that lasts an afternoon and one that survives three months of gentle play.
TL;DR: Chair backs are posts, broom handles are the ridge, a sheet is the cover. Clip the fabric securely and brace the chair legs on smooth floors.
How Do You Build a Sturdy Wooden A-Frame Tent?
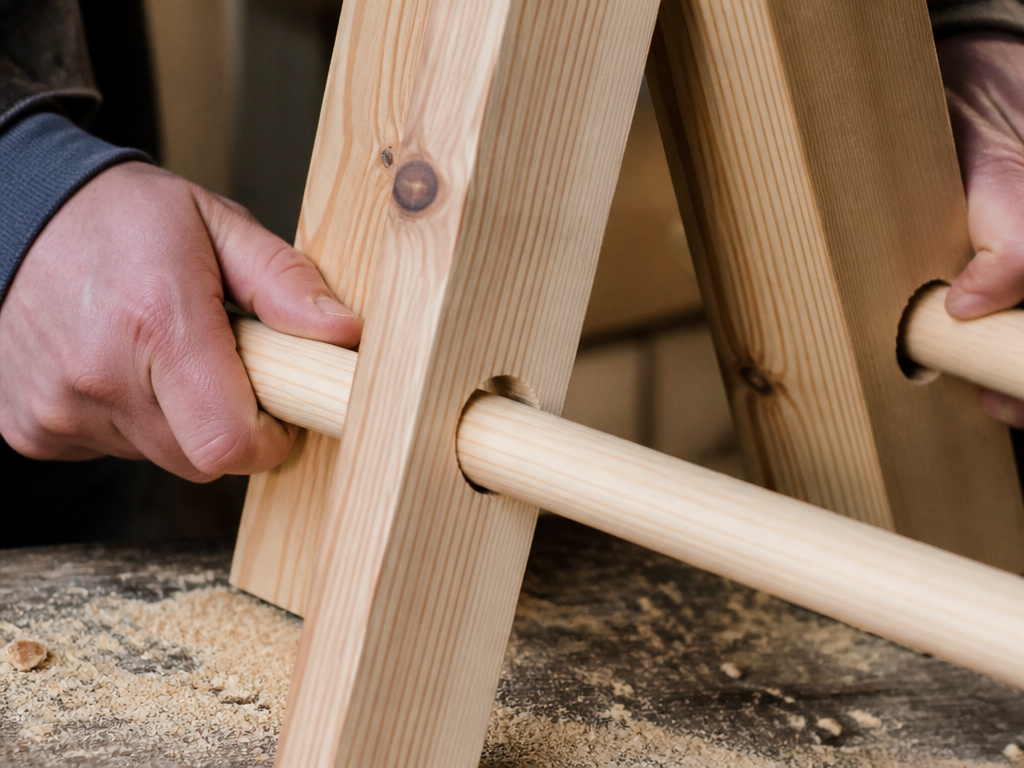
If the chair tent feels like a weekend fling, the wooden A-frame is a committed relationship. It takes more work upfront, but you won’t be retying knots every Saturday. Plans from Ana White and Charleston Crafted are excellent blueprints for a structure that can survive a year of play (and my nephew’s climbing phase).
This design uses a simple dowel-and-gusset system that spreads load across the joints. While a chair frame might buckle under twenty pounds of pressure, this wooden A-frame, built from 1×8 pine, can handle a leaning, hanging kid without a wobble.
The core components are straightforward, but their specifications are precise.
| Part | Specification | Why It Matters |
|---|---|---|
| Legs | (4) 1×8 pine boards, 36″ long | 1×8 provides a stable base; 1×2 boards are too wobbly for active kids. |
| Top Holes | 7/16″ diameter, 9″ from top | A 3/8″ hole is too tight for a 1″ dowel; a 1/2″ hole is too loose. |
| Ridge Pole | (1) 48″ long, 1″ diameter dowel | This bears the weight of the fabric cover and any decorations. |
| Base Stabilizers | (2) 48″ long, 1″ diameter dowels | These prevent the A-sides from collapsing inward when a child leans on the side. |
| Fabric Cover | 3 yards of 54″-60″ wide fabric | Less than 3 yards leaves gaps; more than 4 yards is cumbersome and sags. |
Step-by-Step Assembly
- Cut and Drill: Cut your two 6-foot 1×8 boards into four 36-inch legs. Mark a point 9 inches from the top of each leg and drill a 7/16-inch hole straight through.
- Build the A-Sides: Take two legs and one 48-inch dowel. Insert the dowel through the holes; the legs will splay apart. Repeat to build the second A-side.
- Connect the Frame: Use the two remaining dowels to connect the two A-sides at the top (ridge pole) and bottom (base stabilizer). You now have a free-standing frame.
Adding the Cover
For the fabric, the Charleston Crafted plan calls for a rectangle roughly 105 inches long by 27 inches wide. The simplest no-sew route is a canvas drop cloth, it’s already hemmed. Drape it over the ridge pole and secure it at the corners with ribbon ties or clips.
For a polished look, sew a sleeve along the top edge to slide onto the ridge pole. This distributes weight better than clips and won’t slip. This frame is heavy and won’t slide, but it can tip if pushed from the side. For a permanent reading nook, follow the Ana White method and secure the back legs to a wall stud with a bracket.
I learned that even the best-built frame needs the right companion gear. When I added battery-powered fairy lights and a plush rug inside, it stopped being a “tent” and became a true hideout, just like when you pick the right tent camping accessories for a real camping trip.
Which Fabrics Work Best for Indoor vs. Outdoor Tents?
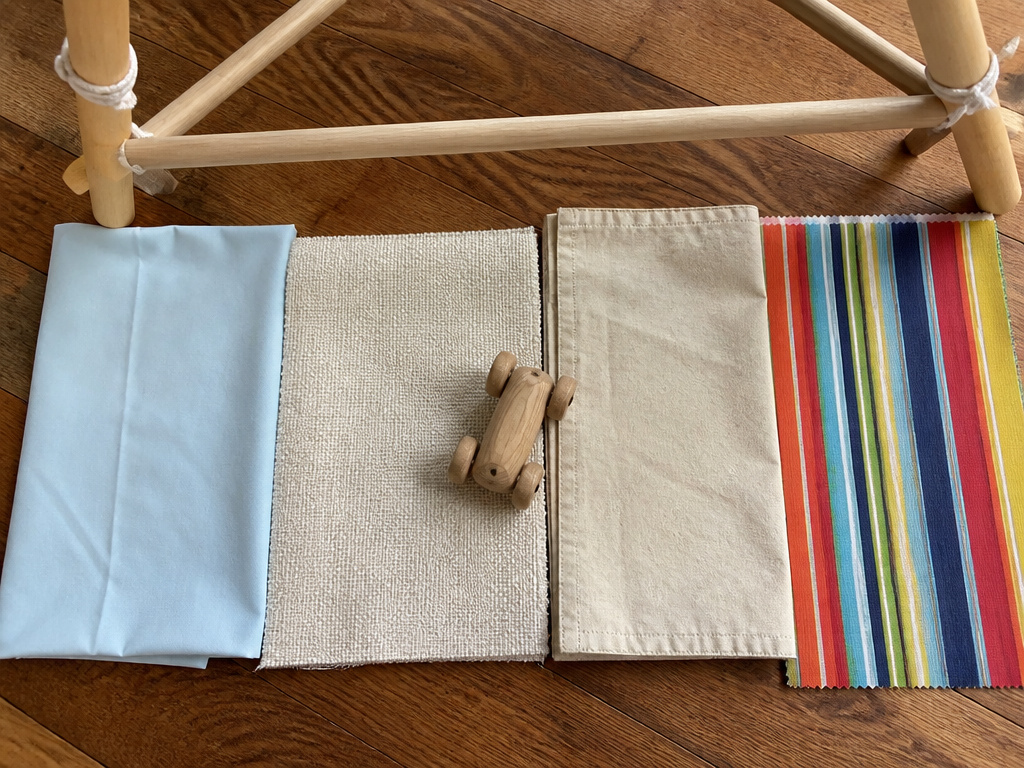
Your fabric choice is what separates a tent that lasts a weekend from one that endures seasons. It’s the difference between a faded, mildewed rag and a vibrant play space. The trade-off is often cost versus convenience.
For strictly indoor use, a queen flat sheet is the quickest solution. Its main flaw is thinness, it stretches and sags over weeks. A mid-weight linen-cotton canvas, like the 54-inch wide fabric recommended by Lia Griffith from Spoonflower, holds its shape for years. It’s an investment, but for a permanent fixture, it pays off.
Outdoor tents face UV rays and moisture. A standard cotton sheet will bleach in a weekend and sprout mildew after one rain. Sunbrella acrylic is the professional choice, but it’s pricey and needs a sewing machine. My practical middle ground is a painter’s canvas drop cloth. It’s treated for mild weather, cheap, and pre-hemmed.
Avoid fabric with a definite one-way design. A print with a row of dinosaurs walking left-to-right will appear sideways on a teepee panel. It looks off. Solid colors, small all-over prints, or non-directional stripes work in any orientation.
This decision matrix can help you choose:
- Indoor, temporary: Queen flat sheet (fast, cheap, stretches).
- Indoor, permanent: Linen-cotton canvas (durable, expensive, holds shape).
- Outdoor, season-long: Canvas drop cloth (weather-treated, affordable, heavy).
- Outdoor, multi-year: Sunbrella acrylic (UV/water-resistant, costly, requires sewing).
Fabric weight matters, too. A light cotton voile looks airy but tears when grabbed. Heavy canvas is durable but can make a teepee frame unstable if the poles aren’t stout enough. Always drape your chosen fabric over the frame for a test fit before making final cuts.
Can You Really Make a Good Tent Without Sewing?
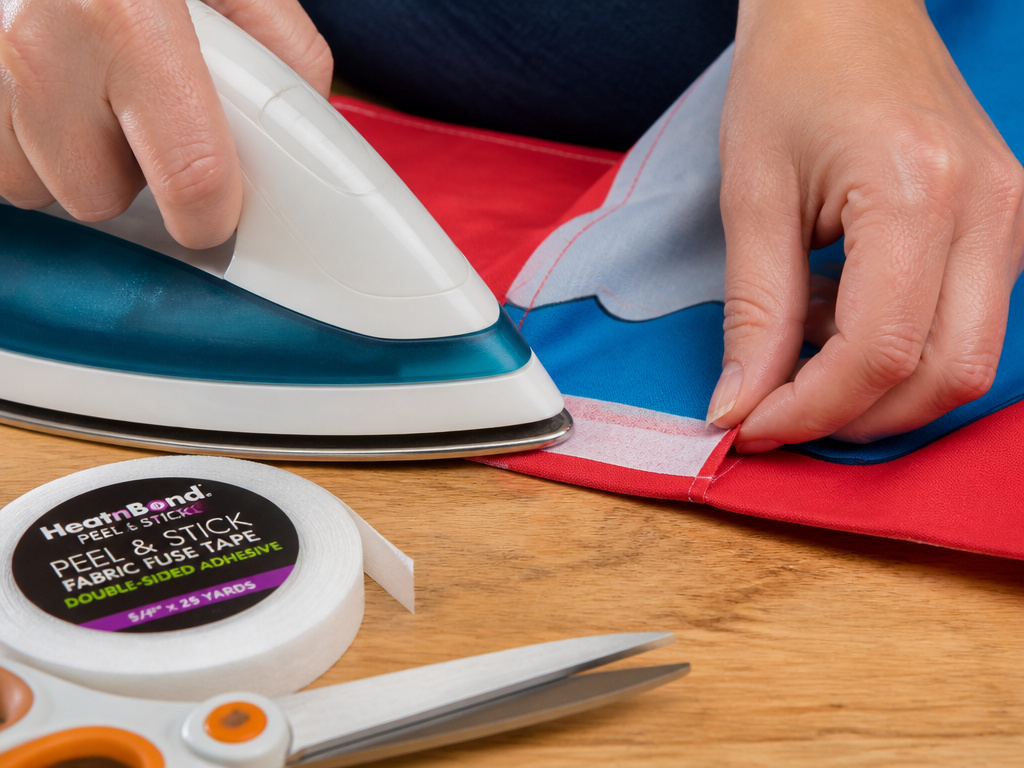
Absolutely. Not everyone has a sewing machine or the patience for it. The good news is that modern adhesives and clever workarounds can yield a tent that’s both handsome and hardy enough for gentle play.
The champion of the no-sew movement is Peel n Stick fabric fuse tape. It’s a double-sided adhesive you iron between fabric layers. For the Charleston Crafted A-frame tent cover, you’d cut your fabric to size, create a half-inch hem, slide the tape inside, and iron it. The bond is surprisingly strong.
I used fuse tape on a play tent cover three years ago. The side seams are still intact. The top sleeve, which gets the most stress from the ridge pole, started to peel after two years of use. I stitched it by hand then, but the tape bought me two full years without touching a sewing machine.
For an even lower-commitment build, embrace clips and ties. The chair-frame method relies entirely on binder clips. For a pole tent, use ribbon or twine to tie the fabric directly to the frame at intervals. This approach is perfect for testing a design before committing to a sewn version.
Consider a hybrid approach: use fuse tape for the clean hems and a sewn sleeve (or a tightly tied one) for the high-stress ridge pole. This splits the difference between durability and effort perfectly.
What Are the Secrets to a Stable, Tip-Proof Tent?
A wobbly tent feels temporary and unsafe; a solid one becomes a cherished fortress. Stability isn’t an afterthought, it’s the foundation of the build. The fixes differ by design but are always straightforward.
For chair-frame tents on smooth floors, the rope or lattice brace between chair legs is mandatory, not optional. For wooden A-frames, the base stabilizer dowel is what keeps the sides from buckling inward. Ensure it’s snug in its holes.
Permanent installation is the ultimate stabilizer. The Ana White reading nook tent is designed to be anchored to a wall. You tighten nuts on the back legs, fixing them to a stud. This turns the tent into a piece of furniture that won’t tip, even if used as a climbing frame. It’s a brilliant solution for a dedicated play corner.
Teepees, with their splayed poles, are inherently stable on any surface. However, you can add a canvas floor or a round rug inside to keep the bottom edge from sliding and define the space.
Common mistake: Using a fabric that’s too heavy for a light frame, it can cause the structure to sag or splay unpredictably. Always test the weight of your draped cover before final assembly.
Beyond structure, think about atmosphere and safety. Battery-powered fairy lights add magic without a fire hazard. A foam pad on the floor adds comfort. The right lighting and flooring transform a structure into a destination, much like choosing the right tent lighting options and sleeping pads turns a basic shelter into a cozy backcountry home.
Frequently Asked Questions
What is the easiest no-sew tent to make?
The chair-frame method is the easiest. You only need four dining chairs, a large sheet, two broom handles, and some clips or pins. No cutting or sewing is required, and it sets up in under ten minutes. Just remember to brace the chair legs on slippery floors.
How do I make a teepee tent for kids?
classic teepee uses six wooden poles. The Welcome To Nana’s plan requires six 6-foot long, ¾-inch dowels and about 4.5 yards of fabric. You drill a hole near the top of each pole, thread a rope through to gather them, then splay the poles out. The fabric is cut into a large semicircle and draped over, secured with ties.
What’s the best wood for a DIY tent frame?
For A-frames, standard pine 1×8 boards are ideal. They’re sturdy enough to be stable but soft enough for easy drilling. For teepee poles, 1-inch diameter hardwood dowels (like oak or poplar) are more durable than softwood dowels, which can snap under stress.
Can I use a real camping tent indoors for play?
You can, but it’s often overkill. A large family camping tents takes up significant space and lacks the cozy, decorative feel of a dedicated play tent. Smaller, affordable budget tents under $100 designed for actual camping can work, but they are usually less aesthetic for a bedroom corner.
How do I clean a fabric play tent?
For machine-washable fabrics like cotton sheets, remove the cover and wash on a gentle cycle. For canvas or heavier materials, spot clean with a mild soap and water solution. For outdoor tents, avoid harsh scrubbing that can damage weather-resistant coatings.
How long will a DIY play tent last?
chair-frame tent lasts a few months with gentle use. A well-built wooden A-frame with a quality fabric cover can last for years of indoor play. An outdoor tent made from treated canvas can survive a full season or two, depending on sun and rain exposure.
Before You Go
Building a child’s tent is more than just assembling a frame and throwing a sheet over it. It’s about anticipating the physics of play, the sliding legs, the leaning weight, the grabbing hands, and building a defense against them first.
The chair method wins on speed, the wooden A-frame on durability, and the teepee on classic style. Your fabric choice seals the deal, determining whether the tent fades into memory or remains a vibrant part of your home. Don’t forget the finishing touches that elevate it from structure to sanctuary: soft lighting, plush pillows, and a good book.
Whether you’re crafting a weekend surprise or a permanent reading nook, the goal is the same: to create a little world of their own. Now you have the plans to build it right the first time.
