
How To Fix A Snapped Tent Pole With A Repair Splint or Sleeve
This post contains affiliate links. As an Amazon Associate, we earn from qualifying purchases.
To fix a snapped tent pole, you need the exact outer diameter measurement, common sizes are 7.9mm, 8.5mm, and 9mm, a metal repair splint, and a length of shock cord (2mm, 3mm, 6mm, or 8mm). Mismatch the diameter by half a millimeter and the splint slides off after three pitches.
Most guides tell you to wrap it and hope. They skip the one measurement that decides whether your fix lasts one night or five seasons. A 7.9mm pole needs a 7.9mm sleeve, not an 8.5mm one you found in a generic kit. Get that wrong and the pole snaps again right next to your repair, usually in a downpour.
This walkthrough covers the two real fixes: a field repair with a splint and tape that gets you through the weekend, and a permanent segment replacement that restores the pole to like-new strength. We will match diameters, thread shock cord, and point out where Big Agnes, Cascade Designs, and Vaude say most people void their warranties by reassembling the pole set backwards.
Key Takeaways
- Measure the pole’s outer diameter with calipers or a tape, common sizes are 6.9mm, 7.5mm, 7.9mm, 8.5mm, 9mm, 10mm, 11mm, and 12.5mm. Guessing here breaks the next segment.
- A metal repair splint and duct tape make a field fix that lasts about two trips. A permanent fix requires a matching replacement segment and new shock cord.
- Shock cord loses elasticity like an old rubber band. If your poles feel loose or won’t stay connected, replace the cord before it fails completely.
- Mark pole segments with a paint pen as you remove them. Reassembling a poleset incorrectly can damage the tent fabric, and Big Agnes notes this voids the warranty.
- The Cascade Designs Syclone Ferrule Kit does not work with DAC aluminum poles. Using the wrong ferrule type cracks the carbon fiber.
What tools do you need to fix a tent pole?
You need a metal repair splint, needle-nose pliers, a sharp utility knife, and a roll of electrical tape. A measuring tape or digital caliper is non-negotiable. Permanent replacement adds a matching pole segment and shock cord to the list.
A repair splint is a thin-walled aluminum tube slit lengthwise. You slide it over the broken pole section and crimp it tight with pliers. The splint transfers bending stress away from the broken area, but only if the inner diameter matches the pole’s outer diameter within half a millimeter.
The splint lives in most tent repair kits. If yours is missing, a section cut from a cheap aluminum tent stake works in a pinch. Needle-nose pliers crimp the metal. Electrical tape holds everything together and protects the tent fabric from sharp edges.
Permanent repair tools get more specific. You need a replacement pole segment of the exact same diameter and material. You also need a length of shock cord, 2mm for most backpacking poles, 3mm for larger family tents, 6mm or 8mm for heavy-duty canvas shelters. A lighter melts the cord ends to prevent fraying. Scissors cut the old cord.
TL;DR: The field kit is a splint and tape. The workshop kit adds a caliper, a matching pole segment, and shock cord. Measure twice.
The field fix: splint and tape
This is the get-home repair. It uses the metal sleeve from your repair kit and whatever tape you have. It works for one or two more trips if you wrap it right.
First, find the break. Clean any dirt from the fracture so the splint seats flush. Slide the sleeve over the broken section. It should fit snugly. If it slides on too easily, it is the wrong diameter.
Now crimp. Use needle-nose pliers to gently squeeze the sleeve along its length, creating a series of small dimples that bite into the pole. Do not crush it flat. You just want to remove the slop.
Common mistake: Wrapping tape before crimping, the sleeve spins inside the tape wrap and never grips the pole. The repair fails on the second pitch.
Wrap the splice with electrical tape. Start about two inches above the break and spiral down, overlapping each turn by half the tape width. Continue two inches past the other side of the sleeve. Pull the tape tight as you go. The final wrap should be smooth, with no wrinkles or gaps. Wrinkles let water in and weaken the adhesive.
Test the repair by flexing the pole gently. It should bend as one piece. If you hear creaking or feel movement at the break, the sleeve is not tight enough. Add another layer of tape.
This fix is temporary. The tape adhesive degrades in sun and moisture. The sleeve concentrates stress at its ends, which can crack the adjacent pole section after repeated flexing. Plan to replace the entire segment before your next major trip.
The permanent fix: replacing a pole segment
Replacing the broken segment and the shock cord returns the pole to original strength. The process is straightforward but requires patience and keeping parts in order.
Start by removing the end cap from the broken pole section. Some pop off with a flat-head screwdriver. Others are press-fit and need pliers to grip the edge. Work slowly to avoid deforming the cap.
Pull the shock cord out of the pole far enough to cut it. Use sharp scissors or a knife. Discard the cord attached to the broken segment, it is stretched out and will not hold tension.
Now slide out the broken segment. Keep all the other segments in the exact order they come out. Lay them in a line on your work surface. Mark each one with a dot of nail polish or a paint pen if you are worried about mixing them up.
I reassembled a Big Agnes Copper Spur pole set backwards once. The pole would not bend correctly, and it put a permanent kink in the tent’s brow pole. The replacement segment was $12. The new brow pole was $85.
Cut a new piece of shock cord. Length is the total length of all the pole segments plus about six extra inches for the knot. Feed the cord back through the pole sections, following the original path. A piece of wire or a unbent paperclip makes a good threading tool.
Tie a double overhand knot in one end of the cord. Pull the knot tight into the end cap, then snap the cap back onto the pole. The knot should be buried inside the cap, not sticking out.
Insert the new pole segment in its correct place. It must be the same diameter and wall thickness as the original. A 7.9mm segment in an 8.5mm pole set will rattle and stress the adjacent ferrules.
Finally, stretch the shock cord and tie a knot at the other end. The cord should be taut enough to pull the segments together snugly, but not so tight that it bends the pole. Assemble the pole and flex it. It should feel uniform.
| Pole Diameter (mm) | Common Use Case | Shock Cord Size (mm) |
|---|---|---|
| 6.9 / 7.5 | Ultralight backpacking tents | 2 |
| 7.9 / 8.5 | Three-season backpacking tents | 2 or 3 |
| 9 / 10 | Family car-camping tents | 3 or 6 |
| 11 / 12.5 | Canvas wall tents, large shelters | 6 or 8 |
TL;DR: Remove the old cord, keep segments in order, thread new cord, tie secure knots. A mismatched segment diameter causes the next break.
Where to find the right replacement parts
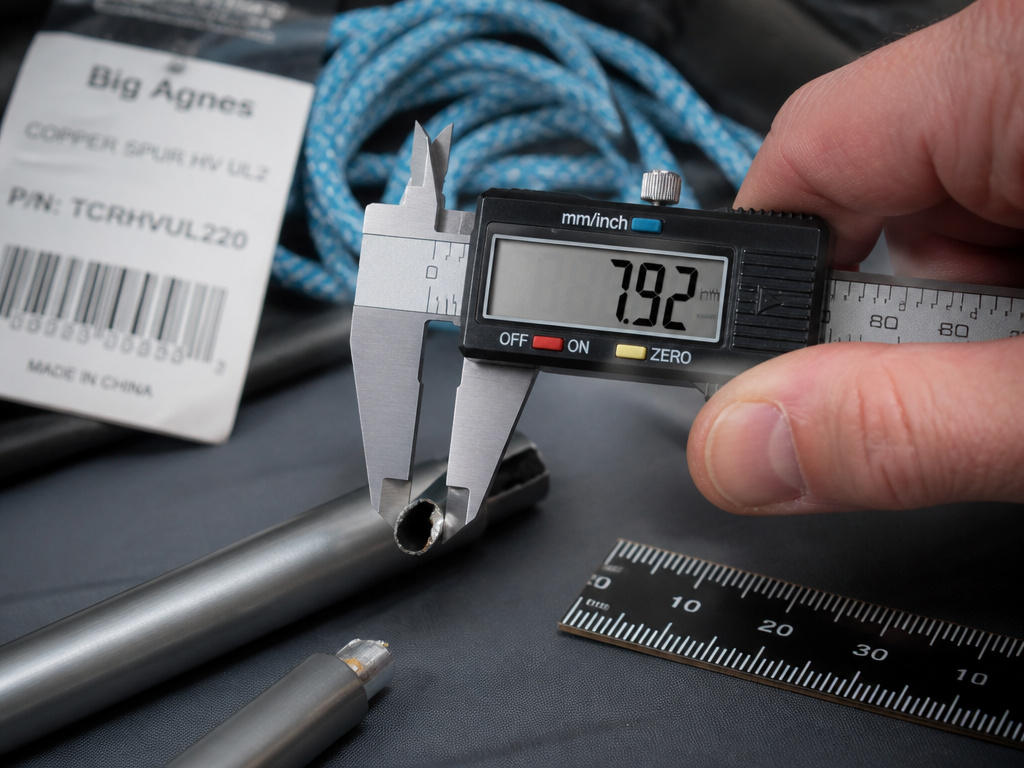
Buying a generic “tent pole repair kit” often gets you the wrong size. You need the exact outer diameter and the correct shock cord thickness.
Start with your tent’s manufacturer. Brands like Big Agnes, MSR (Cascade Designs), and Vaude sell individual pole segments for tents up to ten years old. You will need your tent model and the pole section number, usually printed on a tag near the pole bag.
If the manufacturer is out of stock or does not sell parts, measure. Use digital calipers for accuracy. Tent pole diameters follow standard sizes: 6.9mm, 7.5mm, 7.9mm, 8.5mm, 9mm, 10mm, 11mm, and 12.5mm. Write down the measurement.
Then search for “tent pole segment [your diameter]” or “tent pole ferrule kit”. Outdoor retailers like REI and specialty online shops stock these sizes. For shock cord, match the thickness to your pole diameter using the table above. A 2mm cord fits a 7.9mm pole. A 6mm cord is for a 10mm pole.
The Cascade Designs Syclone Ferrule Kit is designed for their carbon poles. It uses a specific adhesive and will not work on DAC aluminum poles. Using it on the wrong material voids any repair and can crack the carbon.
Some repair shops offer a mail-in service. You send the broken pole, they replace the segment and return it. This is a good option if you lack tools or are unsure about the diameter. It costs more but guarantees compatibility.
For a field-expedient sleeve, a section of aluminum arrow shaft or a tent stake can be cut to length. Match the diameter as closely as possible. It will not be as strong as a proper splint, but it works in a pinch.
When a DIY fix isn’t enough
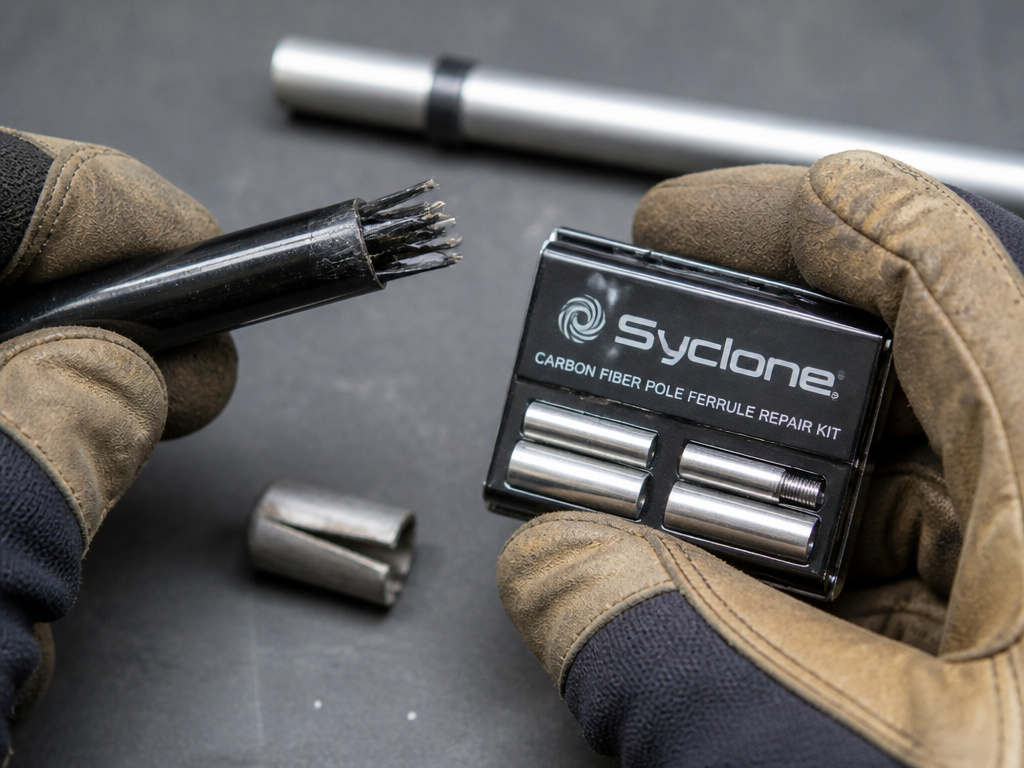
Sometimes the break is at a ferrule, the metal sleeve that joins two pole sections. Sometimes multiple segments are damaged. Sometimes you have a carbon fiber pole, not aluminum.
Carbon fiber repairs are different. The material splinters instead of bending. A standard metal sleeve will not grip properly and can crush the fibers. Cascade Designs makes a specific Syclone Ferrule Kit for their carbon poles. Do not substitute.
If the break is within an inch of the ferrule, replacing the entire segment-ferrule assembly is safer than trying to splice it. The stress concentration at a joint is high.
Severely bent poles, even if not broken, are a risk. The aluminum is work-hardened and will crack along the bend line eventually. Straightening it weakens the metal. Replace it.
Consider the tent’s value. Fixing a pole on a premium four-season mountaineering tent is worth the effort and cost of genuine parts. For a cheap department-store tent, a full pole replacement might cost more than the tent itself. In that case, a field splint is a temporary solution while you shop for a better shelter.
Some repairs are beyond a quick fix. If the pole broke because the shock cord was old and lost its elasticity, you must replace the cord for the entire pole set. Old cord will break again soon.
Frequently Asked Questions
Can you fix a tent pole without a repair sleeve?
Yes, but not well. You can wrap the break tightly with duct tape, perhaps reinforcing it with a twig splint. This is a true emergency repair that might last one night. It will not survive packing and unpacking the tent.
How do you measure tent pole diameter?
Use a digital caliper for accuracy. If you do not have one, wrap a string around the pole, mark the circumference, and divide by 3.14 to get the diameter. Compare to standard sizes: 7.9mm, 8.5mm, 9mm.
How much shock cord do I need to replace?
Measure the total length of all pole segments in that pole set. Add six inches for the knots. For a typical 3-person dome tent, one pole set might need 8 to 10 feet of cord. Big Agnes notes their Shock Cord Repair Kit includes 25 feet, enough for most 1- and 2-person tents.
Does duct tape ruin tent poles?
No, but the adhesive residue is a pain to remove. It attracts dirt and can make the pole sticky. Use electrical tape first, it leaves less residue and is easier to peel off later when you do the permanent repair.
Can you glue a broken tent pole back together?
Do not use glue. Epoxy and superglue create a rigid point that cannot flex. The first strong wind will snap the pole again, right next to the glue joint. The only reliable joins are a mechanical sleeve or a full segment replacement.
Before You Go
Match the diameter. That is the rule that matters. A 7.9mm pole needs a 7.9mm sleeve, not the 8.5mm one from the generic kit. Get it wrong and the repair fails silently, often when you need it most.
Keep your poles clean and dry. Store them loosely coiled, not tight. Check the shock cord tension every season, if it stretches more than an inch between segments, replace it. That simple maintenance prevents most breaks.
And mark your segments before you take them apart. A dot of nail polish on each one saves an hour of frustration and keeps your tent’s warranty intact.
