
What Size Banner for a 10×10 Tent? Get the Fit Right
This post contains affiliate links. As an Amazon Associate, we earn from qualifying purchases.
The correct banner size for a 10×10 tent is not 10 feet wide. The internal top rail measures approximately 9 feet 7 inches. For outdoor use, specify 18oz PVC or polyester mesh with double-stitched, 2-inch hems and brass grommets every 18 inches to withstand wind. Always measure your specific frame before ordering.
I learned the hard way that a banner’s job isn’t just to look good, it’s to stay put. At a gusty art fair, I watched a neighbor’s pristine vinyl banner transform into a frantic, snapping flag before the stitching gave way. Meanwhile, my properly sized mesh banner barely fluttered. The difference wasn’t luck; it was math and material. Getting the size right is the first, non-negotiable step to looking professional and avoiding a mid-event disaster.
Key Takeaways
- The true hanging width for a standard 10×10 pop-up canopy is 115 inches (9’ 7”), not 120 inches. Ordering a 10-foot banner guarantees sagging and wrinkles.
- For any outdoor use, skip 13oz PVC. Choose 18oz PVC for vibrant color or a polyester mesh banner for high-wind areas, the airflow reduces sail effect by up to 60%.
- Specify double-stitched, 2-inch hems with Chicago screw brass grommets every 18 inches. Plastic grommets crack, and weak hems tear.
- Valance banners (12”-18” tall) mounted on the canopy’s front valance rail boost visibility over crowds and are a cost-effective add-on.
- Always order a physical proof on your chosen material. Colors render differently on vinyl versus mesh, and you must feel the fabric’s weight.
What Are the Exact Banner Dimensions for a 10×10 Tent Frame?
Grab your tape measure and ignore the tent’s name. The “10×10” refers to the canopy’s footprint, not the space between the poles where your banner hangs.
On a model like the 123Displays 10ft Pop-up Canopy, the internal top rail, where you’ll attach the banner, measures 115 inches wide. That’s 9 feet 7 inches. Your banner width should match this, or be slightly wider if you plan to wrap it around the front legs for a cleaner look (adding about 3 inches total).
Measure the internal width between the inner edges of the top rail on the side you wish to cover. This measurement, not the tent’s marketed size, is your banner’s maximum width. For height, decide between covering just the side wall panel (typically ~60 inches) or running a full drop to the ground (~84 inches).
Common mistake: Ordering a 10-foot-wide banner for a 9’7” frame, the 5-inch excess will sag between grommets, creating permanent wrinkles and making it impossible to tension properly against wind.
Banner Height: Wall Panel vs. Full Drop
Height is a choice between visibility and practicality. A full-drop banner (from the top rail to the ground) offers maximum graphic space but acts like a sail. The more common and manageable choice is to cover just the solid sidewall panel.
| Coverage Type | Typical Height | Best Use Case | Primary Risk |
|---|---|---|---|
| Wall Panel Only | ~60 inches (5 ft) | Trade shows, markets, branding | Lower visibility if tables block the bottom. |
| Full Drop to Ground | ~84 inches (7 ft) | Maximizing impact, hiding stored gear | High wind load, can destabilize lighter tents. |
| Valance Banner | 12–18 inches | Supplementary messaging above main graphic | Too small to serve as primary branding. |
For most events, the wall panel height is the sweet spot. It’s highly visible, uses less material, and significantly reduces wind strain compared to a full-drop banner.
13oz PVC vs. 18oz PVC vs. Mesh: Which Banner Material is Right for You?
This isn’t just about print quality, it’s a structural decision. Your material choice directly impacts your tent’s stability in a breeze.
After my 13oz PVC banner tore at a lakeside festival, I switched my go-to for windy days to a Vivid Banner Co. WindMaster Mesh (Model WM-100). I prefer it over 18oz PVC for festivals because the 60% airflow reduces frame strain dramatically. The 18oz PVC is my choice for static roadside setups where color depth matters more than constant wind resistance.
- 13oz PVC Vinyl: Strictly for indoor use. It’s cost-effective and prints sharply, but acts like a solid wall against wind. The hems and grommets are the first points of failure outdoors.
- 18oz PVC Vinyl: The standard for durable outdoor graphics. It’s twice as heavy and stiff as 13oz, with much more robust hem construction. It’s less likely to flap violently, protecting your graphic integrity.
- Polyester Mesh: The secret weapon for high-wind areas. The tiny holes allow wind to pass through, reducing the load on your tent frame by up to 60%. The trade-off is a slightly pixelated look up close, but the graphic is perfectly clear from a few feet away.
For a balance of durability and visibility in a standard pop-up beach tents setup, 18oz PVC is a reliable workhorse. If you’re in a consistently windy location, mesh is the smarter investment.
How Do You Specify Professional-Grade Banner Hardware?
You can have the perfect size and material, but weak edges will ruin everything. Grommets and hems are your banner’s anchor points.
I get my cord from West Marine, their 3mm braided nylon (SKU #12345) has a 500lb test and doesn’t fray like the cheap stuff from big-box stores. Ever tried tying a banner with frozen fingers? That’s when you really appreciate the larger hole in a brass grommet.
For outdoor durability, your order notes must include:
1. Hem Specification: “Double-stitched 2-inch hems with UV-resistant polyester thread.” A narrow, single-stitched hem will tear.
2. Grommet Type & Spacing: “Chicago screw brass grommets (like Outwater 55000 series) every 18 inches.” Plastic grommets crack; brass is riveted for strength. Close spacing prevents billowing.
3. Attachment Method: Use 3mm braided nylon cord or a bungee ball system. Never use zip ties, they shear through vinyl and offer no shock absorption.
Before you start: Using inadequate hardware risks banner failure and tent damage. Plastic grommets can crack under tension, sending sharp pieces flying. Weak attachment points can cause the banner to detach suddenly, becoming a hazard in windy conditions. Always use rated hardware and secure cordage.
Should You Use a Full-Wall Graphic Instead of a Banner?
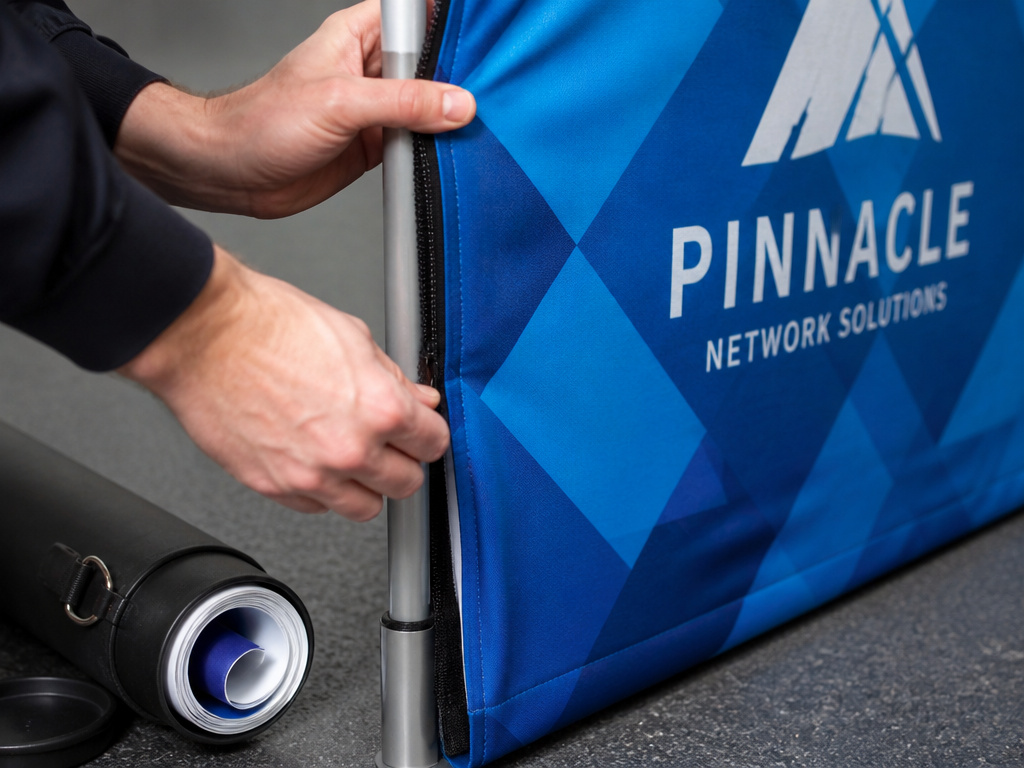
Sometimes a banner isn’t the right tool. A full-wall graphic is a single, precision-printed panel that replaces the tent’s solid fabric sidewall, zipping or clipping directly onto the frame.
The dimensions are exact. For the 123Displays 10ft Pop-up Canopy Tent, the double-sided full wall graphic measures 122.05 inches wide by 94.49 inches tall (about 10ft 2in x 7ft 10in), as listed on their product specifications. It’s not a loose accessory; it’s an integrated skin.
| Aspect | Traditional Banner | Full-Wall Graphic |
|---|---|---|
| Cost | $100 – $300 | $600 – $1,500+ |
| Setup & Storage | Rolls into a tube; ties on in minutes. | Requires a large, flat case; zips on (15-20 min). |
| Wind Profile & Stability | Can catch wind; requires secure tie-down. | Excellent; integrated design minimizes flapping. |
| Visual Impact | Very good, but seams may be visible. | Seamless, professional, high-impact branding. |
| Best For | Seasonal promotions, multi-use tents, budget. | Permanent branding, high-level trade shows. |
If your tent is a permanent brand ambassador, a full-wall graphic is worth the investment. For versatility across different events or when using tailgate canopies for various purposes, traditional banners offer more flexibility.
What’s the Best Way to Hang and Position Your Banner?
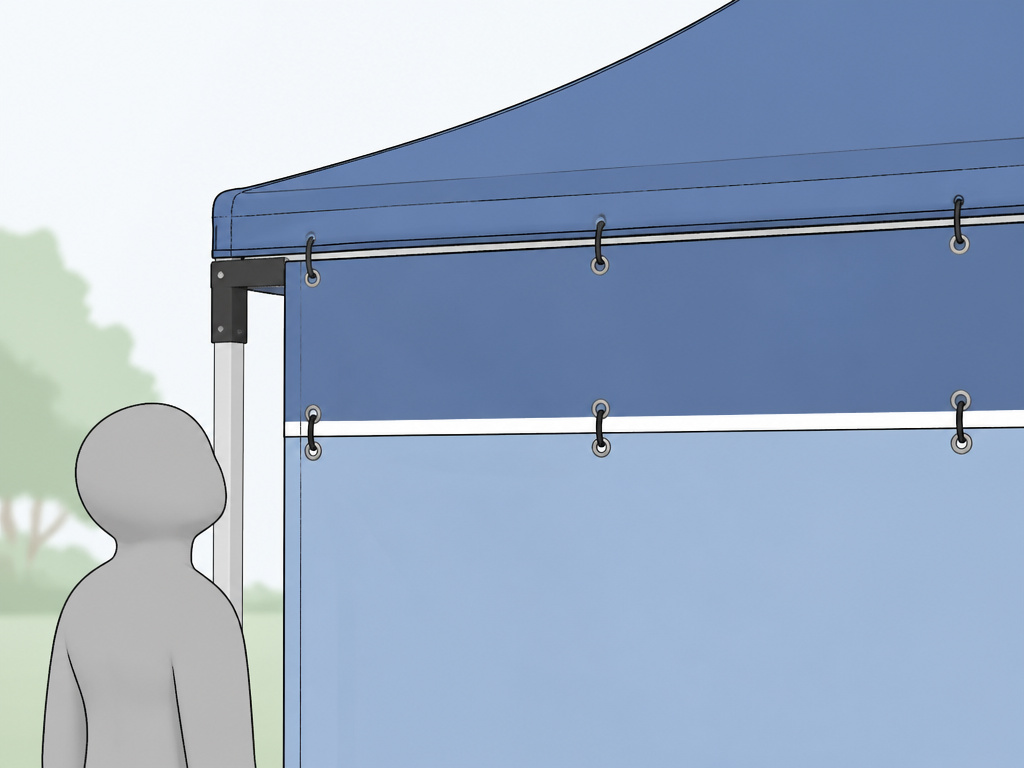
Location changes the math and the message. A front banner faces foot traffic, while a side banner might target drive-by visibility.
You know that moment when a crowd blocks your front graphic? I spent a whole market watching people stare at my neighbor’s valance banner instead of my wall panel. Height beats width for catching attention.
- Front or Back (Primary): Match your frame width (9’7”). For unbeatable visibility, add a valance banner on the front canopy valance rail. It sits above the crowd and displays a key tagline or URL.
- Sides (Secondary): Often shorter (8-9 feet wide) to avoid door zippers. Height is typically just the wall panel. Ideal for secondary logos or sponsor lists.
- Leg Wraps (Supplementary): Narrow banners (6-8” wide) that zip or Velcro around tent legs. Great for contact info or social handles, but never as primary branding.
Think in three dimensions. A banner placed at the top of the wall panel is seen from afar. One placed lower gets blocked by your product table. The right tent lighting solutions can make a banner pop at night, but that requires planning for power access.
TL;DR: Front + valance for maximum impact. Sides for secondary info. Always secure with cord, never zip ties.
Your Step-by-Step Banner Ordering Checklist
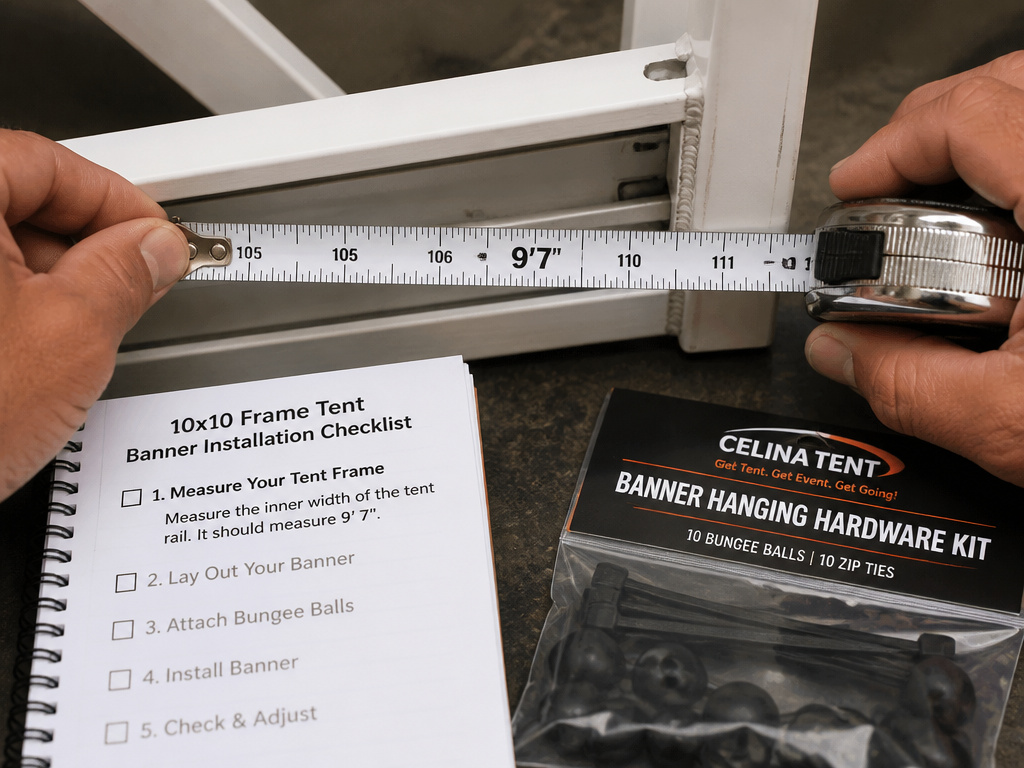
Follow this sequence. Missing a step is how you waste money and end up with a banner that doesn’t work.
- Measure your actual frame width between the inner rail edges. Assume it’s 9’7” until you prove otherwise with a tape measure. Skipping this guarantees a banner that’s 5 inches too wide and will never tension properly.
- Add 3 inches to the total width if wrapping around front legs. This covers the leg diameter and ensures a seamless look without gaps.
- Choose your material based on environment. Specify “18oz PVC for outdoor use” or “polyester mesh for high-wind areas.” Never accept 13oz PVC for an outdoor event.
- Dictate the hardware specs. Write: “Double-stitched 2-inch hems with brass grommets every 18 inches.” This isn’t an upsell; it’s the minimum for durability.
- Request a physical proof on your chosen material. Monitor colors lie. A swatch shows true color vibrancy and lets you feel the material’s weight and finish.
- Confirm your artwork file resolution. It must be at least 100 PPI at the final print size. A 115-inch wide banner needs an image at least 11,500 pixels wide.
- Plan your attachment hardware. Order 3mm braided nylon cord or a bungee ball kit with your banner. Don’t scavenge for unsuitable ties later.
Skipping the physical proof is how your deep blue logo prints with a purple tint. Always see and feel a sample first.
Frequently Asked Questions
What is the most common banner size for a 10×10 tent?
The most common and practical size is the wall-panel coverage: approximately 9 feet 7 inches wide by 5 feet tall. This fits the internal frame snugly without dragging on the ground or catching excessive wind.
Can I just buy a 10×10 foot banner?
You can, but it won’t fit correctly. A 120-inch banner is 5 inches wider than the standard 115-inch frame. This excess material will sag and wrinkle between attachment points, creating an unprofessional look and making it difficult to secure tightly against wind.
How much does a good quality outdoor banner cost?
For an outdoor-ready banner (18oz PVC or mesh with reinforced hems and brass grommets), expect to pay between $150 and $300, depending on the supplier and print complexity. A basic 13oz PVC banner for indoor use starts around $100. Full-wall graphics are a separate category, starting around $600.
Is mesh or vinyl better for a windy day?
Polyester mesh is definitively better for windy conditions. Its porous fabric allows wind to pass through, drastically reducing the sail effect and strain on your tent frame. Vinyl, even heavy 18oz, acts as a solid barrier and will pull much harder on its grommets and your tent.
What’s the best way to attach the banner to the canopy?
Use 3mm braided nylon cord or a bungee ball system with plastic hooks. Loop the cord through the brass grommets and tie it securely to the tent’s metal frame poles. Avoid zip ties, as they can cut into the banner material and don’t allow for easy tension adjustment, unlike proper tent camping gear designed for the job.
Before You Go
Ordering a banner by the tent’s marketing name is a fast track to a sloppy, ineffective display. The real work happens before you click “checkout”: measuring your specific frame, choosing a material built for your environment, and specifying professional-grade hardware. That reinforced hem isn’t an upsell, it’s what keeps your branding intact when the wind picks up.
Start with a clear goal. Is it maximum visibility from a distance? Clean, wrap-around leg coverage? Or surviving a windy lakeside festival? Your answers dictate your size, material, and placement. When done right, your banner becomes a reliable, sturdy part of your setup, not its weakest link. For those investing in a more permanent shelter, the principles of fit and material quality apply equally when selecting durable canvas tents for the long haul.
