
How To Put A Tent Together: Step-By-Step Instructions For All
This post contains affiliate links. As an Amazon Associate, we earn from qualifying purchases.
To put a tent together, you match poles to sleeves, stake the corners taut, clip the body to the frame, and then secure the rainfly. The Coleman Stockton tent manual specifies threading two black 11mm Main Poles through sleeves with black trim and two grey 9.5mm Side Poles through grey trim, mismatch them and the frame won’t seat.
Most people fumble the first stake. They pound it in where the loop lies, which often leaves the tent floor slack. A slack floor collects water under the fly and pools rain inside the vestibule by morning.
This guide walks through site prep, pole matching, and the one staking trick that keeps everything square. We’ll also cover sealing seams the factory missed and why venting matters more than you think.
Key Takeaways
- Match pole color to sleeve trim color. A black pole in a grey sleeve bends the frame.
- Stake the tent body before the rainfly. The Eureka! Tetragon manual says this squares the tent so the door zipper works smoothly.
- Seal only the floor and fly seams exposed to runoff. Factory-taped roof seams don’t need it.
- An adult breathes out about a pint of water overnight. Without cross-ventilation, that moisture condenses on the inner wall by dawn.
- Use a mallet or a stout rock. Tent stakes bend under a shoe.
Before You Start: The Two Things That Wreck a Weekend
Before you start: A tent pitched over a hidden root punctures the floor on night one. A rainfly secured too loosely flaps in a 15-mph wind, tearing a grommet out within an hour. Clear your site and tension everything twice.
You need a flat spot larger than the tent’s footprint. Sweep it clear of debris. Pine cones feel soft but compress into sharp lumps under a sleeping pad. Lay your footprint or a ground tarp down first. This barrier protects the tent floor from abrasion and moisture.
Gather your poles, stakes, mallet, and rainfly before unzipping the tent bag. Fumbling for a stake while the tent catches wind is how poles snap.
The 5-Step Core Assembly Sequence
Follow these steps in order. Swapping steps three and four is the most common cause of a lopsided, saggy tent.
Step 1: Unroll and Orient the Tent Body
Lay the tent body on your prepared footprint. Point the door away from the expected wind direction and toward your view or camp common area. Align the corners roughly where they’ll be staked.
If you skip orienting the door first, you’ll end up facing the wrong way after everything is staked. Restaking four corners wastes ten minutes.
Step 2: Assemble and Match the Poles
Connect all shock-corded pole sections. They should snap together with a firm push. Listen for the cord pulling taut.
Now match them to the sleeves. Manufacturers use color coding for a reason. The Coleman Stockton manual specifies two long black Main Poles (11mm diameter, part 5010000539) go through sleeves with black trim. Two long grey Side Poles (9.5mm diameter) go through grey-trimmed sleeves. Threading a black pole into a grey sleeve forces the thinner pole to carry a load meant for the thicker one. The frame kinks, and the pole can fracture at a joint after a few windy nights.
Step 3: Thread Poles and Raise the Frame
Feed each pole through its sleeve from one end to the other. This can feel fiddly. Work the fabric along, don’t force the pole.
Once all poles are threaded, lift the entire structure. The tent will pop into shape. Insert each pole tip into the grommet or socket at the corner of the tent body. You’ll feel it click or seat firmly.
Step 4: Attach Frame Clips
Start at one corner and work your way around. Snap each plastic frame clip over its corresponding pole. Do not clip the rainfly yet.
Missing a clip lets that section of the tent wall sag inward. In rain, the sagging fabric can touch the inner wall and cause condensation to soak through.
Step 5: Stake the Four Corners
Drive a stake through each corner’s web loop. If your tent has a ring-and-pin system, stake just outside the ring so the “J” hook catches. Pull the stake loop taut toward the outside before hammering the stake home.
Common mistake: Staking too tightly, the door zipper binds and won’t close, and the fabric stretches under tension, weakening the seams over a season.
TL;DR: Match poles to sleeves by color, raise the frame, clip the body, then stake corners taut, but not tight enough to strain the zippers.
Staking and Securing Your Tent
Staking does more than hold the tent down. It squares the floor and establishes the tension all other attachments rely on.
| Stake Point | Purpose | Risk If Skipped |
|---|---|---|
| Four Corners | Squares the floor, anchors structure | Floor stays slack, collects water puddles under the rainfly |
| Rainfly Guylines | Stabilizes fly in wind, creates air gap | Fly flaps, tears grommets, touches inner tent causing condensation soak-through |
| Vestibule Doors | Keeps vestibule volume usable, sheds rain | Door sags, rain pools inside vestibule, wet gear by morning |
For corners, use the provided stakes or upgrade to sturdy steel ones for hard ground. A tent mallet is best, but a smooth, hefty rock works. The Texas Parks and Wildlife photographer in the YouTube transcript notes a rock “works wonders.” Never use your foot, you’ll bend the stake.
After the corners are secure, attach the rainfly. Drape it over the frame, aligning it with the doors and windows. Connect the elastic loops or “S” hooks from the fly to the fabric loops near the frame clips. Then stake out the fly’s guylines.
I once skipped the guyline stakes on a Coleman because the evening was calm. A midnight gust woke me up with a sound like a sail luffing. The fly’s corner grommet was ripped clean out by morning. Now I stake them even when the air is still.
TL;DR: Stake corners first to square the body, then stake every rainfly guyline to create a mandatory air gap that stops condensation transfer.
Attaching the Rainfly and Managing Condensation
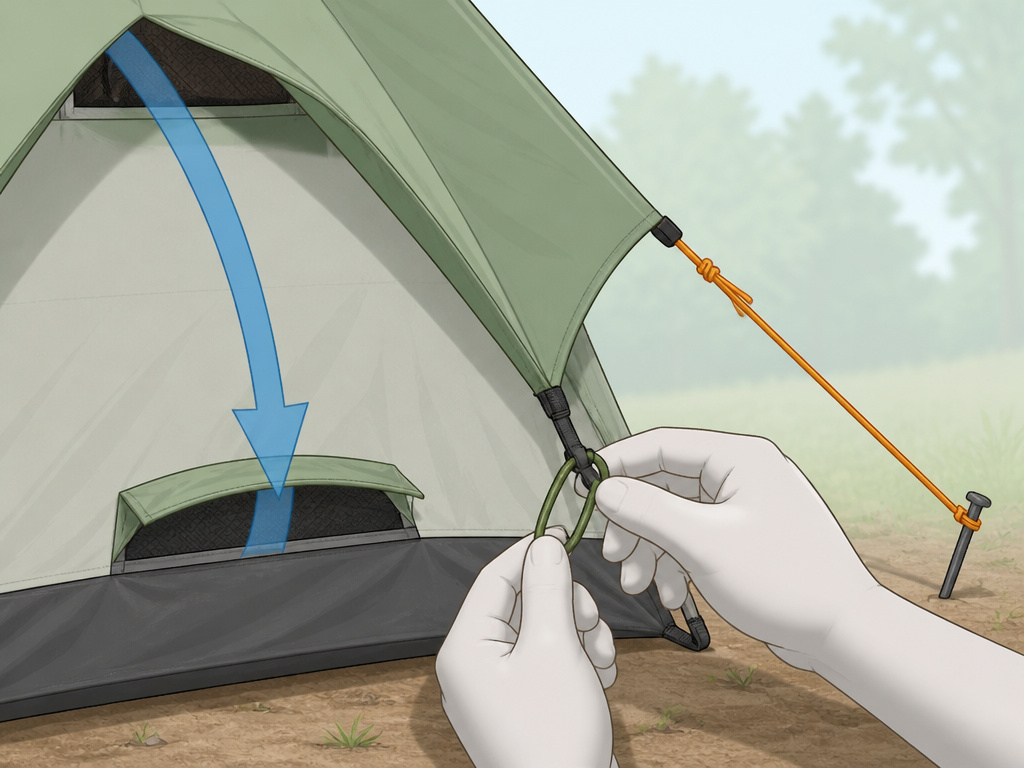
The rainfly is your tent’s waterproof shell. It also creates a critical air buffer between the inner tent and the outside world.
First, ensure the fly is oriented correctly. The pole sleeve side (if it has one) faces down. The door flaps should align with the tent’s doors. Hook the elastic loops or clips underneath the fly to the loops at the base of the tent body. For the Coleman Kenai, you then insert the rainfly pole tips into the grommets on the fly.
Now, stake out the four guylines. Pull them taut at a 45-degree angle away from the tent. This tension keeps the fly from sagging and touching the inner tent.
Condensation is not a leak. It’s moisture from your breath and body condensing on the cooler inner wall. The Eureka! manuals state an adult exhales about a pint of water overnight. Without ventilation, that moisture has nowhere to go.
Common mistake: Sealing all the seams, the Eureka! Jade Canyon manual explicitly says not to seal seams in the roof or factory-taped seams. Only seal the floor seams and fly seams exposed to rain runoff.
To minimize condensation, use your vents. Open the low vents and the high vents to create a cross-flow. Vent the vestibule as well. In humid or cold conditions, this airflow is the difference between a dry sleeping bag and a damp one by dawn.
Which Tent Poles Go Where? (A Decision Table)
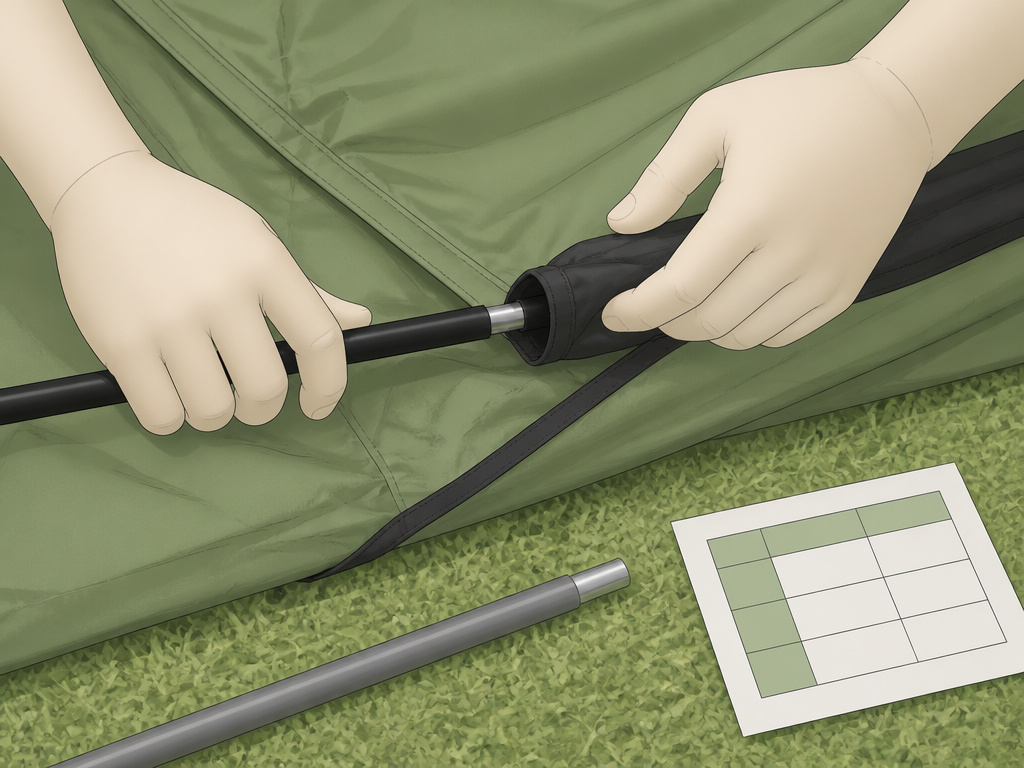
Not all tents use color coding. Some use pole length or sleeve position. This table helps you decode the system.
| Pole Type | Diameter | Sleeve/Trim Color | Tent Model Example | If Misplaced |
|---|---|---|---|---|
| Main Poles | 11mm | Black | Coleman Stockton (2000002532) | Frame kinks, pole fractures at joint |
| Side Poles | 9.5mm | Grey | Coleman Stockton | Tent wall sags, reduces interior volume |
| Vestibule Pole | 11mm | Black (short) | Coleman Stockton | Vestibule sags, rain pools at door |
| Rainfly Pole | Varies | Sleeve on fly underside | Coleman Kenai (9234-908) | Fly doesn’t tension, touches inner tent |
If your tent has two main poles that form an “X”, they usually go through the longest, central sleeves. The shorter poles arc over the top for dome tents. When in doubt, lay all the poles and sleeves out before threading. The longest pole pairs with the longest sleeve.
The physical sensation of threading a pole through a sleeve is a slight resistance from the fabric. If you meet a hard stop, you’ve likely reached a seam. Back up and guide the pole tip past it. Forcing it can tear the sleeve stitching.
Seam Sealing: What To Seal and What To Skip
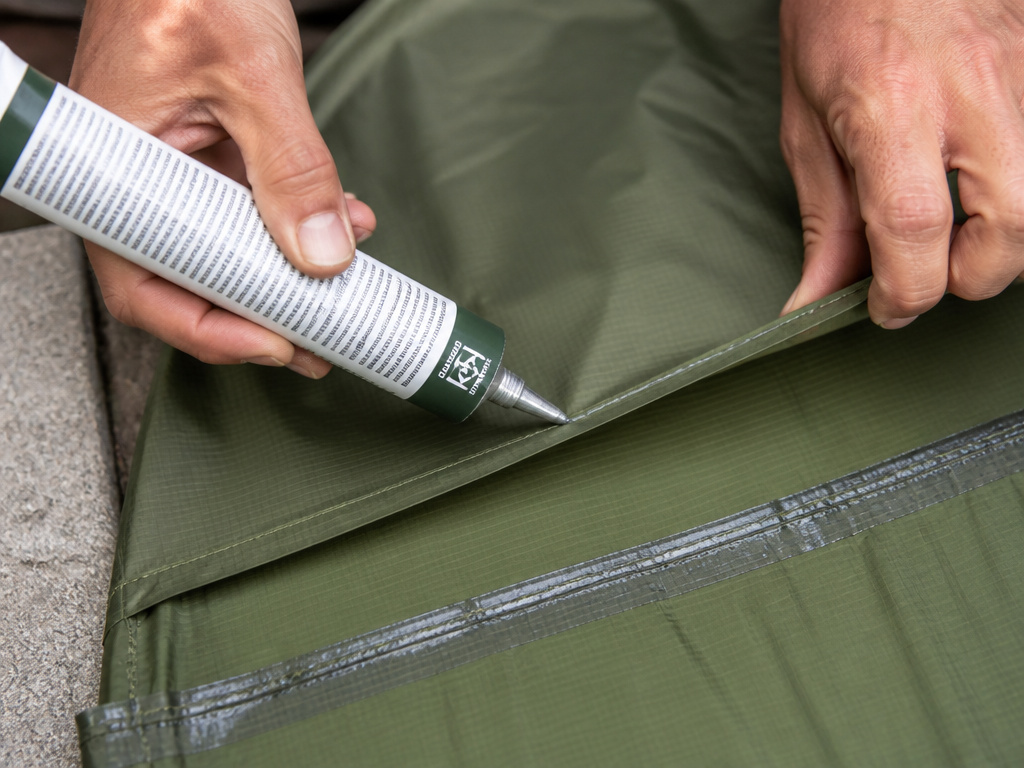
Factory-taped seams are sealed at the factory. You don’t need to touch them. The seams that need your attention are the ones that will see direct water flow: the floor seams and the rainfly seams that aren’t taped.
You need a well-ventilated area and a seam sealer like Kenyon Seam Sealer 3 or McNett Outdoor SeamGrip®. Apply a thin bead along the seam on the inside of the tent floor. Then, turn the tent over and seal the same seam on the outside. This double-sided seal blocks water under pressure.
For the rainfly, seal any stitched seam that isn’t covered by tape, especially around reinforcements and tie-out points. Do not seal the roof seams on a cabin-style tent, those are designed to be taped.
I sealed the floor seams on a Eureka! Tetragon three seasons ago. Last fall, a downpour flooded the campsite. My tent floor stayed bone dry while my neighbor’s unsealed tent had a damp patch along the seam by morning. The $15 tube of SeamGrip® paid for itself that night.
Let the sealant cure for the time specified on the tube, usually 24-48 hours, before packing the tent away. Packing it wet ruins the sealant’s bond.
Frequently Asked Questions
Do I need to seal the seams on a new tent?
Yes, but only the non-taped seams. Most factory-taped seams on the roof and walls are waterproof. The floor seams and untaped rainfly seams are not sealed from the factory. Check your manual, the Eureka! Tetragon instructions explicitly say to seal floor and fly seams exposed to rain.
How tight should I pull the guylines?
Pull them taut enough that the rainfly doesn’t sag or flap in a breeze, but not so tight they strain the fabric or grommets. In wind, a slightly loose guyline allows the fly to move without tearing. A good test: flick the guyline. It should vibrate like a guitar string, not sag like a clothesline.
What’s the difference between condensation and a leak?
Condensation forms evenly on the inner walls, usually in cool, humid weather or when ventilation is poor. A leak drips from a specific point, often along a seam or at a stake loop, and happens during or immediately after rain. If you see moisture inside but it’s not raining, it’s almost certainly condensation.
Can I set up a tent by myself?
You can set up most dome and cabin tents alone, but larger family tents like the Coleman Montana 6 manual recommends at least two people. The trick is to stake one corner first, then move diagonally to the opposite corner to keep the floor square as you work.
How do I fix a bent tent pole?
For a minor bend, you can sometimes straighten it gently by hand. For a severe bend or fracture, use a pole repair sleeve from the manufacturer. The Coleman Stockton manual lists repair kit 5010000539 for the 11mm black poles. Slip the sleeve over the break and secure it with the included clamp.
The Bottom Line
Putting a tent together is a matching game. Match the poles to the right sleeves. Match the stakes to the correct loops. Match the rainfly vents to the prevailing wind. Get those matches right, and the tent goes up in twenty minutes, stands firm in a gust, and keeps you dry.
Skip the matching, force a pole, forget a stake, seal the wrong seam, and you’ll spend the night troubleshooting instead of sleeping. Your first setup might feel slow. That’s fine. Do it right once, and the muscle memory lasts for seasons. Now get out there and pitch it.
