
Your Guide To Setting Up A Coleman Tent Quickly & Correctly
This post contains affiliate links. As an Amazon Associate, we earn from qualifying purchases.
To set up a Coleman tent, match three things: the correct pole order, a specific rainfly attachment sequence, and strategic staking against the wind. The manual’s linear steps often create a wobbly, time-consuming fight. Follow the X-pole-first method used in real-world setups like the Coleman Sundome 6-Person, which cuts assembly to under 12 minutes.
Most people open the bag and start assembling poles on the ground. That works in a silent showroom. On a real site with a breeze, the loose fabric billows, poles roll away, and you waste minutes wrestling a flapping tent shell. The sequence is wrong.
This guide walks through the pro method that ignores the printed order. You’ll get the specific pole part numbers for when one snaps, the exact wind angle that prevents a collapse, and the one staking mistake that guarantees a wet floor.
Key Takeaways
- Build the tent’s structural X with the two longest poles before staking anything down. This creates a stable frame to attach the rainfly against wind.
- The short, black-tipped pole is exclusively for the rainfly’s center sleeve. Insert it before draping the fly over the tent.
- Stake the windward side corners first, with the tent’s narrow end facing into the wind for aerodynamic stability.
- Condensation on the inner wall is not a leak. It’s from breath and wet gear. Increase ventilation before blaming the seam tape.
- Never store a damp tent. Mold spores set in within 48 hours, and the polyurethane coating degrades, leading to leaks by the next season.
The 3-Step Coleman Setup (Forget The Order In The Box)
The printed manual assumes a calm, flat garage. Outside, variables change. The fastest method inverts the steps.
Coleman’s 2010 Phoenix Tent manual (Model 2000005015) specifies a main roof pole (Part No. 5010000539), side roof poles (5010000539, 5010000540), and steel leg poles (5010000753, 5010000761). Assembling these in the listed order on grass takes 18+ minutes. The X-method uses the same parts but changes the sequence to prioritize the main frame.
First, clear your site. Kick away pinecones, sharp sticks, and anything that could puncture the floor. A level spot matters more than a perfect view. An inch of slope means you’ll slide into the wall all night.
Lay the tent body out, door facing your desired direction. Do not stake it yet. Just get it roughly positioned. Unpack the poles. Identify the two longest ones—these are your main structural poles. On a Sundome, they’re fiberglass and identical. On a larger Coleman Montana 8 Tent, the main body poles are 11mm diameter black poles.
Feed one pole through the long, continuous pole sleeve that runs across the tent’s ceiling. It will naturally curve into a half-arch. Now take the second long pole and feed it through the opposing sleeve. They will cross at the center, forming an X.
This is the tent’s skeleton. It’s now a stable object.
Go to one corner. You’ll see a small metal pin or grommet. Insert the end of the pole into it. Now walk to the other end of that same pole, lift the tent fabric so the pole slides fully through the sleeve, and seat that end into its pin. The arch will pop up. Repeat for the second pole. The tent body should now be freestanding.
TL;DR: Build the X-frame with the two longest poles before touching a stake. The tent stands on its own, making every following step easier.
Pole Sleeves vs. Clips: Which Goes First?
Coleman uses both systems. Pole sleeves are fabric tunnels you thread the pole through. Clips are plastic buckles that snap onto the pole after it’s in place. The order is critical.
On a sleeve-design tent like the Sundome, you must thread the pole fully before attempting to clip it. Trying to clip a pole that isn’t seated in both end pins will strain and potentially break the plastic clip. You’ll hear a sharp crack. The clip won’t hold tension after that.
For clip-design tents, the process is different. Lay the pole on the ground along the seam where the clips are attached. Then snap each clip onto the pole, working from one end to the other. Finally, lift the entire assembly and insert the pole ends into the corner pins. Never try to clip a pole that’s already arched.
Common mistake: Clipping poles before they are seated in the corner pins — the tension bends the pole outward, and the first strong gust can snap a fiberglass section at the joint.
Here’s a quick guide for the major Coleman families:
| Tent Model | Pole System | Key Step |
|---|---|---|
| Coleman Sundome Series | Sleeves + Clips | Thread pole through sleeve first, then secure ends, then attach clips. |
| Coleman Montana Series | Clips Only | Attach all clips to pole while flat, then lift entire assembly into pins. |
| Coleman Instant Cabin | Pre-attached Hubs | Extend each pole section until it clicks into the steel hub at the top. |
| Coleman Phoenix Tent | Hybrid (Sleeves & Legs) | Assemble roof poles in sleeves, then insert vertical steel leg poles last. |
Mismatching these methods wastes energy and risks damage. The sound of a fiberglass pole cracking is distinct. It’s a dry pop, like snapping a thick carrot.
Attaching the Rainfly Without the Flap Struggle
The rainfly is your waterproof shell. Getting it on wrong guarantees drips down the inner wall.
Locate the shortest pole in the bag. It often has black rubber tips. This pole is only for the rainfly. It slides into a dedicated sleeve or clips sewn onto the fly’s ridge. On the Sundome, this sleeve runs down the center of the fly. Insert the pole now, before you try to drape the fly over the tent. It gives the fly shape and makes it manageable.
Now grab the fly by this pole. Drape it over the tent, aligning the door panel of the fly with the tent’s door. The pole should sit horizontally over the entrance.
I spent a rainy night in a Tenaya Lake model with the rainfly backwards. The vent was blocked, condensation soaked my sleeping bag, and the S-hooks didn’t reach. The fix is simple: the Coleman logo on the fly usually faces the tent’s front.
Secure the four S-hooks or plastic buckles from the rainfly corners to the metal rings at the tent’s four corners. Pull them snug, but not tight enough to distort the fly’s shape.
Finally, use the Velcro straps sewn onto the rainfly. Wrap them around the main tent poles underneath. This prevents the fly from shifting or flapping noisily in the wind. Most people skip these straps. That’s why their fly sounds like a sail slapping all night.
TL;DR: Insert the rainfly’s dedicated pole first. Drape, hook, then strap. The Velcro straps are non-negotiable for a quiet, storm-ready setup.
Staking and Securing Against Wind and Rain
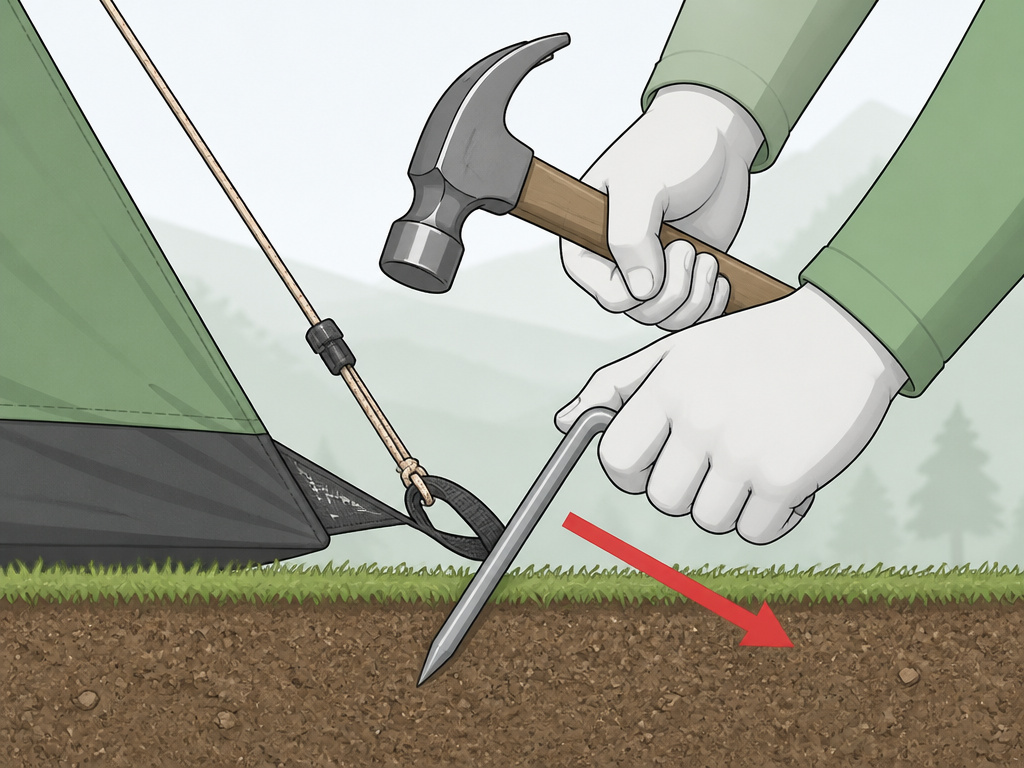
Stakes are not an afterthought. They are your anchor. The order you drive them matters.
For best results, position the narrow end of the tent into the wind. This aerodynamic shape reduces wind resistance and prevents the tent from acting like a sail.
Start with the windward side corners—the side facing the wind. Push a stake through all the loops at the tent corner. Angle the stake away from the tent at about 45 degrees. Drive it fully into the ground. A rubber mallet is ideal, but a solid rock works. If the stake bends, the ground is too hard. Switch to a sturdier steel stake.
Now move to the opposite, leeward side and stake those corners. Finally, stake the remaining two corners and the loop under the door.
Next, the guylines. Coleman tents typically have six. They are not optional decor. In wind, they transfer lateral force from the tent walls down into the ground. Attach each guyline to its stake, placed 3-4 feet from the tent, again at a 45-degree angle. Tighten the line until it’s taut. A loose guyline is useless.
In rain, ensure the rainfly is pulled out taut and not touching the tent body at any point. A fly touching the inner wall will wick water inside via capillary action. That’s how a perfectly waterproof tent still gets wet.
Site Selection and Pre-Pitch Inspection
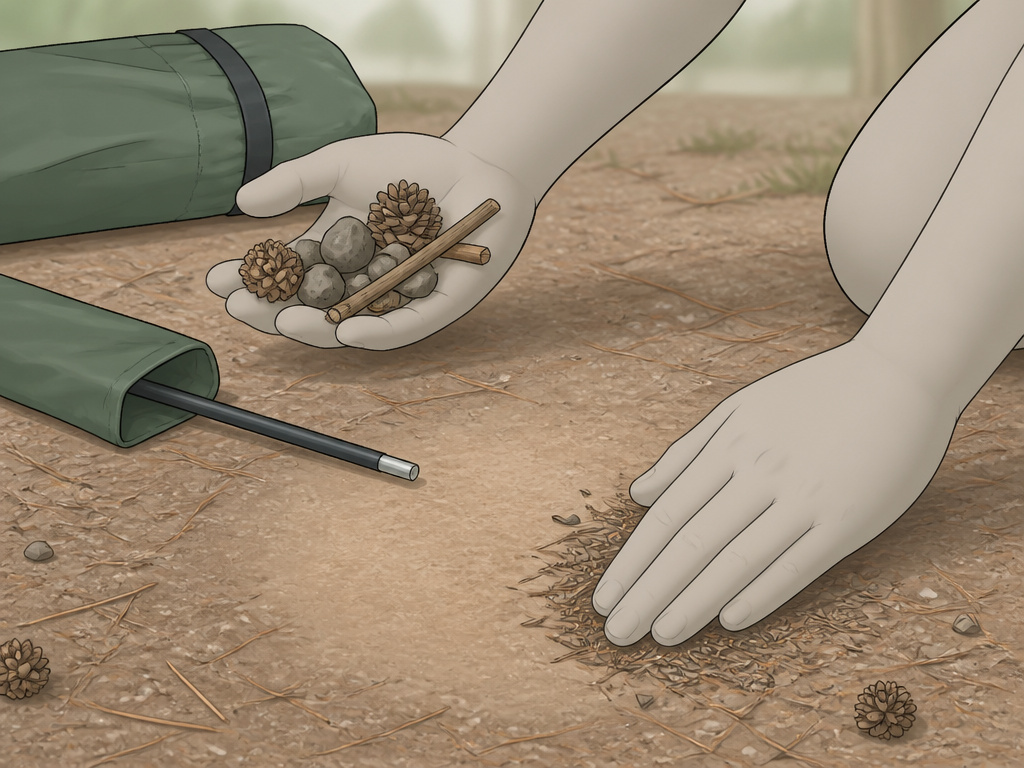
Where you place the tent is more important than how you pitch it. A bad site guarantees a bad night.
Scan the ground. Remove every rock, stick, and pinecone. Feel for hidden roots. A pea-sized lump under your sleeping pad feels like a boulder by midnight. Look up. Avoid setting up directly under dead tree limbs (widowmakers) or near ant hills. Check for slight ground slope to allow water to run away from, not under, your tent.
Common mistake: Setting up on a depression or slight bowl — rainwater will collect under your tent floor, leading to seepage and a cold, damp sleeping bag regardless of the tent’s waterproof rating.
Unpack and inspect all parts before you leave home. Lay out the poles and connect the sections. Look for cracks in the fiberglass, especially near the ferrules. Check the tent fabric for tears, and examine the rainfly’s seam tape. Is it peeling? A quick seam-sealing session at home beats a leak at 2 a.m.
This is also when you match poles to their bags. Color-coding matters. The Coleman Montana 8 uses black 11mm poles for the main body and grey 9.5mm poles for the sides. Mixing them up makes assembly impossible.
Demystifying Condensation and Fabric Care
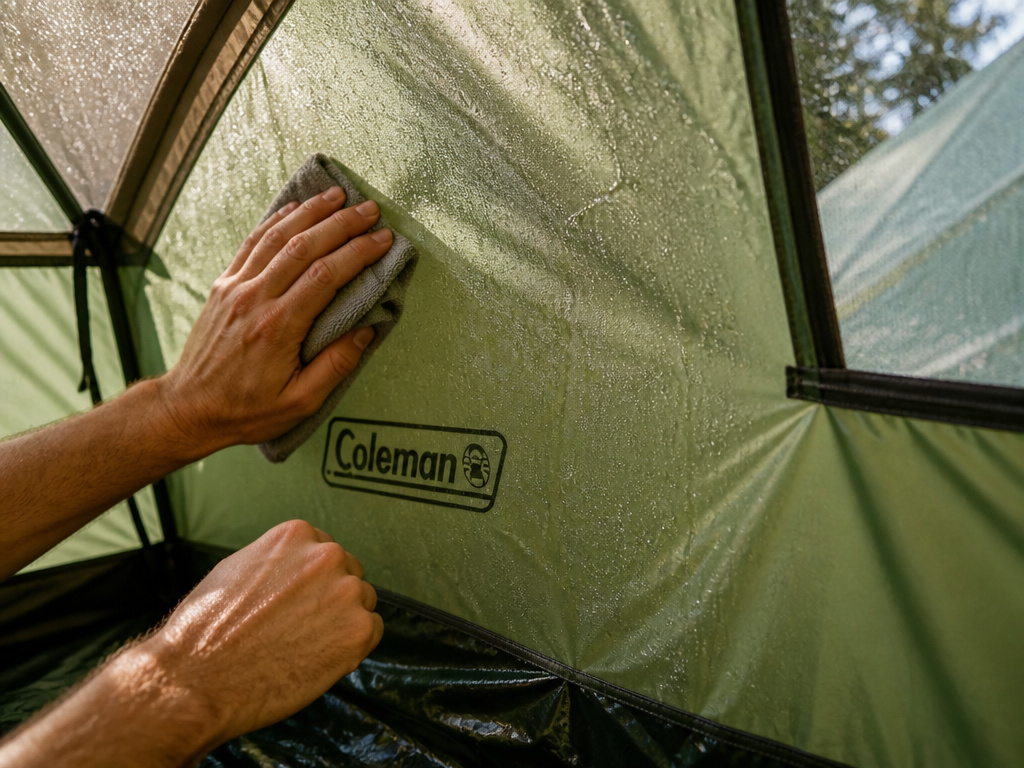
Waking up to wet walls is alarming. But it’s usually condensation, not a leak.
Condensation forms when warm, moist air from your breath and body hits the cooler tent wall. It’s a physics problem, not a product defect. You can minimize it. First, open the roof vent and any lower vents to create a cross-breeze. This exchanges the humid air inside with drier outside air. Second, avoid bringing wet clothes or boots into the sleeping area. Hang them in the vestibule.
If droplets are only on the inner wall and the rainfly is taut and dry, it’s condensation. If water is dripping from a specific seam or the ceiling, you have a leak.
Tent fabric needs care. UV radiation from the sun breaks down the polyester and coatings. Don’t leave your tent pitched for weeks at a time. After your trip, the most important step is drying it completely. Never pack a tent away damp.
Never store a tent, even for a short period, without thoroughly drying it and brushing off caked dirt. Mold and mildew will destroy the fabric’s waterproof coating and create permanent stains and odors.
Shake off dirt, then set the tent up in your yard or hang it over a railing until every surface is bone-dry. This includes the stuff sack. Only then should you pack it loosely for storage.
Frequently Asked Questions
Why does my Coleman tent leak at the seams?
The seam tape has likely failed due to age, UV exposure, or improper storage. Seams are sewn with tiny needle holes; factory-applied tape seals them. When the tape peels, water follows the needle holes through. You can re-seal seams with a liquid seam sealer like Gear Aid Seam Grip.
Can I use a footprint or tarp under my Coleman tent?
Yes, and you should. A footprint protects the tent floor from abrasion and moisture. Ensure it is slightly smaller than the tent’s base. A tarp that extends beyond the edges will collect rainwater and channel it under your tent.
How do I repair a broken fiberglass tent pole?
Coleman sells repair kits specific to pole diameters. For the Montana 8’s 11mm pole, use Repair Kit 501000539. The kit includes a metal sleeve that slides over the break. You secure it with the included adhesive or strong tape for a field fix. For a permanent repair, order a replacement pole section.
What does the CPAI-84 flammability rating mean?
CPAI-84 is a U.S. industry standard for tent flame resistance. All listed Coleman tents meet it. It means the fabric will resist catching fire from a stray ember, but it is not fireproof. The fabric will burn if left in continuous contact with a flame. Never use open flame heaters inside.
Is the electrical access port safe to use?
Only if you use a UL-approved outdoor extension cord rated for the wattage of your device. The port is a grommeted hole; it does not provide any electrical insulation. Running a standard indoor cord through it in the rain creates a severe shock and fire hazard.
Before You Go
Setting up a Coleman tent fast requires a different order than the manual suggests. Build the X-frame first, then attach the rainfly with its dedicated pole already in place. Stake from the windward side and never skip the guylines. Your site choice will make or break your comfort—level ground, clear of debris, and not in a drainage path is the goal.
Remember that a dry, loosely packed tent lasts for years. A damp, stuffed one is ruined by next season. The difference is thirty minutes of care after you get home. That time saves you the cost of a replacement and guarantees your shelter is ready when you need it.
