
Your Guide to Setting Up an Ozark Trail Tent Correctly
This post contains affiliate links. As an Amazon Associate, we earn from qualifying purchases.
To set up an Ozark Trail tent, you need to match your model type, instant dome, connectent, or cabin, to the correct assembly sequence, clear a hazard-free site, and secure every stake and guyline. The silver locking button on telescoping poles must click, and guylines need a 45-degree stake angle to hold in wind. Skipping the site check or guylines is the difference between a dry night and a collapsed shelter.
Most people unbag the tent and start wrestling with poles immediately. That works on a manicured lawn. On a real campsite, a hidden root snaps a pole end, or a sloping floor pools water under your sleeping bag. The manual’s 60-second claim is for two people on perfect ground after they’ve done it three times.
This guide walks through the specific steps for Ozark Trail’s popular instant and connectent models, the tools you actually need, and the mistakes that turn a quick pitch into a long night.
Key Takeaways
- Identify your model first. An Ozark Trail “instant” dome sets up differently than a “connectent” for a canopy. Using the wrong steps bends poles.
- The site check is non-negotiable. Clear every rock and stick larger than a golf ball from an area bigger than the tent’s footprint. A pine cone under the floor feels like a baseball by morning.
- Listen for the click. On instant models, extend each telescoping leg pole until the silver locking button snaps into place. A half-clicked pole collapses under rain load.
- Guylines are not optional in wind. Stake them at a 45-degree angle away from the tent and tighten the slider. Loose guylines let the rainfly slap the tent body, which transfers condensation inside.
- Ozark Trail tents are water-repellent, not waterproof. Seam sealing a new tent controls leakage at the stitch lines during a heavy, prolonged storm.
Before You Start: Site Selection is Everything
Before you start: Pitching a tent under a dead tree limb or near overhead power lines risks serious injury from falling branches or electrocution. Setting up on a slope without orienting the narrow end into the wind can lead to a collapsed frame in a gust. Always clear the ground and check above.
The perfect tent spot is flat, clear, and sheltered. It’s also rare. You compromise. The rule is to control what you can: the ground under the tent. Run your hands over the dirt. Pull every pine cone, acorn, and twig. A rock the size of a walnut will press through the floor fabric after a few hours. You’ll feel it.
Slope matters less than drainage. A very slight slope is good if it directs water away. A severe slope means you’ll slide into the wall all night. If you must pitch on a slope, sleep with your head uphill. Obvious, but you’d be surprised.
Common mistake: Skipping the overhead hazard check, a dead branch (a “widowmaker”) can fall silently on a still night, and a tent offers zero protection from a 50-pound limb.
Wind direction dictates orientation. The Ozark Trail 6-Person Instant Cabin manual explicitly says to position the narrow end into the wind. A broadside catches gusts and strains every pole joint. Face the door away from the prevailing wind unless you enjoy a sandblasting.
TL;DR: Clear a flat area bigger than the tent, remove all debris, check for dead branches above, and point the narrow end into the wind.
The 3-Step Instant Tent Setup (and the One Step Nobody Skips)
Ozark Trail’s “instant” tents, like the 9′ x 7′ Dome (Model 30165), have the poles pre-attached to the tent body. The manual says two people can set up in 60 seconds. That’s true after practice, on a lawn, with no wind. Your first time will take five minutes. That’s fine.
Lay the bundled tent flat on your cleared site. Unfold it completely so the fabric isn’t twisted under the frame. Find the steel poles, they’re the thick, rigid arms already connected at the top.
Grip each pole below the elbow joint (the plastic connector) and lift. The tent body will rise with it. Walk the poles outward until the structure is upright and the fabric is taut. Don’t force it. If it fights you, the tent is still folded under itself.
Now extend the telescoping leg poles. These are the thinner sections that form the lower half of each arch. Pull them out smoothly until you hear and feel a distinct click. Look for the silver locking button to be fully seated in the hole. This is the single most important mechanical action in the entire setup.
A pole that isn’t fully locked will retract under the weight of a wet rainfly or a gust of wind. The tent sags. Then it buckles.
| Step | Action | What Happens If You Skip It |
|---|---|---|
| 1. Unfold & Lift | Lay tent flat, lift poles below joints. | Twisted fabric stresses seams; poles bend at weak points. |
| 2. Extend & Lock | Pull telescoping sections until silver button clicks. | Pole collapses under load; tent falls in rain/wind within hours. |
| 3. Secure Corners | Stake out four base corners before adding rainfly. | Tent walks or shifts on windy ground; door zipper alignment fails. |
Once the frame is up and locked, stake the four base corners. Use the webbing loops, not the tent fabric itself. Slide the stake through the loop and drive it straight down until the head is flush with the ground. This stops the tent from “walking” across the site in a breeze.
Now attach the rainfly. It usually clips onto the pole ends or straps around them. The fly should be taut, not touching the tent body except at the attachment points. Contact creates a condensation bridge, water wicks from the fly to the inner tent.
TL;DR: Unfold, lift poles from the joints, extend and lock each leg, stake the corners, then add a taut rainfly.
What If You Have a “Connectent” or Cabin Model?
Not all Ozark Trail tents are instant. The W634.1A is a “4 person connectent for canopy.” It requires a separate 12’x12′ canopy adaptor kit (Part No. W634.1.12). You can’t just stake it to the ground. If you bought this model by accident, you need to order that kit from Ozark Trail at 1-800-325-4121.
Cabin tents, like the 6-Person with LED Light, use traditional pole sleeves or clips. The process is more familiar but slower.
- Lay out the tent body and identify all poles. They’re usually color-coded or labeled.
- Assemble each pole section, feeding them through the sleeves or attaching the clips.
- Raise the structure by lifting the central hub or arching the main poles.
- Stake out the corners, then add the rainfly.
The principle is the same: a taut fabric is a happy fabric. A loose tent sags, collects water on the roof, and flaps loudly. Never skip the stake-out step, even if the tent seems freestanding. A gust can send a freestanding tent tumbling.
I learned the connectent lesson the hard way. I bought a W634.1A for a festival, thinking it was a standard dome. At the site, I spent an hour trying to figure out why the poles didn’t reach the ground before I found the tiny “for canopy” note on the bag. Had to sleep in the car. Now I read the model description twice.
These traditional models are better for car camping where weight doesn’t matter and you want maximum headroom. For a quick overnight or unpredictable weather, the instant dome is the smarter play.
Securing Your Tent Against Wind and Rain
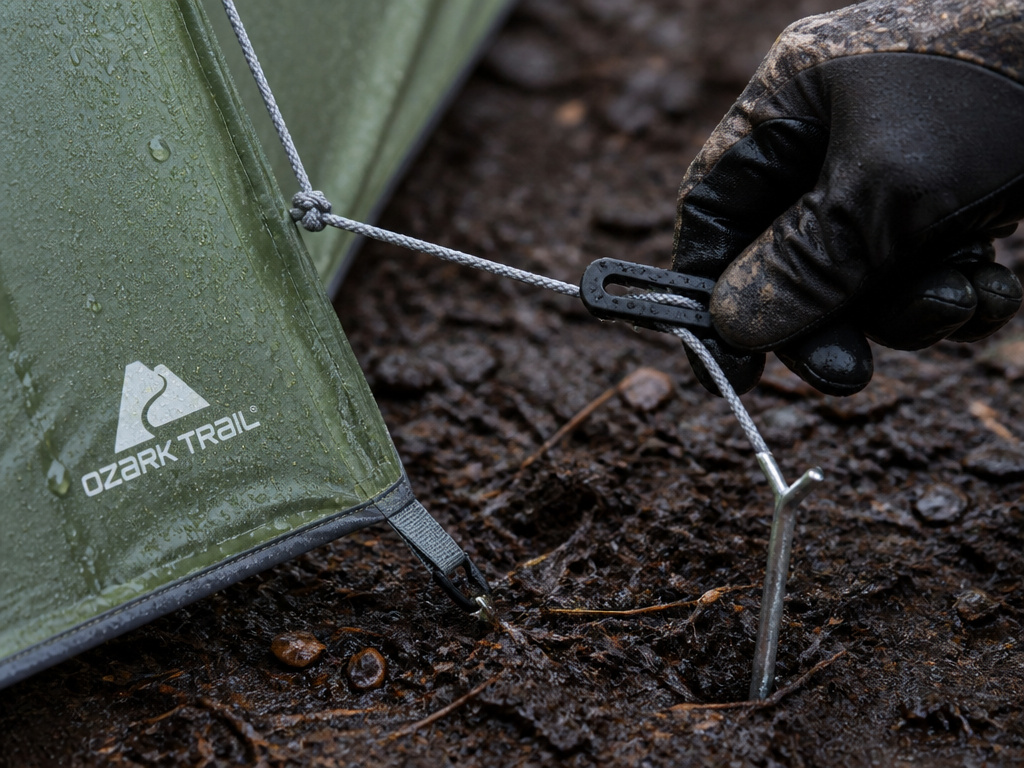
Staking the corners is basic. Securing the tent against a storm is different. This is where guylines earn their keep. They are the thin cords attached to the rainfly, often with a plastic tensioner slider.
The manual for the 9′ x 7′ Instant Dome is specific: secure guylines by sliding stakes through their loops, extending the stakes at a 45º angle away from the tent, and tightening with the slider.
That 45-degree angle is non-negotiable. A straight-up-and-down stake pulls out of soft soil with about 20 pounds of lateral force. Angled, it can hold over 100 pounds. In soaking ground, even angled stakes can loosen. The Flex Ridge Tent manual warns that water pockets form in the roof if the tent isn’t assembled taut, and uprights can sink.
| Condition | Stake Type | Guyline Angle | Additional Measure |
|---|---|---|---|
| Hard, dry ground | Standard steel pin stakes | 45 degrees away | Tap fully flush with ground. |
| Soft, sandy soil | Longer, wider “sand” stakes | 45 degrees away | Bury stake completely if possible. |
| Soaking wet ground | Heavy-duty Y-stakes or deadman logs | 45 degrees away | Check and retighten after 1 hour of rain. |
If you’re in a real blow, you can create a “deadman” anchor. Tie the guyline to a sturdy stick or log, bury it horizontally in a shallow trench, and pack dirt on top. It won’t budge.
After the storm passes, or even during a lull, walk around and retighten every line. Nylon cord stretches when wet. That slight slack lets the tent vibrate, which fatigues the poles over time.
TL;DR: Stake all guylines at a 45-degree angle away from the tent. Retighten them after rain. In mud, use bigger stakes or a deadman anchor.
The Maintenance Most Campers Ignore (Until It’s Too Late)
Ozark Trail tents are budget-friendly. They are not indestructible. The manuals state two critical facts many users miss.
First, the fabric is flame-resistant to CPAI-84 specification but is NOT FIREPROOF. It will burn if left in continuous contact with a flame. Applying any foreign substance (like some insect repellents or sunscreen) can negate that flame resistance. Keep lanterns and stoves well outside the tent walls.
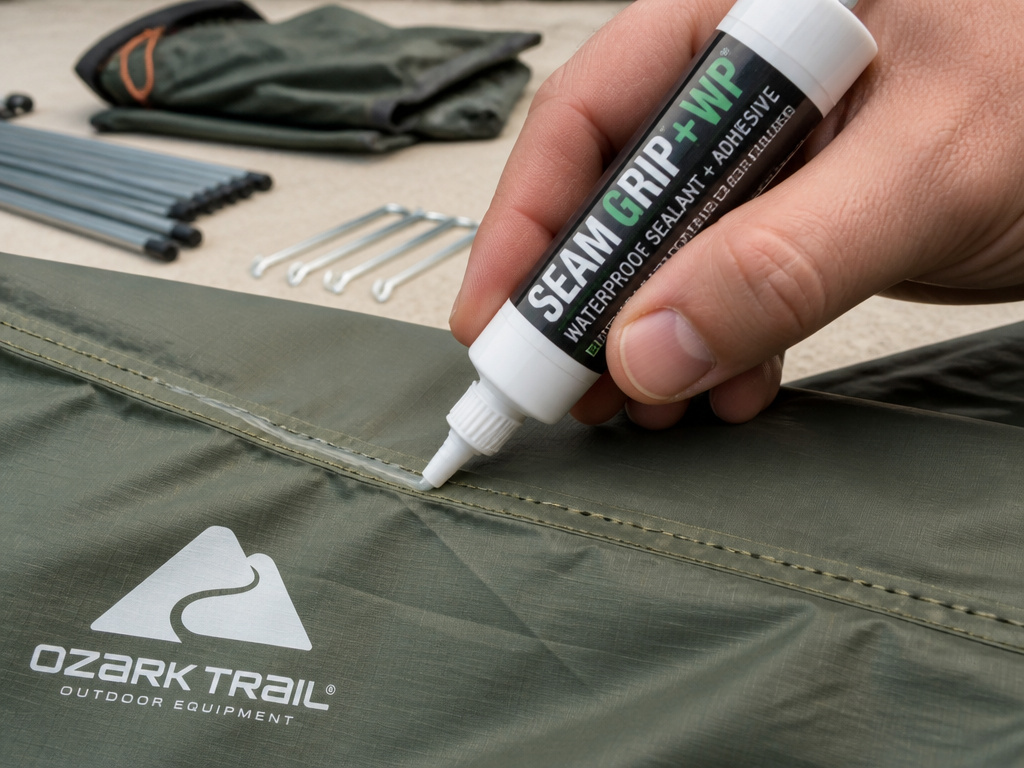
Second, the tents are water-repellent, not waterproof. Some leakage may occur in heavy, driving rain. The W634.1A manual notes that objects touching the inside wall can cause leakage at that point. Seam sealing a new tent is a smart, one-time task that dramatically improves weather resistance.
UV light is a silent killer. The manual advises against leaving the tent in direct sunlight longer than necessary. UV degrades both the polyester fabric and the waterproof coatings. A tent left pitched in a backyard for a month will be noticeably weaker and more brittle than one stored after a weekend trip.
Before packing up, always let the tent dry completely. Shake off loose dirt, wipe down mud spots with a damp cloth, and air it out until no moisture remains. Packing a wet tent guarantees mildew, a sour, pervasive smell you cannot remove.
Common mistake: Storing a tent damp, mildew spores germinate in 24-48 hours in a sealed bag. The resulting stains and odor ruin the fabric permanently.
If you need replacement parts, a pole section, a stake bag, a guyline. Ozark Trail directs you to call 1-800-325-4121 or email [email protected]. The parent company, Exxel Outdoors, handles parts. Have your model number (like W944 or 30165) ready.
Frequently Asked Questions
Do all Ozark Trail tents set up the same way?
No. You have three main types: “Instant” tents with pre-attached frames, traditional “Cabin” tents with pole sleeves, and “Connectent” models designed to attach to a canopy. Always check the specific model name and manual before your first pitch.
How long does it really take to set up an Ozark Trail instant tent?
The advertised “60 seconds” is a best-case scenario with two practiced people. Plan for 5-10 minutes for your first few attempts, allowing time to clear the site and ensure all pole locks are engaged.
Why did my Ozark Trail tent leak during a rainstorm?
Ozark Trail tents are water-repellent, not fully waterproof. Leakage can occur at seams during heavy, prolonged rain or if something inside (like a backpack) is pressed against the tent wall. Pre-treating seams with a seam sealer compound greatly improves performance.
Can I leave my Ozark Trail tent pitched in my backyard?
You can, but it’s not recommended. Continuous UV exposure from the sun degrades the fabric and coatings, shortening the tent’s lifespan. If you do, take it down during extended harsh weather and always store it dry.
Where can I get replacement parts for my Ozark Trail tent?
Contact Ozark Trail customer service at 1-800-325-4121 or email [email protected]. You’ll need your tent’s model number, usually found on the carry bag or in the manual. For specialized gear like canopy adaptors, this is your only source.
The Bottom Line
Setting up an Ozark Trail tent is straightforward if you follow the rules for your specific model. The instant dome’s click is gospel. The connectent’s need for a canopy kit is a trap for the unwary. Your campsite choice matters more than any pole technique.
A tight pitch with secured guylines turns a budget shelter into a reliable storm bunker. A sloppy pitch turns it into a noisy, damp sack. Take the extra five minutes to do it right. Your future dry, well-rested self will thank you.
The best tents are the ones you trust. That trust is built one correctly locked pole and one taut guyline at a time. Now go pitch it.
