
Step-By-Step Guide: How To Waterproof A Canvas Tent For Good
This post contains affiliate links. As an Amazon Associate, we earn from qualifying purchases.
Waterproofing a canvas tent means matching the sealant to the fabric treatment, spraying seams twice as heavy as the walls, and letting it cure for a full 48 hours in the sun. The wrong product clogs the fabric’s breathable pores, and packing it away damp guarantees mold within a week.
Most guides treat all canvas the same. They miss the fact that a Kodiak Canvas tent with Hydra-Shield™ treatment needs a specific silicone spray, while a vintage wall tent needs a heavier wax or oil blend. Using the wrong one doesn’t just fail, it actively damages the fabric’s ability to shed condensation.
This guide walks through the three methods: the simple hose-down for new tents, the spray-on reproofing for annual maintenance, and the heavy-duty brush-in treatment for older shelters. You’ll get the exact products, drying timelines, and the one mistake that voids the Kodiak Canvas Limited Lifetime Warranty.
Key Takeaways
- Match the sealant to your canvas. Kodiak’s Hydra-Shield™ needs a silicone spray like Kiwi Camp Dry®; wax-based products like Canvak® clog its breathable weave.
- Seams drink twice the sealant. The stitching channels are the primary leak path. Spray them until the thread darkens, then wait five minutes and spray again.
- A damp tent stored for 48 hours grows mold. The warranty doesn’t cover it. If you must pack it wet, unroll and dry it the same day.
- Late summer is reproofing season. Spring and fall humidity keeps sealant tacky for days. You need consecutive hot, dry days for a full cure.
- Skip the soap unless it’s muddy. Detergents strip the factory water-repellent treatment. For general dust, a hose rinse is enough.
The One-Step Mistake That Voids Your Warranty
Store a wet canvas tent just once. That’s all it takes.
The Kodiak Canvas Limited Lifetime Warranty covers defects in materials and workmanship for the original purchaser. It does not cover damage from normal wear and tear, including mildew. If you roll up a damp tent after a rainy weekend and stow it for a month, the mold spores already present in the air and ground soil activate. They feast on the organic cotton fibers. By the time you unroll it, the canvas smells like a basement and shows black speckles along the fold lines. The repair bill is yours.
Common mistake: Packing a tent that feels dry to the touch but still holds moisture in the seam stitching, mold develops along the thread channels within two weeks, and the warranty claim gets denied.
The fix is simple but non-negotiable. Pitch the tent in the sun after every trip, even if it didn’t rain. Condensation from a single night of sleeping adds a quarter-cup of water to the fabric. Let the morning sun bake it out. If you’re forced to pack it wet, transport it loosely rolled. The moment you’re home, unroll it in the garage or across a fence. A fan pointed at the seams cuts drying time in half.
TL;DR: Never store a canvas tent with any dampness. Dry it completely, every time, or you own the mold damage.
Is Your Tent Already Waterproof?
Many are. A lot of the worry is unnecessary.
Modern treated canvas like Kodiak’s Hydra-Shield™ is watertight straight from the factory. You can set it up in a downpour on day one. The real purpose of “seasoning” or waterproofing isn’t to create a barrier, it’s to maintain and enhance the one that’s already there. The process swells the cotton fibers, tightening the weave and sealing micro-gaps around the stitches that only reveal themselves after the fabric relaxes.
| Tent Type | Likely Waterproof Status | First-Season Action |
|---|---|---|
| New Kodiak Canvas (Hydra-Shield™) | Factory watertight | Hose-down seasoning recommended; silicone spot-treatment only if leaking |
| New Untreated Cotton Canvas | Not waterproof; needs sealant | Full waterproofing treatment required before first use |
| Vintage/Used Canvas Tent | Likely compromised | Inspect for leaks; full reproofing with heavy-duty sealant |
| Pre-Seasoned Canvas (some brands) | Waterproof out of bag | Confirm with manufacturer; may only need annual touch-ups |
The hose-down method isn’t about adding chemicals. It’s about using water itself as a tool. When you soak the canvas and let it dry taut in the sun, the fibers expand and then contract as they lose moisture. This natural tightening is what closes those pinhole gaps. It’s why a YouTube demonstration shows water beading and rolling off a new tent before any spray is applied. The tent was already waterproof. The soaking just locked the fibers in place.
If you see water soaking in instead of beading up, you have a different project. That tent needs a sealant.
The Right Spray for Your Canvas
This is where most people waste money and create a bigger problem. Not all waterproofing products work on all canvas.
Kodiak Canvas is explicit: for their Hydra-Shield™ tents, use a silicone-based waterproofing spray like Kiwi Camp Dry® if spot treatment is needed. Other types, such as wax-based Canvak®, can affect the canvas’s breathability. The tiny pores in the treated fabric allow moisture vapor from inside the tent (your breath, sweat, wet gear) to escape. Clog those pores with wax, and condensation pools on the ceiling. You’ll wake up to a cold drip on your forehead.
For untreated canvas or older tents that have lost their finish, you have two proven paths:
1. Aerosol sprays like STAR BRITE Waterproofing Spray. These are convenient and dry quickly. They form a flexible silicone layer that sheds water but stays breathable.
2. Liquid concentrates like Dry Guy Waterproofing Concentrate. These are mixed with water and applied with a pressurized hand sprayer, as Beckel Canvas Products recommends. They offer more uniform coverage and are cost-effective for large wall tents.
I keep a can of Kiwi Camp Dry® in my gear bin for my Kodiak. For my older, untreated wall tent, I mix a batch of silicone and mineral spirits in a garden sprayer every other season. The wall tent needs the heavier coating; the Kodiak just needs the seams touched up.
The DIY mix from the bushcraft video, 100% silicone caulk dissolved in mineral spirits, is a solid option for heavy-duty reproofing. It’s cheap and durable. The creator used a gallon and a half of mineral spirits and four tubes of silicone for one tarp. The consistency should be a runny syrup, not thick paint. You brush it on, and it soaks deep into the fibers. The downside is the smell and the 48-hour cure time. You also need a well-ventilated space.
Gear Up: What You Actually Need
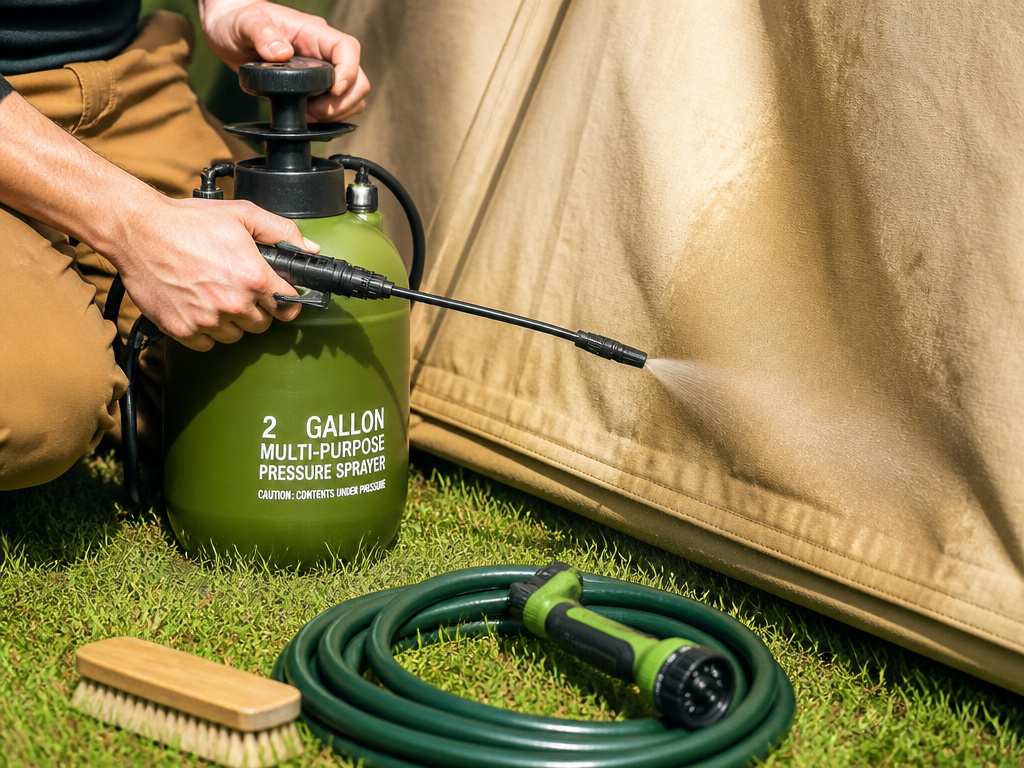
You don’t need a garage full of specialty tools. A basic home setup works.
- A garden hose with a spray nozzle. The “shower” setting is perfect for the initial rinse and the seasoning soak.
- A pressure hand sprayer (1-2 gallon). This is for applying liquid concentrates like Dry Guy. The $10 sprayer mentioned in a YouTube tutorial is the right tool, it gives an even mist without drips.
- Soft-bristle brush. For scrubbing off mud or bird droppings before reproofing. Avoid stiff brushes; they can fray the canvas.
- Clean microfiber cloths. To wipe away excess sealant from zippers and windows.
- The correct waterproofing product. Decide based on your tent type from the section above.
- A dry, sunny weekend. This is the most critical piece. Reproofing on a late summer weekend is advised to allow sufficient sun for the sealant to dry completely.
Skip the temptation to use a paint roller on a big tent. It seems faster, but it applies the sealant unevenly. You get thick, sticky patches next to thin, weak spots. The sprayer, while slower, gives a consistent coat that dries uniformly.
Step-by-Step: The Weekend Warrior’s Method
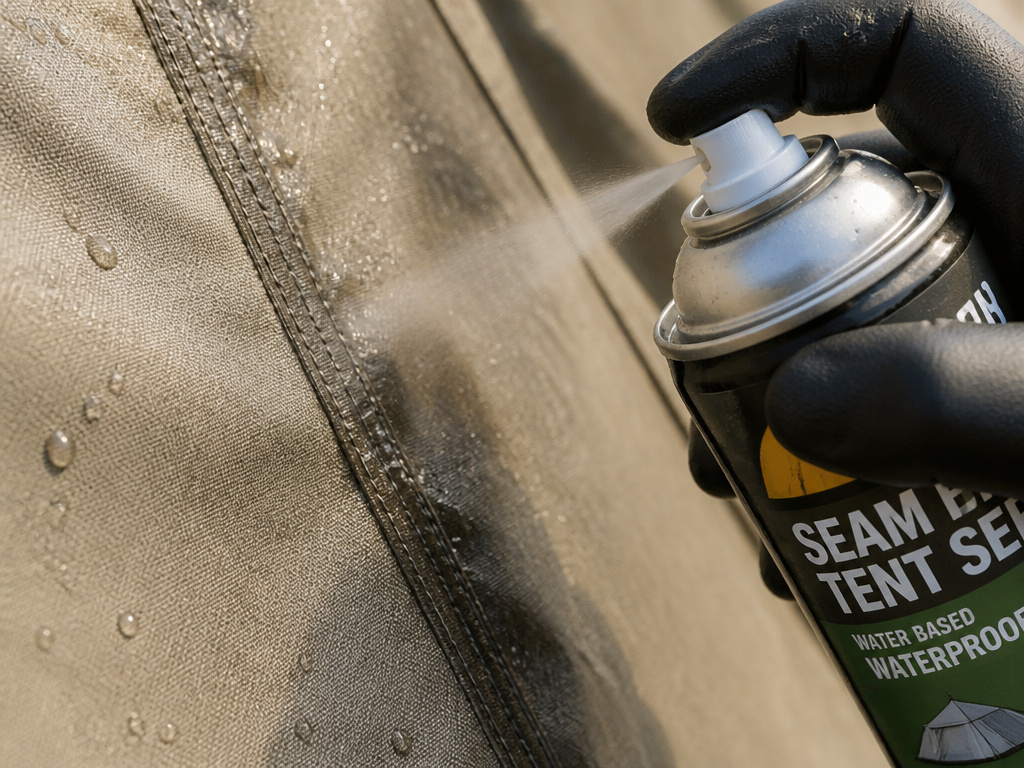
Follow this sequence. The timing between steps matters more than the steps themselves.
Before you start: Work in a well-ventilated area. Wear safety glasses and gloves when handling chemical sealants. Keep the product away from open flames, mineral spirits and some aerosols are flammable. Test any spray on a small, inconspicuous area first, like a corner of the stuff sack.
1. Pitch It Dry, Zip It Shut
Find a dry patch of grass or lay down a tarp. Assemble the tent completely. Pull all the guylines taut. This stretches the canvas, opening up the weave for the sealant. Close every zipper, doors, windows, vents. You don’t want sealant on the mesh or the zipper teeth. Remove the mattress pad and any interior gear.
Leaving the floor bare lets the ground absorb any runoff. If you’re just doing a water-seasoning rinse, the grass works. If you’re applying a silicone spray, put a tarp underneath to catch overspray.
2. Clean Only If Necessary
Is the tent muddy or stained with organic matter? If yes, mix a mild, non-detergent soap with lukewarm water. Dish soap is a detergent, it will strip the water-repellent treatment. Use a castile soap or a dedicated canvas cleaner. Gently scrub soiled areas, then rinse thoroughly with the hose.
If the tent is just dusty, skip the soap. A full hose rinse is enough. Detergents do more harm than good on factory-treated canvas.
3. Apply the Sealant
Shake your spray can or mix your concentrate according to the instructions. For a spray like Kiwi Camp Dry®, hold the can 8–10 inches from the canvas. Apply in steady, sweeping motions, slightly overlapping each pass. You want a damp, even sheen, not a dripping wet surface.
Seams first. Spray the stitched seams until the thread darkens with moisture. Wait five minutes for it to soak in, then hit them again. The stitching holes are the primary leak path, and they absorb more sealant than the flat fabric.
Work from the bottom up. This prevents drips from running over dry areas and creating uneven streaks. Pay special attention to areas under high stress: where the walls meet the roof, around door zippers, and any patches or repairs.
4. The Double-Coat Dilemma
Should you apply a second coat? For a brand-new Kodiak tent getting its first seasonal hose-down, no. One thorough soak is enough. For an older tent receiving a spray-on reproofing, yes, but with a caveat.
Apply the first coat. Let it dry to the touch. This takes about two hours in direct sun. Then apply the second coat, focusing again on the seams. The first coat seals the surface; the second coat builds a durable layer on top. Applying a second coat before the first is tacky creates a gummy, uneven mess that never fully cures.
5. The Crucial Cure
This is the step everyone rushes. Don’t.
The tent must cure bone-dry, inside and out. In ideal conditions, full sun, low humidity, a light breeze, this takes a full 24 hours. In average conditions, plan for 48. Touch the inside of the wall. If it feels cool or slightly damp, it’s not ready. Packing it now is the same as storing it wet.
I once reproofed a tent on a Friday evening, left it up over a sunny Saturday, and packed it Sunday morning thinking it was dry. Two months later, a faint musty smell greeted me. The moisture had been trapped in the thick seam stitching where the sun never quite reached.
Leave it pitched. Let the sun and air do the work. This single patience test separates a five-year tent from a 25-year tent.
Silicone vs. Wax: Which Sealant Wins?
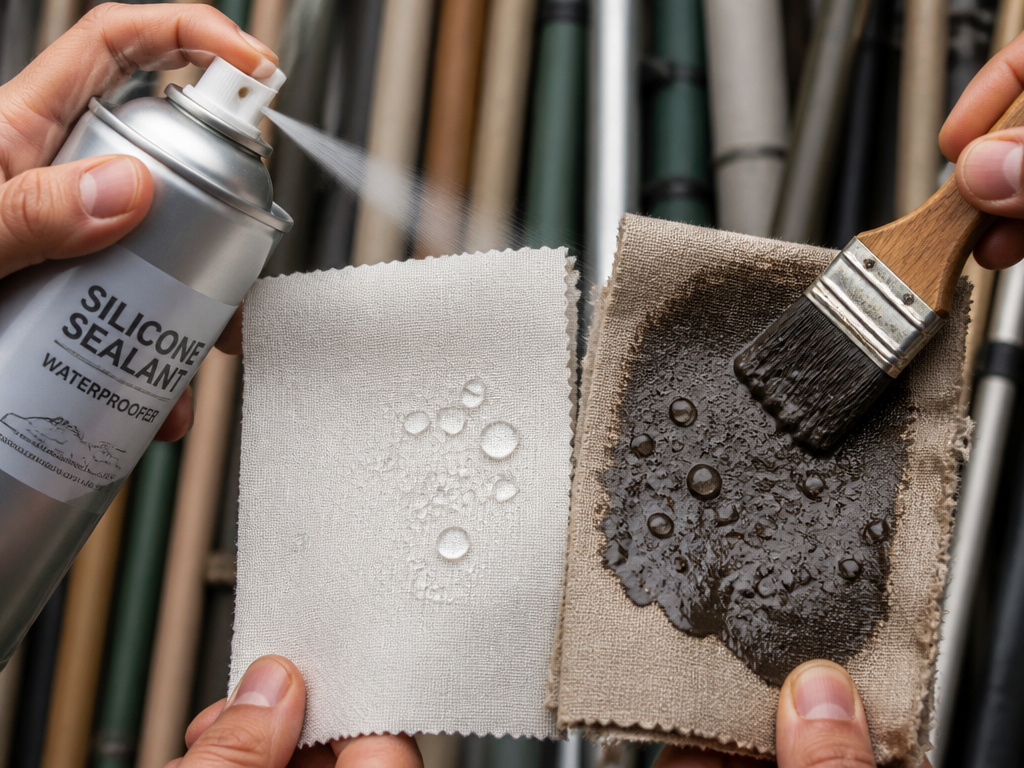
The debate isn’t about which is better. It’s about which is right for your specific canvas.
| Sealant Type | Best For | Risk If Used Wrong |
|---|---|---|
| Silicone Spray (Kiwi Camp Dry®) | Factory-treated canvas (Kodiak Hydra-Shield™), synthetic blends | Clogs breathable pores if over-applied; less durable on heavy wear areas |
| Wax-Based (Canvak®) | Untreated, heavy cotton canvas, floor tarps, awnings | Can melt and migrate in extreme heat; attracts dirt; ruins factory-treated breathability |
| Oil-Based (Linseed/Tung Oil) | Historical reenactment tents, ultra-heavy duty shelters | Highly flammable during curing; very long dry time (weeks); darkens canvas significantly |
| DIY Silicone/Mineral Spirits | Budget reproofing of large wall tents, DIY projects | Mix ratio is critical; mineral spirits smell requires outdoor ventilation |
Silicone wins for modern, breathable fabrics because it forms a flexible, water-repellent layer without completely sealing the fabric’s pores. Wax wins for brute-force waterproofing on thick, untreated cotton where breathability is less of a concern, think of a wall tent’s rain fly or a truck tarp.
The wrong choice has a physical consequence. Wax on a breathable-treated canvas fills the microscopic holes. Condensation from inside has nowhere to go. It condenses on the ceiling and rains back down on you. You’ll feel the humidity spike inside the tent within an hour of zipping up.
TL;DR: Use silicone spray on any tent with a factory treatment label. Use wax or oil only on thick, untreated canvas where you prioritize absolute waterproofing over climate control.
When To Reproof (And When To Leave It Alone)
A canvas tent can last 15-30+ years with proper care. Yearly weathering and waterproofing extends that lifespan. But you don’t need to reproof every season.
Reproof when you see water soaking into the fabric instead of beading up. A simple test: splash a cup of water on a clean, dry section of the wall. If it forms beads that roll off, you’re good. If it darkens the fabric and soaks in within a minute, it’s time.
Spot-treat leaks as they appear. Don’t wait for the entire tent to fail. Mix a small batch of your chosen sealant and focus on the leaking seam or area. For Kodiak tents, remember the manual’s rule: if spot treatment for water repellency is needed, only silicone-based repellents like Kiwi Camp Dry® should be used.
Leave it alone if it’s working. Over-application is a real problem. Each layer of sealant adds a slight film that can stiffen the fabric over time. A tent that’s perfectly waterproof but feels like cardboard is harder to pitch and pack.
Frequently Asked Questions
Can I use Scotchgard on a canvas tent?
No. Scotchgard is designed for upholstery and fabrics like nylon or polyester. Its chemical formulation can degrade cotton canvas fibers over time and may not adhere properly, leading to flaking. It also lacks the durability needed for outdoor UV exposure and abrasion.
How long does waterproofing last?
thorough spray-on reproofing with a product like STAR BRITE or Kiwi Camp Dry® lasts one to two camping seasons, depending on sun exposure and storage. A brush-on heavy-duty treatment with a wax or oil blend can last three to five years. The hose-down “seasoning” method should be done annually for new tents, as it tightens the fibers without adding chemicals.
Will waterproofing make my tent hotter?
Silicone-based sprays have a minimal effect on breathability and thus a negligible impact on interior temperature. Wax-based products, however, can significantly reduce breathability. In direct sun, a waxed canvas tent will feel noticeably hotter inside because the trapped moisture vapor (humidity from your breath) can’t escape, reducing the cooling effect of evaporation.
Can I waterproof a tent in the rain?
Absolutely not. The canvas must be completely dry before application. Water on the surface will dilute the sealant, prevent proper adhesion, and cause it to run or streak. Any moisture trapped under the sealant during curing will lead to mildew growth between the fabric and the waterproof layer.
Is a second coat always better?
Only if the first coat has fully cured. Applying a second coat before the first is dry to the touch creates a tacky, uneven layer that may never fully harden. For most spray-on silicones, wait at least two hours in direct sun between coats. For brush-on wax or oil treatments, follow the manufacturer’s dry time, which can be 24 hours or more.
Before You Go
Waterproofing a canvas tent isn’t a mystery. It’s a match between your fabric and the right sealant, followed by patience during the cure. The biggest error isn’t picking the wrong spray, it’s packing the tent away while a single seam is still damp.
For a modern treated tent like a Kodiak, keep a can of silicone spray on hand for seam touch-ups and give it a good hose-down at the start of each season. For an older wall tent, plan a weekend to brush on a heavy-duty sealant every few years. Both methods, done correctly, will turn a canvas shelter from a seasonal item into a multi-decade heirloom.
Your gear list for the job is short: the right spray, a hose, a dry weekend, and the discipline to wait an extra day. That last item is the one most people forget.
