
Winter Camping: How to Insulate a Tent for Maximum Warmth
This post contains affiliate links. As an Amazon Associate, we earn from qualifying purchases.
To insulate a tent for winter camping, you need to create a thermal break at the floor, block wind, and manage interior moisture. The floor is the priority, a standard 3-season tent is only about 5°F warmer than the outside air. For 30°F weather, your combined sleeping pad system needs an R-value of at least 4 to 5. Skip the floor insulation, and you lose heat straight into the ground within an hour.
Most people think a four-season tent and a good bag are enough. They pitch on snow, zip the door, and wake up shivering at 3 a.m. with a wet sleeping bag. Cold radiates up from the ground. Condensation drips from the ceiling. Wind finds every loose seam.
This guide covers the sequence that works below freezing. We will walk through insulating the floor, managing airflow to stop condensation, and the one heater rule that keeps you safe. This is for car campers who can carry extra gear, backpackers need a different, lighter playbook.
Key Takeaways
- Your sleeping pad’s R-value is more critical than your bag’s temperature rating for ground insulation. Aim for a combined R-value of 4-5 for 30°F nights.
- An emergency blanket (Mylar) lining the tent floor, reflective side up, reflects body heat back into the sleeping area. It is a lightweight, cheap game-changer.
- Ventilation is non-negotiable, even in sub-freezing temps. Closing all vents leads to condensation that soaks your gear and steals more heat than the cold air you’re keeping out.
- Portable propane heaters like the Mr. Heater Big Buddy require a vent open at least 2 inches for carbon monoxide safety. Never run one while sleeping.
- The difference between a 3-season and a true 4-season tent is about 15-20 degrees of warmth retention, according to field tests. A 3-season tent with proper insulation can work, but you start at a disadvantage.
The 7-Step Floor-Insulation Sequence (And What Happens if You Skip Step 3)
Cold ground is a heat sink. Your body warmth conducts straight into the earth if you do not build a proper barrier. This is not about comfort, it is about safety. Follow this order.
- Site selection is your first insulation. Pitch behind a natural windbreak like a tree line or rock face. Clear the ground of sticks and rocks. If on snow, pack it down firm. A soft, uneven base creates air pockets that accelerate heat loss.
- Lay a heavy-duty groundsheet. Use a tarp or a footprint specifically cut for your tent model. It should be slightly larger than your tent’s floor. This barrier stops ground moisture and adds a first air gap.
- Add a closed-cell foam pad. This is the critical thermal break. Roll out a full-length closed-cell foam pad (like a Therm-a-Rest Z Lite Sol) over the groundsheet. This pad has an R-value around 2. Skipping this layer means the cold penetrates your primary sleeping pad within the first hour, no matter its rating.
- Pitch your tent on the insulated pad. Set the tent up directly over the foam. The pad should extend slightly beyond the tent walls. This creates a full perimeter buffer.
- Line the interior floor with an emergency blanket. Unfold a Mylar emergency blanket, reflective side up, and place it across the entire tent floor. Tape the corners to the tent wall seams with painter’s tape to keep it flat. The reflective surface bounces radiant body heat back at you.
- Place your sleep system inside. Now add your primary insulated sleeping pad (aim for R-value 4-5) and your cold-rated sleeping bag. The layered system, foam, tent floor, Mylar, your pad, creates dead air spaces that slow conduction.
- Fill dead space with soft gear. Stuff empty packs, clothing sacks, or a folded blanket into the corners and along the tent walls. This eliminates air pockets that circulate cold air.
A standard 3-season tent is only about 5 degrees Fahrenheit warmer than the outdoor temperature. Winterized 3-season and 4-season tents can be 10-20 degrees Fahrenheit warmer, while specialty expedition or insulated tents may be up to 25 degrees Fahrenheit warmer.
TL;DR: Insulate from the ground up in layers: packed site, groundsheet, closed-cell foam, tent, Mylar liner, your sleep pad. The foam pad is the non-negotiable thermal break.
Why a Tarp Over Your Tent Isn’t Enough
Hanging a rain fly or a spare tarp over your tent is classic advice. It blocks wind and snow. But if you just drape it directly on the tent fabric, you create a new problem.
The tarp traps moist air from your breath against the cold tent wall. That moisture condenses, freezes on the inside, and then melts onto your gear when the sun hits the tent in the morning. Your sleeping bag gets damp, and damp insulation fails.
The fix is an air gap. Pitch the tarp 6 to 12 inches above your tent’s rainfly, using a separate ridge line or trees. This creates a buffer of still air that acts as insulation and allows condensation on the tent to dissipate. Secure it well. A flapping tarp in a winter wind will shred itself by dawn.
Common mistake: Draping a tarp directly on the tent, condensation soaks your sleeping bag by morning, and the wet fabric loses about 30% of its loft (and warmth).
Car Camping vs. Backpacking: Two Different Games
The advice to layer foam pads and wool blankets comes from a car-camping mindset. Weight does not matter. For backpacking or expedition scenarios, every ounce counts, and your strategy flips.
| Insulation Tactic | Car Camping (Weight Irrelevant) | Backpacking (Weight Critical) |
|---|---|---|
| Ground Insulation | Multiple foam pads, wool blankets under tent | Single high-R-value inflatable pad (e.g., Therm-a-Rest NeoAir XTherm, R-value 6.9) |
| Wall Insulation | Hang moving blankets or extra sleeping bags inside | Wear all your clothes to bed; use a sleeping bag liner |
| Windbreak | Large, heavy tarps rigged above tent | Site selection only; use a dedicated 4-season tent |
| Heat Source | Portable propane heater (with ventilation) | Chemical heat packs, hot water bottle in bag |
If you are backpacking, you cannot carry extra blankets and a bulky tarp. Your insulation comes from a superior sleep pad, a better tent, and wearing your insulated layers to bed. Investing in a true four-season mountaineering tent or one of the newer lightweight hot tents is often the smarter weight trade-off than carrying pounds of supplemental insulation.
The Ventilation Trap: How to Not Suffocate in Your Own Breath
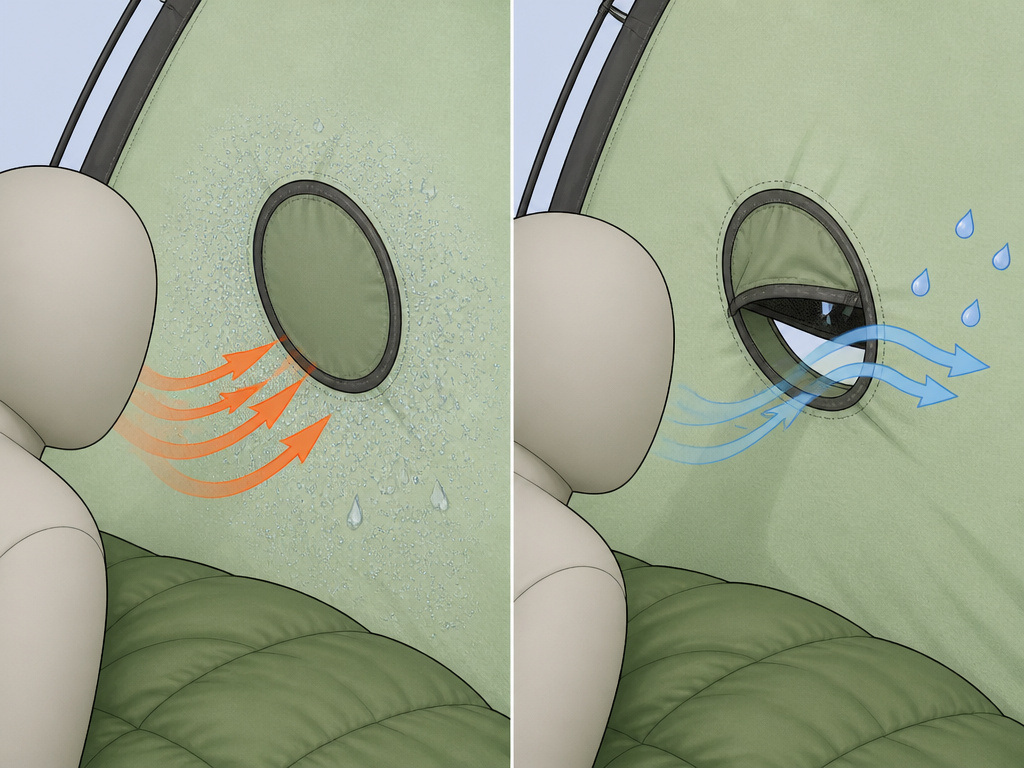
You seal every vent to keep warm air in. By midnight, the inside of your tent is wet. By 3 a.m., that moisture has migrated into your down sleeping bag, collapsing its loft. You are now colder than if you had left a vent cracked.
Cold air holds less moisture. When your warm, moist breath hits a cold tent wall, the water condenses. The solution is controlled airflow. Crack the vent opposite the prevailing wind by about an inch. If your tent has a high/low vent system, open both to create a chimney effect.
This feels counterintuitive. The moving air feels colder. But it is dry air, and it carries the moisture out before it can condense. A dry sleeping bag at 20°F is warmer than a damp one at 30°F.
I once sealed a tent completely during a 15°F night in the Adirondacks. I woke up to a frozen rain of condensation that had dripped onto my bag. The bag’s shell was stiff with ice. It took two hours of sun the next day to dry it out, two hours I spent shivering. Now I always crack the top vent.
TL;DR: Always open at least one vent, even just an inch. Dry cold is manageable; wet cold is dangerous.
Can You Use a Heater? The One Rule That Matters
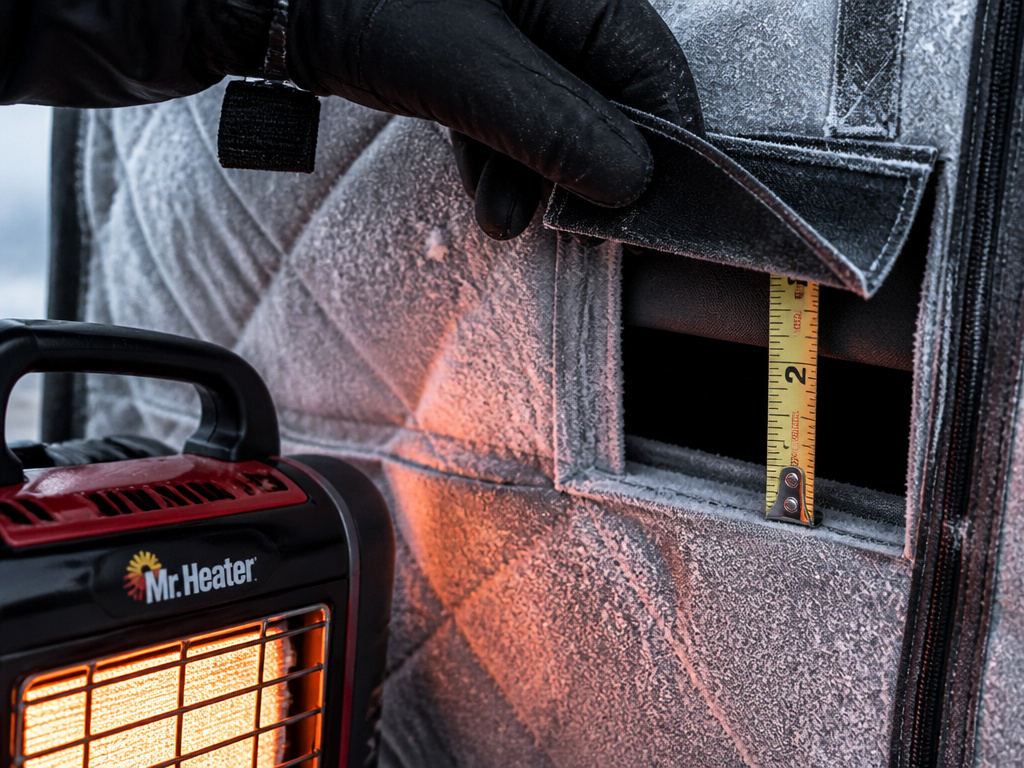
Yes, a portable propane heater like the Mr. Heater Big Buddy can take the edge off while you’re reading or changing clothes. The rule is absolute: you must have a vent open at least 2 inches while the heater is running.
Propane combustion consumes oxygen and produces carbon monoxide, an odorless, deadly gas. In a sealed tent, it will kill you. The open vent provides oxygen for combustion and lets CO escape. Never run a heater while sleeping. Turn it off before you zip into your bag.
For safer supplemental heat, use a hot water bottle in your sleeping bag or chemical heat packs in your pockets. These are zero-risk options. If you are considering a heater, you should also be looking at dedicated hot tents with stoves, which are designed with proper flues and ventilation.
Your Gear Checklist: What Actually Works
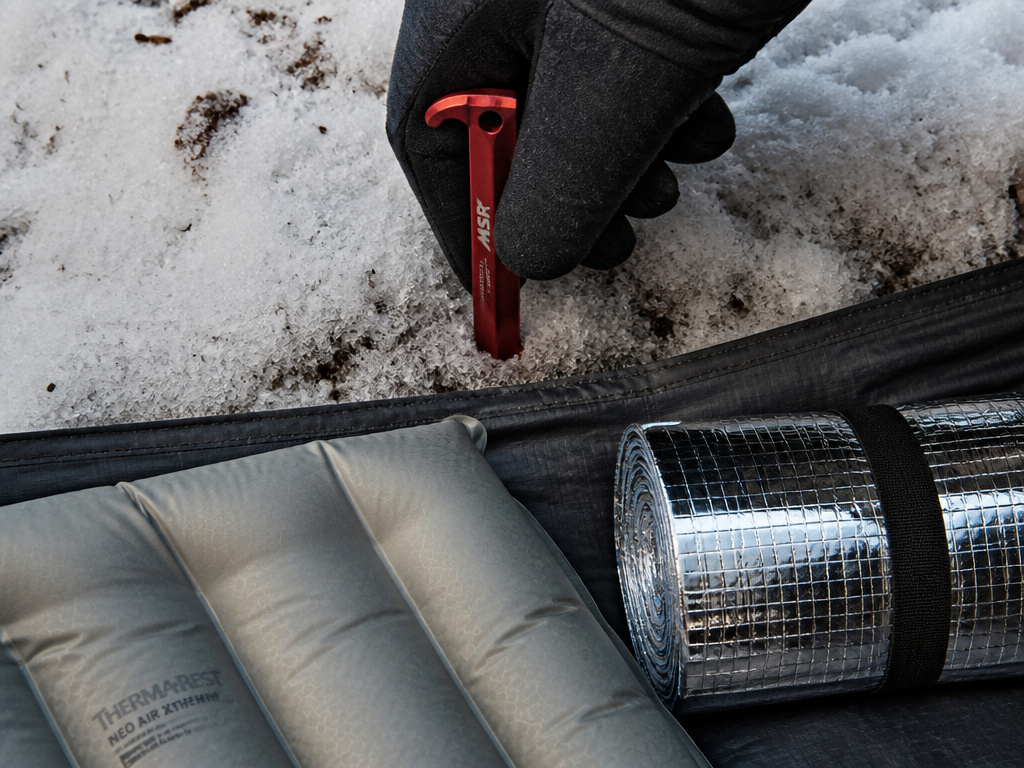
This is not a generic list. These are the specific items that change a winter night from survivable to comfortable.
- Sleeping Pad: Your pad’s R-value is its resistance to heat flow. Higher is warmer. For winter, you need a minimum combined R-value of 4-5. Many campers stack a closed-cell foam pad (R-value 2) with an inflatable insulated pad (R-value 3-4).
- Emergency Blanket (Mylar): The $3 secret weapon. Line your tent floor, reflective side up. It reflects radiant heat. Do not wrap yourself in it, you will sweat and get wet.
- Seam Grip: Apply this sealant to any suspect seams on your tent and rainfly before the trip. A leaking seam lets in a micro-draft that drains heat all night.
- Winter Stakes: Standard tent stakes pull out of frozen ground. MSR Blizzard stakes are designed for snow. For hard ground, use rock pegs or deadman anchors with stuff sacks filled with snow or rocks.
- Balaclava and Vapor Barrier Liner: Wear a balaclava to bed. Your head loses significant heat. A vapor barrier liner (a thin, waterproof sack) inside your sleeping bag keeps body moisture from soaking your bag’s insulation.
Packing the right tent camping accessories like a high-R pad and Mylar blanket is more effective than buying a heavier bag. Your core winter camping equipment should prioritize stopping heat loss before generating heat.
Frequently Asked Questions
What is the cheapest way to insulate a tent?
The cheapest method is to use a closed-cell foam pad under your tent and a Mylar emergency blanket taped to the interior floor. Together, these cost under $30 and address the two biggest heat losses: conduction through the ground and radiant heat escaping.
Can you use blankets to insulate a tent?
Yes, but only for car camping. Heavy wool or moving blankets can be hung on the tent walls or laid on the floor under your sleeping pad. They add bulk and weight but provide good insulation. For backpacking, blankets are impractical.
Does putting a tarp over a tent help?
Yes, if you create an air gap. Hang the tarp 6-12 inches above your rainfly to create a windbreak and an insulating air buffer. Draping it directly on the tent traps moisture and leads to condensation.
How can I keep my tent warm without a heater?
Focus on retaining your body heat. Use a high-R-value sleeping pad system, wear dry layers and a hat to bed, eat a high-calorie snack before sleeping, and use a hot water bottle in your bag. A well-insulated tent body, like those found in canvas tents with stove jacks, also retains heat better than nylon.
Before You Go
Winter camping warmth is a system, not a single product. Insulate the ground first with a foam pad. Manage moisture by ventilating, even when it’s cold. Use a Mylar blanket on the floor to reflect heat. And if you use a heater, never close the vent.
Your sleeping bag’s rating is meaningless if the cold ground is sucking heat from below. Start with the R-value, control the airflow, and you will sleep through the night. For extreme conditions, the system changes, look into dedicated four-season tents or hot tent models designed for deep cold. But for most winter campers, mastering the floor and the airflow is the difference between a story and a survival lesson.
