
How Do You Draw a Tent | Master Depth & Realistic Textures
This post contains affiliate links. As an Amazon Associate, we earn from qualifying purchases.
To draw a tent, you block the primary shape with a 2B pencil, define the base and structural details, then use a 4B pencil for shading and a kneaded eraser for highlights. The specific silhouette, a wide arc for a dome, a triangle for an A-frame, or parallel curves for a tunnel, dictates every line that follows. Getting the initial shape wrong guarantees the finished sketch will look flat.
Most tutorials tell you to start with a triangle. That only works for the classic A-frame pup tent your grandparents used. Modern tents have complex curves, and drawing them like a simple triangle leaves you with a flat, cartoonish shape that has no weight or texture.
This guide walks through the three most common tent silhouettes, dome, A-frame, and tunnel, with the specific pencil techniques for each. You will learn which pencil grade to use for the foundation and which one creates depth, how to shade synthetic fabric so it looks real, and the single line most people miss that makes a tent look grounded.
Key Takeaways
- Use a 2B pencil for your initial sketch and a 4B pencil for shading; the softer 4B graphite lays down darker tones without gouging the paper.
- Start with the correct silhouette: a wide arc for dome tents, a tall triangle for A-frames, and parallel curves for tunnel tents.
- Shade the fabric inside the door and under the rainfly first; those areas are always in shadow and establish the tent’s three-dimensional form.
- Draw fabric folds radiating from stress points like the peak and pole anchors; straight, parallel lines make the material look stiff and unnatural.
- Lift highlights with a kneaded eraser after shading; trying to draw around white areas on the paper rarely works and makes the texture look muddy.
The 6-Step Foundation for Any Tent
Follow this sequence for any tent style. Skipping a step won’t ruin the drawing, but it will force you to correct proportion mistakes later with heavier, darker lines that are harder to erase.
Use a 2B graphite pencil for the initial sketch and structural lines. Its medium hardness keeps lines light and erasable. Switch to a 4B graphite pencil for shading darker areas like fabric shadows and interior spaces, as the softer lead deposits more graphite with less pressure.
Step 1: Block the primary shape. Lightly sketch the tent’s core silhouette. For a dome, this is a wide, low arc. For an A-frame, it’s a tall triangle. For a tunnel, it’s two parallel, curved lines. This shape is your anchor. If it’s lopsided, the whole drawing will be.
Step 2: Establish the base and door. Draw a horizontal line for the ground. This line should be straight and level, a tilted ground line makes the tent look like it’s sliding downhill. Then, add the door. On a dome or tunnel tent, draw a curved opening. On an A-frame, draw a rectangular door flap.
Step 3: Add the pole structure. This is the skeleton. For a dome tent, draw curved lines inside the arc that follow its contour. For an A-frame, draw a vertical line down the center from the peak to the base. For a tunnel tent, draw several arches connecting the two parallel curves. These lines are often hidden by the fabric in the final drawing, but they ensure your tent has believable volume.
Step 4: Define fabric folds and seams. Fabric doesn’t hang flat. Draw soft, curved lines that radiate from stress points: the peak, the corners, and where the poles connect. These lines show where the material sags or pulls tight.
Step 5: Shade with your 4B pencil. Identify your light source. Imagine it coming from one corner of the page. Use the side of your 4B pencil to lay down mid-tones on the opposite side of the tent and inside the door. Apply heavier pressure in the deepest shadows.
Step 6: Layer texture and highlights. Use a sharp 4B pencil for cross-hatching to suggest woven fabric texture. Then, pinch your kneaded eraser to a point and lift graphite from the crest of folds and where light hits the poles. This creates highlights that pop.
TL;DR: Sketch light with a 2B, shade dark with a 4B, and always draw the hidden pole structure first to get the volume right.
Dome vs. A-Frame vs. Tunnel: Getting the Silhouette Right
The biggest mistake is treating all tents the same. Each structure demands a different approach from the very first line.
A dome tent is defined by its curved poles. Your first mark should be a broad, sweeping arc, not a pointy triangle. The arc’s height is usually about one-third of its width. Get that ratio wrong, and your dome will look squat or unnaturally tall.
Common mistake: Drawing an A-frame tent with perfectly straight sides, most have a slight curve in the rainfly, and drawing rigid lines makes it look like a child’s drawing of a house.
An A-frame tent is the classic triangle, but the sides are rarely perfectly straight. There’s often a slight outward bow from the tension of the rainfly. Start with the triangle, then gently curve the lines outward. The door is a rectangle, not an arch.
| Tent Type | First Shape to Draw | Key Structural Detail | Common Proportion Error |
|---|---|---|---|
| Dome Tent | Wide, low arc | Curved poles following the arc | Making the arc too tall and narrow |
| A-Frame Tent | Tall triangle | Central vertical pole line | Drawing sides perfectly straight |
| Tunnel Tent | Two parallel curves | Multiple arched pole lines | Drawing curves with different radii |
A tunnel tent is essentially a half-cylinder. You draw two long, parallel curves for the top and bottom. The secret is ensuring both curves have the same radius and are equidistant apart along their entire length. If one curve is flatter than the other, the tunnel will look collapsed.
TL;DR: Dome = arc. A-frame = triangle with bowed sides. Tunnel = two parallel curves. Start with the right shape.
Shading Isn’t Just Dark and Light
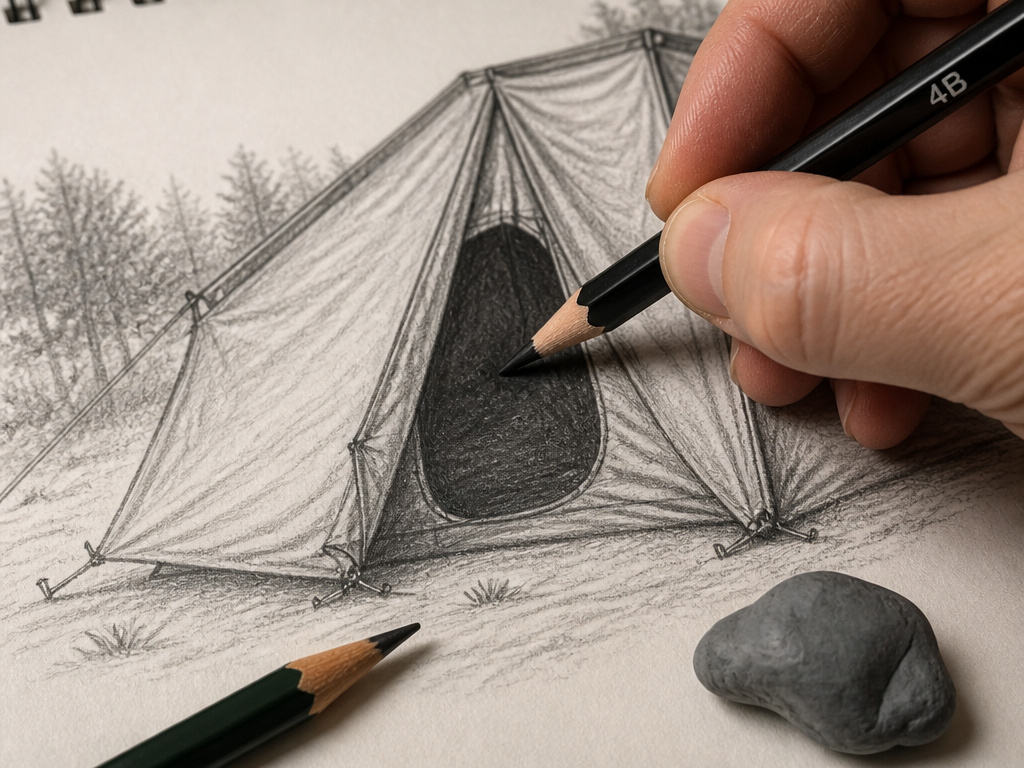
Shading a tent is about depicting nylon or polyester, not a solid object. You are drawing taut fabric, loose fabric, and the empty space inside.
The deepest shadow is always inside the door. Even on a bright day, the interior is a dark cavity. Shade this area first with firm, consistent pressure using your 4B pencil. This dark anchor gives you a value scale to work against.
Next, shade the area under the rainfly. On most modern double-wall tents, the rainfly sits a few inches off the main tent body. This creates a narrow band of shadow that runs along the tent’s lower edge. It’s a thin line, but it instantly creates the illusion of a separate layer.
I used to shade the entire side of the tent evenly. The result was a flat, cardboard cutout. Now I shade in patches, following the fabric’s wrinkles. The drawing gains weight and the material looks like it would rustle in the wind.
Fabric has texture. To show it, use two techniques after your base shading is down:
* Cross-hatching: Use a sharp 4B pencil to draw a light grid of lines in the mid-tone areas. This mimics the woven grid of tent material.
* Stippling: For areas like a dirt-splattered groundsheet or a worn patch, use the pencil tip to make tiny dots. It suggests a rough, granular surface.
The final step is the highlight. You don’t draw it, you reveal it. Use a kneaded eraser to lift graphite from the paper where the light hits directly: along the crest of a fold, on the curve of a pole, or on a taut section of rainfly. This is what makes the fabric look glossy or wet.
How Do You Draw Realistic Tent Fabric and Wrinkles?
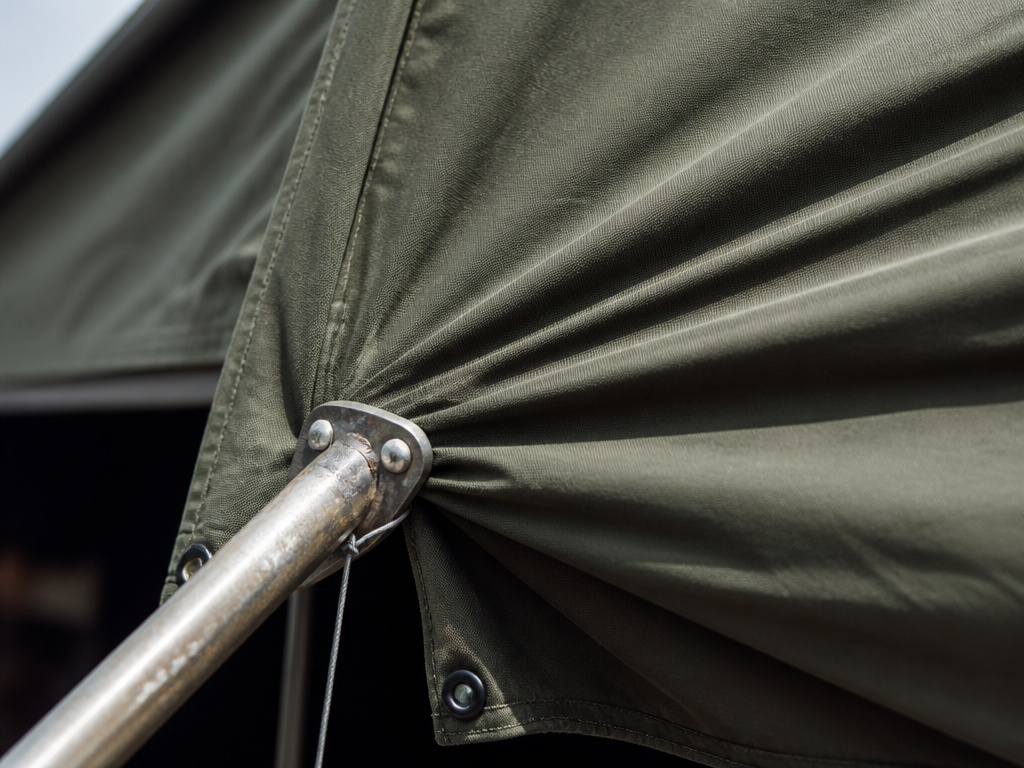
Fabric wrinkles follow physics. They radiate from points of tension and pool where the material is loose.
Find the tension points. On a dome tent, the primary points are where the poles intersect at the peak and where they anchor at the corners. From the peak, draw soft, curved lines downward like the seams of an orange. From the corners, draw shorter lines curving inward.
On an A-frame, the tension runs along the ridgeline. Wrinkles will run perpendicular to that line, cascading down the sides. They are not random squiggles.
Common mistake: Drawing wrinkles as straight, parallel lines, fabric under tension forms soft curves, and parallel lines make it look like corrugated metal.
For a tunnel tent, the tension runs along the length of the arches. Wrinkles will run across the tunnel, perpendicular to the poles. They will be deepest in the middle of each arch segment and fade toward the anchors.
The weight of the material matters. A heavy canvas tent has thick, deep folds. A lightweight tarp shelter has sharp, angular creases. Observe the gear you’re drawing from. The portable beach tents I use have almost no wrinkles when new, the fabric is taut and smooth. My older durable canvas shelters are a map of soft folds.
TL;DR: Wrinkles radiate from poles and anchors. Draw soft curves, not straight lines, and adjust their depth based on the material’s weight.
What Are the Best Pencils and Paper for Outdoor Drawings?
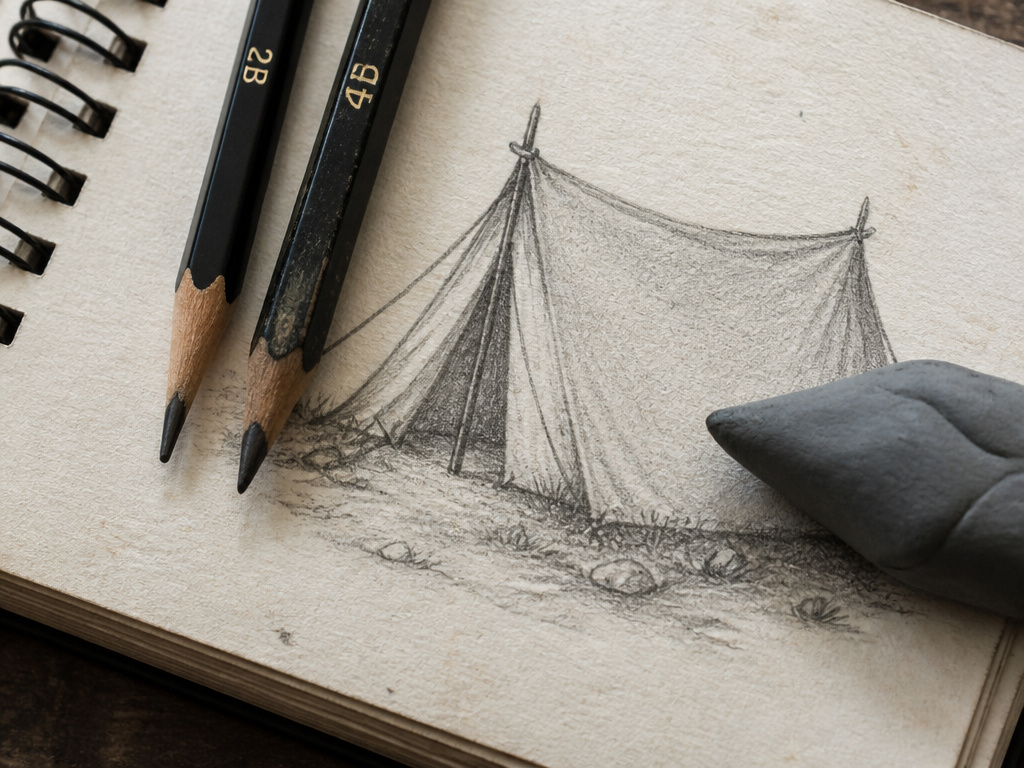
Your tools dictate your control. A standard #2 pencil is too hard. It scores the paper when you press for darks. A 6B pencil is too soft. It smudges instantly and loses fine detail.
Here is the kit that survives in a backpack:
* A 2B graphite pencil for sketching. It’s dark enough to see but hard enough to keep a point and erase cleanly.
* A 4B graphite pencil for shading. This is your workhorse for mid-tones and shadows. It lays down rich graphite without needing excessive pressure.
* A kneaded eraser. This is non-negotiable. It lifts graphite for highlights and can be shaped to a fine point for precision. A standard rubber eraser abrades the paper.
* Paper with a slight tooth. A smooth Bristol board is great for ink, but pencil needs texture to grip. A medium-weight sketching paper (around 100 lb) provides enough tooth for layers of graphite without looking fuzzy.
A simple portable tent light on your desk is the final tool. It creates consistent, directional shadows on your subject if you’re drawing from life, or on your page to check the consistency of your imagined light source.
TL;DR: 2B for lines, 4B for shadows, a kneaded eraser for light, and paper with some tooth. That’s the entire kit.
Adding a Campsite Context Without Clutter
A tent alone can look like a museum display. Placing it in a scene tells a story. The key is suggestion, not detail.
Start with a horizon line behind the tent. Place it about two-thirds up the page. This simple line establishes ground and sky. Then, add one or two context elements:
* A simple, jagged line for a distant treeline.
* A few oval shapes with quick downward marks to suggest bushes or rocks in the foreground.
* A faint, curving line for a path or stream.
The human element is powerful but subtle. Suggest a person with two simple shapes: an oval for the head and a triangle for the torso, placed near the tent door. Or, draw a few basic geometric shapes to represent camping equipment like a cooler or a backpack leaning against a tent pole.
Sketch the campsite context with the same 2B pencil you used for the tent’s initial outline. Use lighter pressure. These elements should be a stage, not the actor.
The goal is to make the environment feel inhabited without drawing every leaf. The tent should remain the focal point. If your background elements start to attract more attention than the tent itself, you’ve gone too far. Use your kneaded eraser to lift some graphite and push them back visually.
Frequently Asked Questions
What is the easiest tent to draw for a beginner?
Start with a simple A-frame tent. Its triangular shape is straightforward, and the straight lines for the poles and door are easier to manage than the curves of a dome. Once you master the A-frame’s proportions and shading, move on to dome tents.
How do you draw a tent from a front view?
front-view tent is primarily about symmetry. Lightly draw a vertical center line down your page. Sketch your chosen silhouette (triangle, arc) centered on this line. Ensure elements like the door and any visible pole lines are mirrored on either side of the center line. This view is great for emphasizing the tent’s entrance.
How do you make a tent look 3D?
Three key techniques create depth. First, shade the interior of the door and any overhangs (like a rainfly) significantly darker than the exterior. Second, vary line weight, use thicker, darker lines for edges in shadow and thinner, lighter lines for edges in light. Third, include subtle background elements like a horizon line or a few simple trees to place the tent in space.
Can you draw a tent with just a regular pencil?
You can, but you’ll struggle with contrast. A standard #2/HB pencil has a limited range from light gray to a medium dark. To get deep shadows inside the tent or under the rainfly, you’ll need to press so hard you risk indenting the paper. Using a softer pencil like a 4B or 6B for shading gives you a wider tonal range with less pressure.
How do you draw a tent with a rainfly?
Draw the main tent body first. Then, sketch the rainfly hovering a few inches above it, following the same basic silhouette but slightly larger. The critical detail is the gap between the two layers. Shade this gap as a thin, dark shadow. Use short, curved lines to show where the rainfly is attached to the main tent with clips or guylines.
The Bottom Line
Drawing a tent well comes down to respecting its engineering. Start with the correct underlying structure, the arc, triangle, or tunnel. Use a 2B pencil for that foundation so you can adjust. Build up shadows with a 4B pencil, focusing on the dark cavity of the door and the shadow under the rainfly. Finally, remember the fabric. Its wrinkles aren’t random; they flow from the poles and anchors. Pinch your kneaded eraser to pull out highlights on the folds and poles. That contrast between the deep 4B shadows and the clean white of the paper is what makes a tent look solid, real, and ready for a night under the stars.
