
How to Assemble a Tent: A Camper’s Step-by-Step Guide
This post contains affiliate links. As an Amazon Associate, we earn from qualifying purchases.
To assemble a tent correctly, follow a strict sequence: prepare a taut ground base, erect the pole framework, then secure the rainfly and guylines. The critical details most miss are staking the footprint first at a 45° angle, matching specific pole diameters to their correct grommets, and tightening the rainfly only after all stakes are set.
I’ve watched too many campers wrestle a flapping nylon monster at sunset. The problem is almost never the tent, it’s skipping the foundational step that makes every other step harder. A loose base means poles won’t seat, the rainfly sags, and by 3 AM, you’re mopping condensation off your sleeping bag.
This guide ditches the generic advice. I’m using exact specs from Coleman and Eureka! manuals, hard-won lessons from my own mistakes in the Lake District, and the subtle tricks that turn a 20-minute struggle into a 5-minute setup. You’ll learn not just how to pitch a tent, but how to make it storm-ready.
Key Takeaways
- Stake your ground tarp first, before touching a pole. A taut, centered base is the single biggest factor for a smooth, solo setup.
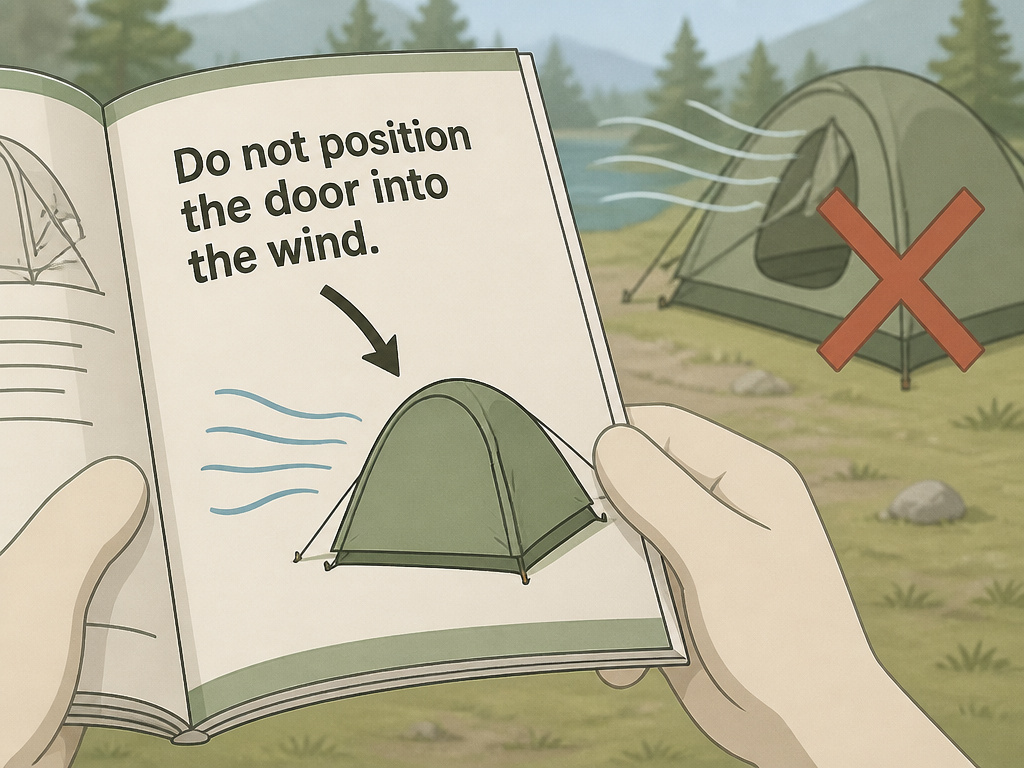
- Wind orientation is model-specific. For a Coleman Montana or Stockton, point the narrow end into the wind. For a Coleman KENAI, never point the door into the wind.
- Condensation is not a leak. An adult exhales about a pint of moisture overnight. Without cross-ventilation, it condenses on the tent walls.
- UV damage is silent and cumulative. Leaving a tent pitched in direct sun for weeks degrades fabric strength by roughly 30%; always dry and store it loosely.
- Tighten the rainfly last. Attach it loosely, stake out all guylines and vestibules, then cinch every buckle for a drum-tight, weather-shedding shell.
The Universal 3-Phase Setup System
Every tent, from a simple dome to a spacious family car camping tent, assembles in the same logical order. Swapping steps leads to frustration and a weak structure.
Proper tent assembly follows a strict sequence: foundation, framework, then shell. Skipping the foundation phase causes the pole framework to shift during erection, resulting in misaligned grommets and a sagging rainfly that promotes internal condensation.
This system is your mental checklist. It works for quick-setup tents and complex heavy-duty canvas tents alike.
| Phase | Core Action | Tool/Check | Why It’s Non-Negotiable |
|---|---|---|---|
| 1. Foundation | Lay & stake ground tarp/footprint | Mallet or rock, site inspection | Prevents groundwater wicking and anchors the tent body for pole insertion. |
| 2. Framework | Assemble & erect shock-corded poles | Identify pole diameters (e.g., 11mm vs 9.5mm) | Creates the structural skeleton; incorrect pole order prevents full height. |
| 3. Shell & Security | Drape, stake, then tighten rainfly & guylines | Stake bag, taut-line hitch knot | Provides weatherproofing; a loose fly touches the inner tent, causing condensation. |
Phase 1: Lay and Stake the Foundation
Unpack your ground tarp (footprint) first. Lay it with the shiny, waterproof-coated side up. If it has color-coded tabs, like the red ones mentioned in the YouTube transcripts, note their position; they’ll align with your tent door. The tarp must be slightly smaller than the tent floor. If it peeks out, rain will sheet onto it, pool underneath, and seep up.
Now, stake the four corners. This is the step everyone wants to skip, and it’s the one that ruins solo setups.
- Insert a stake through the tarp’s corner grommet.
- Push it into the ground at a 45-degree angle, pointing toward where the tent’s center will be. This creates a hooking action against wind lift.
- Pull the tarp taut away from the stake to tension it, then secure.
Common mistake: Staking the tent body corners loosely, then trying to arch the poles, the whole assembly slides, and pole ends pop out of grommets. I now stake my footprint so tight I can strum the guidelines like a guitar string before I even unpack the tent body.
If the ground is hard, use a smooth rock or your boot heel. Never hammer a stake with another rock; you’ll bend it. Steady, firm pressure works.
Phase 2: Erect the Pole Framework
Unpack your shock-corded poles. Gently guide the sections together, don’t force them. Now, identify the ends and match them to the tent’s grommets or sleeves. This is where model specifics matter.
For example, the Coleman Montana 6 (Model 2000001593) uses specific poles: grey 9.5mm Side Body Poles and black 11mm Main Body Poles. The black poles must overlap the grey ones. Getting this wrong means the frame won’t achieve its designed height or stability.
- Insert one pole end into a corner grommet on your pre-staked footprint/tent base.
- Gently arch the pole and seat the opposite end into the diagonal grommet. Listen and feel for a solid click.
- Repeat for remaining poles, then clip the tent body to the pole framework (if your model uses clips).
Why order matters: With the foundation staked, the tent body can’t slide. The pole ends stay aligned with the grommets, allowing you to arch and secure them with confidence.
Phase 3: Secure the Rainfly and Guylines
The rainfly is your waterproof shell. Drape it over the assembled frame, aligning doors and any color-coded tags. Attach all clips, buckles, or straps, but leave them loose.
Next, stake out the rainfly’s vestibules (the awnings over doors) and any additional guyline points along the sides. Use the same 45-degree angle. Now, go back and systematically tighten every connection on the rainfly, starting from the corners and working inward.
A rainfly that sags and touches the inner tent wall creates a condensation bridge. Moisture from your breath will migrate across the contact point and drip inside, perfectly mimicking a leak. This happened to me on a humid night in the New Forest, the damp patch was directly under a drooping fly corner.
Finally, tighten guylines. In wind, use a taut-line hitch knot for adjustable tension. Good tent camping equipment includes extra stakes for these critical stability lines.
TL;DR: Stake a taut base first, click poles into a stable frame second, and only tighten the rainfly after all stakes are in the ground.
Model-Specific Rules You Can’t Ignore
The three-phase system is universal, but your tent’s manual contains non-negotiable specifics. Ignoring them leads to premature wear or failure.
Wind Orientation Is Not One-Size-Fits-All
Pitching your tent like a sail guarantees a stressful night. The correct orientation varies by design.
- Coleman KENAI™ 10’x8’: The manual explicitly states, “Do not position the door of the tent into the wind.” Face a solid wall into the breeze.
- Coleman Stockton & Montana 6: These models instruct you to “position the narrow end of the tent into the wind” for aerodynamic stability.
- Gazelle™ T8: For windy conditions, its manual emphasizes staking “down both corners through the provided grommets” for extra anchoring.
I learned the hard way on a trip to the Lake District with my Coleman Montana 6. I pitched the door into a prevailing wind, thinking the vestibule would block it. By midnight, the constant flexing had fatigued the grey 9.5mm side pole so much that the shock cord snapped at a joint. I spent the rest of the trip with a pole section taped together.
Managing Condensation and Moisture
Waking up to damp walls when it didn’t rain is almost always condensation, not a leak.
“An adult gives off about a pint of water overnight through breathing and perspiration,” notes a Eureka! camping tent manual. “If it cannot escape, it will condense on the tent walls.”
The fix is active ventilation, even in cold weather:
1. Always open roof vents.
2. Crack a window or door on the side opposite the wind to create a cross-breeze.
3. Store all wet gear, boots, jackets, towels, in the vestibule, not inside the living space.
The Right Way to Pack and Store Your Tent
How you pack up determines your tent’s lifespan. The number one killer is storing it damp.
| Do This | Why It Works | Don’t Do This |
|---|---|---|
| Dry tent & fly completely, even in sun for 20 mins | Prevents mildew spores from germinating (they can in 48 hrs) | Roll up a slightly damp tent “to dry at home” |
| Brush off dirt, store poles separately (not telescoped) | Prevents shock cord fatigue and aluminum joint wear | Cram everything into the stuff sack wet or dirty |
| Use a large, breathable mesh storage bag | Allows residual moisture to evaporate; prevents coating cracks | Store long-term in the tight, non-breathable carry bag |
Investing in a larger storage bag is one of the most practical camping tent accessories you can buy.
Troubleshooting a Problematic Pitch
You followed the steps, but something’s wrong. Here’s how to diagnose and fix it fast.
Problem: A pole won’t reach its grommet.
- Cause: The tent body isn’t centered on the staked footprint. One corner is pulling the entire structure out of square.
- Fix: Loosen all four corner stakes. Re-center the tent body perfectly over the footprint. Re-stake, then try the pole again.
Problem: The rainfly is wrinkled and won’t sit flat.
- Cause: You tightened the buckles before staking out the vestibule and guylines.
- Fix: Loosen all rainfly attachments. Fully stake out the vestibule and any side guylines. Then, systematically tighten the buckles from the corners inward.
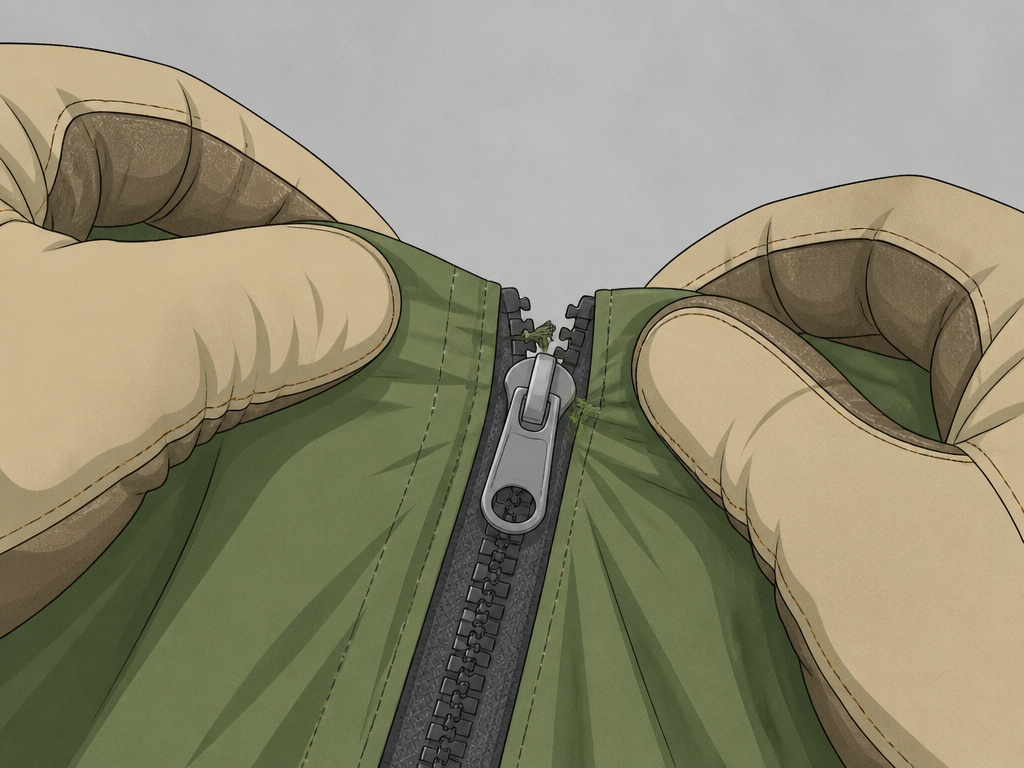
Problem: The zipper is stuck.
We’ve all been there, frantically yanking as the rain starts. The culprit is almost always a tiny fold of nylon caught in the teeth, you can feel the gritty resistance. Don’t force it. Instead, pinch the fabric on either side of the slider and gently ‘walk’ it back, millimeter by millimeter, until the snag releases with a satisfying little pop.
Frequently Asked Questions
Should I seam seal a new tent?
Most mass-market tents benefit from it. The Coleman KENAI manual explicitly recommends seam sealing for added protection, as sealer isn’t included. Use a product like McNett SeamGrip®, applying a thin bead to the inside of exposed rainfly and floor seams. Let it cure for 24 hours before use.
Can I leave my tent pitched for weeks at a campsite?
No. Coleman and other manufacturers warn that ultraviolet (UV) rays seriously damage fabric and cause discoloration when a tent is left up for extended periods. The material weakens, becoming brittle. For long-term shelter, consider a traditional canvas shelter designed for prolonged exposure.
What’s the best tent for a beginner?
It depends on your tolerance for frustration. My first was a cheap pop-up tent, great until a gust turned it into a tumbleweed. For most, I recommend starting with a simple dome like the Coleman Sundome. Its color-coded clips are idiot-proof. For more space without complexity, look at quality tents under $200 that balance durability with straightforward assembly.
How do I choose the right size?
Always buy a tent rated for at least one more person than you need. A “4-person” tent fits four sleeping pads with zero gear space. A spacious 6-person tent gives four adults room to sleep and store packs comfortably, which is crucial for livability.
Do I need a ground tarp if my tent has a bathtub floor?
Yes. A footprint protects the tent floor from abrasion and punctures. More importantly, it’s a separate, smaller moisture barrier. If water runs under your tent, a proper footprint stops it from being pressed up through the floor seams via hydrostatic pressure.
What Actually Matters
Assembling a tent is a physical skill. You can’t just read about it, you have to feel the pole click into the grommet and learn the sound of a properly tensioned guyline. Practice in your backyard before any trip.
Remember the non-negotiable sequence: a staked foundation first, then the pole framework, and finally a taut rainfly. Orient your specific model correctly for the wind, never pack it away damp, and understand that condensation is a ventilation issue, not a defect.
With these steps, you’ll build a shelter that’s a dry, secure home, not a source of dread when clouds roll in. And when you’re done, the right tent lighting will let you enjoy your well-earned shelter long after the sun goes down.
