
How to Lock a Tent: Secure Zippers and Anchor Against Wind
This post contains affiliate links. As an Amazon Associate, we earn from qualifying purchases.
Locking a tent means two distinct actions: securing the zipper pulls with a small lock to discourage casual snooping, and, far more critically, anchoring and tensioning the entire structure with stakes, poles, and guy lines to withstand wind and weather. The first is a simple visual deterrent; the second is a rule I learned the hard way after a collapsed tent in Wyoming.
Most campers fixate on the padlock. They buy a shiny lock, clip it on, and feel secure, only to watch their tent wall flap violently because a guy line is loose. The real failure isn’t theft, it’s a 3 a.m. gust peeling back a poorly anchored rainfly. Structural integrity always matters more than zipper security.
Let’s get our hands dirty with the zipper first, because that’s where most people start (and often mess up). Then, we’ll dive into the real work of locking down your shelter against the elements.
Key Takeaways
- A small TSA luggage lock on zipper pulls acts only as a visual deterrent for opportunistic thieves; a sharp knife bypasses it in seconds.
- Manufacturer manuals from MSR, Oztent, and Coleman all mandate staking, even for “freestanding” tents, to prevent them from flying away.
- Master line-lock systems or the taut-line hitch knot to create adjustable, weatherproof tension that acts as a structural lock.
- Drive stakes at a 45-degree angle away from the tent, and never, ever pull on the fabric loops to remove them.
- For twist-lock poles, engage the mechanism fully but gently; forcing a gritty collar is how $90 pole sections get destroyed.
Should You Physically Lock Your Tent Zippers?
The short answer is yes, you can, but you must understand its severe limitations. A lock signals you’ve taken a basic precaution, turning a zero-effort crime into a one-step one. In a crowded campground, an opportunistic thief checking doors might skip yours for the next with open zippers. That’s the entire benefit.
The critical vulnerability is the fabric itself. Nylon, polyester, and canvas are not slash-proof. A determined person ignores the zipper and goes through the wall. On my 2022 trip to the Oregon coast with my Big Agnes Copper Spur HV UL2, I used a Master Lock 4688D padlock. A 40mph gust sheared the plastic zipper pull clean off the YKK #5 coil zipper, leaving the lock dangling and the door flapping. I had to field-repair it with a zip tie, learning that heavy locks stress lightweight tent hardware.
Before you start: A fabric tent wall is not a secure barrier. A sharp pocket knife slices through most tent materials in under two seconds. Locking the zipper does not create a safe; it creates a modest delay. Never leave true valuables like passports or expensive electronics unattended inside.
| Security Layer | What It Deters | What It Fails Against |
|---|---|---|
| Small zipper lock | Casual “check-the-door” opportunists | Anyone with a blade or shears |
| Well-lit, high-traffic site | Thieves who prefer privacy | Brazen daytime theft |
| Valuables on person / in safe | All theft from the tent | Loss or damage elsewhere |
| Neighbor awareness | Sneaky attempts during quiet hours | Collusion or distraction thefts |
TL;DR: Use a small lock for peace of mind against casual snooping, but never rely on it. Your tent wall is tissue paper to a knife.
How to Properly Lock a Tent Zipper
If you choose to use a lock, doing it correctly prevents self-inflicted problems. You need a lock with a shackle small enough to fit through the holes in the zipper pulls. A Lewis N. Clark TSA-approved 3-dial lock, like the 1513 model I keep on my keychain, works perfectly.
- Close the door and run zippers to the bottom. Ensure both sliders are at the bottom track stop. If you leave them halfway, even a locked zipper will have a several-inch gap at the top. I once returned to find a squirrel had chewed through my tent’s mesh vent because I’d left this gap.
- Thread the lock through both pull holes. Pass the lock’s shackle through the metal or fabric loops on both zipper pulls.
- Close the lock and test tension. Gently try to pull the zippers apart. They shouldn’t budge.
- Have a backup plan. Keep a spare key in your car or with a partner. If you lose the key, you’ll be cutting your own tent.
I learned this lesson at a festival with a combination lock. A sudden downpour hit, and I fumbled the combo with cold, wet fingers for ten miserable minutes while rain soaked my gear inside the door. I now use a key lock and zip-tie a spare key to a frame pole.
Locking Tent Poles and Frames for Stability
This is the locking that keeps you dry and safe. Manufacturer procedures are specific, and skipping steps leads directly to failure.
For Twist-Lock Poles (Common on Oztent Awnings)
The Oztent manual details using its 2.2m awning poles: extend the pole to the desired length and rotate the collar until the internal mechanism clicks. If it doesn’t turn smoothly, check for dirt. Forcing it strips the plastic threads. The salt left a gritty, white film on my MSR Carbon Reflex poles after a beach trip. Two months later, trying to twist the lock felt like grinding sand before it seized with a sickening crunch.
For Shock-Corded Poles with Pin & Ring Systems
The Coleman KENAI 10’x8′ manual outlines the process: assemble the shock-corded poles, insert one end onto the corner pin, gently arch the pole across the tent, and seat the opposite end. Use steady pressure, never let the shock cord snap the ends together.
The MSR Tents Owner’s Manual is blunt: “Handle tent poles carefully, nearly all pole damage occurs during setup.” It warns that snapping pole ends together damages them, leading to breaks under tension. Push poles together; don’t let the cord yank them.
Securing Internal Frames
Some cabin tents, like the Oztent RV-4, have internal frames that Velcro to the tent wall. After erecting the frame, you must reach inside and secure every strap. Miss one, and that wall will sag and flap all night, a mistake that turns a shelter into a noisy, drafty cave.
TL;DR: Pole locks work by friction, pin, or twist. Engage them fully but gently. Rushing this step is how poles snap.
Mastering Line-Lock Systems for Perfect Tension
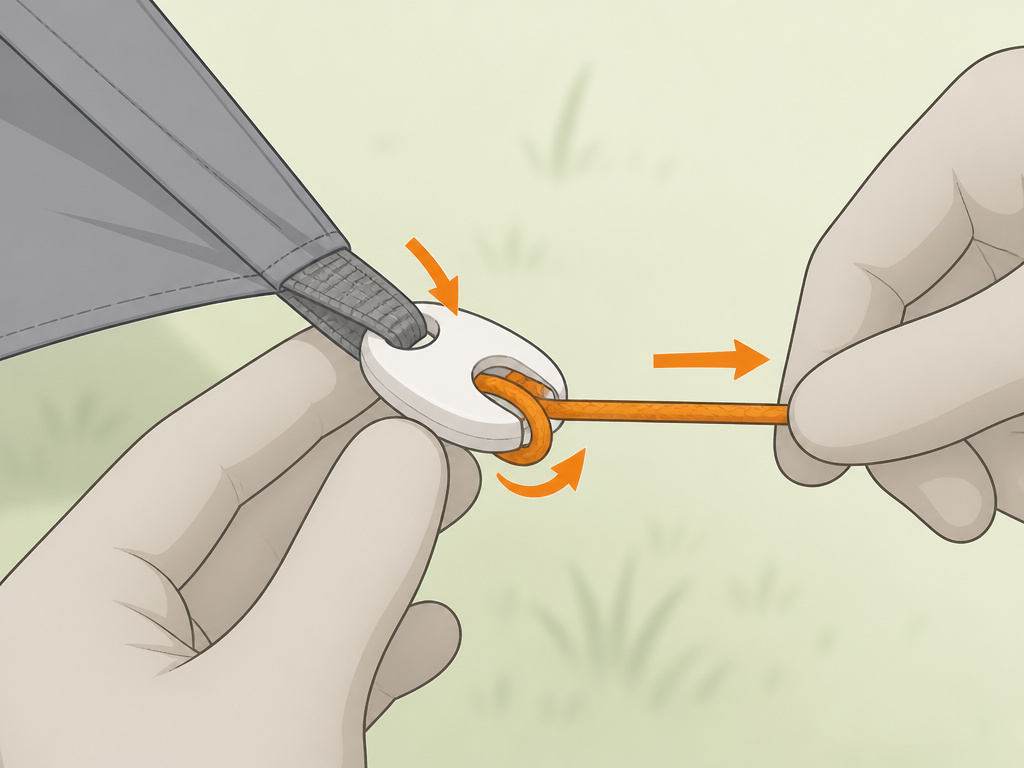
This is the most overlooked structural lock. A line-lock is a small plastic device that lets you tension a cord and have it hold fast. My Seek Outside Cimarron 2 uses their proprietary Tri-Lock tensioners, which are superior to the generic plastic ones on my old REI Co-op Half Dome 2+.
Common mistake: Threading the line lock backwards. If the cord slips the moment you let go, you’ve routed it wrong. The cord should enter the back hole (the fixed one), then loop through the front hole (the tensioning one).
To use a line-lock system for guying out your tent:
1. Tie a fixed loop in your guy line and attach it to the stake.
2. Thread the free end through the back hole of the line lock on the tent, then through the front hole.
3. Pull the line tight to raise the tent wall or adjust tension. To release, pull the line from the front-hole side.
4. For extra security, tie a simple overhand knot in the tail after tensioning so it can’t slip back through.
Ever heard a guy line hum in the wind? That’s the sound of good tension. The MSR manual states this “greatly increases the tent’s strength and stability,” preventing fabric droop and rainwater pooling. A loose guy line is an unlocked door for bad weather. For tents without this hardware, learning the taut-line hitch knot is a fundamental skill, as essential as having the right tent camping accessories for comfort.
The Critical Role of Staking and Anchoring
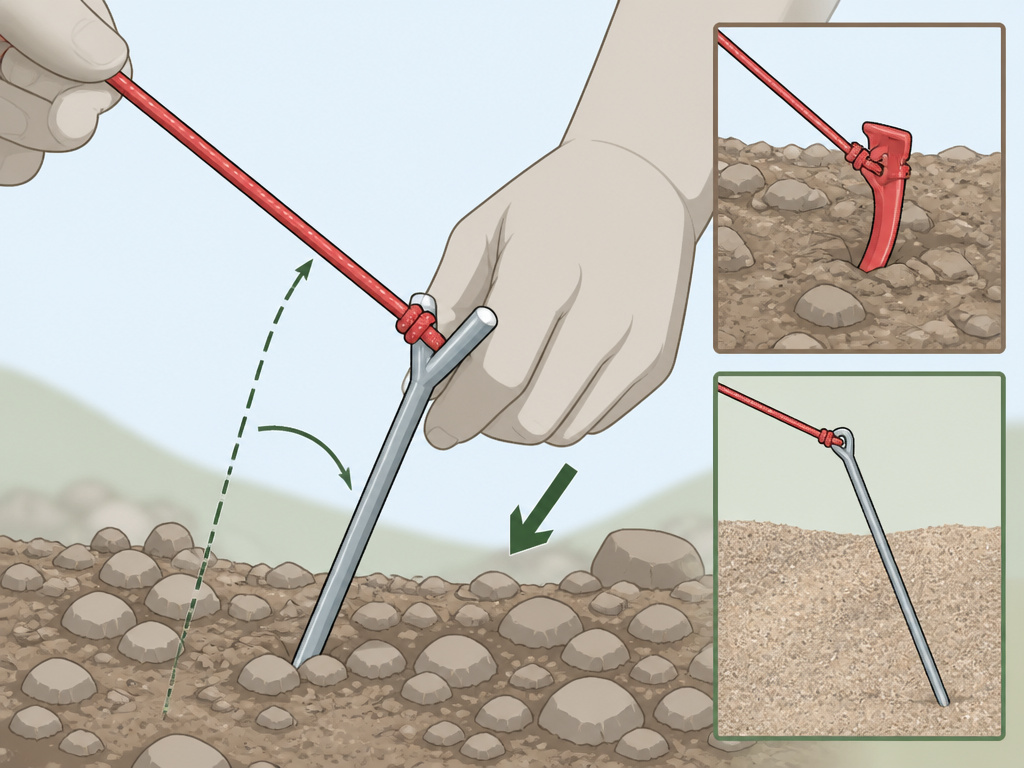
Forget the “freestanding” label in any wind. Every manual we reviewed orders you to stake the tent down. The MSR line is definitive: “All tents, including freestanding models, require staking to prevent them from flying away in a gust of wind.” This is your ultimate anchor lock.
| Ground Type | Recommended Stake | Why It Works | Common Pitfall |
|---|---|---|---|
| Soft Soil / Grass | Wide Plastic “Shepherd’s Hook” | Large surface area resists pull-out | Bends easily in hard ground |
| Hard / Rocky Ground | Tough Steel “Y” or “V” Stakes | Penetrates and holds in compacted soil | Difficult to drive without a hammer |
| Sandy Beach | Long, Wide Aluminum Sand Stakes | Deep penetration and large surface area in loose material | Standard stakes pull out with minimal force |
| Snow | Long, Wide Aluminum “Snow” Stakes or Deadman Anchor | Distributes force over a larger area in soft snow | Using short stakes that offer no holding power |
- Angle is everything. Drive each stake at a 45-degree angle away from the tent. A straight-down stake pivots and lifts out easier.
- Tension sequentially. Don’t fully tighten one guy line and move on. Get all stakes in loosely, then walk around the tent tightening each line evenly to avoid uneven stress on the frame.
- Remove stakes correctly. Both the Oztent and Coleman manuals warn: NEVER pull on the tent fabric or the stake loop. You will rip it. Use the stake itself, or hook another stake underneath it for leverage.
TL;DR: Staking isn’t optional. Use the right stake for the ground and angle it properly. This is the most important lock on your tent.
When More Security Creates More Problems
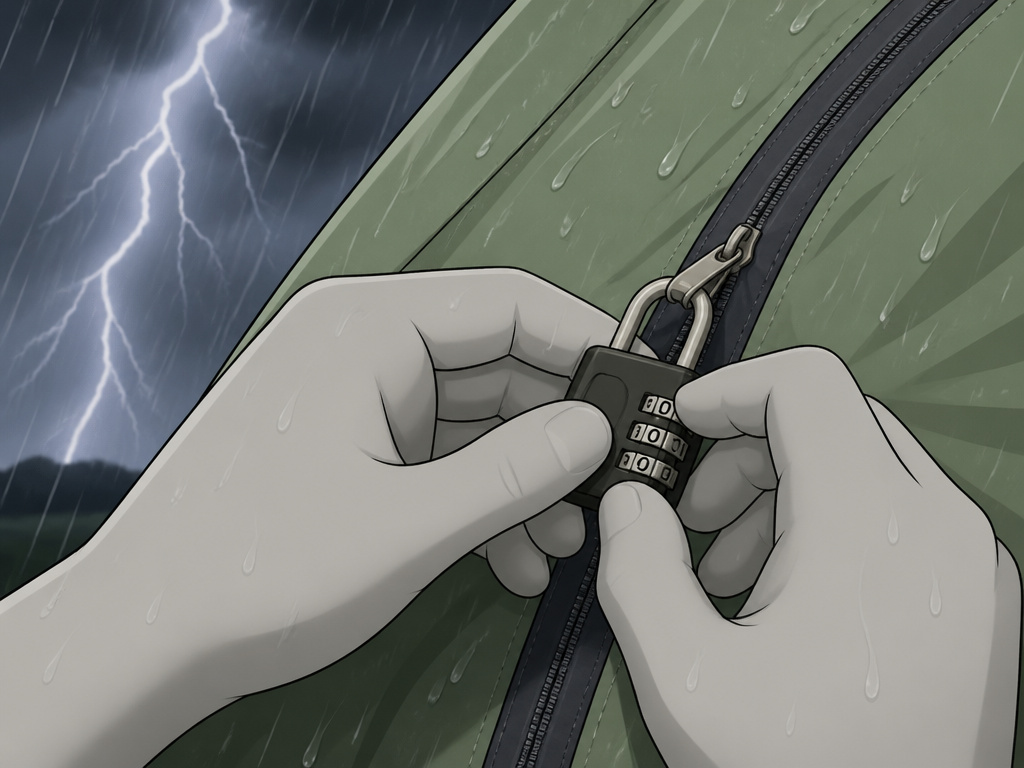
Context dictates everything. Applying a “lock everything” mindset can backfire in specific scenarios.
- In Bear Country: A locked tent with food inside is a sealed piñata. You must use bear-proof storage lockers away from your sleep site. A zipper lock is irrelevant and dangerous.
- During Extreme Weather: In a lightning storm or high winds, your priority is getting to safety. Fumbling with a combination lock to get in or out wastes critical seconds.
- Impeding Ventilation: Locking every vent to feel secure leads to dangerous condensation buildup. The Coleman manual explicitly states condensation is caused by occupant moisture and is minimized with ventilation.
- Saltwater Corrosion: The MSR manual warns saltwater corrodes aluminum poles. If you don’t rinse and lightly lubricate them with something like McNett Silicone Spray after your trip, the twist-lock mechanisms can seize permanently.
Common mistake: Using a large, visible padlock on your tent door. It advertises that you have items inside worth securing, which can attract more targeted attention. A small, discreet lock is less conspicuous.
The best security is often invisible. It’s choosing a site near other respectful campers, keeping a clean camp, and using the natural security of a well-tended campground. Your mindset should prioritize situational awareness, and your gear list should include versatile essential tent camping gear that supports both safety and comfort.
Frequently Asked Questions
Does locking a tent prevent theft?
It prevents only the most casual theft by someone checking for unlocked zippers. It does not prevent theft by someone willing to cut the tent fabric, which takes seconds. View a lock as a minor deterrent, not a barrier.
What is the best lock to use on a tent?
small, discreet TSA-approved luggage lock is ideal. Its shackle fits through zipper pulls, and it’s inexpensive. Avoid large, shiny padlocks that draw unwanted attention to your tent.
How do you lock a tent without a lock?
For physical security, you can use a small zip-tie. For structural security, use a taut-line hitch knot on guy lines and ensure all pole locks are fully engaged. Remember, staking is mandatory for stability, not optional.
Can you lock a tent from the inside?
Most tent zippers can be operated from both sides. You can thread a small lock through the internal zipper pulls while you’re inside. This might slow down an intruder but offers no more protection than the fabric itself.
Do you need to lock pop-up tents?
The same principles apply. A pop-up beach tent is often made of lighter material. A zipper lock is a visual deterrent, but you must anchor it thoroughly with sand stakes or weights, as wind is a far greater threat than theft.
What Actually Matters
Locking your tent is a split-focus task. Spend 10% of your effort on the zipper lock, a small, discreet one clipped on and forgotten. Spend 90% on the structural lock: stakes driven at a hard 45-degree angle, guy lines tensioned drum-tight with line locks or proper knots, and every pole junction clicked firmly into place.
Remember the manufacturer warnings. Stake everything. Never pull a stake by its fabric loop. Rinse salt off poles. Ventilate to manage condensation. These habits protect you from the more likely disasters of weather and wear. Whether you’re setting up one of the best car camping tents for a family weekend or a minimalist shelter for a solo hike, these principles are universal.
Your shelter is your home outdoors. Secure it first against the predictable forces of wind and rain. The human threat is less common but is best mitigated by smart campsite selection and keeping valuables secured on your person. A locked zipper is just one quiet part of that larger, quieter strategy. Now go pitch a tent that stands firm.
