
How to Fold a Canopy Tent Without Breaking It
This post contains affiliate links. As an Amazon Associate, we earn from qualifying purchases.
To fold a canopy tent correctly, press the leg release buttons first, then the roof locks, lower all legs fully, and collapse the frame by walking opposite corners toward the center. The wrong sequence jams the telescoping tubes. Always detach and dry the fabric completely before storage to prevent permanent mildew and fabric damage.
I learned this the hard way after a charity car wash in 2022. In a hurry to beat a storm, I mashed every button on my then-new Eurmax 10×10. The frame locked halfway, the fabric caught, and I spent 20 minutes wrestling what felt like a sprung steel octopus in my driveway. That’s how I put a permanent 15-degree bend in the front-left leg, a $90 replacement part.
This guide cuts through the generic advice. I’ll show you the model-specific sequences, the storage debate manufacturers can’t agree on, and the tools that prevent a $200 service call.
Key Takeaways
- Leg buttons before roof buttons. Reversing this traps the frame in a half-open state.
- Dry fabric is non-negotiable. A damp canopy rolled in its bag will show mildew spots in 72 hours.
- Remove the top for long-term storage. Constant tension fatigues stitches and stretches seams.
- Never fold in wind over 15 mph. The sail effect can snap scissor hinges or send the canopy airborne.
- Walk the frame closed, don’t push. Lifting one corner and walking the opposite corner inward prevents binding.
Press the push-button in the middle of each leg to lower it, then press the top gray buttons near all four apex support poles to release them from the locked position. This is the sequence for the 10×10 instant canopy and similar designs.
What’s the Correct Button Sequence?
Get the button sequence wrong just once, and you can turn $300 of powder-coated steel into a permanent modern art sculpture for your garage. The correct sequence is not intuitive because the roof buttons are more obvious, but the leg buttons must go first.
On standard models like the Home Depot 10ft. X 10ft. Straight Leg Canopy or the Amazon 40155 13×13 Canopy, you’ll find two sets: gray buttons on the legs and gray buttons near the roof apex. The leg buttons control the telescoping tubes; the roof buttons release the scissor-hinge locking pins.
- Lower all four legs fully. Press each leg button and slide the lower section down until it stops. Ensure the canopy is on level ground, an unlevel setup twists the frame and binds the tubes.
- Release all four roof locks. Press each roof button until you hear a distinct click. No click means the pin is still engaged.
- Collapse the frame. Use the one- or two-person method described below.
- Detach the fabric. Unhook all corners and Velcro straps. Never drag it.
- Store separately. Place the folded frame and loosely rolled fabric in their bags.
TL;DR: Legs down, roof unlocked, corners walked in, fabric detached and dry.
One-Person vs. Two-Person Folding Method
The AssemblyInstructions_CMXPUYT009C_Final manual details both. Your choice depends on size and conditions.
The One-Person Method:
Stand at one corner. Lift it until the other three legs rise off the ground. Push that lifted corner toward the canopy’s center, then move to the opposite corner and repeat. This works for most pop-up canopy tents up to 10×10 feet.
The Two-Person Method:
Each person takes two adjacent corners. On a count, both lift and walk toward each other. This distributes force evenly and is mandatory for larger spacious canopy models or in any breeze. Lifting from one corner puts about 70 lbs of uneven force on that joint; two people cut that stress in half.
Common mistake: Pushing the frame straight in from one side, this binds the scissor hinges and can permanently deform them, leading to a shaky setup next time.
Why Did My Canopy Jam?
Usually, you pressed the roof buttons first. With the legs extended, the released roof locks have nowhere to go, redistributing tension until a leg button seizes. The fix is physical but simple.
Lay the canopy on its side. Find the stuck leg and press its button firmly while pulling the lower section. If it’s frozen, tap the button with a rubber mallet, the specific thwock of rubber on plastic is a sound of victory, not damage. You want that dead, dense sound, not the sharp ping of metal on aluminum that means you’ve just created a dent.
The other culprit is wind. A gust over 15 mph acts on the canopy like a sail, pulling the frame out of square while you work. The Best Buy AssemblyInstructions for folding gazebos explicitly warns that attempting a takedown in windy conditions may damage the product. If the canopy shifts, lower it and wait.
How Should I Store the Canopy Fabric?
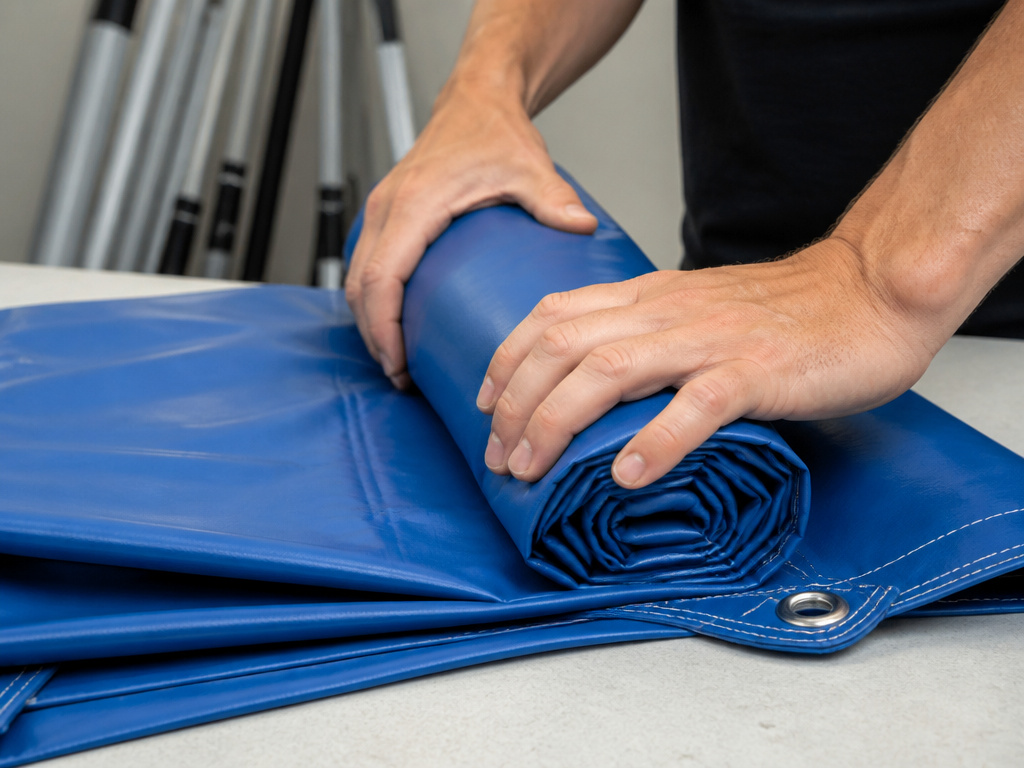
Manufacturers disagree, creating confusion. The 40155_13x13Canopy_ForWeb manual states leaving the top on for 1-2 weeks is acceptable. The Lowe’s STANDARD POP-UP CANOPY manual from March 2021 says, “Never store fabric on the frame as it will damage the fabric, frame, or both.”
I follow the never-store-it rule. Here’s why: Constant tension, even over a week, fatigues corner grommets and stretches seams. Eventually, the roof sags and pools water. The Lowe’s manual warns that pooling water stretches fabric, wrecks the waterproof coating, and can break the frame.
For true longevity, detach the fabric after every use. Roll it loosely, alternating your roll pattern, to avoid creasing the same fold lines, which cracks the waterproof laminate. This is one of the most overlooked tent camping accessories habits that prolongs your shelter’s life.
| Storage Scenario | Manufacturer A (e.g., 40155) | Manufacturer B (e.g., Lowe’s) | My Recommendation |
|---|---|---|---|
| Overnight/Day | Okay to leave on | Not advised | Leave on for convenience |
| 1-2 Weeks | Acceptable | Will cause damage | Remove and store separately |
| Seasonal/Long-Term | Remove | Remove | Always remove and store separately |
What Tools Prevent Costly Damage?
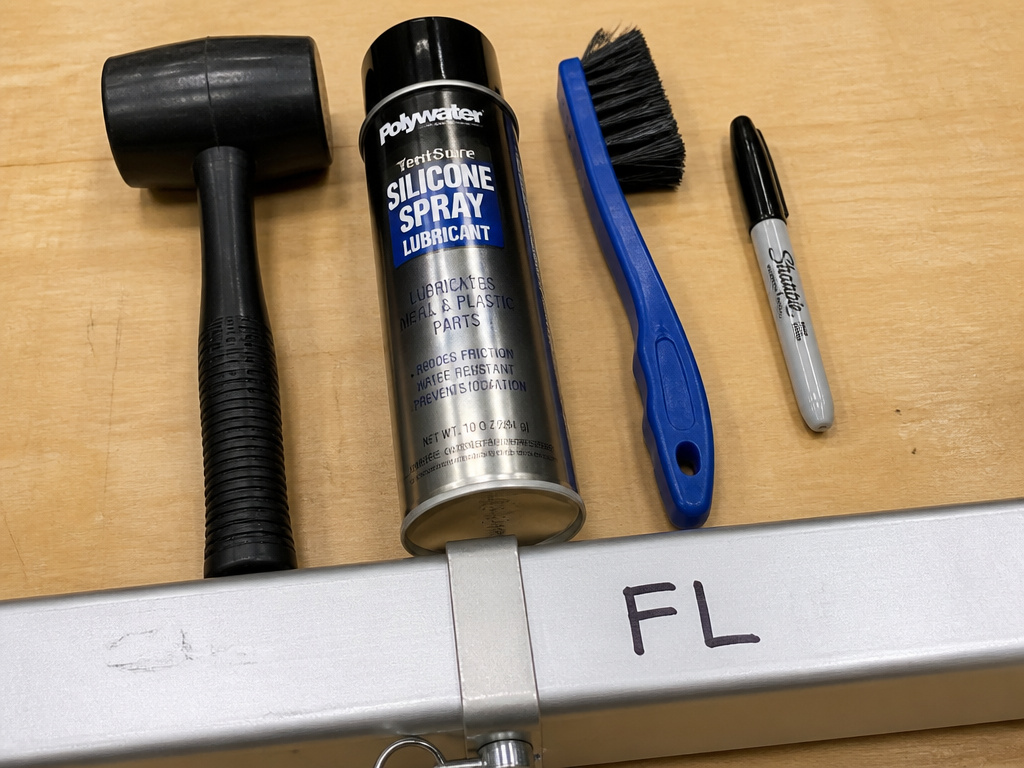
You don’t need specialty gear, just the right tools from your garage. Missing these means relying on force, which breaks plastic and bends aluminum.
- Rubber Mallet: For tapping stuck release buttons without marring the frame.
- Silicone Spray Lubricant: A light annual spray into button mechanisms keeps pins moving. Avoid WD-40, it attracts dust and gums up.
- Soft-Bristle Brush: Cleans grit from leg tubes before storage. Sand inside scratches the inner wall, making legs stick.
- Permanent Marker: Label legs and roof poles (“FL,” “FR,” etc.). Mismatched parts bind and can damage sockets.
These four items are more valuable than many fancy tent camping equipment gadgets. The repair bill for one bent leg often exceeds their total cost.
Before you start: 1) Wind Hazard: Gusts can turn the canopy into a sail, causing loss of control and potential injury. Mitigate by never folding in winds over 15 mph. 2) Pinch Points: Scissor hinges can snap shut during collapse. Keep fingers clear of all moving joints. 3) Falling Structure: An improperly collapsed frame can suddenly buckle. Maintain a stable, balanced stance throughout.
Can You Fold a Wet Canopy?
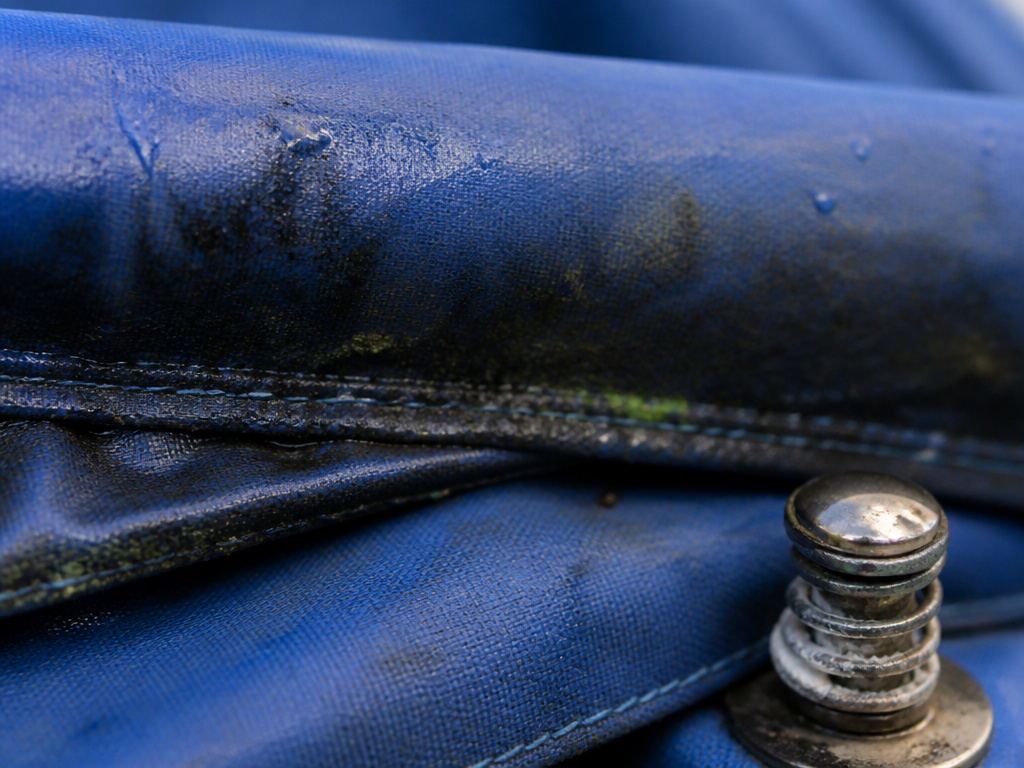
You can, but you must dry it completely before storage. The AssemblyInstructions_CMXPUYT009C_Final manual is blunt: “Never fold or store the canopy when it is wet or damp; allow it to dry completely to avoid mildew.”
Mildew spores are always present. Add moisture and a dark bag, and you’ve built a petri dish. Black or green spots appear along fold lines in as little as three days. Wet storage also corrodes the steel springs inside buttons, leading to that white crust that eventually seizes the pin.
If caught in rain, your only move is to re-erect the canopy under cover until bone-dry. Wiping with a towel isn’t enough, stitching and seam tape hold moisture. This vigilance is what separates a canopy that lasts a season from one that lasts a decade.
How Do You Pack Fabric Without Damaging It?
Tight, sharp creases along the same lines every time crack the polyurethane waterproof coating. Instead of folding, try rolling.
Lay the fabric top-side down. Roll it loosely around a pool noodle or towel from one side to the other. If you must fold, alternate the pattern, thirds one time, quarters the next. Never keep it compressed in the tight retail packaging long-term; that’s for shipping, not storage.
For durable canvas materials, the rules change slightly. Canvas breathes and handles folds better, but it’s even more susceptible to mildew when stored damp. The core principle of complete dryness remains the same, whether you own a modern polyester pop-up tent model or a traditional canvas canopy tent.
| Problem | Likely Cause | Immediate Fix | Long-Term Prevention |
|---|---|---|---|
| Leg won’t telescope | Sand/dirt in tube; frame under tension | Lay canopy down, clean tube, tap button with rubber mallet | Clean tubes with brush before storage; use silicone spray |
| Roof button won’t click | Locking pin jammed; uneven ground | Slightly lift corners to relieve pressure, then press button | Ensure setup on level ground; lubricate mechanism |
| Frame leans after folding | Legs not lowered to same height | Extend frame, lower all legs fully, re-collapse | Mark leg sections with permanent marker for consistent height |
| Mildew spots on fabric | Stored damp | Clean with mildew remover, dry thoroughly | Never, ever store a wet canopy |
Frequently Asked Questions
Can I leave the canopy on the frame between weekend trips?
Technically yes, but I advise against it. While one manual says 1-2 weeks is okay, the constant tension on grommets and seams leads to premature sagging. For a season of weekly use, detaching it will double the fabric’s life.
What if a release button is stuck and won’t press?
The frame is likely under tension. Lower the canopy to the ground to relieve pressure. Apply a small amount of silicone lubricant into the button housing. Wait a minute, then try again. If still stuck, a gentle tap with a rubber mallet usually frees it. Never use pliers, you’ll shear the plastic plunger.
How do I fold a large canopy tent by myself?
For a 10×10, use the one-person method described above. For anything larger, like a 13×13, you realistically need a second person. The weight and fabric drag make it unsafe and likely to damage the heavier frame of these tall canopy shelters.
Why does my canopy fabric sag after storage?
This is usually the result of leaving the fabric on the frame under tension for extended periods. The material stretches at the corners and along the seams. Once stretched, it cannot shrink back, leading to water pooling. The only fix is a replacement top.
Is it okay to store the canopy in its original box?
Only for a very short period. The original packaging is designed for shipping, not for long-term storage where the fabric needs to breathe. For seasonal storage, use the provided breathable carry bag or a larger, ventilated container.
Before You Go
Find the buttons. Press the leg ones first, then the roof ones. Walk the corners in, don’t push from the side. Dry the fabric completely, every single time, before you roll it. Store the frame and top separately unless it’s just for tomorrow.
Wind over 15 mph will fight you, and sand will grind your leg tubes. A wet bag grows mold faster than you think. Your shelter deserves the five extra minutes it takes to fold it right. The alternative isn’t just a bent frame or a sagging roof; it’s missing out on perfect golden-hour evenings because your gear failed. Do it once, do it slow, and your budget canopy tent will outlast pricier, neglected models. Now get out there.
