How Do You Make A Teepee Tent
This post contains affiliate links. As an Amazon Associate, we earn from qualifying purchases.
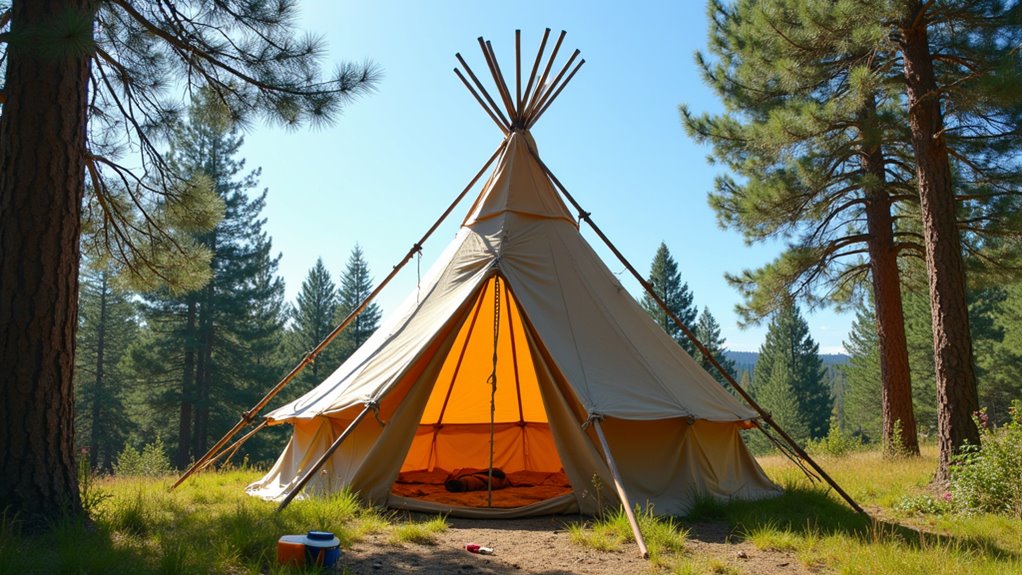
To make a teepee tent, begin by assembling strong poles into a conical frame and covering it with durable fabric like heavy cotton or treated canvas for weather protection. Start with six-foot wooden dowels or PVC pipes tied securely at the top, then select a flat, stable site to set up your teepee. Further details on construction techniques and tips for enhancing comfort and stability will be explained later in the article.
Essential Facts in 30 Seconds
- Use sturdy wooden dowels or PVC pipes at least 6 feet long for the frame.
- Cover the frame with heavy fabrics like canvas or cotton ducking, securing tightly.
- Arrange and tie poles in a teepee shape for stability.
- Choose a flat, level site away from flood areas with natural windbreaks.
- Ensure enough space around the teepee for safety, ventilation, and movement.
Materials Needed for Teepee Construction
Building a teepee tent needs the right materials for strength and comfort. Use wooden dowels about 6 feet long and ¾ inch thick for a strong frame. PVC pipes work too; they cost less but aren’t as sturdy.
Heavy fabrics like canvas or cotton ducking make good covers. Drop cloths are cheaper but less durable.
Buy materials at stores like Lowes or Home Depot. Recycled fabrics save money. A small teepee needs about 4½ yards of fabric.
Use polyethylene tarps on the ground to stop dampness. Add cotton yarn for decoration. It looks nice and costs little. Additionally, make sure to secure poles together to ensure the stability of your teepee.
Your teepee will be strong, comfy, and inviting.
Pole Assembly and Setup
Select strong poles for your teepee to ensure good support.
Arrange them so the weight spreads evenly. This creates a stable base.
Tie the poles tightly using laces and knots. This keeps the teepee steady as you build.
A well-built structure stands firm against wind and weather.
Solid poles and secure ties make your teepee safe and lasting.
Selecting Suitable Poles
Selecting poles for your teepee tent ensures it stays strong and works well. Four important points help you pick the right ones:
- Diameter and Length: Poles must fit your tipi size. A 20-foot tipi needs 20-foot poles.
- Durability and Flexibility: Use treated wood or carbon fiber for strength and light weight.
- Count and Arrangement: Bigger tipis need more poles. For example, a 24-foot tent uses 20 poles.
- Transport Considerations: Make sure poles are easy to carry. Long poles can be hard to move.
Good poles keep your teepee safe and steady. Choose carefully for the best camping experience.
Arranging for Stability
Start by putting the poles into the tent’s sleeves. Use double PVC or wooden poles.
Begin near the door for even pole placement. Make sure the holes in the poles point up. This helps keep the tent steady.
Lift the poles and spread them evenly on the ground. Form a round shape with the poles.
Tie a rope tightly around the top of the poles. Keep the rope tight but not too tight.
Check that the tent fabric is 3 to 6 inches above the ground. Look at the pole spread again. Adjust it if the tent feels unsteady.
This method gives your teepee a strong, balanced frame.
Securing the Structure
Securing your teepee tent keeps it strong and lasting longer. Follow these simple steps:
- Connect poles using PVC connectors. Make sure holes at the top match.
- Slide poles into the canopy sleeves. Start at the door’s left side and go clockwise.
- Lift the poles carefully. Pull fabric tight to hold poles in place.
- Tie poles at the top with strong knots. Use square or clove hitch for even tension.
This method prevents slipping and keeps your tent steady in the wind.
A well-built teepee stands firm and safe.
Covering the Teepee
Cover the teepee with strong fabric for long-lasting use. Heavy cotton duck canvas works well.
Sunforger® treated cotton fights mold and mildew. Use fabric with reinforced corners and grommets. This keeps the cover tight and stable in bad weather.
A good cover protects from rain, wind, and sun. It helps the teepee last many seasons.
Fabric Choices and Types
Picking the right fabric for your teepee tent matters a lot. You want something strong but not too heavy.
Here are good fabric choices:
- Nylon: Very light and cheap. It breaks down in sunlight unless it’s ripstop nylon.
- Polyester: Tough and easy to care for. It resists water and sun well.
- Cotton (Canvas): Lets air in and keeps warmth. Great for all seasons but heavy and needs care.
- Polycotton: Mix of cotton and polyester. Lighter than cotton but still strong.
Think about how you plan to use your tent.
Pick a fabric that lasts and feels right to carry.
Securing the Cover
Secure the fabric tightly to the teepee frame.
Tie the top of the fabric to the central lift pole.
Spread the fabric evenly around the poles.
Smooth out wrinkles carefully.
Use the “lifting pole” method for a strong hold.
Make sure the fabric faces outward.
Thread ropes through loops at the base flaps.
Stake the ropes firmly into the ground to stop sagging.
Leave a small gap at the bottom for air to flow.
This helps with ventilation and keeps the cover steady.
Adjust smoke flaps to control the airflow.
Strengthen the edges to avoid wear and tear.
Check all ties and ropes often.
Keep the cover tight and secure.
This way, your teepee stays safe and works well.
Size and Height Considerations
The right size and height of a teepee tent make all the difference. Teepees come in diameters from 3 to 9 meters. A 5-meter teepee fits 4 to 5 people comfortably.
Heights range from 6 to 27 feet. Taller tents offer better air flow and more space inside. A central fire works best in taller teepees because smoke escapes easily.
Give yourself about 2 meters (6.5 feet) of space around the tent. This space helps with safety and lets you move freely.
Bigger teepees need longer poles. More poles add stability but can make carrying and setting up harder.
Think about these points to pick a teepee that feels just right.
Location and Environmental Factors
Pick a flat, level spot for your teepee tent. This keeps it steady and makes staking easy. Additionally, remember that stability is essential for maintaining the tent’s shape and integrity during adverse weather conditions.
Stay away from places that flood. Watch how water flows in the area. Avoid thick bushes to lower fire risk.
Set up near trees or hills to block strong winds. Make sure there’s space above for smoke to escape. Point the entrance away from strong winds.
Use materials that help protect nature. Keep the ground safe by not disturbing it much. This way, your teepee stays safe, comfy, and kind to the environment. Additionally, it’s important to choose a location that is free of natural windbreaks to ensure a stable setup.
Accessories and Comfort Enhancements
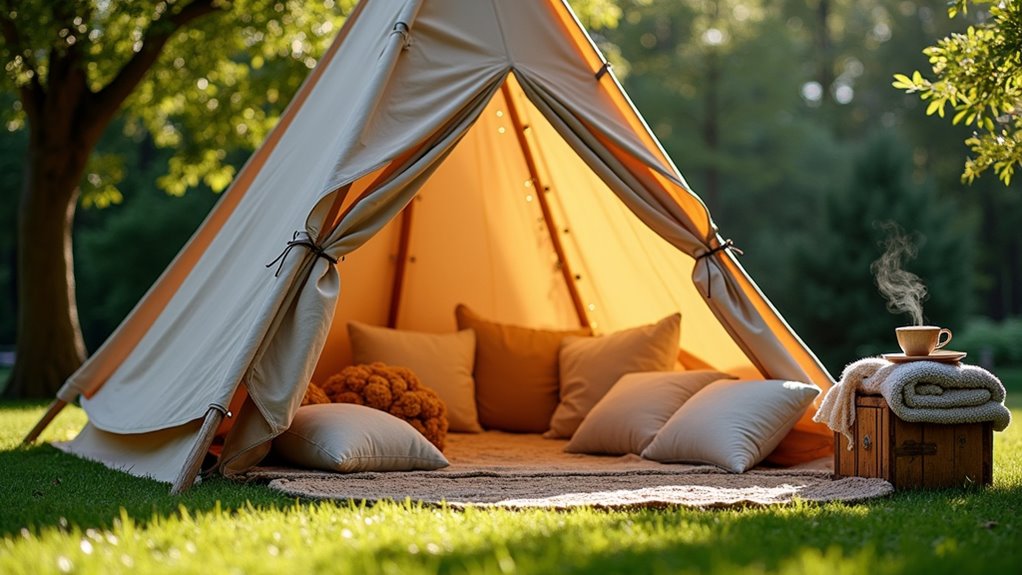
Improve your teepee tent with key accessories and comfort upgrades. Use floor mats to add cushion and block cold from the ground.
Add decorative pillows with stars or clouds for a cozy, fun look. Light the space with battery-powered string lights or lanterns. They create a warm glow without needing wires.
Use liners made of canvas or synthetic fabric. They help keep the tent warm and fresh.
These simple upgrades make your teepee more comfortable and inviting. They also add a personal touch. Enjoy your camping or gathering more with these easy improvements. Comfort and style make the space welcoming for you and your guests.
Frequently Asked Questions
How Long Does It Take to Build a Teepee Tent?
Building a teepee tent takes between 5 minutes and 2 hours. The time depends on the materials used, the tent design, and your experience. Simple tents with easy materials go up quickly. Complex designs or heavy materials take longer. Practiced hands work faster. Planning helps speed up the process. Quick setups focus on basic shapes. Detailed tents need care and patience. Always allow extra time if you are new to building.
Can Children Help in Constructing the Teepee?
Children can help build the teepee. It teaches teamwork and makes them feel proud. Give them simple jobs to do safely. Working together creates fun and lasting memories. Kids enjoy learning new skills this way. Always watch closely to keep everyone safe. Building a teepee with kids brings joy and strong bonds.
What Are the Best Fabrics for Cold Weather?
Oxford fabric keeps you warm with strong insulation. Ripstop nylon resists tears and lasts long. Polycotton balances heat well, making it comfy inside and out. These fabrics protect against cold and harsh weather. Each one has special strengths for staying warm and cozy. Perfect for chilly days and cold nights.
How Do You Maintain and Clean a Teepee?
Clean your teepee often using a mix of bleach and water. Use mild soap for hard stains. Always dry the fabric well to stop mold. Let fresh air flow inside to keep it dry. Check the fabric and poles for damage regularly. Fix small tears quickly. This keeps your teepee safe and lasts longer.
Is It Safe to Use a Fire Inside the Teepee?
Using a fire inside a teepee can be safe. Ventilation is very important. Make sure fresh air flows to avoid smoke build-up. Keep all flammable items far from the fire. A small, controlled fire works best. Always have water or sand nearby to put out flames quickly. Fires provide warmth and light but need respect and care. Follow these steps to enjoy a cozy, safe teepee fire.
Conclusion
Building a teepee tent brings creativity and practical skills together. Select strong poles and sturdy fabric for the best results. Arrange the poles in a tight circle and tie them firmly at the top. Stretch the fabric evenly around the frame to keep it stable. Pick a flat, dry spot to set up your tent. This helps it last longer and stay comfortable inside. Take your time during assembly; careful work leads to a stronger tent. Practice makes the process easier and more fun. Enjoy your new outdoor space. Let it bring you peace and happiness.