
How to Collapse a Pop-Up Tent Without Breaking It
This post contains affiliate links. As an Amazon Associate, we earn from qualifying purchases.
Collapsing a standard 8×10 or 10×10 pop-up tent requires two people working in unison to overcome the frame’s spring tension. The proven method is to clear all guy lines, lower the legs, release the roof locks, and walk the frame closed from opposite sides. Attempting this alone often results in bent legs or sheared rivets.
Hi, I’m Chloé – a tent-obsessed hiker, trail-lover, and outdoor staycation junkie. I’ve pitched more tents than I can count, and I’ve also fought my fair share of them when it’s time to go home. There’s a special kind of frustration that comes from wrestling a sprung-steel frame that’s determined to stay open. I wrote this guide so you can skip that fight entirely.
The secret isn’t muscle. It’s mechanics. Pop-up tents, especially the larger party canopies, are under constant tension. Fighting that tension alone is how you end a great day with a broken, expensive piece of gear. Let’s get yours packed away properly, so it’s ready for your next adventure.
Key Takeaways
- Manufacturer manuals for models like the 8’x10′ Pop-Up Tent (Model #159) explicitly state a two-person takedown is required. Ignoring this is the leading cause of frame failure.
- The “taco method” is a legitimate solo technique, but only for smaller, low-tension shelters like many pop-up beach tents or compact sun canopies.
- Always detach every stake and guy line first. A single taut line creates an anchor point that twists the frame, concentrating stress on a single joint.
- Never store a damp canopy. Mildew can begin forming within 48 hours in a sealed bag, ruining the fabric and its waterproof coating permanently.
- High wind is a pop-up tent’s worst enemy. Canopy manuals, like the one for MODEL CMXPUYT009C, state windy conditions are “no place for a pop-up canopy” due to uplift risk.
The Manufacturer-Approved Two-Person Method
For any pop-up tent over roughly 6×6 feet, this is the only safe method. It’s not a suggestion; it’s a requirement built into the physics of the scissor-hinge frame.
Depress the leg lock button, then carefully lower the leg. Repeat for all four legs, keeping the canopy top on. Ensure all legs are level with the ground before proceeding to fold the frame.
Direct excerpt from the Standard Pop-Up Canopy manual.
The goal is to collapse the frame evenly, so no single joint bears disproportionate force. Here’s the step-by-step process, synthesized from manuals for brands like Eurmax and E-Z Up.
- Clear the Stage. Remove all interior items. A forgotten lantern or water bottle becomes a hard pivot point under the fabric. When you fold the frame, that concentrated pressure can kink an aluminum leg, a flaw most warranties won’t cover. Then, detach every single stake and guy line. A staked corner cannot move, forcing the opposite corner to over-extend and likely fail.
- Lower the Legs. Locate the release mechanism on each leg, usually a push-button or toggle lock. With your partner, work your way around the tent, depressing the button and lowering each leg to the ground. Keep the canopy fabric attached and lying flat. All four legs must be level before moving on.
- Release the Roof Locks. Find the primary locking mechanisms at the corners or central hub. On an E-Z Up Instant Shelter, this is the Auto Slider® Pull Pin. Critical step: you must push up on the truss near the pin to relieve spring tension before releasing it. Yanking it directly can cause it to snap back violently, a classic finger-pincher.
- Walk It Closed. Stand opposite your partner. Each of you grab the frame at a top corner or a marked “X” point. Lift slightly to take the weight off the ground and walk steadily toward each other. The frame will begin to fold. Stop when it’s halfway. Now, each grab a set of legs and continue walking inward until the frame is fully collapsed. Secure it with the built-in strap.
TL;DR: Two people, clear all anchors, lower legs evenly, release roof locks with care, then walk the frame closed in a coordinated move.
Why Does a One-Person Takedown Break the Frame?
The design that makes these tents “pop up” effortlessly is the same thing that makes them fight you on the way down. The scissor-hinge frame is pre-tensioned. Closing it requires applying opposing force on two sides at once.
When you try alone, you can only push or pull from one side. The other side drags, jams, or lifts unevenly. This torque is focused on the weakest point: the thin aluminum tubing at the joint. I learned this not with a generic tent, but with a specific 2021 Eurmax 10’x10′ Classic Party Canopy I’d bought for tailgates. I was alone, in a hurry, and sure I could manage. I got one side folded, but the opposite corner dug into the grass. I pulled harder. A sharp crack echoed, not a pop. The rivet holding the scissor arm sheared clean off. Eurmax quoted me $85 for a new corner assembly, plus shipping, which was more than half what I’d paid for the tent on sale. I had to junk it.
Common mistake: Attempting a solo collapse on a large party canopy, the uneven torque typically shears a rivet or kinks a leg at the joint, a repair that often costs 50-75% of a new tent.
For a true one-person job, you need a tent engineered for lower tension, like the Coleman Instant Cabin series. The trade-off is that they don’t “pop” open with the same satisfying speed. The high-tension frame of a standard Eurmax or E-Z Up Odyssey is designed for speed and stability, which demands a two-person collapse.
| Tent Type & Size | Safe Takedown Method | Primary Risk of Solo Attempt |
|---|---|---|
| Small Sun Shelter (4×4 ft to 6×6 ft) | One Person (Taco Method) | Low – Minimal frame tension, manageable alone. |
| Standard Party Canopy (8×8 ft to 10×10 ft) | Two People (Walk-In Method) | High – High spring tension leads to bent legs or sheared rivets. |
| Large Event Canopy (12×12 ft+) | Two or More People | Very High – Potential for catastrophic, irreparable frame failure. |
The Solo “Taco Method” for Small Tents
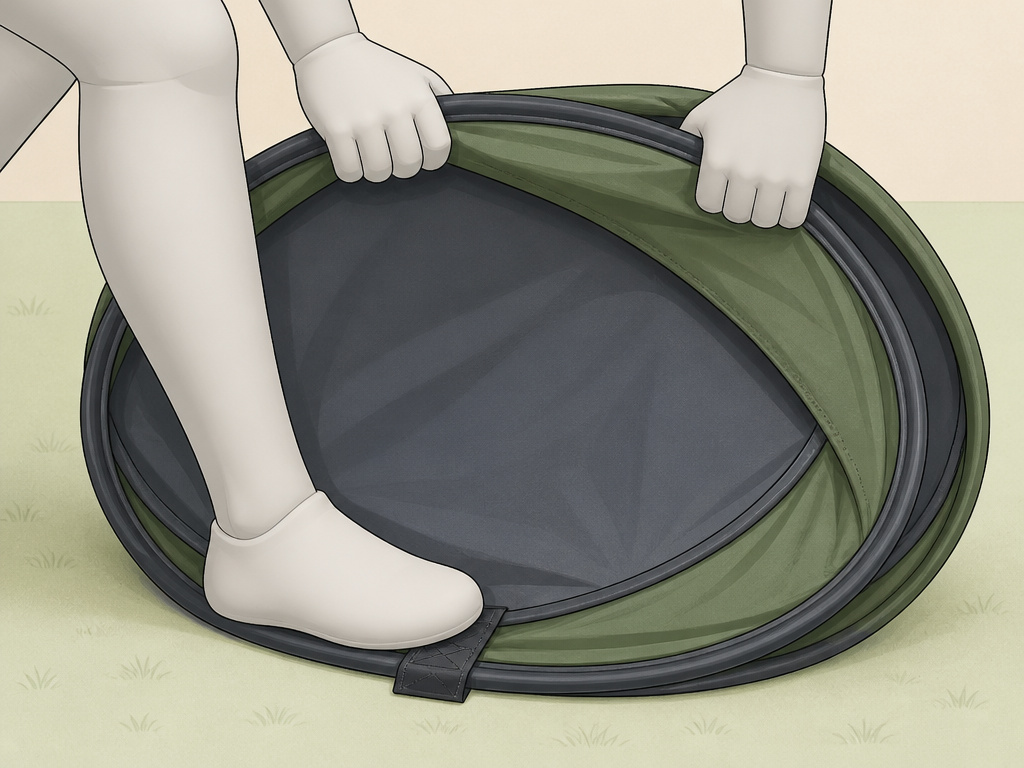
If you’re packing a smaller, lighter pop-up tent, like many two-person tents or beach sunshades, the formal two-person method is overkill. The “taco method” is the field hack that works.
I’ve used this countless times with my smaller pop-up tents for the beach. It uses your body weight to counter the light frame tension. Here’s how:
1. Clear the tent and detach any stakes.
2. Grab the bottom corner of the fabric on one end. Walk it over to the adjacent corner, creating a fold. Continue around the perimeter until the tent forms a long, narrow crescent, your “taco.”
3. Identify the side with the sewn-in base or strap loops (this is the spine). Place this side firmly on the ground.
4. Step on the base with your foot to pin it. This is non-negotiable; it’s your anchor.
5. With both hands, lift the top arc of the taco and fold it over onto itself. You’ll create two stacked circles of fabric.
6. Slide one circle over the other and secure the bundle with its attached straps.
It takes 30 seconds with practice. The key is that foot on the base. Without that counterweight, the whole thing will squirm away like a live fish.
What to Do Before You Start Folding
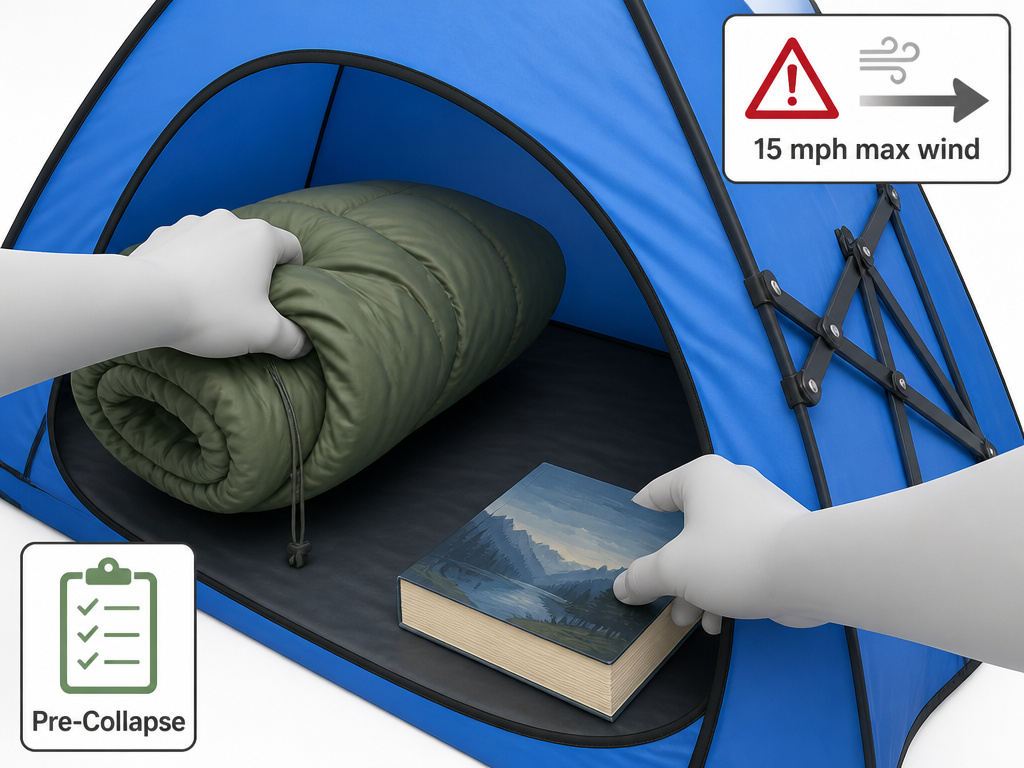
The collapse is the finale. The real work, and the real risk prevention, happens before you touch a single release button.
Here’s the pre-collapse checklist that separates a smooth pack-up from a disaster:
* Strip It Bare. Remove every single item from inside. This includes sleeping bags, pads, and even that paperback novel. Hard objects left inside create pressure points that dent or warp the frame during folding.
* Release All Anchors. Untie every guy line, unclip every rainfly attachment, and pull up every stake. A single taut line acts as an anchor, preventing that corner from moving and concentrating all the folding force onto one joint.
* Brush Off Debris. Give the canopy a good shake. Sand, pine needles, and grit trapped in the folds will act like sandpaper against the fabric during storage and transport, wearing down the waterproof coating and weakening the material.
* Check the Wind. Never attempt to fold a canopy in winds over 15 mph. The uplift force turns it into a sail. The manual for MODEL CMXPUYT009C is blunt: high wind is “no place for a pop-up canopy.” Take it down before the gusts pick up.
Before you start: The two primary hazards are pinched fingers from sudden frame movement and musculoskeletal strain from improper lifting. Always communicate with your partner, keep fingers clear of scissor hinges, and lift with your legs, not your back, when handling the folded frame.
If you use guy lines for stability (a smart move), secure them correctly. The same manual specifies a minimum distance of 3 ft (0.9 m) from each leg. This angle provides optimal leverage against wind lift, a useful tip for any tent setup tips in breezy conditions.
How to Dry and Store Your Tent Properly
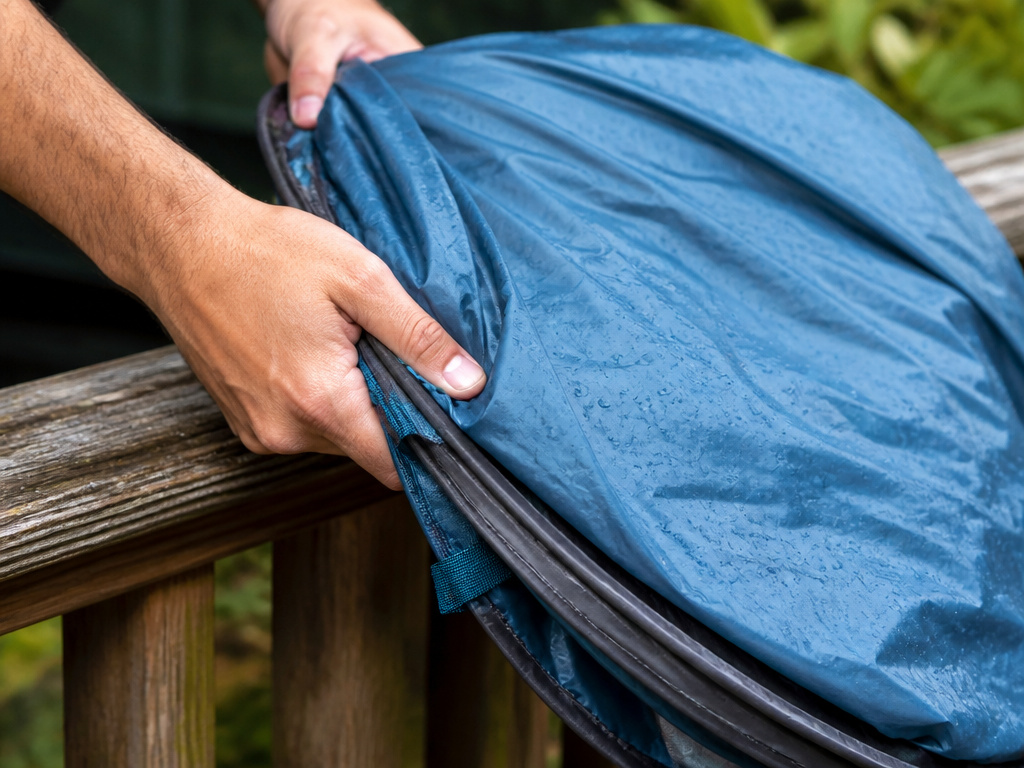
So you’ve folded it perfectly. Great. Now, if you zip it into the bag while it’s damp, you’ve just wasted all that effort. Drying and storage isn’t an afterthought; it’s the step that determines if you have a functional tent next season.
Immediately after collapse, if the fabric is damp from rain, dew, or condensation, you must dry it completely. Do not pack it away.
* Hang the canopy over a railing or clothesline.
* Lay it flat on a dry, sunny patch of grass.
* Drape it over chairs in a well-ventilated garage.
This is critical for car camping tents that often deal with morning dew. The inside condensation is more than enough to start mildew.
Never fold or store the canopy when it is wet or damp. Mildew will grow on the fabric and the polyurethane coating will break down.
Paraphrased from the 8 FT x 10 FT Pop-Up Tent (Model #159) and other OEM manuals.
If you’re forced to pack damp (like in a rainstorm), your first task upon arriving home is to unpack it. Hang it indoors with a fan blowing on it. I learned this lesson the hard way with a slightly damp beach shelter stored for a week in a warm garage. The musty smell never left, and black mildew speckles permanently dotted the roof.
For long-term storage, keep the bag in a cool, dry, climate-controlled place. Avoid attics and sheds where extreme heat can degrade the fabric’s coatings and weaken the elastic cords in the frame.
Troubleshooting a Stuck or Malfunctioning Tent
Look, sometimes a tent just won’t budge, even if you’ve followed the manual to the letter. (I’ve been there, muttering under my breath.) It’s not you, well, usually it’s not you. Think of the frame like a stubborn, folded lawn chair that’s caught a piece of its own fabric. The solution isn’t force; it’s a systematic diagnosis.
- One corner won’t lower. Likely a bent leg or a seized lock button. Inspect the metal for a kink. If the button is stuck, a quick spray of dry silicone lubricant (not WD-40, which attracts dirt) on the mechanism can free it.
- The roof locks won’t release. The spring tension is still too high. Have your partner push up on the center of the canopy roof while you try the release. This relieves pressure on the pin or toggle.
- The frame folds unevenly. The canopy fabric is almost certainly snagged on a frame joint. Stop, partially re-open the frame, and walk around to ensure the fabric is lying perfectly flat without twists or catches.
- The tent is “springy” and wants to re-open. You missed a secondary lock. Go around the frame a second time, checking all four corners and any central hub locks. Many models have more than one locking point.
For persistent issues, always consult your specific manual. The process for an E-Z Up with its Auto Slider® Pull Pin differs from a generic pop-up tent model. Forcing a mechanism designed for a specific release pattern is a shortcut to a broken tent.
Frequently Asked Questions
Can you really not collapse a pop-up tent by yourself?
You can collapse a small, low-tension pop-up tent (like a 4-person beach shelter) by yourself using the taco method. For any standard 8×10 foot or larger party canopy, the manufacturer’s instructions explicitly require two people. The manual for the 8 FT x 10 FT Pop-Up Tent (Model #159) doesn’t suggest it; it states the canopy “will not easily close” with one person due to the frame tension.
What’s the most common reason a pop-up tent won’t collapse?
The top three reasons are, in order: 1) A guy line or stake is still attached, anchoring a corner. 2) A roof locking mechanism (like a pull pin or toggle) is still engaged. 3) You are attempting a solo collapse on a tent that requires two people, creating unbalanced force. Always check these before applying more muscle.
How do you fix a pop-up tent that is stuck open?
Stop forcing it. Partially re-open the tent if possible. Clear any debris from the scissor joints and ensure no canopy fabric is pinched in the hinges. For stiff leg lock buttons, apply a dry silicone spray. If a roof lock is stuck, have a helper lift up on the canopy’s center to relieve tension before you try the release again. Never hammer or use excessive leverage.
Is it okay to leave a pop-up tent set up for a week?
For short-term use at a multi-day event, it’s generally fine if it’s properly secured with stakes and guy lines. However, UV radiation from prolonged sun exposure breaks down the fabric and plastic components much faster than you’d think. For permanent or semi-permanent shade, invest in a structure made from UV-stabilized materials.
What is the absolute best practice for off-season storage?
Ensure the canopy is bone-dry. Fold it loosely following its natural seams, don’t cram it. Store it in its original carry bag (or a larger breathable bag) in a cool, dry, indoor space like a closet. Avoid damp basements and hot attics, as both extremes accelerate material degradation.
The Bottom Line
Collapsing a pop-up tent isn’t a test of strength; it’s a lesson in following the frame’s engineered sequence. For the large canopies that are staples of tailgates and backyard parties, that means recruiting a partner. The coordinated, two-person walk-in method protects what is often a $200+ investment.
Remember, the prep work, clearing the site, releasing every anchor, and lowering legs evenly, is what prevents the most common and costly failures. The solo taco method is a brilliant hack for your smaller pop-up beach tents, but never try to hero your way through a takedown meant for four hands.
Finally, treat drying and storage as part of the takedown process, not an afterthought. An hour of air-drying time is a cheap insurance policy against buying a replacement from our list of the best tents under $100 next season. Your future self, pulling out a fresh-smelling, ready-to-go canopy, will be grateful you took the care.
