
How to Create Name Tents in Word: A Pro’s Guide
This post contains affiliate links. As an Amazon Associate, we earn from qualifying purchases.
To create reliable name tents in Word, build a custom 2×1 table template with 0.5-inch margins and a 3.75-inch row height. Format your text, duplicate the table, and rotate the text in the lower copy for the second side. Print double-sided using your printer’s manual feed tray for card stock. This method overcomes the alignment failures of the built-in Avery 5305 label template, which often prints crooked on home printers.
Most tutorials point you to the Labels feature. I learned to distrust that the hard way. Preparing for my Dacia Adventure crew’s annual trailhead potluck, I trusted the Avery 5305 template, printed 40 tents on expensive 110 lb. card stock, and ended up with a pile where every name was crooked by a quarter-inch, a total waste of $12 in paper and an hour of my time.
This guide covers the two methods I now swear by: a rock-solid manual template for small batches and a mail merge process for big events. We’ll also tackle the physical reality of printing, from paper choice to the printer settings that actually work.
Key Takeaways
- Ditch the built-in Avery 5305 template. A custom table locks text position and guarantees fold alignment.
- For mail merge, you must use Mailings > Start Mail Merge > Labels to enter the correct mode, not just the standalone Labels button.
- Always run a single-page test on plain paper first. Fold it and hold it to a light to check alignment before using card stock.
- If text won’t rotate with its text box, right-click the box, choose Format Shape, go to Layout & Properties, and uncheck “Do not rotate text.”
- Feed card stock through your printer’s manual feed tray or bypass slot to prevent jams and ensure correct second-side orientation.
Before you start: Printing on thick card stock can cause paper jams in auto-feeders, wasting material. Manually feeding sheets gives the printer’s rollers a straight path. Also, a misconfigured duplex setting can print the second side upside-down, ruining a batch. Always do a two-sheet test first.
Why Do Most Name Tent Tutorials Fail?
They start with a logical shortcut: use Word’s Labels feature and select “Avery 5305 – Tent Card.” The template appears perfectly aligned on your screen.
The failure happens in the physical handoff between software and hardware. Your printer has a non-printable margin, a tiny border where it can’t put ink. Printer drivers interpret Word’s template coordinates differently, shifting elements to fit this margin. When you fold the printed sheet, the top and bottom halves drift out of alignment. The name on one side sits higher than on the other, creating a sloppy, crooked tent.
The solution is to remove that variable. You create your own layout within a universally safe printable area, using tools that respect your specific printer’s limits.
Common mistake: Using the default Avery 5305 template without a test print, the driver shift can misalign the fold by 1/8 inch, making an entire batch look unprofessional.
TL;DR: Abandon the pre-made label template. Build your own layout using Word’s gridlines and tables for guaranteed post-fold alignment.
What’s the Most Reliable Manual Method for Small Batches?
This three-step process gives you complete control and is my go-to for any event under 20 people. It uses a table, which is far more stable than floating text boxes.
1. Establish Your Safe Zone
Open a new Word document. Navigate to Layout > Margins > Custom Margins. Set Top, Left, Right, and Bottom to 0.5 inches. This creates a safe buffer zone almost every consumer printer can handle.
Next, go to the View tab and check the Gridlines box. A light grid will overlay your page, revealing the underlying structure and helping you visualize symmetry and center points. This is your blueprint.
2. Build the Tent Structure with a Table
Click Insert > Table and create a table with 2 columns and 1 row. With the table selected, go to Table Design > Borders and choose “No Border.” You now have an invisible, rigid container.
Right-click the table, select Table Properties, and go to the Row tab. Check “Specify height” and set it to 3.75 inches. This creates the tall, narrow cell perfect for a name.
Type your first name into the left cell. Format it with a clean, sans-serif font like Arial or Calibri at 48 pt or larger, and center it horizontally.
A table cell acts like a tent peg, locking content in place relative to the page margins. Text boxes can drift when copied; tables hold firm. It’s the difference between a secure guyline and one that slips in the wind.
3. Duplicate, Rotate, and Prepare for Print
Select the entire table by clicking its handle (the small box that appears when you hover near the top-left corner). Copy it (Ctrl+C), move your cursor just below the first table, and paste (Ctrl+V).
Now, click inside the second (bottom) table. Under the Table Layout tab, find the Text Direction button. Click it twice. The text in the bottom cell should now be upside-down relative to the top cell.
Before printing, return to the View tab and uncheck Gridlines for a clean preview.
TL;DR: Use a 2×1 table with a fixed 3.75-inch height as your name cell. Duplicate it and flip the text direction in the lower copy to create the second side.
| Step | Critical Action | Pro Reason |
|---|---|---|
| Set Safe Margins | All margins to 0.5 inches. | Creates a universal buffer zone your printer won’t clip. |
| Build Container | Insert a 2×1 table with no borders. | Provides a rigid frame that prevents text drift during layout. |
| Fix Cell Height | Set row height to 3.75 inches. | Creates the ideal proportion for a standard folded tent. |
| Flip Bottom Text | Use Table Layout > Text Direction. | Ensures text reads correctly on both sides after folding. |
How Do You Handle Mail Merge for 50 or More Names?
For a conference, wedding, or large workshop, manual entry is impractical. Mail merge is essential, but it has a notorious quirk you must navigate. I learned this during a trail-conservation fundraiser where I printed 70 tents, and every single one had the same name on both sides.
First, prepare your data in an Excel sheet or Word table with a column titled “Name.” Save it.
In a new Word document, initiate the merge correctly: go to Mailings > Start Mail Merge > Labels. This specific command path is crucial.
In the Label Options dialog, choose Avery US Letter as the vendor and 5305 – Tent Card as the product number. Click OK. Word generates a page of cells.
Now, link your data via Mailings > Select Recipients > Use an Existing List.
Here’s the critical bug workaround. Click “Update Labels.” Word inserts the «Name» merge field into the first cell, then mindlessly copies it into every other cell. You must manually delete the merge fields from all the even-numbered cells (cells 2, 4, 6…). These represent the “back” of your tents. If you skip this, every side will show the same name, just like my fundraiser fiasco.
Preview your results. The odd cells should show sequential names; the even cells should be blank. Finish the merge to a new document. Finally, copy the entire first page of names, paste it onto a second page, and rotate that second page’s text 180 degrees using the Text Direction button.
TL;DR: Use Start Mail Merge > Labels, pick Avery 5305, link your list, and manually delete the extra «Name» fields from all even cells before finalizing.
What Are the Non-Negotiable Printer and Paper Settings?
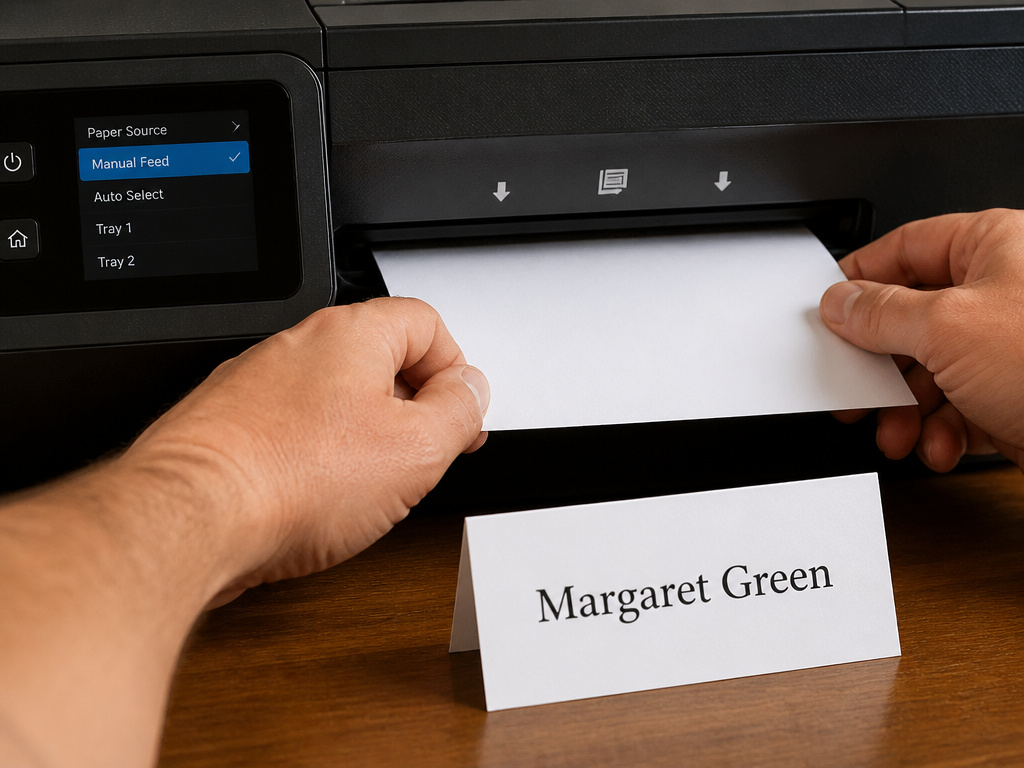
You’ve nailed the digital layout. The printer can still sabotage you. That faint crinkle-thump from the auto-feeder is the sound of card stock getting mangled.
Standard 20 lb. copy paper is too flimsy. It wilts on the table. You need the rigidity of card stock. For reliable results, I use Neenah Exact Index 110 lb. because its bright white finish makes black text pop and it feeds cleanly. If your printer is older, like a Brother HL-L2350DW laser, stick to 65 lb. stock to prevent jams.
Feeding is the next hurdle. Always use your printer’s manual feed tray or single-sheet bypass slot. The paper path is shorter and straighter. In Word’s Print dialog, click “Printer Properties” and set the Paper Source to “Manual Feed.”
Now, configure duplex printing. Under Settings in the main Print window, select “Print on Both Sides” and choose “Flip on long edge.” This matches the top-to-bottom fold of a tent card.
If your printer lacks a manual feed slot, fan the stack of card stock, load only 5 sheets into the main tray, and select the “Thick Paper” or “Card Stock” media setting. This reduced jams on my old Canon MX922 from 1 in 3 to 1 in 20.
| Symptom | Root Cause | Tested Fix |
|---|---|---|
| Text is upside-down after folding. | Duplex set to “Flip on short edge.” | Re-print with “Flip on long edge” selected. |
| Frequent paper jams with card stock. | Using the auto-document feeder. | Switch to the manual feed tray or bypass slot. |
| Print quality is faint or blurry. | Inkjet on porous paper without correct setting. | In Printer Properties, set Media Type to “Card Stock” or “High Quality.” |
| Second side print is misaligned. | Pages reinserted incorrectly for manual duplex. | Mark the top corner of your test stack with a pencil before printing side one. |
How Do You Fix Common Text Rotation and Merge Bugs?
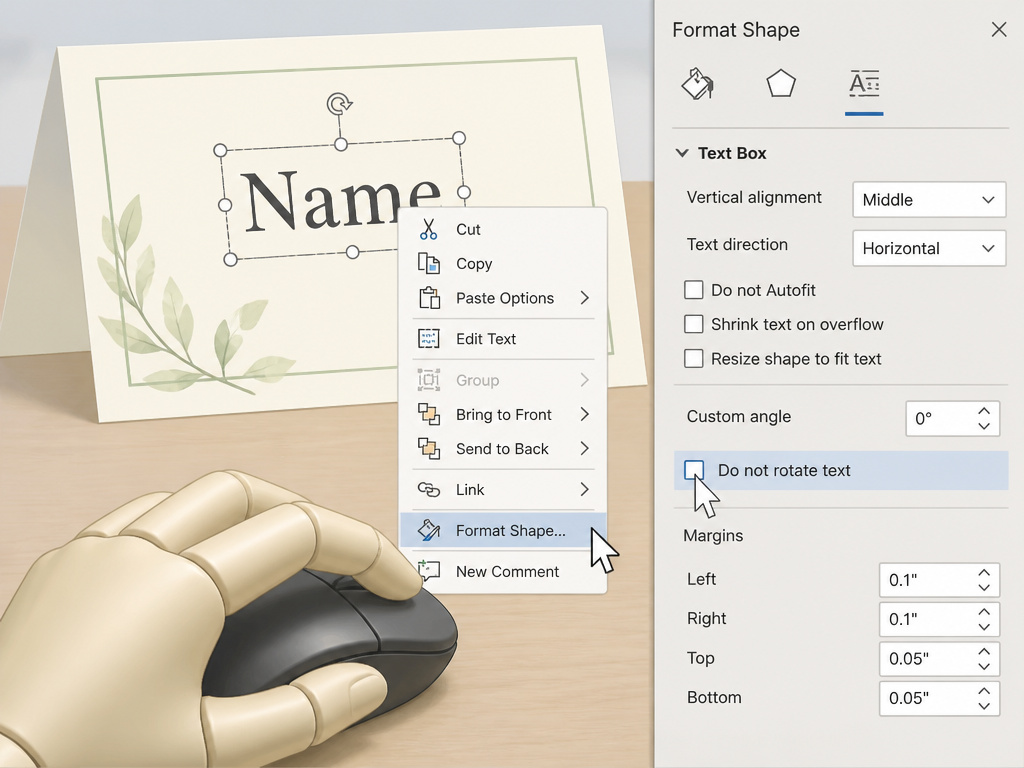
Sometimes, the bottom text refuses to flip with its container. This is a formatting lock.
Right-click the problematic text box or table cell and select “Format Shape.” In the pane, click the Layout & Properties icon. In the Text Box section, find and uncheck the box labeled “Do not rotate text.” Click OK. Your text will now obey the rotation command.
For mail merge, if names are repeating on the back side, you didn’t delete the extra merge fields. Return to your source label document. The even-numbered cells (2, 4, 6…) must be completely empty. If they contain «Name», delete those field codes.
If your printer prints the second side on separate sheets, the duplex setting is off at the driver level. In Printer Properties, look for a dedicated “Duplex” or “Two-Sided Printing” toggle and enable it there. For specific driver guidance, a resource like the UMA Technology document formatting guide can be helpful.
What Design Choices Boost Readability and Style?
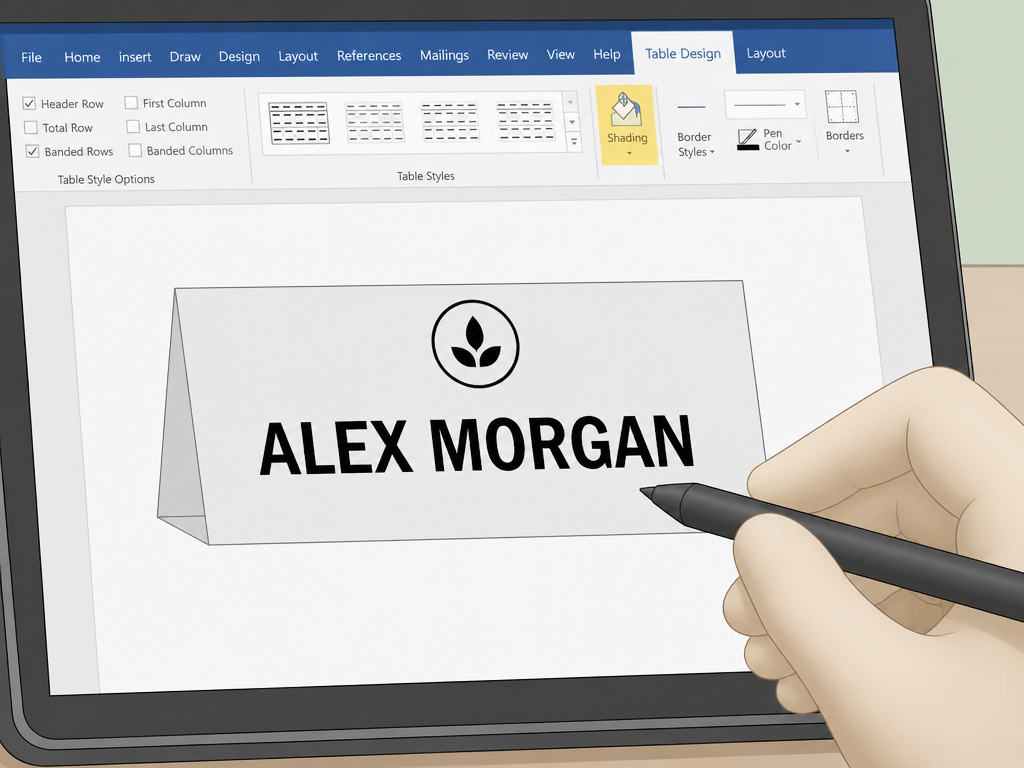
Function is key, but a polished tent sets a professional tone, much like choosing the right tent camping accessories completes a setup.
Font size is critical. For a table tent viewed from a few feet away, 24 pt is the bare minimum. I use 36 pt or 48 pt as my standard. For a large meeting hall, go larger. Stick to high-contrast, sans-serif fonts like Arial, Calibri, or Helvetica. They’re legible at a distance. Avoid script fonts for anything under 36 pt.
Add subtle branding. Insert a small, centered logo or icon above the name using Insert > Icons. Keep it monochrome and simple. This adds polish without clutter.
For color, avoid colored text. Instead, use the Shading tool on your table cell. Select the cell, go to Table Design > Shading, and pick a very light gray (10% tint) or pastel. This provides a colored background without sacrificing readability, ensuring your tent lighting solutions or other key details are visible to all.
Frequently Asked Questions
What paper weight should I use for name tents?
Use card stock between 65 lb. and 110 lb. weight. Lighter paper won’t stand upright; heavier stock may jam in some printers. Neenah Exact Index 110 lb. is a reliable, bright-white option for most inkjet and laser printers.
Can I use pre-cut Avery 5305 tent cards?
Yes, but still create a custom template. The built-in Word template often misaligns. Measure a blank card (typically ~3.5″ x 4″) and create a table with matching cell dimensions, then follow the standard duplication and rotation steps.
My text box rotates, but the text inside stays upright. How do I fix it?
The text box has a formatting lock enabled. Right-click the box, choose Format Shape, navigate to Layout & Properties > Text Box, and uncheck the option that says “Do not rotate text.”
How do I print double-sided without an auto-duplex printer?
In Word’s Print dialog, choose “Print on Both Sides” and select “Manually Print on Both Sides” when prompted. Word prints the odd pages first. You then take the stack, flip it over, and reinsert it so the top edge goes in first and the printed side faces up to print the even pages.
What’s the best method for over 100 name tents?
The mail merge method is the only efficient choice. After merging, copying, and rotating the second page, use your printer’s manual feed tray. Always conduct a 2-page alignment test on plain paper first, this habit saves most of your tent camping equipment budget from waste.
Can I add a logo automatically through mail merge?
Not easily with basic Word mail merge, which handles text fields, not images. The advanced method requires adding image paths to your data source. For simplicity, add your logo as a static image to the template itself before starting the merge.
Before You Go
Creating flawless name tents in Word is about asserting control over default settings. The built-in Avery template and the standard Labels feature introduce variables your printer doesn’t respect. The solution is to bypass them.
Build your own stable template with a 2×1 table and safe margins. For large jobs, master the mail merge process, remembering to delete those duplicate fields. Never send precious card stock to the printer without a plain-paper alignment test first.
The result is a crisp, professional tent that stands straight and reads clearly, a small detail that, like choosing durable canvas tents over flimsy ones, signals quality and care. Whether you’re outfitting a boardroom or a trailhead gathering, that attention to detail makes all the difference.
