
Remove Mold From a Canvas Tent Without Ruining It
This post contains affiliate links. As an Amazon Associate, we earn from qualifying purchases.
To safely remove mold from a canvas tent, apply a 1:1 white vinegar and water solution, let it dwell for 30 minutes, scrub gently, rinse thoroughly, and dry the tent completely before applying a dedicated waterproofing treatment like 303 Fabric Guard. This process kills spores without damaging the canvas fibers or its protective coatings.
I learned this protocol the hard way on my old Teton Sports Mesa Canvas Tent. After a soggy Lake District trip, I panicked at the black speckles and sprayed them with a full-strength bleach cleaner. The spots vanished, but a year later, during a downpour in the Peaks, the tent’s polyurethane coating peeled off in sheets. I spent that night in a damp hostel, £200 poorer. Most guides miss the critical link: the cleaning agent that kills mold also strips or compromises the waterproofing. That’s why the drying and sealing steps aren’t just follow-ups, they’re the actual repair.
This is your rescue manual. We’ll cover the pantry-staple fix, when to escalate to pro-grade products, and exactly how to restore your shelter’s storm-ready finish.
Key Takeaways
- A 50/50 white vinegar and water solution is your safest, most effective first strike against surface mold, killing spores without harming the canvas.
- Complete, bone-dry drying is non-negotiable. Cotton canvas stored damp can start growing new mold within 24 to 48 hours.
- Re-waterproofing is mandatory, not optional. Cleaning opens the canvas fibers, making your tent temporarily absorbent.
- Some stains are permanent but harmless. If the musty smell is gone, the mold is dead, and your tent’s performance is intact.
- For deep mold where fibers are already damaged, cleaning may not restore full waterproof integrity, and replacement should be considered.
Why Is Vinegar the Go-To for Canvas Mold?
Bleach is a brute-force oxidizer. It attacks the organic growth but also the cotton or polyester fibers in your canvas and the chemical bonds in its waterproof coating. Vinegar, an acid, changes the surface pH to a level where mold spores cannot survive. It’s lethal to the organism but gentle on the fabric’s long-term strength.
The YouTube restoration community consistently lands on this one-to-one ratio after testing harsher options. One creator restoring a mildewed camper canvas noted, “after just a few minutes of letting this solution sit… pretty significant difference… looks like we’re on the right track.” The visual proof is immediate.
Using full-strength bleach or an undiluted “outdoor” mold remover, the mold vanishes, but the canvas loses its waterproofing. The tent will leak on your next trip, often within a season, and the fabric may become brittle and tear at stress points.
You’ve succeeded when the musty, damp smell disappears after drying. Visual stains, especially on lighter canvas, might linger. Teton Sports confirms this is normal and does not affect the tent’s durability. The goal is to kill the organism, not achieve museum-grade whiteness.
TL;DR: Stick with a 1:1 vinegar-water solution. It’s the proven method to kill mold without sacrificing your tent’s weatherproofing or strength.
Can You Clean Mold With Just Vinegar? (A Step-by-Step Guide)
So, you’ve spotted the first ominous black specks. This is your action plan for surface mold, the kind that appears after a single damp packing job. You’ll need a sunny, breezy day. Attempting this in humidity is a recipe for immediate re-infestation.
Before you start: Wear gloves and eye protection. While vinegar is mild, you’re still dealing with mold spores, which can irritate skin and lungs. Work in a well-ventilated outdoor area.
- Pitch the tent outdoors. Find a dry, grassy spot or lay down a tarp. You need full access and maximum airflow, so open every door, window, and vent.
- Mix your solution. In a spray bottle or garden sprayer, combine equal parts white distilled vinegar and water. For an extra antifungal punch, add 10 drops of tea tree oil, a potent natural fungicide, and shake gently.
- Apply, generously. Soak the moldy areas until the canvas is saturated. Pay extra attention to seams, corners, and the roof, which are notorious moisture traps. Don’t just mist the surface.
- Let it dwell. Walk away for 30 minutes. Seriously, go have a coffee. This wait is critical, allowing the acid to penetrate and murder the spores at the root. Scrubbing now is wasted effort.
- Scrub gently. Use a soft-bristled brush. The brush material matters: for a silicone-coated canvas, use super-soft horsehair to avoid scratches; for a PU-coated tent, a medium-nylon brush is safe. Use circular motions to lift the dead mold.
- Rinse everything. Use a garden hose with a gentle spray to flush the tent from top to bottom. Residual vinegar can interfere with the waterproofing treatment you’ll apply next.
- Air dry, utterly. Leave the tent pitched in full sun. Touch the canvas in several spots, especially thick seams. If it feels cool or damp anywhere, it’s not done. This can take 4 to 8 hours.
The most common restoration error is impatience during drying. I’ve seen a tent packed at 95% dryness develop a full map of new mold within 48 hours. If you can’t commit to a full dry day, wait until you can.
When Should You Escalate to Heavy-Duty Cleaners?
Your tent looks less like a shelter and more like a biology project. That’s when you graduate from pantry staples. For severe, set-in mold, manufacturers have specific, powerful recommendations.
Stout Tent advises using Marine31 Cleaner, diluted 50/50 with water and applied with a pesticide sprayer for even coverage, about one gallon per tent. These formulas are engineered to be tougher on organic growth while being slightly kinder to technical fabrics than hardware-store bleach.
After such an aggressive clean, especially if you’ve had to power-wash, the reproofing requirement jumps. Stout Tent suggests adding an extra gallon of 303 Fabric Guard to the standard application to rebuild the compromised water barrier.
| Cleaning Scenario | Recommended Product | Post-Clean Priority |
|---|---|---|
| Light, fresh surface mold | White vinegar & water (1:1) | Standard re-waterproofing (e.g., 303 Fabric Guard). |
| Moderate to heavy staining | Marine31 Cleaner (50/50 dilution) | Aggressive re-waterproofing; extra product needed. |
| Deep mold with fiber damage (fabric discolored throughout) | Professional assessment | Waterproofing may fail; fabric integrity could be compromised. |
The choice often hinges on your tent’s value. A vintage wall tent justifies the investment in specific products like CanvasCare Waterproofer. For a modern blend, starting with vinegar is wise. When selecting new gear, reading detailed canvas tent reviews can help you choose models known for durability and easier maintenance.
TL;DR: For severe cases, use a dedicated cleaner like Marine31. Follow with a heavier re-waterproofing treatment to compensate for the deep clean.
How Do You Re-Waterproof a Tent After Mold Removal?
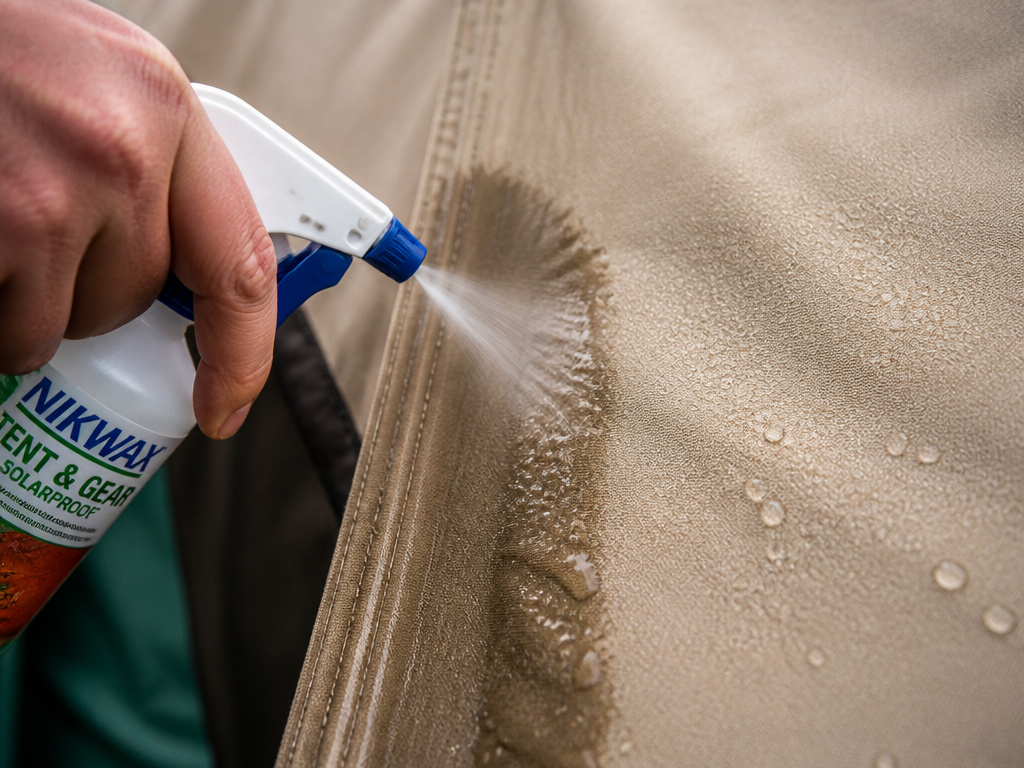
This is the step that makes or breaks the rescue. Cleaning, even with vinegar, opens the canvas fibers and can remove the factory-applied waterproofing. Skip this, and your pristine tent will soak up rain like a towel.
Most liquid waterproofers cover roughly 5-6 square meters per liter, but thick canvas drinks more. Manufacturer guidelines are essential. Stout Tent’s protocol for 303 Fabric Guard is precise: about 2 gallons for the tent top, plus an extra gallon for sidewalls and seams, applied with a sprayer for uniformity.
The Re-Proofing Process
- Confirm absolute dryness. The canvas must be bone-dry. Any residual moisture blocks the waterproofing agent from bonding.
- Prepare your product. Some, like Stimex liquid (recommended by Psyclone Tents), are ready-to-use. Others require dilution. Read the label.
- Apply evenly. Using a sprayer, apply in steady, sweeping motions. Hit every exterior surface, doubling down on seams and stitch lines, the primary leak points.
- Let it cure. Allow the treatment to dry completely per the instructions, usually a few hours in good conditions. Don’t pack it away until dry to the touch.
Arid climates pose a unique challenge. If reproofing in extremely dry air, Stout Tent suggests lightly misting the canvas with water first and letting it mostly dry. This pre-hydrates the fibers so they accept the treatment evenly, preventing a blotchy, ineffective coat.
Common mistake: Waterproofing in cold or damp conditions, the product won’t cure properly, resulting in a sticky, uneven coating that attracts dirt and fails to bead water. Always work above 50°F (10°C).
TL;DR: Reproofing is mandatory. Use a product like 303 Fabric Guard on perfectly dry canvas and let it cure fully before storage.
What’s the Best Way to Stop Mold From Returning?
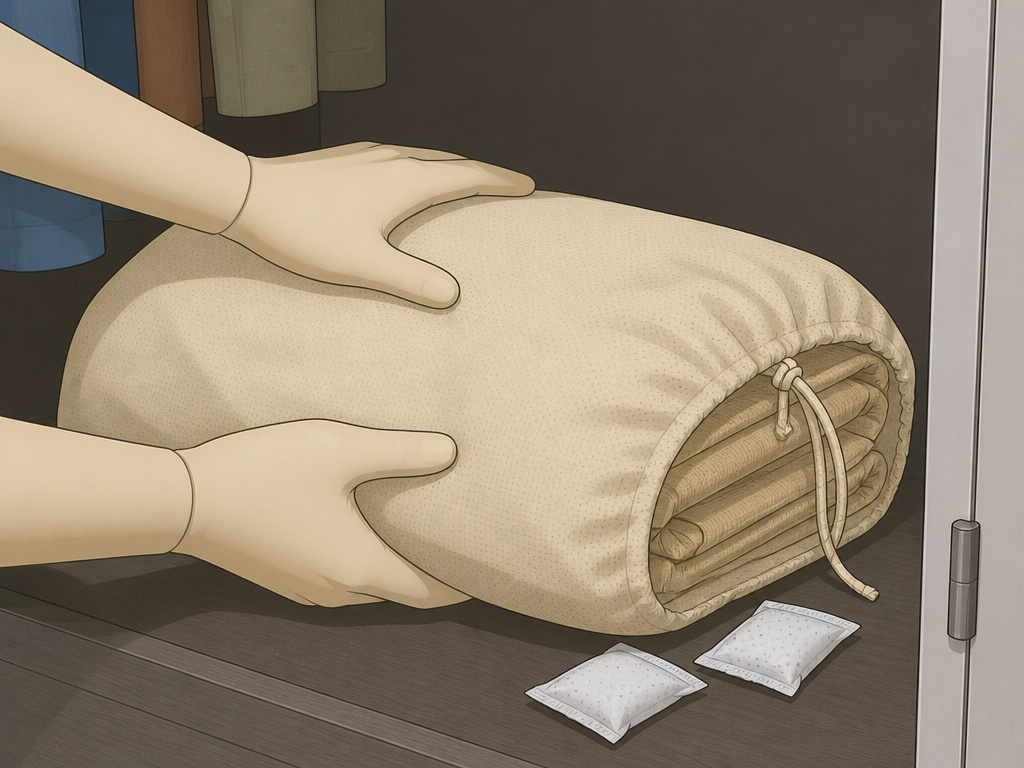
Killing mold is reactive; preventing it is proactive. The rule is brutal but simple: never pack away a damp tent. According to VDL Hapro, a cotton canvas stored damp can start forming new mold within 24 to 48 hours.
Make drying your non-negotiable unpacking ritual. Got home in the rain? Pitch it in the garage with fans blasting. Had to pack it wet on the road? Unpack it at your first chance, even if it’s under car headlights at a rest stop.
Long-Term Storage Strategy
- Environment: Choose a cool, dry place. A damp basement or hot attic are the worst options.
- Bag: Use a breathable storage sack, never a plastic bin, which traps residual moisture.
- Aid: Toss in a couple of silica gel desiccant packs to control ambient humidity.
Your campsite habits also help. A full-coverage groundsheet reduces moisture wicking into tent walls. Prioritizing tents with excellent airflow in your next purchase is a smart move for humid climates. And pairing your shelter with the right essential camping gear, like a moisture-wicking footprint, builds a strong defense against mold from the ground up.
Frequently Asked Questions
How does baking soda compare to vinegar for mold?
Baking soda is a mild abrasive and deodorizer, better for scrubbing away stains and odors after the mold is dead. For the killing phase, vinegar’s acidity is the proven, effective tool.
Are leftover mold stains harmful to my tent?
No. As Teton Sports notes, if the musty smell is gone, the mold is dead. Remaining stains are purely cosmetic and do not affect the fabric’s strength or weather performance. Consider them badges of a well-used adventure shelter.
How often should I re-waterproof my canvas tent?
There’s no fixed schedule. Waterproof when water stops beading. Perform the sprinkle test: flick a few water drops onto the clean, dry canvas. If they soak in instead of beading up, it’s time for a fresh treatment.
My tent still smells musty after cleaning. What next?
The mold is likely deeper than surface level, or moisture is trapped in the seams. You may need a second, more aggressive cleaning with a product like Marine31. Ensure the tent is 100% dry. Persistent seam smells might require stripping and re-applying seam sealant, a more advanced repair.
Can I use this method on any canvas tent?
Yes, the vinegar method is safe for both cotton and synthetic-blend canvases. However, always check your tent’s care label first. Some modern high waterproof rating tents with specific coatings may have unique manufacturer instructions.
Before You Go
Rescuing a moldy canvas tent is a systematic salvage operation, not a death sentence. The formula is clear: kill the growth with vinegar, remove it, rinse meticulously, dry without compromise, and then meticulously rebuild the waterproof barrier. The longevity of your shelter hinges entirely on those final two steps.
This maintenance mindset lets you invest confidently in quality gear, whether you’re eyeing winter-ready canvas tents for cold-weather expeditions or spacious car camping tents for family trips. Treat your tent with care, store it dry, and it will repay you with seasons of reliable shelter under the stars.
