
How to Repair a Tent Tear: A Step-by-Step Guide
This post contains affiliate links. As an Amazon Associate, we earn from qualifying purchases.
To repair a tear in a tent, you need a patch larger than the damage, the correct adhesive for your fabric type, and a clean work surface. The patch must extend at least a half-inch beyond the tear with rounded corners to prevent peeling. Critically, using rubbing alcohol on a waterproof-coated rainfly will strip its protective layer, creating a new leak.
I learned this the hard way on a trip in the Wind River Range. In a hurry to patch a small puncture in my MSR Hubba Hubba rainfly, I wiped the area with an alcohol swab. The patch held for that trip, but a month later in a drizzle, water wicked through the entire treated area. The alcohol had degraded the polyurethane coating, and I needed a whole new fly. Patience and the right materials aren’t just advice, they’re the difference between a quick fix and a costly mistake.
This guide walks you through a permanent repair, from choosing your patch to letting it cure. We’ll cover the manufacturer warnings most people ignore and what to do when a patch just isn’t enough.
Key Takeaways
- Soap and water are your first cleaning step for any coated fabric. Isopropyl alcohol, while great for uncoated mesh, will damage the waterproof coating on your rainfly or tent body, as noted by MSR’s own engineers.
- Round every patch corner you cut. Square corners catch on gear and peel up. A rounded patch can last for years; a square one often fails by your next outing.
- Your tent’s coating dictates your glue. Silicone-treated fabric needs a silicone-based sealer like Gear Aid Seam Grip SIL. Polyurethane-coated fabric needs a polyurethane adhesive like Gear Aid Seam Grip WP. Mixing them creates a bond that never fully cures.
- Sewing is a genuine last resort. Brands like MSR and Tatonka explicitly advise against DIY stitching, as it creates more puncture holes and can enlarge the tear. It’s for field survival, not a permanent solution.
- A pole repair sleeve has one limitation. If the pole breaks right at the connection point where sections join, a sleeve will prevent the pole from folding neatly. You’ll need a replacement section.
A successful tent repair requires matching the cleaning agent and adhesive to the specific fabric coating. Using isopropyl alcohol on a waterproof-coated rainfly degrades the coating, while applying a silicone-based sealer to a polyurethane-coated tent creates a weak, non-curing bond.
What’s in Your Repair Kit? (And Why Each Item Matters)
Before you touch the tear, gather your tools. A proper fix relies on more than just any tape you have lying around.
- Cleaning Agents: You need two. A small bottle of 70% isopropyl alcohol for uncoated mesh and nylon, and a mini bottle of unscented dish soap (like Dawn Ultra) for coated fabrics. The soap cuts grime without leaving a residue that repels waterproofing.
- Patch Material: Not all tape is equal. Tenacious Tape is thicker and superb for high-abrasion areas like tent corners. Gear Aid Repair Tape is thinner and more flexible, conforming better to curved rainflies. For mesh, you must use a mesh-specific patch.
- Adhesive: This is non-negotiable. Identify your tent’s coating (check the manual or label) and get the corresponding sealer. For a polyurethane coating, use Gear Aid Seam Grip WP. For silicone, use Seam Grip SIL.
- Sharp Scissors & a Roller: For cutting clean, rounded patch shapes. A small roller (or a smooth rock) is invaluable for applying firm, even pressure without getting glue all over your fingers.
- Repair Sleeve: A small aluminum tube for splinting a broken tent pole. Keep one in your kit, it’s a trip-saver.
Before you start: Working with adhesives requires ventilation. Some fumes can be irritating in enclosed spaces. Also, ensure your workspace is clean and dry; dust or moisture trapped under the patch will cause premature failure, often within the first few uses.
How Do You Prepare the Tear for a Patch?
Preparation is 80% of a lasting repair. Rushing here is why most field fixes fail.
First, identify your fabric. Is it the coated nylon of your rainfly, the uncoated polyester of a gear loft, or the delicate mesh of a door? Your cleaning method depends on this.
For coated fabrics (rainflies, most tent bodies): Use a drop of unscented dish soap in water and a clean cloth. Gently scrub the area around the tear to remove dirt, sap, and body oils. Rinse with a damp cloth and let it dry completely. I drape mine over a camp chair in the sun for twenty minutes.
For uncoated mesh or fabrics: A cotton ball soaked in isopropyl alcohol works perfectly. It evaporates quickly without a residue. Let it air dry.
Common mistake: Using alcohol on a coated fabric, it dissolves the waterproof polyurethane or silicone layer. The damage might not be visible, but the coating will fail around the patch within a week, creating a new leak zone.
The area must be bone-dry before you proceed. Any moisture turns your adhesive into a useless slurry.
Which Patch and Adhesive Should You Use?
This is where your repair becomes permanent or pointless. The right combination depends entirely on your tent’s material and the tear’s location.
Choosing and Cutting the Patch
Your patch should be at least a half-inch larger than the tear on all sides. Always, always round the corners with your scissors. A square corner is a snag waiting to happen, on a branch, in your stuff sack, against another pole. That snag starts the peel.
For the material, match the patch to the stress:
* Tenacious Tape: My go-to for high-stress zones. Its thickness stands up to ground abrasion on tent corners or floors. It’s less ideal for a highly curved rainfly, where it might not conform smoothly.
* Gear Aid Repair Tape: Thinner and more pliable. I use this for rainfly repairs and any curved surface. It’s also the only thing I’ll use on mesh, as it remains flexible.
* DIY Canvas Patch: For traditional durable canvas tents, a scrap of matching canvas and a strong fabric glue like Tear Mender creates a robust, long-lasting repair.
| Tear Location & Fabric | Recommended Patch | Adhesive Type | Key Consideration |
|---|---|---|---|
| Tent Floor / Corner (Coated Nylon) | Tenacious Tape | Polyurethane-based (Seam Grip WP) | Abrasion resistance is critical. |
| Rainfly / Curved Surface (Coated Polyester) | Gear Aid Repair Tape | Polyurethane or Silicone-based (match coating) | Flexibility ensures it conforms. |
| Mesh Door or Window | Mesh-Specific Patch | Flexible Fabric Glue | Prevents stiffening; maintains airflow. |
| Canvas Tent Wall | Canvas Scrap | Heavy-duty Fabric Glue (Tear Mender) | Patch must be larger than the tear. |
Applying the Adhesive
Follow the glue instructions meticulously. Some, like Tear Mender, require application to both the patch and the tent, letting them get tacky before bonding.
Apply a thin, even coat. You should still see the fabric weave through it. Too much glue oozes out the sides, creating a messy, dirt-attracting ridge. I use a small piece of cardboard as a spreader.
Press the patch on from the center outward, smoothing with your fingers or a roller to eliminate air bubbles. Then, apply firm, continuous pressure for at least 10 minutes. I weight mine down with a book, my trail-worn copy of “Wild” has fixed more than my spirit.
Walk away for 24 hours. A full cure is non-negotiable. Peeking early breaks the bond formation. I ruined a repair on a lightweight tarp shelter by packing it too soon; the patch delaminated in my pack.
TL;DR: Cut a rounded patch from material suited to the stress. Apply a thin layer of the correct glue, bond it, apply pressure, and then leave it completely alone for a full day.
When Is a Tear Too Big to Patch?
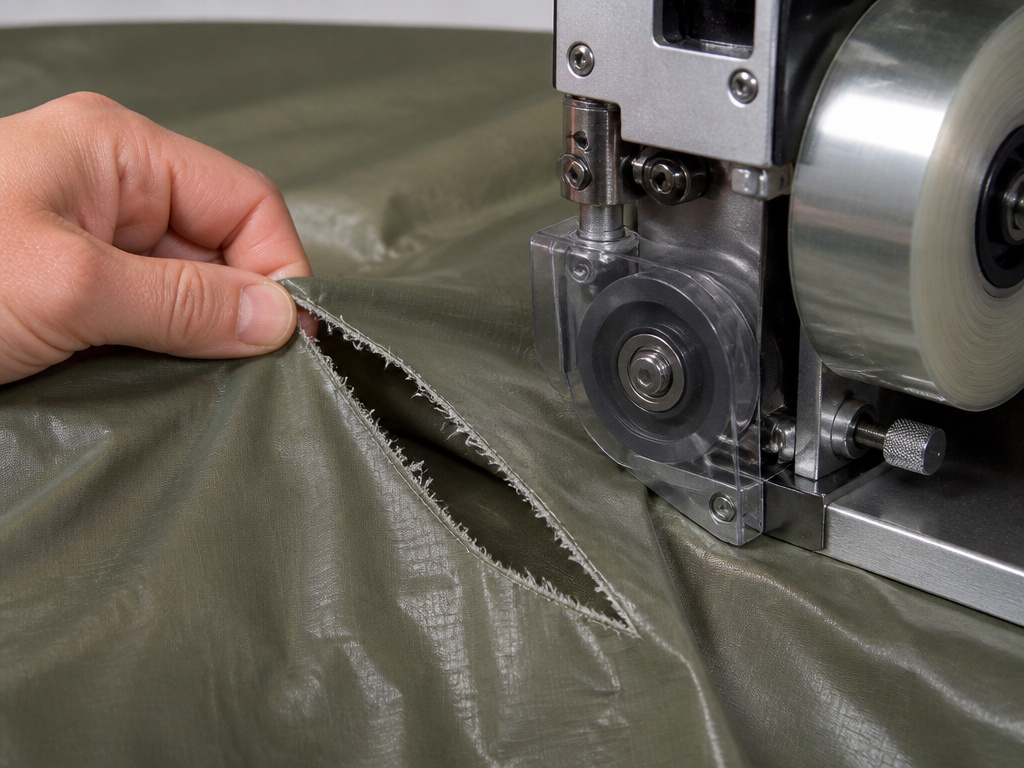
Patches work brilliantly for holes and tears up to about two inches. Beyond that, the fabric distortion is often too great, and the structural integrity is compromised.
For larger gashes, the common impulse is to sew it. Please think twice. MSR designers explicitly recommend stitching only as an absolute last resort if patches or tape are unavailable. Tatonka warns that DIY sewing damages the material’s coating. Every stitch is another puncture in your fabric, and pulling the thread tight can actually enlarge the tear.
If you must stitch in the field to get home, use a needle and polyester thread. Make small, neat stitches to hold the edges together, but don’t pull them taut. The real goal is to stabilize the damage for a professional repair later. Once stitched, you must seal both sides of the seam with the appropriate sealer to attempt any waterproofing.
For a catastrophic tear, say, a 10-inch rip from a fall, your best and most economical choice is often to send it to the manufacturer or a dedicated repair service. They have the industrial sewing machines and seam-taping equipment to restore it properly. Investing in storm-resistant tent designs from the start can help avoid these catastrophic failures.
What About Broken Poles and Mesh?
Not all tent injuries are fabric tears. Two other common issues require different approaches.
Fixing a Snapped Tent Pole
A repair sleeve is a mandatory piece of essential camping tools. This hollow aluminum tube slides over the broken pole section. Slide it on, center it over the break, and tighten the included hose clamp.
Common mistake: Using a sleeve on a break at the pole connection point, the joint where one section inserts into another. The sleeve will prevent the pole from folding compactly. You’ll fight a stubborn, bulky pole every time you pack up.
If the break is at the connection, a sleeve is a temporary field fix that will complicate your life. The proper solution is to order a replacement pole section from the tent’s manufacturer.
Repairing a Mesh Tear
Mesh is simpler because there’s no coating to worry about. Clean with isopropyl alcohol, cut a patch from a mesh repair kit (or an old screen), and use a flexible fabric glue. The trick is to apply a very thin coat; too much glue will bleed through the open weave and dry into a stiff, cardboard-like spot that cracks when folded. A well-done mesh repair should be almost undetectable to the touch.
Frequently Asked Questions
Can I use duct tape to repair my tent?
Only in a true emergency to get you through a night. Duct tape adhesive breaks down rapidly under UV light and moisture. It will leave a gummy residue and typically fails within 2-3 days of exposure. Replace it with a proper fabric patch at your earliest opportunity.
How long will a well-applied tent patch last?
correctly done repair can last the remaining lifespan of the tent. I have Tenacious Tape patches on a five-year-old tent that are still fully bonded and waterproof. The longevity hinges entirely on proper preparation, material matching, and cure time.
What’s the real difference between Seam Grip WP and Seam Grip SIL?
Seam Grip WP is a water-based polyurethane adhesive for polyurethane-coated fabrics (most common). Seam Grip SIL is a silicone-based adhesive for silicone-coated fabrics (common in ultralight and high waterproof rating tents). Using the wrong one creates a chemical mismatch, resulting in a bond that stays tacky and fails under stress or humidity.
Should I sew a tear if I don’t have tape?
Manufacturers strongly advise against it. View sewing as a survival tactic, not a repair. If you must stitch to stabilize the tear, plan to apply a proper patch or seek professional service as soon as you’re able. The needle holes will compromise the area.
Is a tent repair kit worth buying?
Absolutely. A good kit like the Gear Aid Tenacious Tape Repair Kit consolidates the essentials: multiple tape types, glue, and a pole sleeve. It’s lighter and more organized than piecing it together yourself and is one of the most sensible tent care accessories you can own.
The Bottom Line
A tear in your tent doesn’t mean its life is over. It means you get to learn a practical skill that extends the life of your gear. The formula is simple: clean with the right agent, cut a rounded patch, and bond it with the glue that matches your tent’s coating. Then, have the patience to let it cure fully.
Resist the urge to sew unless it’s a field emergency, and understand that a pole repair sleeve has its limits. Keeping a small, well-stocked repair kit in your pack turns a potential trip-ender into a minor delay. For those in the market for new gear, this experience underscores the value of investing in durable budget tents from reputable brands known for their repairability. Now, get that patch on, let it set, and get back out there. Your next adventure is waiting.
