
How To Take Down A Canopy Tent | The Safe 2-Person Method
This post contains affiliate links. As an Amazon Associate, we earn from qualifying purchases.
To take down a canopy tent, you lower the legs, detach every fabric fastener, remove the canopy, release the corner locks, and collapse the frame inward with a partner. The specific corner release mechanism, a push button, pull-pin, or slider, varies by brand, but the core sequence is universal. Skipping the partner for the collapse is the single biggest cause of bent frame poles and jammed sliders.
Most people rush the take-down, especially when rain is coming or the sun is setting. They yank stakes, fight the fabric, and try to muscle the frame closed alone. That’s how you get a twisted frame that won’t open next season, or a torn canopy with stretched grommets.
This guide walks through the exact steps from four major manufacturer manuals, points out where they differ, and shows you the two-person method that prevents the most common repair bills. We’ll cover the safety must-dos first, then the universal sequence, and finally the model-specific quirks for Harbor Freight, Lowe’s, Home Depot, and TentCraft canopies.
Key Takeaways
- Never store the fabric on the frame. The Lowe’s and Home Depot manuals are explicit: leaving the canopy attached while stored causes permanent fabric stretch and can warp the frame.
- Collapsing the frame is a two-person job. Trying to force a 10×10 frame closed alone almost always twists a leg or jams a slider. The TentCraft manual specifies pushing inward on opposite sides.
- Dry everything completely before packing. Residual moisture on the steel frame causes rust within weeks, and packing a damp canopy guarantees mildew stains by your next outing.
- Use the bag that came with your model. Carrying bags are not universal; a misfit bag puts pressure on frame joints and can tear the fabric during transport.
- The corner release is the only step that varies. Know whether your model uses a push button (Lowe’s, Home Depot), a pull-pin (Harbor Freight), or a red tab button (TentCraft) before you start.
Before You Start: The Safety Non-Negotiables
Wind is the enemy of a canopy coming down. A sudden gust can turn a lightweight frame into a dangerous sail. The Lowe’s manual states clearly: do not use during windy conditions due to high susceptibility to uplift. If the wind picks up while you’re working, stop. Lower the canopy to the ground and weight it down until the wind passes.
Before you start: A collapsing frame has pinch points that can catch skin. Wear work gloves. Never attempt to take down a canopy during a lightning storm, the metal poles are a conductor. If rain is pooling on the fabric, push it off from underneath with a broom handle before you lower the legs. That pooled weight stretches the fabric and renders the waterproof PU coating ineffective.
Clear the area around the canopy completely. Pull up every stake and weight. Coil guylines and set them aside. You need a clean perimeter to walk the frame inward during the final collapse. This is also the time to detach any sidewalls or tent camping accessories like mesh screens or walls.
The Universal 7-Step Take-Down Sequence
Follow these steps in order for any standard pop-up canopy, from a basic budget canopy tent to a more durable canvas canopy tent. The brands agree on this sequence; they only disagree on how you release the corners in step four.
1. Lower All Four Legs to the Ground
Find the locking mechanism on each leg. For most models, it’s a push button in the middle of the leg section. Press it in and carefully lower that leg segment until it clicks into the lowest setting. Work your way around the canopy, keeping it level. An uneven lower puts torsion on the frame.
If your legs have a pin-and-hole system like the Harbor Freight model, pull the locking pin out, retract the inner leg, and re-insert the pin to secure it at the shortest length. The goal is to get the entire roof frame resting on or just above the ground. This relieves all tension from the canopy fabric.
2. Detach Every Fabric Fastener
This is the most missed step. You must remove every hook-and-loop (Velcro) strap that secures the canopy to the frame. The Home Depot manual specifies detaching fasteners inside the roofline, on the side scissors bars, and at all four corners. Run your hand along the entire underside of the roof frame. If you feel a strap, unhook it.
For canopies with integrated sidewalls, unzip them from the main roof and detach any additional clips or straps. Set the sidewalls aside to be folded separately. Leaving one strap attached means the fabric can’t lift cleanly off the frame. You’ll fight it, and likely tear a grommet or the fabric itself.
3. Remove the Canopy Fabric
With all fasteners detached, lift each corner of the fabric up and over the corresponding frame corner. Have a partner support the fabric from the opposite side to keep it from snagging on any protruding bolts or sharp edges.
Common mistake: Dragging the canopy fabric across the ground to pull it off, this grinds dirt and grit into the waterproof coating, creating micro-tears that leak within a season.
Lay the removed canopy fabric out on a clean, dry surface like a tarp or a grassy area. Smooth it out to begin the drying process if there’s any moisture.
4. Release the Corner Locking Mechanisms
Here’s where models diverge. You must identify your type before applying force.
| Brand / Model | Corner Release Type | Action Required |
|—————————-|————————-|————————————————————————————-|
| Lowe’s / Home Depot Standard | Push Button | Press the button located at the upper corner where the roof slider meets the leg. |
| Harbor Freight 10×10 | Pull-Pin | Pull the Locking Pin straight out from the corner joint. |
| TentCraft Pop-Up | Red Tab Button | Push the red button on the inner corner, then pull the corner connector piece down. |
If you force the wrong mechanism, you can break the plastic housing or bend the pin. Look first.
5. Collapse the Frame with a Partner
This is the step nobody wants to wait for, and it’s the one that breaks canopies. The frame is designed to collapse inward symmetrically. With a person on each opposite side, place your hands on the roof frame and push inward toward the center. At the same time, guide the legs inward with your feet or your partner’s hands.
The TentCraft manual explicitly says to “push inward on opposite sides.” The frame will fold down into a tight, rectangular bundle. If it resists, stop. Check that all four corner releases are fully disengaged. Never jump on the frame or use your body weight to force it, that’s how you permanently bend a leg.
TL;DR: Two people pushing inward on opposite sides folds the frame smoothly. One person trying to wrestle it alone bends metal.
6. Dry and Fold the Fabric Properly
Never pack a wet or damp canopy. The Lowe’s manual warns that residual moisture on the frame causes rust, and packing wet fabric guarantees mildew. If the canopy is dry, fold it along its original crease lines. If it’s slightly damp, hang it over a railing or lay it flat in the sun for an hour before folding.
For a crisp fold, lay the fabric flat, smooth out all wrinkles, and fold it in half, then in half again, matching the existing seam lines. Rolling it can cause permanent creases that weaken the fabric. A neatly folded canopy is easier to pack and less likely to develop stress tears at the grommets.
7. Pack in the Correct Storage Bag
This feels trivial, but it matters. Carrying bags are not universal. The Lowe’s manual states this directly: “Most carrying bags are not universal; ensure you have the correct one for your specific model.” A bag that’s too small will force you to cram the frame, stressing the joints. A bag that’s too large lets the contents shift and bang around, which can dent the poles.
Place the folded canopy fabric on top of the collapsed frame inside the bag. This cushions the frame and protects the fabric from abrasion during transport. Throwing the frame on top of the fabric can puncture it.
Model-Specific Corner Release Steps
While the core sequence is the same, the moment you release the corners changes the tactile feel of the job. Getting this wrong costs you a replacement part.
For Push-Button Models (Lowe’s, Home Depot, Many Generics)
Locate the plastic button at the top corner where the sliding roof truss meets the vertical leg. Press it firmly with your thumb. You should hear a faint click. While holding the button, use your other hand to slowly slide the roof section down the leg. If it doesn’t move, the button isn’t fully depressed, often because dirt is jammed in the mechanism. Blow it out or tap the button with a rubber mallet.
I’ve seen a button mechanism jammed by a single grain of sand from a beach trip. The owner forced it, snapped the plastic housing, and the corner joint wouldn’t lock securely again. A $5 part turned into a wobbly canopy.
For Pull-Pin Models (Harbor Freight 10 FT. X 10 FT. Canopy)
The Harbor Freight manual instructs you to “pull out the Locking Pin at each corner and slowly pull the Slider down until the Pin is free.” The pin is a small metal cylinder. Use pliers if it’s stuck, but wiggle it side-to-side as you pull, don’t just yank. These pins can bend. If you lose one, the Harbor Freight manual notes replacement parts are not available for this item (UPC 193175580627). You’re now fabricating a fix.
For Red Tab Button Models (TentCraft and Similar Commercial Units)
TentCraft uses a sturdier system. Push the red button on the inner corner of the frame. While holding it, pull the entire corner connector piece downward. This action releases the tension in the roof’s scissor mechanism. The motion is more of a pull-down than a slide. These models are built for frequent assembly, so the action is usually smoother, but it requires a firm, deliberate pull.
What Not to Do: The Costly Shortcuts
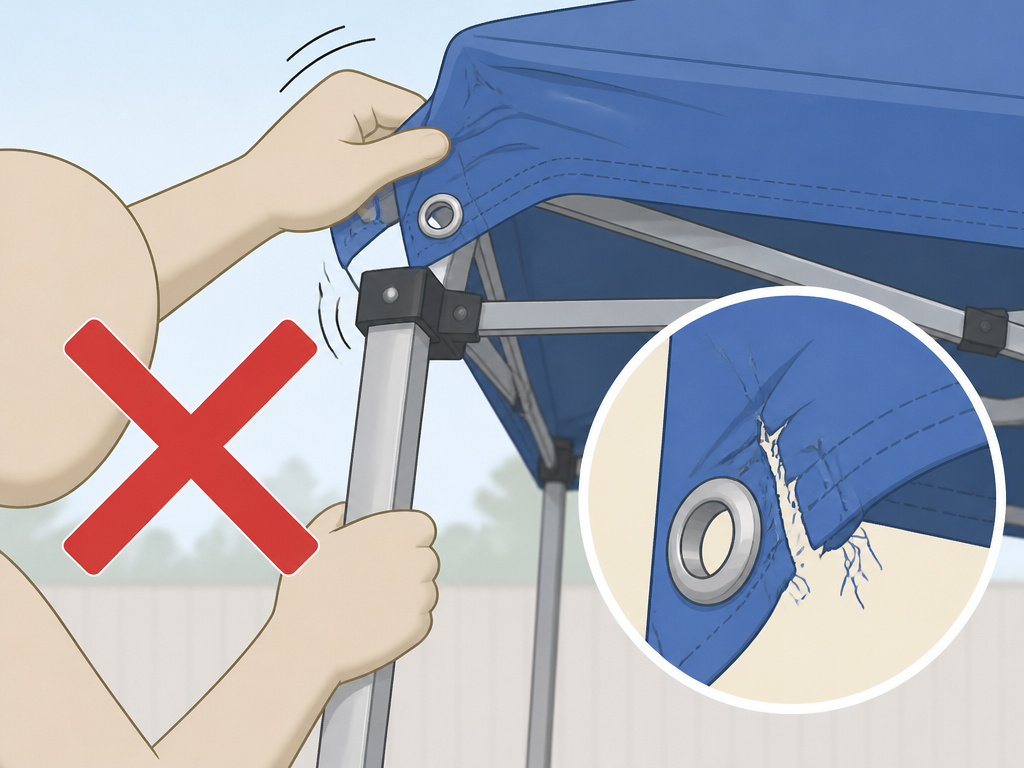
People develop bad habits after a few easy takedowns. Then the weather changes or the canopy ages, and the habit breaks the equipment.
Don’t lower the canopy with sidewalls still attached. The added weight and wind catch can make the frame buckle unevenly. Always remove sidewalls and any tent lighting or other attachments first.
Don’t skip the leg-lowering step because you’re in a hurry. Trying to detach the canopy while the frame is at full height puts immense strain on the Velcro and the fabric’s corner grommets. You’ll hear a ripping sound. That’s the stitching letting go.
Don’t collapse the frame on uneven ground. One leg sitting in a hole or on a rock creates a pivot point. The frame twists instead of folding, and you’ll kink a leg tube. Always move the canopy to flat ground if necessary.
Don’t store the canopy in a damp garage or shed without airing it out first. Trapped moisture from a single dew-covered morning can rust steel frames and mildew fabric in a matter of weeks. If you must store it damp, unpack it at home within 24 hours to dry.
Packing for Transport and Long-Term Storage
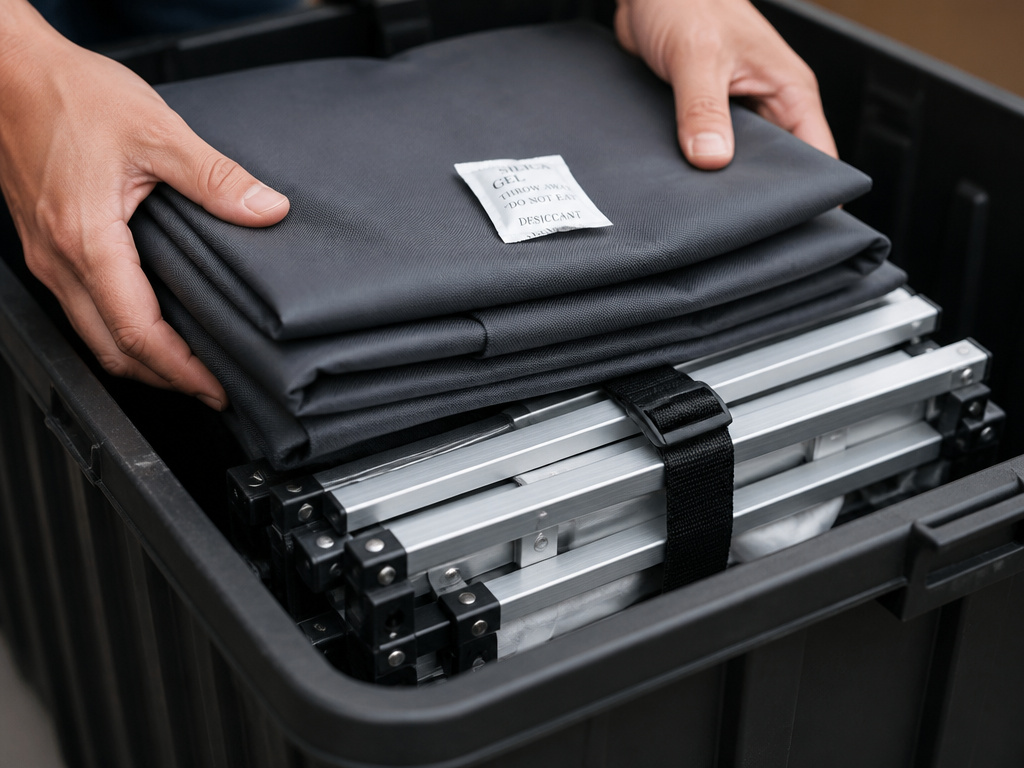
How you pack the canopy directly determines how it performs next season. The goal is to prevent pressure points.
Start with the frame. Secure the collapsed frame with the included strap or a bungee cord to keep it from springing open. Place it in the bottom of the storage bag or a sturdy plastic tub. If using a tub, ensure it’s large enough that the frame lies flat without being crammed.
Next, place the folded canopy fabric on top of the frame. This order uses the fabric as a cushion. If your canopy came with a wheeled bag, a feature praised in user reviews for easy-up canopy shelters, load it so the weight is balanced over the wheels. An off-balance load strains the bag’s seams and makes it hard to pull.
For long-term storage over the winter, consider a moisture-absorbing desiccant pack placed inside the bag with the fabric. Never store the bag directly on a concrete floor, which can draw moisture. Place it on a wooden pallet or shelf.
An off-season is long enough for a small damp spot to become a large mold patch. If you pack it dry, it stays dry.
Frequently Asked Questions
Can one person take down a 10×10 canopy tent?
Technically yes, but you risk damaging the frame. The collapse step requires simultaneous inward pressure on opposite sides to keep the scissor mechanism aligned. One person trying to walk around the canopy and push each side sequentially often twists the legs. For smaller pop-up tents or stand-up tents with simpler frames, one person can manage. For a full 10×10, always use two.
How do you fix a stuck corner button?
First, ensure no debris is jammed in the button housing. Blow it out or use a thin tool like a toothpick to clear it. If it’s still stuck, apply a silicone-based lubricant (not WD-40, which attracts dirt) around the button’s edge and tap it gently with a rubber mallet. Forcing it usually breaks the plastic latch inside.
Is it okay to leave the canopy on the frame during storage?
No. Every manufacturer manual we reviewed. Lowe’s, Home Depot, Harbor Freight, explicitly says to remove the canopy fabric before storage. Leaving it attached keeps tension on the fabric, leading to permanent stretch, and can warp the frame if the bag is compressed.
What’s the best way to clean the canopy before packing it away?
Use a soft brush or cloth with mild soap and lukewarm water. Gently scrub the fabric, then rinse thoroughly with a hose. Never use a pressure washer, abrasive cleaners, or bleach. Let the canopy dry completely in the sun before folding. Packing it wet is the surest way to ruin it.
My canopy bag ripped. Can I use a different bag?
You can, but it must be the correct size. A bag that’s too small forces you to over-compress the frame. A bag that’s too large allows the contents to shift and abrade during transport. The best replacement is the OEM bag from the manufacturer. If that’s not possible, measure the collapsed frame bundle and find a durable duffel or storage bag that matches those dimensions closely.
The Bottom Line
Taking down a canopy tent isn’t about speed. It’s about patience and following a sequence that doesn’t fight the design. Lower the legs, detach every strap, remove the fabric, release the corners according to your model, and collapse the frame inward with a partner. The twenty minutes you save by rushing will cost you a hundred dollars in replacement parts, or a ruined weekend when the canopy won’t open next time. Do it right once, and it becomes a five-minute routine that keeps your shelter ready for every market, picnic, or beach day ahead.
