
How to Build a Slumber Party Tent: A Real-World DIY Guide
This post contains affiliate links. As an Amazon Associate, we earn from qualifying purchases.
To build a slumber party tent, construct a stable A-frame from four 4-foot wooden legs and a 4.5-foot dowel, then drape and secure a twin-size sheet over it. This design, using 1×2 furring strips and a 3/4-inch dowel, creates a reusable shelter that beats flimsy chair-and-blanket forts. The total material cost is under $40, but your first build will take about 90 minutes of focused work.
Pinterest makes this look effortless. What it doesn’t show is the splinter you get from skipping the sanding, or the way a 1/2-inch dowel, like the one in that tempting Amazon kit, will bow under a simple sheet by midnight. I’ve pitched my share of tents in gale-force winds, and I can tell you a wobbly indoor frame is just as frustrating.
This guide gives you the specifics most tutorials gloss over: the exact hole placement to prevent a lopsided frame, the brand of fairy lights that won’t die mid-party, and what “15 mm thick” for wood stability actually means for your build. We’ll also cover when it’s smarter to hire a pro, so you can choose the path that saves your sanity.
Key Takeaways
- Use 1×2 furring strips (actual thickness 0.75″ or 19mm) cut to 4 feet for legs. Thinner wood wobbles.
- Drill the 3/4-inch hole for the dowel exactly 3 inches from the top of two leg pieces. An oval hole from a wandering drill bit will cause a persistent creak.
- Secure the fabric with a staple gun for permanence. For a removable cover, use adhesive-backed Velcro strips instead of staples.
- A professional sleepover tent rental service like Pitch to Perfection can cost $300-$900 but includes setup, takedown, and all bedding.
- For decor, Dollar Tree provides affordable activity kits, but invest in reliable fairy lights like the Twinkle Star 300 LED Copper Wire strings.
Before you start: Power tools are required. Wear safety goggles when drilling. Clamp your wood to a work surface before using a spade bit, kickback can split the wood or cause injury. Keep fingers clear of the drill’s path and saw blade.
Is Building a Tent Worth It, or Should You Rent?
Your first decision isn’t about wood; it’s about time versus money. Building one tent costs about $40 in lumber and fabric. Hiring a company like Pitch to Perfection, which serves areas like eastern North Carolina, costs $300 to $900 for a full setup and breakdown.
I learned this the hard way. For a cousin’s kids, I once tried a pre-fab “GlowDream Sleepover Kit” from Amazon. The included 1/2-inch dowels flexed so badly under a standard sheet that the whole frame sagged inward by morning. I spent more time reinforcing it than the kids spent inside. For a one-time, milestone tenth birthday, a pro service that delivers, styles, and removes everything is often the wiser investment.
If you have multiple kids or host often, DIY builds a reusable asset. The upfront 90-minute labor pays off on the third or fourth use. But if your schedule is packed, your time has value. Writing the rental check lets you be a guest at the party.
TL;DR: DIY = $40 + 90 minutes of your labor. Professional rental = $300+ + zero minutes of your sanity. Choose based on how often you’ll use it.
What Tools and Materials Do You Actually Need?
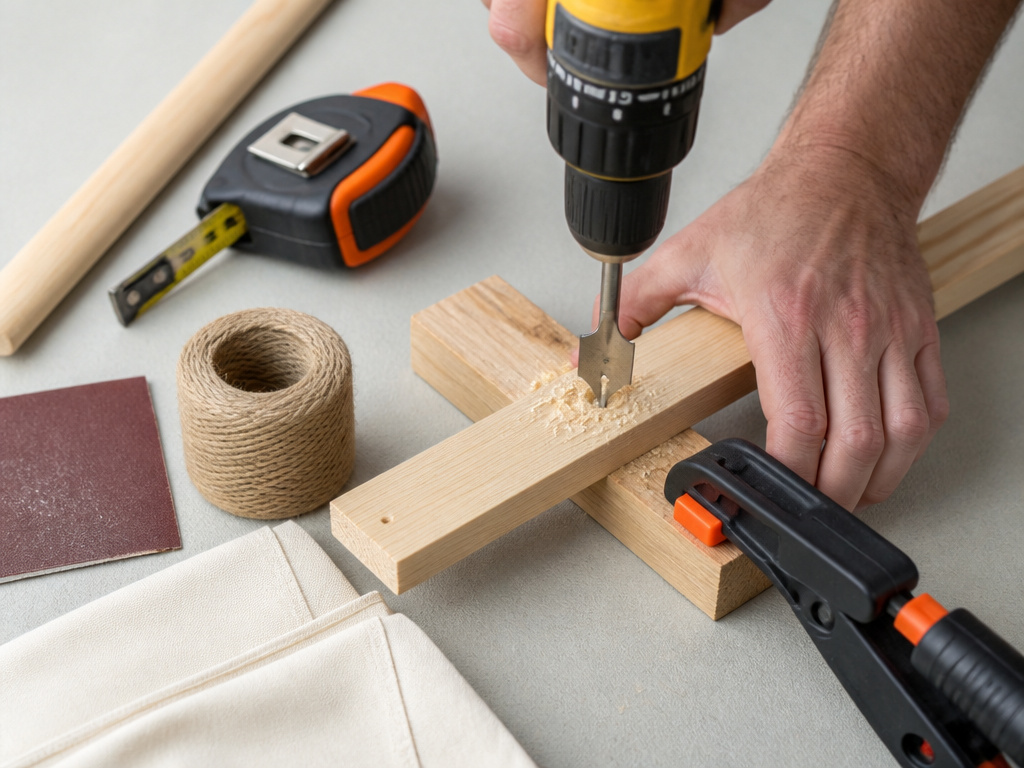
Gather everything first. A 1×2 furring strip is nominally 1.5 inches wide but only about 0.75 inches (19mm) thick. For stability, the research notes specify all wood should be at least 15 mm thick, so this standard board just meets the threshold. Don’t go thinner.
For one tent, you need:
* (4) 1x2x8 ft. furring strips (pine is fine)
* (1) 3/4-inch diameter x 6 ft. wooden dowel
* (1) Twin-size flat sheet (a poly-cotton blend works well)
* Twine or sturdy string
* Sandpaper (start with 80-grit, finish with 120-grit)
The tools are basic but non-negotiable. If you don’t own a drill, you must borrow one, this frame can’t be built without it.
* Hand saw or power miter saw
* Drill with a 3/4-inch spade bit (a brad-point bit makes a cleaner hole) and a 1/4-inch drill bit
* Staple gun with 1/4-inch staples
* Tape measure, pencil, and scissors
* Clamp (to secure wood for drilling)
Using a scrap block of wood clamped behind your drilling point prevents tear-out and gives you a clean, round hole for the dowel. An oval hole means a wobbly frame.
How Do You Build the Tent Frame Correctly?
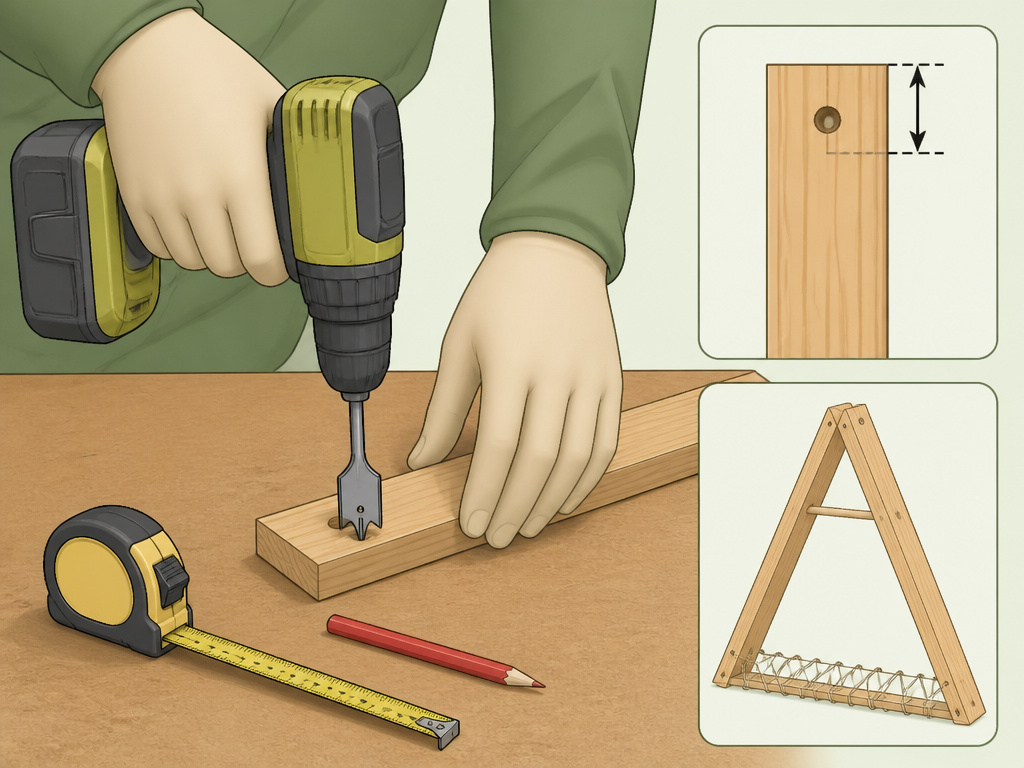
This is where precision prevents collapse. The goal is a rigid A-frame that doesn’t sway when a kid bumps it.
1. Cut and Sand Everything.
Cut four furring strips to 4 feet in length. These are the legs. Cut the 6-foot dowel down to 4 feet 6 inches for the top crossbar. Sand every cut edge and surface until completely smooth. Run your hand along each piece, if you feel a catch, sand more. This boring step prevents snagged sheets and splinters.
2. Mark and Drill the Holes.
On two of the leg pieces, measure and mark a point 3 inches down from the top. This is for the dowel. Use your 3/4-inch spade bit to drill a hole straight through at this mark. On all four leg pieces, measure up 1 inch from the bottom and drill a 1/4-inch hole for the stabilizing twine.
3. Assemble the A-Frame.
Slide the dowel through the large holes in the two pre-drilled legs. These form the front and back of the tent. Place the two undrilled legs inside the first two, spreading the bottoms about 3.5 feet apart to create a stable “A” shape.
4. Secure the Base.
Thread a long piece of twine through the small holes at the bottom of all four legs, creating a square, and tie it off tightly. This cross-bracing stops the legs from sliding outward. For a more permanent fix, you could screw a short horizontal board between the front and back leg pairs at the base.
| Component | Specification | Why It Matters |
|---|---|---|
| Leg Material | 1×2 furring strip (0.75″ x 1.5″) | Meets the 15mm minimum thickness for stability. Wider wood is unnecessarily heavy. |
| Leg Length | 4 feet | Creates a child-scale tent with about a 3.5-foot peak height. |
| Dowel Diameter | 3/4 inch | 1/2-inch dowels (like in some kits) flex under load. 3/4-inch provides rigidity. |
| Dowel Hole Placement | 3 inches from top | Centers the dowel in the leg’s width for balanced weight distribution. |
| Base Hole Placement | 1 inch from bottom | Keeps the stabilizing twine off the ground to prevent tripping. |
Common mistake: Drilling the dowel hole too close to the top edge of the leg. This reduces the wood’s strength at a critical stress point and can lead to a split down the line, especially during disassembly.
TL;DR: Cut four 4-foot legs and a 4.5-foot dowel. Drill top holes 3 inches down, assemble the A, and lace the base with twine. Clamp your wood when drilling.
What’s the Best Way to Attach the Fabric Cover?
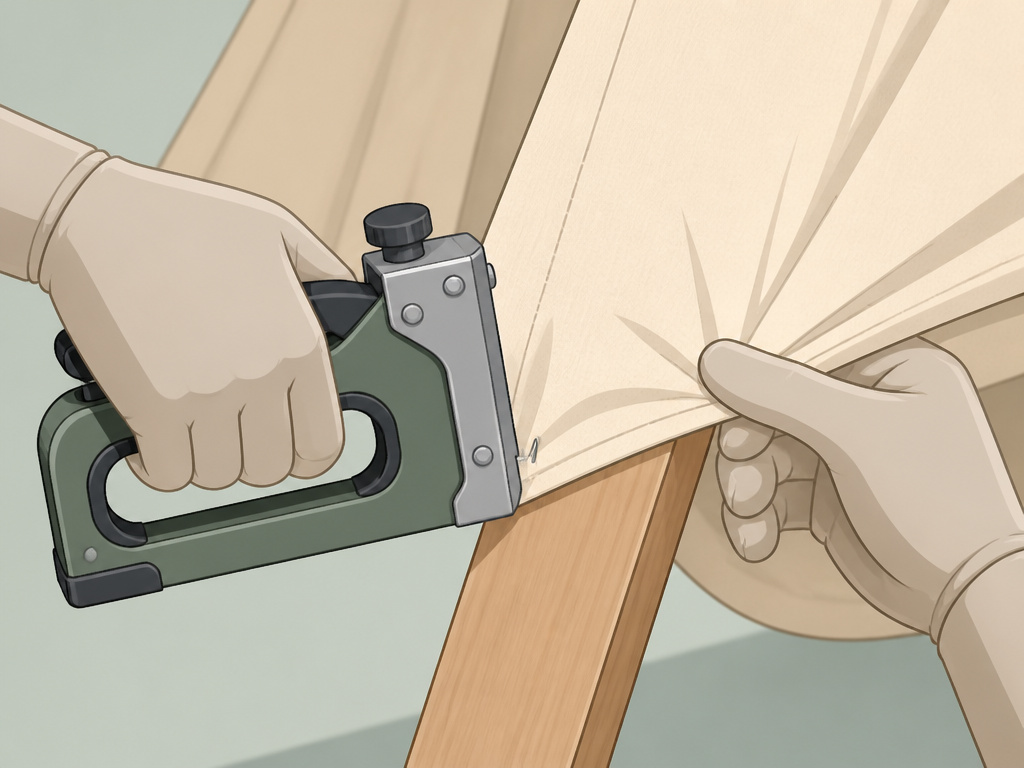
The frame is the bones; the fabric is the personality. A standard twin flat sheet (roughly 66″ x 96″) is ideal. You can cut it to 46 inches on the short side to reduce floor pooling, as one design suggests.
Drape the sheet over the dowel so equal length hangs front and back. Center it. Have a helper gently pull the fabric taut against each leg while you secure it.
- For a Permanent Cover: Use a staple gun. Place a staple every 4-6 inches along each leg. Trim excess fabric.
- For a Removable/Swashable Cover: Use adhesive-backed Velcro strips. Stick the hook side to the wood leg and the loop side to the fabric. Press firmly. This is perfect if you want to make different themed covers, similar to how you might choose different rainflies for various backpacking tent options.
Common mistake: Attaching the fabric before the frame is fully assembled. You’ll struggle to get the sheet over the dowel and likely tear a seam. Always build the bare frame first.
How Do You Turn a Tent Into a Glamping Paradise?
Now for the magic. Comfort is non-negotiable. A basic twin air mattress is the standard. Inflate it to about 90% capacity for a softer feel. Top it with a fitted sheet, a cozy blanket, and a heap of pillows, the more, the better.
Lighting is the transformation. Skip no-name fairy lights. I’ve had three cheap sets fail. The Twinkle Star 300 LED Copper Wire strings are brighter, have a reliable timer, and the battery pack is small enough to hide. Drape them inside over the dowel or around the mattress. Never use plug-in lights that get hot.
For decorations and activities, Dollar Tree is a lifesaver for plates and cups. Create a “spa station” basket with face masks and nail files, or a “morning garden” spot with small pots, soil, and seeds. This curated touch makes the party special. For the ultimate convenience, some rental companies provide matching pajamas and personalized decor, a turnkey solution that mirrors the full-service experience of high-end tents for backpacking couples where every detail is handled.
The right ambiance is everything, much like choosing the perfect tent lighting for a backcountry camp. It’s those thoughtful details that elevate a simple shelter into an unforgettable experience.
Frequently Asked Questions
How much does it cost to make a slumber party tent?
The raw materials for one wooden frame and fabric cover cost between $30 and $40. An air mattress, reliable fairy lights, and decorations add another $50 to $100, depending on the brands you choose.
Can you make the tent frame without power tools?
No. You must be able to cut wood to length and drill a 3/4-inch hole. A hand saw can substitute for a power saw, but a drill is essential. Consider a local tool library or makerspace if you don’t own one.
How do you store a DIY slumber party tent?
For compact storage, untie the base twine and slide the dowel out. The frame collapses into four legs and a stick. Bundle them together. Fold the fabric cover separately. Storing it assembled takes up far too much space, unlike more packable ultralight tents.
What’s the best fabric to use for the tent cover?
cotton or poly-cotton blend twin flat sheet is ideal. It’s lightweight, breathable, and easy to cut. Avoid heavy fabrics like canvas or quilts, they will sag and put undue stress on the wooden frame.
How long does it take to set up the tent after it’s built?
After the initial 90-minute build, subsequent setups take about 10 minutes. You simply reassemble the frame and drape the sheet. All the cutting, drilling, and sanding is a one-time task.
The Bottom Line
Building a slumber party tent is a satisfying project with a huge payoff in giggles and memories. The key is in the specifics: use 3/4-inch dowels, drill clean holes, and sand everything smooth. Your reward is a sturdy, reusable piece of party infrastructure.
Remember the fork in the road. The DIY route offers pride and long-term value, much like investing in durable two-person backpacking tents for years of adventures. The rental path buys you peace and presence for a one-time celebration.
Whichever you choose, the goal is the same: to create a little world of wonder under a sheet and some lights. Just maybe keep the puppy away from the dowel while you build it.
