
How to Rainproof a Tent: A Real-World Guide to Staying Dry
This post contains affiliate links. As an Amazon Associate, we earn from qualifying purchases.
To rainproof a tent, you must target its engineered weak points: unsealed seams, degraded fabric coatings, and worn-out DWR. Success hinges on matching your sealant to the fabric type, polyurethane (PU) sealant for common PU-coated nylon, silicone sealant for silnylon, and applying it to meticulously clean, dry surfaces. A proper refresh demands patience, with full curing taking up to 48 hours.
I learned this lesson shivering in a puddle. My first “real” backpacking tent, a budget-friendly model I’d trusted for a season, turned into a colander during a sudden Oregon coast downpour. The leak wasn’t in the fabric; it was a steady drip from a seam over the foot of my sleeping bag. That cold, soggy night taught me that a tent’s waterproofing is a temporary shield, not a permanent forcefield. It wears out.
This isn’t about buying a magic spray. It’s about understanding how your shelter works and giving it the maintenance it desperately needs. I’ve sealed more seams than I can count, in my driveway, at trailheads, and once, desperately, in a campground bathroom. Let’s get your tent beading water like new.
Key Takeaways
- Tent fabric is never waterproof on its own. Polyester and nylon are just woven threads; their water resistance comes from factory-applied polyurethane (PU) or silicone coatings and seam tape, which degrade with sun, packing, and use.
- Using the wrong sealant ruins the repair. Applying PU-based sealant to a silicone-treated (silnylon) tent creates a useless, peeling mess. Always check your tent’s material tag or specs first.
- A wet interior is often condensation, not a leak. If the inside of your rainfly has a fine mist of droplets but the outside isn’t beading water, you need more ventilation, not more sealant.
- Budget tents frequently need immediate seam sealing. Models like the Naturehike Cloud-Up or Alps Mountaineering Lynx often have spotty factory tape. A backyard hose test before your first trip is non-negotiable.
- The Hydrostatic Head (HH) rating is your floor’s limit. A 1500mm HH floor will wet through if you camp on a puddle. Know your tent’s rating and always use a footprint in wet conditions.
A tent’s waterproofing is a composite system: a durable water repellent (DWR) coating on the exterior makes water bead up, a polyurethane or silicone laminate on the fabric interior blocks penetration, and sealed seams bridge the gaps created by stitching.
Is It a Leak or Just Condensation?
Before you uncork a tube of sealant, diagnose the problem. I’ve watched friends spend hours re-waterproofing a tent that was just sweating. Condensation happens when warm, moist air from your breath and body hits the cooler surface of the rainfly. The fix is airflow, not chemicals.
A true leak is different. You’ll see water coming through the fabric or seams in a distinct drip or trickle, often in one spot. To find it, set your tent up in the yard on a dry day. Get inside with a flashlight during daylight and have someone spray the fly with a hose. Mark any drips with painter’s tape. This “rain test” is the most reliable method I know.
| Symptom | Likely Cause | Immediate Action |
|---|---|---|
| Fine droplets on fly interior, general dampness | Condensation from poor ventilation. | Open all vents, crack door zippers, ensure tent isn’t pitched in a low, still-air spot. |
| Drip from a specific seam line | Failed seam tape or sealant. | Mark the spot. The entire seam will need cleaning and re-sealing. |
| Fabric darkens and soaks through in sheets | Worn-out DWR coating causing “wetting out.” | The fly needs a deep clean and application of a new DWR spray. |
| Sticky or flaky residue on tent floor/fly interior | Degraded polyurethane (PU) coating. | The old coating must be removed before a new PU sealant can be applied. |
| Large, spreading damp spot on tent floor | Moisture wicking from ground; low HH rating. | Use a waterproof footprint. If persistent, the floor’ laminate may be compromised. |
TL;DR: Rule out condensation first. A true leak shows as a directed drip from fabric or seams, which a simple hose test can pinpoint.
What Gear Do You Actually Need? (Skip the Gimmicks)
You don’t need a hardware store. Over the years, I’ve whittled my kit down to a few proven products that live in my gear closet. The key is specificity.
- Seam Sealant: This is your #1 tool. For most common PU-coated tents (like those from Coleman, REI Co-op, or Big Agnes), use Gear Aid Seam Grip WP. For silicone-treated nylon (silnylon) common in ultralight tents, you must use Gear Aid Seam Grip SIL. One 1-oz tube typically covers a 2-person tent.
- Fabric Cleaner: Dirt and oils repel sealant. I use Nikwax Tech Wash because it’s designed for technical fabrics and won’t harm DWR. In a pinch, a drop of unscented Dr. Bronner’s in a gallon of water works, but you must rinse it thoroughly.
- DWR Rejuvenator: To restore the water-beading surface on your rainfly, a spray-on product like Nikwax TX.Direct Spray-On is reliable and easy. The wash-in versions are fussier and less effective for tents.
- Brush & Cloths: A soft horsehair brush (like the one from Granger’s) for cleaning, microfiber cloths for drying, and some isopropyl alcohol for pre-sealing prep.
Before you start: This process involves chemicals that require ventilation. Work outside or in a very well-ventilated garage. Wear nitrile gloves to keep sealant off your skin, and never apply products near an open flame. Allow the full, recommended cure time (often 24+ hours) before packing the tent away, or you’ll create a sticky, ruined mess.
What should you skip? The internet is full of DIY hacks, like mixing silicone caulk with mineral spirits. It might work once, but it’s inconsistent, adds significant weight, and can gum up your fabric permanently. It’s a gamble with your shelter. Stick with products engineered for the job. Having the right tent waterproofing gear on hand turns a chore into a simple routine.
How Do You Seal a Tent’s Seams?
This is the single most impactful rainproofing task. Factory seam tape fails, it flakes, peels, and delaminates. I now seal the seams on every new budget tent before its first trip. Here’s my exact process.
- Clean & Dry: Set up your rainfly and tent body. Clean the seams with a cloth dampened with isopropyl alcohol to remove any dirt or oils. Let it evaporate completely.
- Apply the Sealant: Working on the inside of the fly, squeeze a thin bead of the correct sealant directly over the stitching. I use the brush applicator (or a gloved fingertip) to smooth it, working the sealant into the needle holes. Cover every seam: ridgelines, corners, guylines, vestibule zippers, and reinforcement patches.
- Cure Undisturbed: This is the patience test. Let the sealant cure for the full time listed on the tube, for Gear Aid Seam Grip WP, that’s 8-12 hours. It needs warmth (above 60°F/15°C) and airflow. Don’t pack it away until it’s no longer tacky to a light touch.
Common mistake: Sealing over dirt or a damp seam. The sealant will bead up on the grime and peel off after a few uses, wasting your time and product. The surface must be immaculate and bone-dry.
TL;DR: Seal all interior seams with the correct sealant type on a clean, dry, warm day. The curing time is non-negotiable.
Can You Fix a Flaky or Sticky Tent Coating?
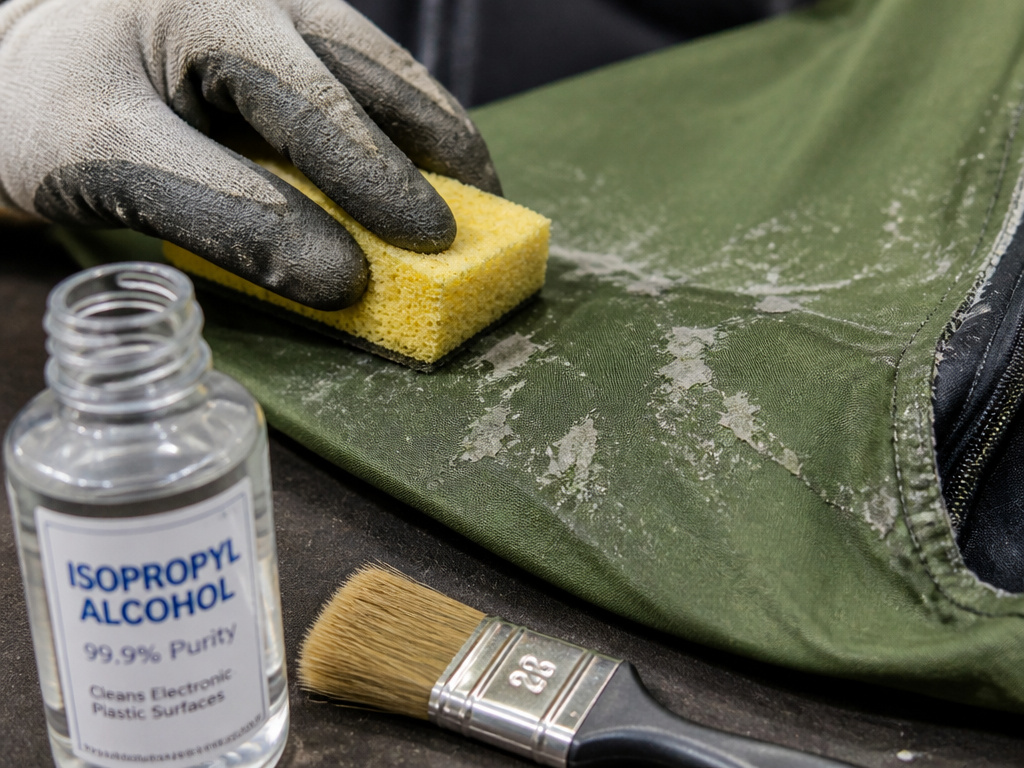
That tacky, peeling feeling on the inside of your tent floor or fly is a failing polyurethane (PU) laminate. It has a distinct old-rubber-band smell. You can fix it, but it’s more involved than seam sealing.
First, the old coating must go. Lay the fabric flat. Gently scrub the flaking areas with the abrasive side of a sponge and isopropyl alcohol to lift the residue. It’s a tedious job. For a full fly, Gear Aid’s official troubleshooting guide notes that severe cases may require soaking in a mix of water, cleaner, and alcohol.
Once the fabric is clean and dry, apply a thin, even layer of a PU tent sealant, like Gear Aid Tent Floor Sealant, with a brush. It will add a slight weight penalty, but it resurrects the fabric. Let it dry for a full 24 hours. Silicone coatings don’t flake but can delaminate, appearing milky. DIY recoating silicone is notoriously difficult; for a valuable silnylon tent, a professional service is often the best call.
This is also the time to address the exterior. After cleaning, while the fly is slightly damp, apply your DWR spray evenly across the outside surface. Wipe it gently with a damp cloth to distribute, then let it dry completely. The fabric should now shed water like a waxed jacket.
Investing in robust storm-proof tents from the start minimizes these coating issues, as they use higher-spec materials. For a different approach, canvas tent materials rely on tight weave and natural fiber swell, not chemical laminates, for water resistance.
When Is a Tent Beyond Saving?
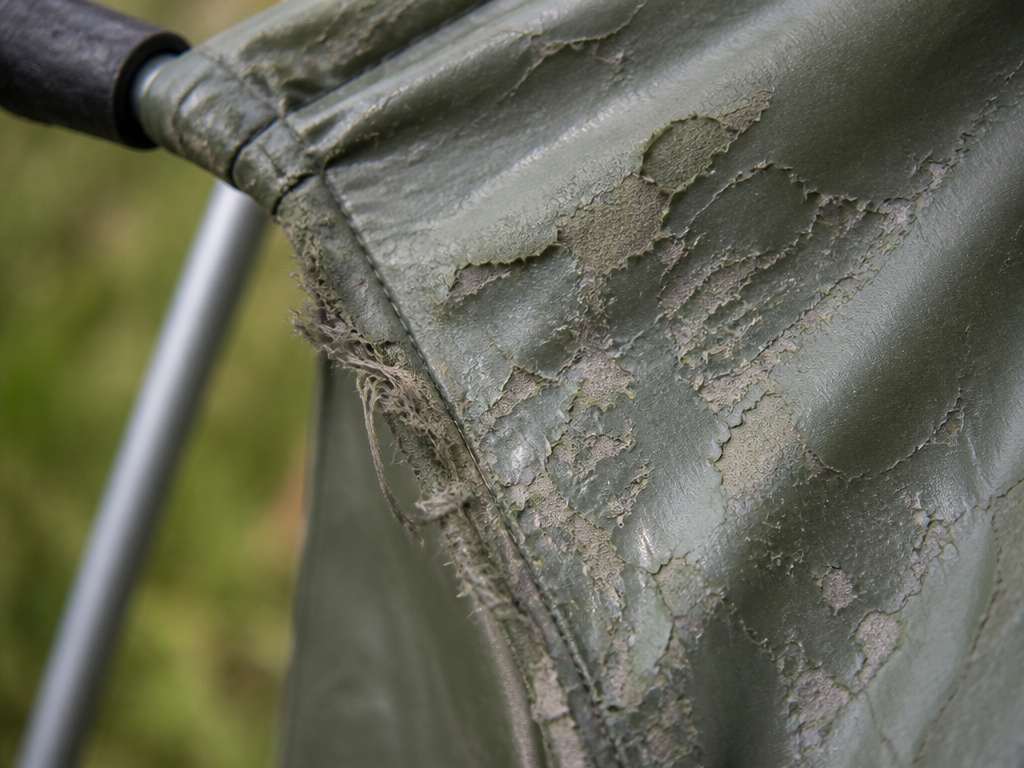
Rainproofing has its limits. If the fabric itself is fraying, riddled with holes, or the PU coating is universally sticky and foul-smelling, you’re fighting a losing battle. A tent with a very low Hydrostatic Head rating (under 1500mm) is a fair-weather friend that will always struggle in a storm.
Trying to salvage a tent with a completely delaminated silicone coating or rotten fabric is like repainting a rusted-out car. The cost and effort often meet or exceed buying a reliable new shelter designed for the conditions.
If you’re facing a major failure, it may be smarter to invest in a new model. The good news is that effective shelter doesn’t have to break the bank. Many of the best tents for heavy rain are built to withstand seasons of abuse, and there are solid budget tent options that perform brilliantly with a proper seam-sealing session right out of the bag. The goal is to match your shelter to your adventures.
Frequently Asked Questions
How often should I re-waterproof my tent?
There’s no fixed schedule. Re-seal seams when the tape fails or every 2-3 years of active use. Refresh the DWR on your fly whenever water stops beading and soaks in. Recoat a flaky PU layer as soon as you notice it. Your eyes and a garden hose are the best diagnostics.
Can I use duct tape for a field repair?
Absolutely not. Duct tape leaves a horrific residue and fails when wet. For emergency field repairs, always carry a roll of clear, waterproof repair tape like Gear Aid Tenacious Tape. It’s designed for technical fabrics and can patch a seam or puncture until you get home.
Is a leaking tent floor repairable?
Yes, if the fabric is intact. Clean the area, let it dry, and apply a PU floor sealant. For large areas, using a compatible footprint as a permanent liner is a good fix. For a severely compromised floor, a lightweight tarp shelter might be a simpler long-term solution for fair-weather trips.
What’s the difference between waterproof and water-resistant?
Waterproof means no water penetrates under a specific pressure, measured by its Hydrostatic Head (HH) rating in millimeters. Water-resistant means it can shed light spray but will wet through under sustained rain or pressure. Your tent should be waterproof; your wind jacket is water-resistant.
Can I waterproof a tent in cold weather?
Most sealants require application above 60°F (15°C) to cure properly. The chemical reaction needs warmth to form a strong, flexible bond. Plan this job for a warm, dry day, not in a cold garage or before a winter trip.
The Bottom Line
Rainproofing your tent isn’t a mysterious art, it’s straightforward maintenance. It boils down to sealing the thousands of tiny holes in your seams and refreshing the coatings that time and sun wear away. The investment is a few hours and about twenty bucks, but the payoff is seasons of dry, confident camping.
Start with a quality shelter. Choosing from well-reviewed rainproof tent models designed for wet weather gives you a stronger foundation. Pair it with the right essential camping equipment, a good footprint, proper stakes, and you’ve built a system that keeps you comfortable.
Now grab that tube of sealant, put on some music, and give your tent the refresh it deserves. Your future dry, warm self will thank you.
