
A Complete Guide On How To Winterize A Tent For Off-Season
This post contains affiliate links. As an Amazon Associate, we earn from qualifying purchases.
Winterizing your tent means cleaning it thoroughly, drying it completely, and storing it loosely in a cool, dry, climate-controlled space. Skipping any of these steps invites mold, mildew, and permanent damage to waterproof coatings and fabrics. The Kodiak Canvas owner’s manual states storing a damp tent, even briefly, can ruin it and void the warranty.
Most people think a quick wipe-down and a stuff in the garage is fine. It isn’t. Moisture trapped in folds becomes mold within weeks, and temperature swings in an attic degrade tent pole elastic shock cords. You lose hundreds of dollars in gear value.
This guide covers the exact cleaning sequence, the critical drying step most miss, and the storage mistakes that cost you a tent by spring.
Key Takeaways
- Store a tent wet once, and you’ll likely void the manufacturer’s warranty. Both Kodiak Canvas and Coleman explicitly warn against it in their manuals.
- Drying a tent takes longer than you think, a full day in the sun with a breeze, not just an hour in the shade. The floor and seams hold moisture longest.
- Never store a tent in its original stuff sack. The tight compression creases the waterproof coatings, causing them to crack and flake off.
- Garages and attics are the worst storage spots. Big Agnes advises against them due to large temperature and humidity swings that degrade seams and fabrics.
- For tents with electronics, like the Big Agnes mtnGLO, remove all batteries before storage. Corrosion from a single leaking cell can destroy the lighting system.
The Two Non-Negotiable Steps Before Storage
You cannot skip cleaning and drying. Ever. The Coleman Kenai manual is clear: never store the tent, even for a short period, without brushing off caked dirt and letting it dry thoroughly. Dirt grinds into fabric under compression, and moisture breeds mold.
Start by pitching the tent in a shaded area, direct sun on wet fabric can set stains. Use a soft brush or dry cloth to remove all loose debris from the fly, body, and floor. For ground-in dirt or sap, mix a mild, non-detergent soap with cool water. Dish soap or laundry detergent strips the durable water repellent (DWR) finish. Scrub gently with a soft sponge.
Common mistake: Using detergent to clean a tent, it removes the water-repellent treatment on the outer fly. Kodiak Canvas warns that soaps and detergents can damage their Hydra-Shield™ canvas. Use a silicone-based repellent like Kiwi Camp Dry® for re-treatment.
Rinse the entire tent with a garden hose on a gentle spray setting. You want the water to run completely clear from every seam. Pressure washers are forbidden, they force water through the seam tape.
Now, the part everyone rushes: drying. Leave the tent fully pitched in a breezy, shaded spot. A single sunny afternoon is rarely enough. The floor and seam areas take the longest. If you must pack it damp for transport, the Kodiak manual says to roll it loosely and set it up again at home within 24 hours. Storing it damp for a week guarantees mildew.
TL;DR: Clean with mild soap, rinse until clear, and dry completely, even the seams. A damp tent stored for a week will grow mold.
Where to Store Your Tent (And Where Not To)
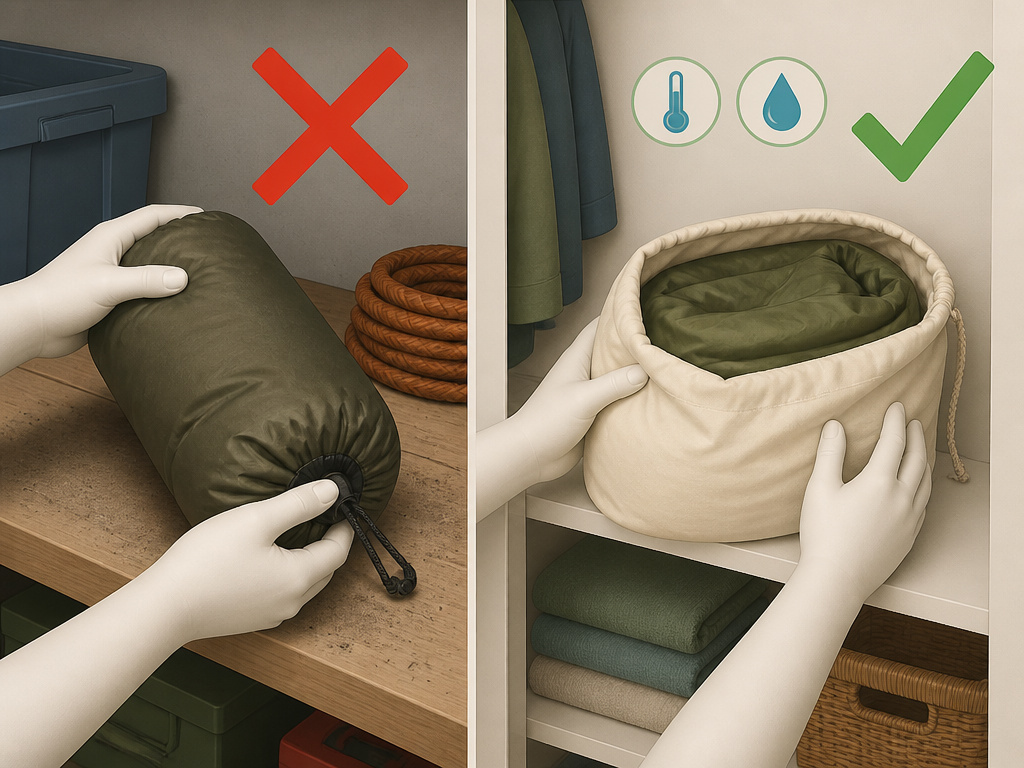
The storage environment determines if your tent survives the off-season. Big Agnes explicitly advises against garages or attics. The large fluctuations in temperature and humidity there degrade seam tape and fabric coatings.
A dry, temperature-controlled closet or under-bed space is ideal. Basements can work if a dehumidifier runs consistently. The goal is stable, moderate conditions.
I stored a season-old Coleman in a garage one winter. By spring, the pole shock cords were slack and the rainfly had a tacky feel where the polyurethane coating had started to break down. It never shed water properly again.
Use a large, breathable storage bag. A old pillowcase or a specially made cotton storage sack works. The original nylon stuff sack is for transport, not storage. Constant compression in the stuff sack sets permanent creases in the waterproof coatings. Those creases become weak points that crack.
For pole care, Terra Nova recommends a specific technique to extend shock cord life. Collapse the poles from the middle to distribute tension equally, or store them partially folded. This relieves constant strain on the elastic.
| Storage Location | Risk If Used | Better Alternative |
|---|---|---|
| Garage / Attic | Temperature swings degrade coatings; humidity causes mildew | Hall closet or under a bed |
| Original Stuff Sack | Compression creases crack waterproof layers | Large cotton storage sack or loose box |
| With Stakes/Poles Inside | Abrasion punctures tent floor | Separate bag for hard items |
| Plastic Bin (Sealed) | Traps residual moisture | Cardboard box (breathes) |
TL;DR: Store your tent loosely in a closet, not a garage. Keep poles partially folded to save the shock cords.
Handling Special Fabrics and Electronics
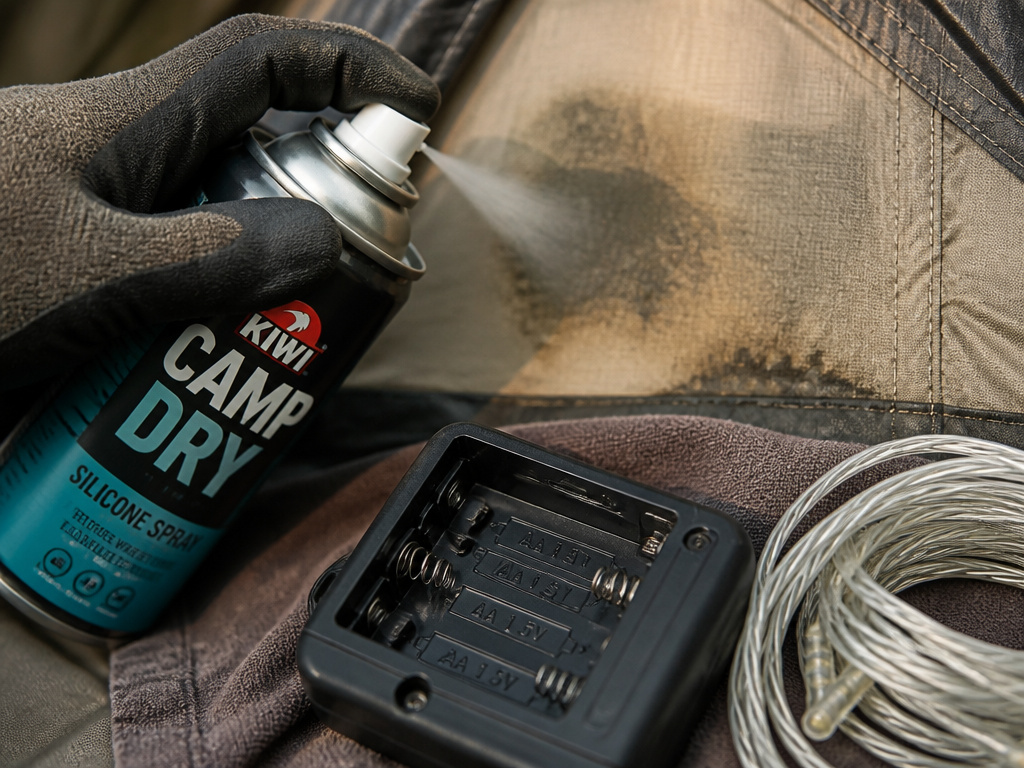
Canvas and nylon require different care. Electronic components demand their own protocol.
Caring for Canvas Tents
Canvas tents, like those from Kodiak, are breathable and durable but heavier. Their care differs from synthetic nylon. The Hydra-Shield™ canvas on Kodiak models is watertight yet breathable. If you need to re-treat it, use only a silicone-based water repellent like Kiwi Camp Dry®. The manual cautions against other treatments, such as Canvak®, which can clog the canvas’s tiny holes and eliminate breathability.
Never use a pressure washer. The high pressure can damage the tight canvas weave. For extended use, more than three consecutive weeks. Kodiak refers to specific care instructions on their website.
Winterizing Tents with Electronics
Tents like the Big Agnes mtnGLO have integrated LED lighting. Before storage, remove all batteries from the battery pack to prevent corrosion. Unplug the battery controller from the LED light strand. Ensure every electronic part is completely dry. The manual is explicit: do not turn on the lights if the controller or lights get wet, as this can damage the system permanently.
A single leaking battery can ruin the entire unit. Store the components separately in a sealed plastic bag within your main storage sack.
The Condensation Trap and How to Beat It
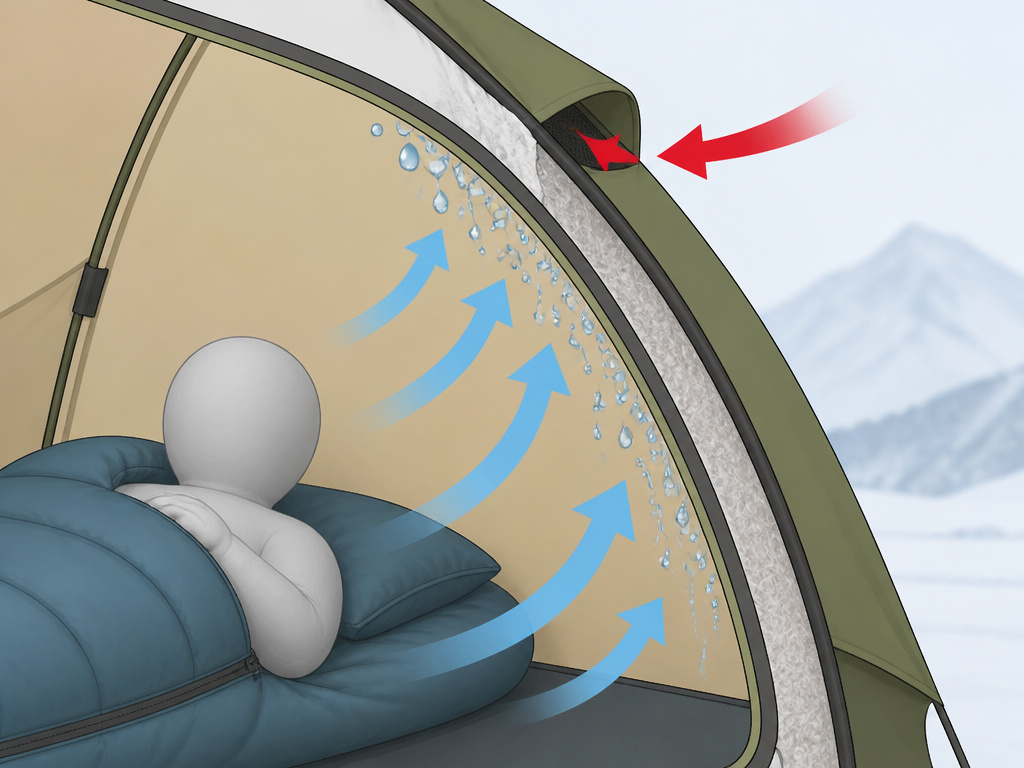
Condensation inside a tent is a function of physics, not a fabric flaw. It happens when warm, moist air from your breath and body hits a cold tent wall. The water vapor condenses into droplets.
Placing a ground cloth underneath your tent reduces condensation between the floor and a sleeping mat. It also protects the tent floor from abrasion.
Ventilation is your primary weapon. Always use the vents built into your rainfly, even in cold weather. Crack a door or window slightly to allow moist air to escape. If you’re using a hot tent or a tent with a stove jack, the dry heat significantly reduces interior humidity, but you still need adequate venting to manage combustion gases and moisture.
TL;DR: Condensation is managed by ventilation and a ground cloth. Seal the tent up tight, and you’ll wake up to a damp sleeping bag.
Repair and Maintenance Before Packing Away
A small repair now prevents a trip-ending failure later. Lay the dry tent out flat and inspect every inch.
- Seams: Look for thinning thread or visible gaps in the seam tape. For non-taped seams on older or basic models, apply a fresh bead of seam sealer. The Coleman Kenai manual notes that seam sealer is not provided, but additional protection is recommended prior to camping.
- Zippers: Run them back and forth. If they catch, clean the teeth with a soft brush and apply a silicone-based zipper lubricant. Never use wax or oil, it attracts dirt.
- Poles: Examine each section for hairline cracks, especially near the ferrule ends. Check the shock cord tension. If it’s overly stretched, consider a re-stringing kit.
- Fabric: Hold the rainfly up to the light. Look for thin spots or pinholes. Apply a tenacious tape patch on both sides for a permanent fix.
- Guy lines and tensioners: Replace any frayed lines. Ensure all plastic tensioners slide smoothly.
Having the right tent camping equipment on hand, like a repair kit with seam grip, tape, and spare cord, turns a 15-minute fix into a saved weekend.
Frequently Asked Questions
Can I store my tent in the basement?
Only if your basement is dry and climate-controlled. Run a dehumidifier if there’s any chance of dampness. A musty basement smell means mold spores are present, and they will migrate to your tent fabric.
Is it okay to pack the tent away slightly damp if I promise to dry it soon?
No. The Kodiak Canvas manual states that storing a wet or damp tent, even for a short time, can ruin it and void the warranty. If you must pack it damp, roll it loosely, transport it home, and set it up again immediately to dry fully.
How do I know if my tent is completely dry?
Feel the seams and the tent floor, these are the last areas to dry. They should feel cool and completely dry to the touch, not cool and slightly clammy. In doubt, leave it pitched for another few hours.
What’s the best way to clean mold or mildew?
Mix a solution of one cup of lemon juice and one cup of salt in a gallon of warm water. Gently scrub the affected area with a soft brush, then rinse thoroughly. Sunlight is a natural disinfectant, so dry the tent in direct sun afterward. This works for mild cases; severe mildew may permanently stain the fabric.
Should I re-waterproof my tent every year?
Not necessarily. If water stops beading up on the rainfly and instead soaks in, it’s time. Use a spray-on, silicone-based waterproofing product designed for technical fabrics. Follow the product instructions exactly, apply to a clean, dry tent in a well-ventilated area.
Before You Go
Winterizing isn’t just a chore; it’s insurance. A clean, dry, loosely stored tent will be ready for instant deployment when the first warm weekend hits. The difference between a tent that lasts five seasons and one that molds out after two is a single afternoon of care. Store it right, and your four-season shelter will be ready for whatever next year’s adventures bring. Ignore the steps, and you’re just pre-paying for your next gear purchase.
