
How To Keep Moisture Out Of Tent With Pro Ventilation Tips
This post contains affiliate links. As an Amazon Associate, we earn from qualifying purchases.
To keep moisture out of your tent, you must manage the humidity you create and maximize airflow before the temperature drops. This means picking a campsite away from water, opening all vents at sunset, and storing every damp item outside your sleeping area. The goal isn’t to stop condensation physics, but to control where the water ends up.
That cold drip hitting your forehead at 3 a.m. isn’t rain. It’s you. It’s the steam from your breath, the damp sigh of yesterday’s socks, and the warm air from your body meeting the cold nylon ceiling. I’ve spent too many mornings wringing out my sleeping bag liner to think this is just bad luck.
Forget the showroom pitch. A dry night is about the choices you make in the last hour of daylight. Let’s talk about where to put your tent, how to set it up so it breathes, and what you should never, ever bring inside with you.
Key Takeaways
- Pitch on high, dry ground at least 200 meters from water, under tree cover if possible. Valley bottoms and lakeshores are cold, humid traps.
- Open every vent, peak, low, and doors, before sunset to establish airflow while the temperature difference is small. Waiting until you feel clammy is too late.
- Isolate all moisture sources. Seal wet clothes and boots in a dry bag and leave them in the vestibule. A single damp shirt can coat your tent ceiling in droplets.
- For single-wall shelters like the NEMO Spike, you must create aggressive cross-ventilation using both top and door vents simultaneously. They require a different, more active management style.
- Breathe through your nose. Studies suggest mouth breathing releases about 40% more water vapor overnight, depositing it directly on the wall by your head.
Where Should You Pitch Your Tent to Avoid Condensation?
Your campsite choice is the first and most powerful lever you pull. It’s not about the view; it’s about microclimates. Cold air sinks, and water evaporates. Ignore these facts, and you’re signing up for a soggy sleeping bag.
Cold, still nights with minimal air circulation between the warm interior and cool exterior cause rapid condensation accumulation on interior surfaces.
Get off the valley floor. Cold, dense air pools in low areas like water, bringing moisture with it. A site just 50 feet higher on a slope or a forest bench allows that damp air to drain away from you. I learned this the hard way on a trip in the Wind River Range, waking up in a meadow bottom to a tent so wet inside and out it felt like I’d slept in a cloud.
Give water a wide berth. A lake or river actively evaporates, saturating the air around it. That “fresh, lakeside breeze” is loaded with moisture that will condense on your fly. The 200-meter rule is a good minimum. On a rainy Scottish trek, pitching just 30 meters from a loch meant my MSR Hubba Hubba NX fly was soaked with condensation by dawn, despite wide-open vents.
Use trees as a thermal buffer. A dense canopy acts like a blanket, reducing radiant heat loss from your tent to the cold night sky. This shrinks the temperature difference between inside and outside, the main driver of condensation. Always check for dead branches overhead, but a sheltered spot under living trees is often warmer and drier than an exposed field.
| Campsite Type | Condensation Risk | Primary Reason |
|---|---|---|
| Valley Bottom | Very High | Cold, moist air pools; minimal wind for drainage. |
| Lakeshore / Riverside | Very High | Evaporation saturates air within a 200-meter radius. |
| Exposed Ridge | High | High winds can cool the fly rapidly; no thermal buffer. |
| Open Field | High | Full exposure to radiant cooling and heavy dew. |
| Under Tree Canopy | Moderate | Canopy buffers temperature drop and blocks dew. |
| Mid-Slope Forest Bench | Low | Cold air drains away; some wind; limited dew. |
TL;DR: Spend the last 20 minutes of daylight hunting for a spot that’s high, dry, and sheltered. Your future dry self will thank you.
How Do You Set Up Your Tent for Maximum Ventilation?
Ventilation isn’t a switch you flip when you get damp. It’s a system you build while you still have dry hands and daylight. The sequence here matters.
Before you start: Never cook or boil water inside your tent. It releases a massive volume of water vapor directly into the enclosed space. The fabric also absorbs food odors, which can attract wildlife long after you’ve eaten.
- Start with a proper footprint. Lay your groundsheet or tent footprint first. This creates a crucial vapor barrier. Skip it, and soil moisture can wick up through the tent floor. I learned this on a clay-soil site in Oregon, waking up with a damp sleeping pad despite a perfectly dry rainfly.
- Pitch for taut, steep walls. A sagging wall creates dead air pockets and can brush against your sleep system, transferring condensation directly. For specific models, follow manufacturer specs. Gossamer Gear, for instance, recommends setting poles to 125 cm for their shelters to increase wall steepness and air movement at the base.
- Open high and low vents immediately. The moment your tent is pitched, open the peak vent (like those on MSR rainflies) and any low side vents. The goal is to equalize the inside and outside air before the evening cooldown begins.
- Configure doors and vestibules strategically. If rain isn’t forecast, leave at least one vestibule door fully open. If rain is possible, crack it an inch at the top and bottom. Never block the gap under the vestibule with your pack, that’s a primary exhaust route for heavy, moist air.
- Wipe down at dawn. Accept that some condensation is likely. Carry a dedicated towel like a PackTowl Personal for a quick absorbent wipe of the inner walls before packing. Shake the fly out thoroughly. Packing a wet tent is a one-way ticket to mildew.
Common mistake: Waiting until you’re in your sleeping bag to open vents, by then, the temperature gradient is steep and humidity is already high, making ventilation less effective.
What’s the Best Way to Manage a Single-Wall Tent?
Double-wall tents give you a buffer, the air gap between the inner mesh and the rainfly. Single-wall shelters like the NEMO Spike, Chogori, or ultralight tarp tents remove that gap. The waterproof fabric is your ceiling, and when it gets cold, that’s where the water beads up. It will drip on you if you’re not proactive.
Single-wall shelters like NEMO’s Spike, Chogori, Wagontop, and Tenshi require extra care in setup to mitigate condensation, as crosswinds cannot circulate air as effectively as in double-wall shelters.
Ventilation is mandatory, not optional. These tents have top and door vents for a reason. You must use both simultaneously to create a cross-flow. Opening just the top vent lets moist air rise and stagnate. In still conditions, this might not be enough. Be prepared for more active management, including morning wipe-downs.
Pitch for a steep angle. Many single-wall tents are trekking-pole supported. Pitch them at the maximum recommended pole length to steepen the walls. A steep wall encourages condensation to runnel down to the edges instead of beading directly above your face. A shallow angle means droplets fall straight onto your bag.
Ignore the touching-the-wall myth. NEMO Equipment states liquid does not wick through fabric simply by contact during rain. However, in a single-wall tent, touching a wet inner surface transfers that moisture directly to your gear. The real goal is keeping that inside surface dry through aggressive airflow.
Why Is Your Gear the Biggest Condensation Culprit?
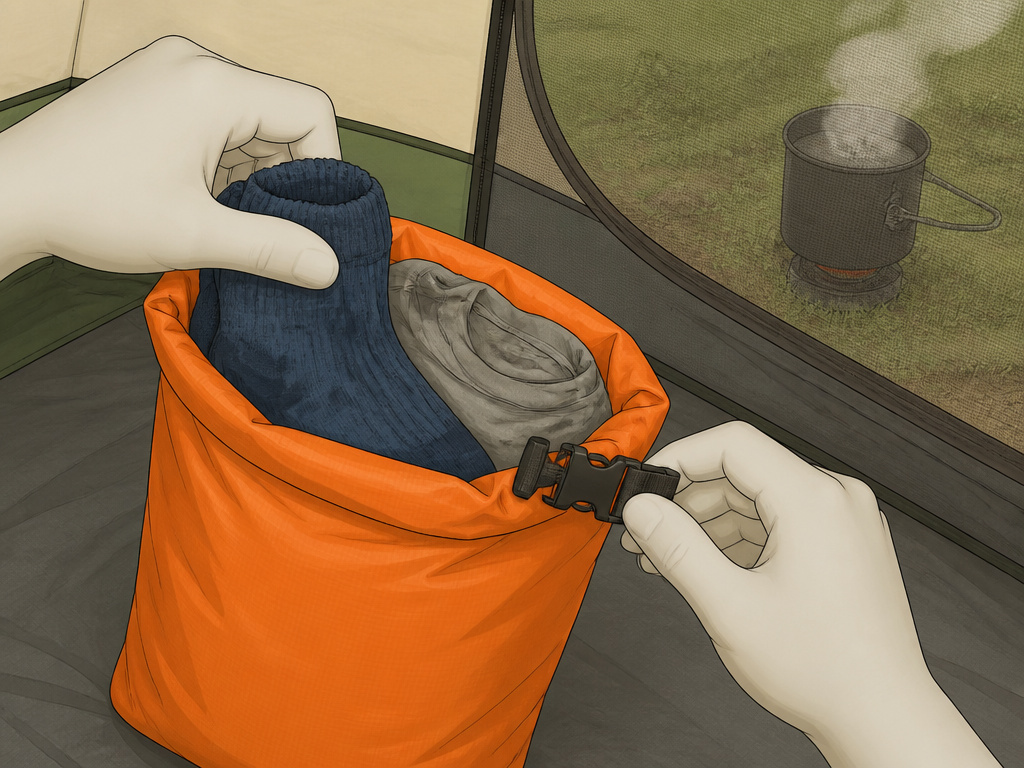
You are a mobile humidifier, exhaling about a liter of water vapor per night. Everything damp you bring inside competes for second place. Managing this “humidity factory” is non-negotiable.
Common mistake: Hanging wet socks or a shirt inside the tent to dry, they won’t dry overnight, and all that evaporated moisture condenses on the coldest surface: your tent walls.
Quarantine all wet clothing. That damp hiking shirt, rain-soaked socks, or a swimsuit, they all evaporate. The solution is simple and brutal: anything damp stays in the vestibule, sealed in a dry bag like those from Sea to Summit. Isolate the moisture from your living area.
Keep cooking outside. Boiling water is an instant fog machine. Doing it inside your tent, even with the door cracked, guarantees a rainforest climate. Always cook outside, well away from the tent door. The steam from your bedtime tea adds up, too.
Let your sleep system breathe. Using a waterproof bivy inside your tent or putting your feet in a non-breathable stuff sack backfires. Your body perspires, the moisture gets trapped, and you end up damp from the inside out. Use a breathable liner if needed.
| Gear Item | Moisture Contribution | Smart Storage Move |
|---|---|---|
| Wet Hiking Clothes & Socks | Very High | Seal in a dry bag, place in vestibule. |
| Damp Boots & Gaiters | High | Place outside, under vestibule awning if possible. |
| Cook Pot with Residual Water | Medium | Clean and store outside, away from tent. |
| Open Water Bottle | Low | Ensure lid is sealed tight, store in vestibule. |
| Your Breath | Very High | Manage through nose breathing and ventilation. |
For more on organizing your kit, our tent camping equipment guide has you covered.
How Do You Handle Extreme Conditions Like Rain or High Altitude?
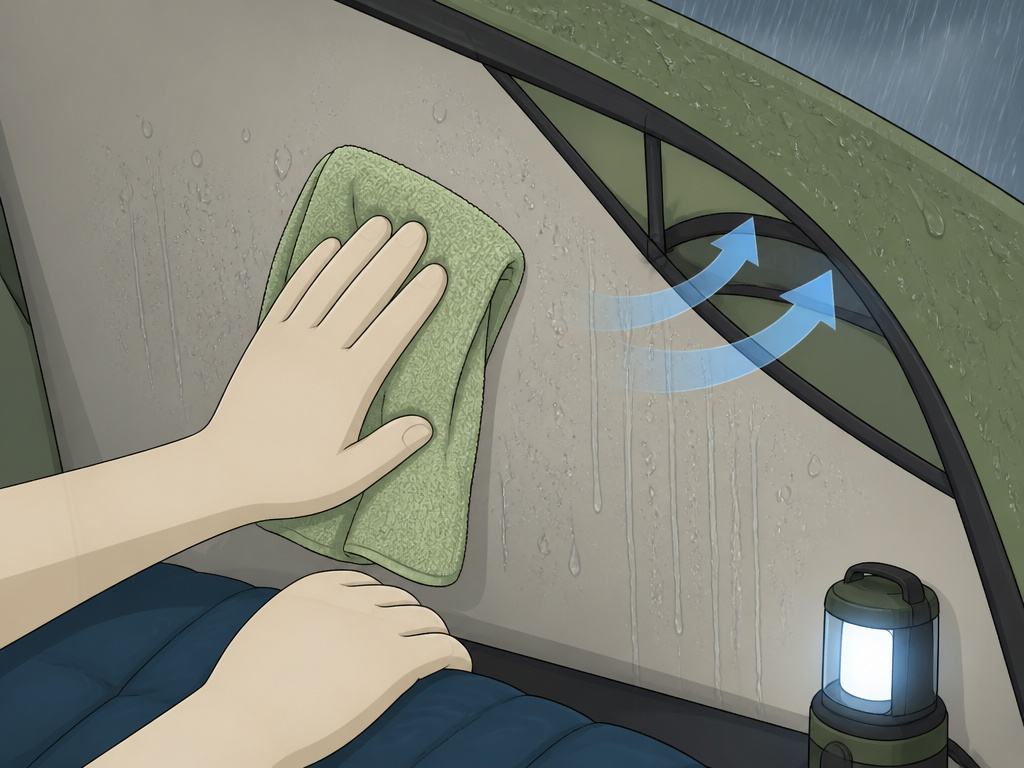
Standard advice works for a temperate forest. When the environment gets extreme, your tactics need to adapt. Perfect control might be impossible, but good management is still within reach.
Rain saturates the air. When it’s actively raining, outside humidity is near 100%. Pulling that air through your vents does little to dry things out. Your goal shifts from prevention to damage control: keep your bag away from the walls, use a tent lighting solutions that doesn’t add heat, and have your absorbent towel ready for a major morning wipe-down before packing.
High altitude changes the physics. Decreased atmospheric pressure means there’s less resistance to water vapor. Humidity moves more freely from your warm interior to the cold fly, which can increase condensation rates. Ventilation remains critical, but so does avoiding those damp, beautiful alpine basins. This is where robust storm-resistant tents designed for severe weather often have superior venting systems.
Cold, still nights are the perfect storm. No wind means no natural air exchange, and the temperature gradient is steep. This is when cracking a vent opposite your head can create a chimney effect. If you seal up completely for warmth, you’ll wake up to an interior frost layer. In winter scenarios, hot tent stoves in specialized canvas tents with stove jacks solve this by keeping the interior air warm and dry, but that’s a whole different level of camping.
Frequently Asked Questions
Does touching the tent wall make condensation worse?
No. Liquid does not wick through tent fabric simply from contact. NEMO Equipment has debunked this myth. However, if the wall is already wet from condensation, touching it will transfer that water to your sleeping bag or clothing. The goal is to keep the wall dry through ventilation.
Should I use a battery-powered fan in my tent?
Yes, a small fan can be a game-changer for airflow, especially in single-wall tents or on utterly still nights. Position it to move air from a low vent toward a high vent to create a cross-breeze. It won’t eliminate condensation in saturated air, but it can reduce its severity.
Do tent materials like canvas condense less?
Heavier canvas tents often have better inherent breathability than thin silnylon, which can help vapor escape. However, no material is immune to the laws of physics when warm, moist air meets a cold surface. Design (double-wall vs. single-wall) is usually a bigger factor than material alone.
How do I properly dry a wet tent at home?
Never store a wet tent. At home, hang the tent body and rainfly separately in a shaded, well-ventilated area, direct sun can degrade fabrics and coatings. Ensure every seam and fold is completely bone-dry before packing it away for long-term storage to prevent mildew.
Can a treatment like Nikwax Tent Proof help?
Yes, but with a caveat. A water-repellent treatment helps water bead and roll off your fly faster, which can slightly reduce moisture buildup on the fabric itself. I used it on a fly before a wet trip and noted less morning moisture. However, it’s no substitute for core ventilation practices.
The Bottom Line
Staying dry in your tent isn’t about buying the most expensive shelter. It’s about the discipline of campsite selection, the habit of pre-emptive venting, and the ruthless exile of anything damp from your sleeping area.
For most trips in a double-wall tent, that’s enough. If you’re venturing into shoulder seasons, high altitude, or using a sleek single-wall shelter, you add the next layer: accept that some wiping down is part of the drill. Carry the right tools, like a good tent camping accessories kit that includes a dedicated absorbent towel. Your comfort, your gear’s longevity, and your mood at dawn depend on winning this quiet battle against the humidity you bring with you.
