
How To Fix A Broken Zipper On Your Tent – Quick Repair Guide
This post contains affiliate links. As an Amazon Associate, we earn from qualifying purchases.
To fix a broken tent zipper, first diagnose the exact failure: a stuck slider, a broken pull tab, a detached slider, or missing teeth. The fix ranges from a 30-second squeeze with pliers to a full slider replacement requiring a model-specific part from the manufacturer.
Most people grab the slider and yank when it sticks. That’s the move that tears teeth right off the nylon tape. Once a tooth is gone, your field repair options shrink to duct tape, and that stuff quits sticking below 40°F.
This guide walks through the four common failures, the tools you actually need, and the one-step-at-a-time fixes that don’t make the problem worse. We’ll cover the 30-second plier trick, the cold-weather duct tape warning, and how to get the right replacement slider from Big Agnes or your tent’s maker.
Key Takeaways
- Forcing a stuck slider is the fastest way to tear teeth from the tape. That’s a permanent field failure.
- Duct tape loses adhesion below about 40°F (4°C). A field patch needs replacing every morning if the night drops below freezing.
- Store your tent with the zippers closed. An open zipper holds the slider in a stretched position, which accelerates wear on the internal spring.
- Sand and grit grind down zipper teeth faster than rain or UV damage. Rinse the zipper tape with clean water after beach or desert trips.
- Manufacturer repair timelines are long. Nemo Equipment quotes up to three weeks. Knowing how to DIY a slider replacement saves a camping season.
How to Diagnose Your Zipper Problem in 60 Seconds
Look at the zipper, but don’t touch it yet. Run your finger along both sides of the track. You’re feeling for four specific failures.
A bent tooth feels like a small bump or catch. A missing tooth is a gap. A slider that’s off the track dangles loose at one end. A slider that’s on the track but won’t budge is either jammed on debris or its internal channel is deformed.
Check for damage along the entire length of the zipper teeth before applying force. A single missing or bent tooth can jam the slider, and forcing it can tear adjacent teeth from the fabric tape, creating a larger irreparable section.
The most common mistake is treating all zipper failures the same. Lubricating a deformed slider does nothing. Sewing a patch over a missing tooth when the slider is the problem just creates a new jam point.
TL;DR: Run your finger down the teeth first. Find the exact point of failure before you pick up a tool.
The 30-Second Fix: Tightening a Loose Slider
If the zipper moves but doesn’t catch, or separates easily after you zip it, the slider is loose. The top and bottom plates have spread apart.
This happens over hundreds of cycles. The fix takes a pair of needle-nose pliers and half a minute. Pull the slider all the way to the top of the zipper track. Look at the slider’s rectangular opening. You’ll see a top plate and a bottom plate.
Gently squeeze the front and back of the slider together with the pliers. You’re not crushing it. You’re applying even pressure to narrow the channel by a fraction of a millimeter.
Test the zip. It should move with firm, even resistance and lock the teeth together. If it’s too tight and binds, you squeezed too hard. Use the pliers to very slightly widen the channel again.
Common mistake: Squeezing the sides of the slider instead of the front and back, this pinches the track sideways and creates a permanent drag point. The zipper will never run smoothly again.
Skip the wax or lubricant for this repair. A loose slider is a mechanical problem, not a friction problem. Adding lubricant to a loose slider just makes it slip more.
Unjamming a Stuck Zipper Without Force
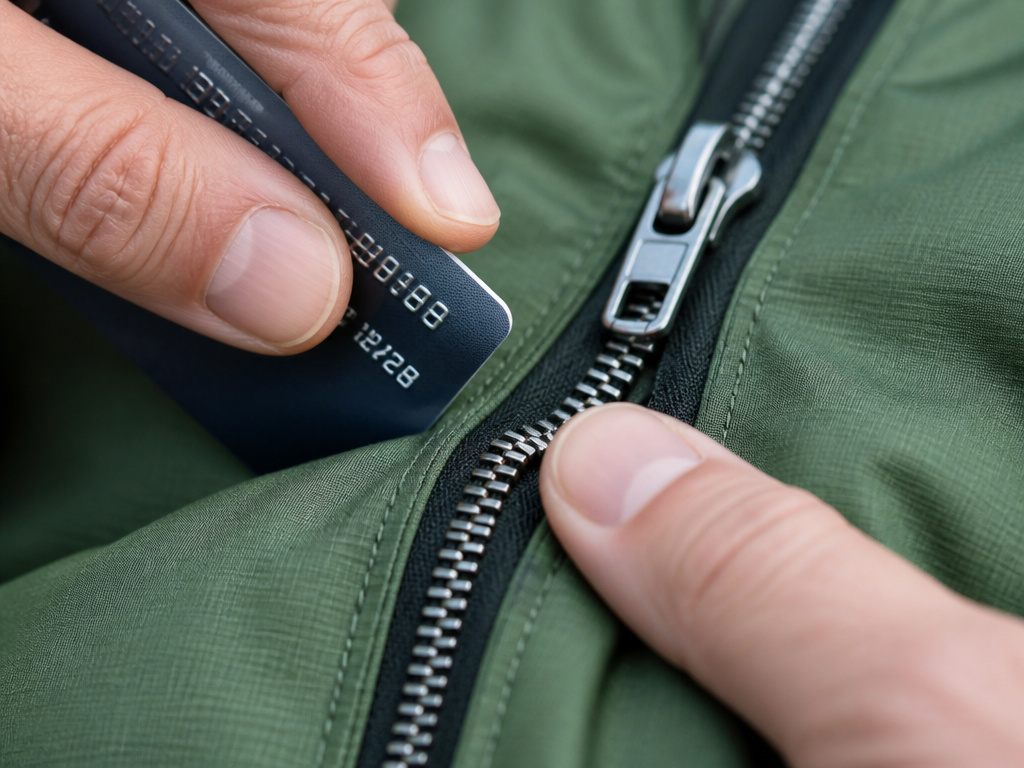
The slider is on the track but won’t move. Your first instinct is pull. Don’t.
Force is what tears teeth. Instead, work the slider backwards off the track from the direction it came. If it’s stuck midway, gently wiggle it back toward the open end.
Once it’s free, inspect the teeth around the jam point. Look for a bent tooth, it will be folded inward or outward compared to its neighbors. Use a credit card edge, a blunt knife tip, or your fingernail to push it back into alignment.
| Tool | Best For | Risk If Skipped |
|---|---|---|
| Credit card edge | Levering a single bent tooth back into line | Snapping the tooth off if you pry too hard |
| Blunt knife tip | Guiding multiple teeth in a row | Cutting the fabric tape if the blade is sharp |
| Needle-nose pliers | Pinching a severely deformed tooth | Crushing the tooth and creating a sharp edge |
After aligning the teeth, apply a dry, silicone-based zipper lubricant along both sides of the track. Rub it in with your fingers. Do not use WD-40 or oil-based lubricants, they attract dirt and will gum up within a day.
Now thread the slider back onto the track from the bottom end and zip slowly. Listen for crunching. Feel for hesitation. Stop if it binds again.
Replacing a Broken Slider or Pull Tab
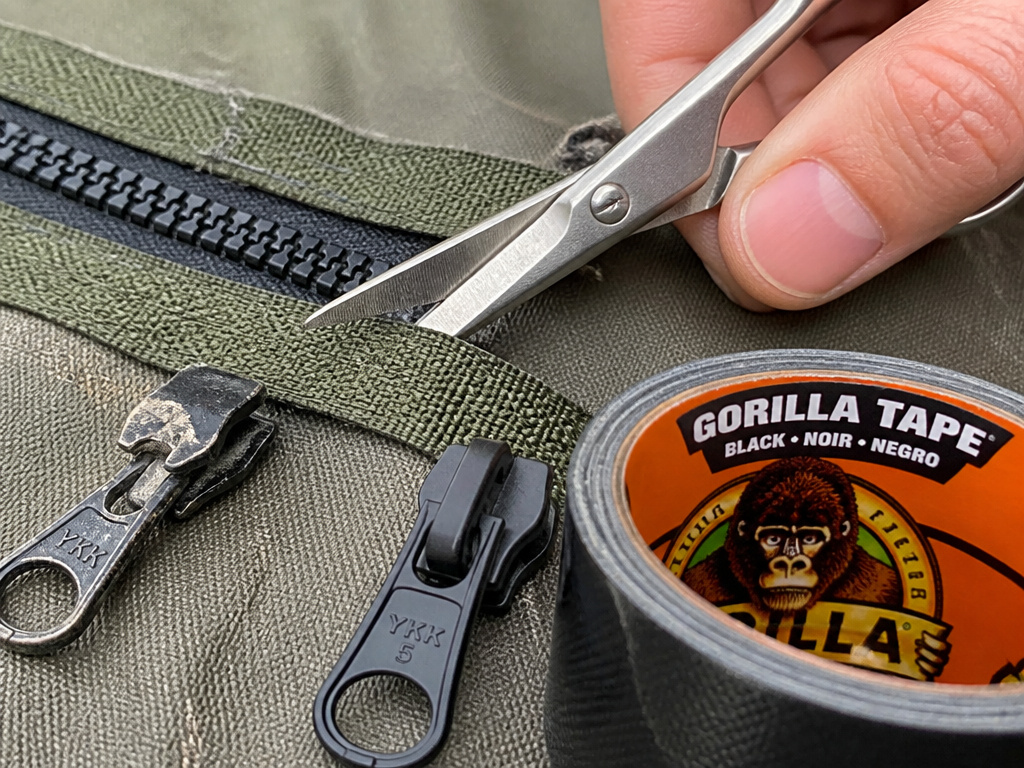
The pull tab snaps off, or the slider itself cracks. You need a replacement. This is where the repair shifts from universal to model-specific.
Most quality tents use YKK zippers. The number stamped on the back of the slider, like #3, #5, #10, denotes the tooth size. A #3 slider will not work on a #5 zipper.
Big Agnes, for example, sells replacement sliders for the YKK #3 zippers on their tents. You open a support case, give them your tent model, and they ship you the exact part. Other manufacturers have similar programs.
Here’s the swap. You’ll need the new slider, a small pair of scissors, and either strong tape or a plastic cable tie.
- Cut the zipper tape. About one centimeter from the bottom end of the zipper, cut straight across one side of the tape. You’re creating a new “starting” end.
- Thread the tape into the slider. Separate the two sides of the zipper. Carefully feed one side of the tape into the top of the new slider, then the other. This takes patience, the teeth must mesh inside the slider channel.
- Zip it once to test. Slowly pull the slider up. The teeth should lock together smoothly. If they don’t mesh, the slider is upside down or the wrong size. Take it off and try again.
- Create a new stop. The old bottom stop is now above the slider. You need a new one at the cut end. Wrap a small piece of heavy-duty tape (Gorilla Tape, T-Rex Tape) around both sides of the tape, front and back. Or, punch a small hole on each side of the tape and thread a plastic cable tie through, pulling it tight. This prevents the slider from running off the end.
TL;DR: Match the slider number stamped on the old one. Threading the tape is finicky, go slow.
When to Use Duct Tape (And When It Will Fail)
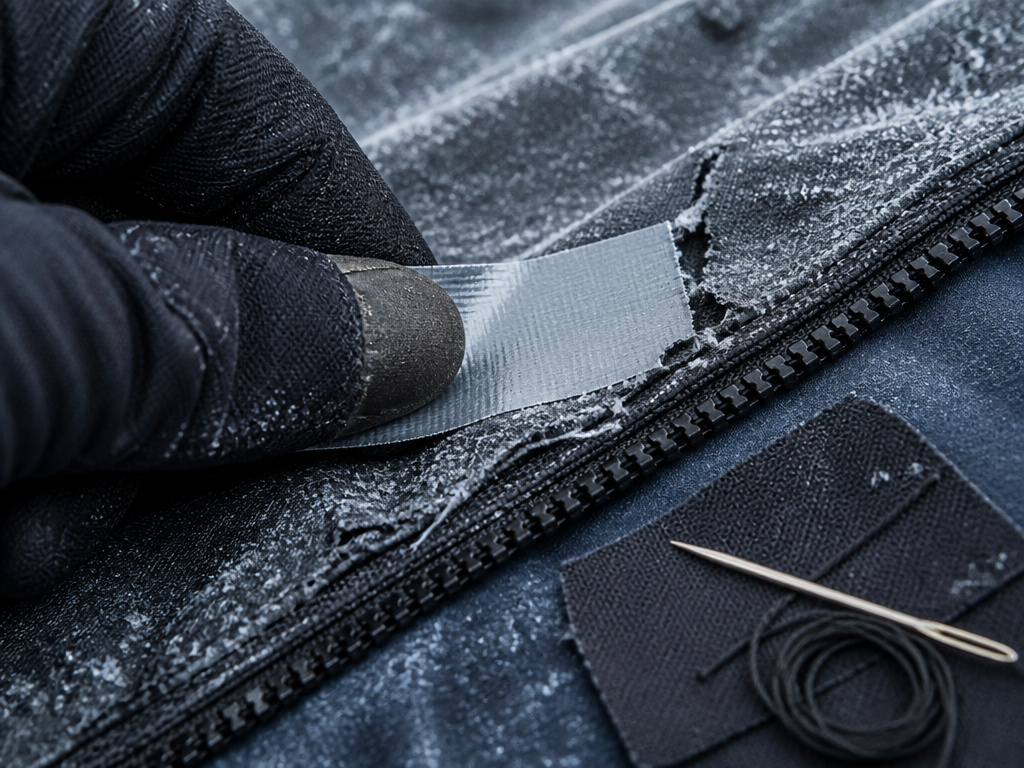
Missing teeth or a torn tape section needs a field patch. Duct tape is the standard. It’s also a temporary fix with a known failure point.
Duct tape adhesive dies in the cold. Below approximately 40°F (4°C), the bond weakens. By morning, the patch will peel. You must replace it daily in freezing conditions.
For a longer-lasting field repair, sew a patch of tough fabric (like a piece of a stuff sack) over the damaged section. Use a heavy-duty thread and a simple running stitch. Sew above the missing teeth, so the slider runs over a smooth fabric bridge, not the lumpy thread.
This isn’t pretty, but it holds for weeks. The slider will catch slightly on the seam, but it won’t jam.
I won’t recommend sewing a zipper shut as a permanent fix. It works for a season, but you’ll curse yourself next spring when you need to sell the tent or want full door functionality. A proper slider replacement is a weekend project with the right part.
Preventing the Next Zipper Failure
Zippers die from abuse, not age. Three habits kill them fast.
First, storing the tent with zippers open. The slider stays stretched over the teeth, fatiguing the internal spring. Always zip the doors shut before stuffing the tent into its sack.
Second, never rinsing sand out. Grit acts like lapping compound on the teeth and inside the slider. After a beach trip, rinse the zipper tape with fresh water and let it dry completely before storage.
Third, yanking the slider when it binds. That single pull can torque a tooth right off the tape. If it sticks, back it up and find the obstruction.
| Prevention Step | Why It Works | Consequence If Skipped |
|---|---|---|
| Zip doors before storage | Relaxes the slider spring, prevents metal fatigue | Slider wears out 2–3x faster, starts separating |
| Rinse zipper after sandy use | Removes abrasive particles that grind down teeth | Teeth wear flat, slider won’t grip, permanent skip |
| Apply dry silicone lubricant 2x/year | Reduces friction without attracting dirt | Zipper feels rough, requires more force, teeth bend |
| Avoid overstuffing the tent bag | Prevents zipper tape from being creased and weakened | Tape develops a weak fold, teeth pop off under tension |
Your tent camping accessories kit should include a small tube of silicone lubricant and a pair of needle-nose pliers. Those two items solve 80 percent of zipper problems on the trail.
For tents for heavy rain or storm-proof tent models, a functioning zipper is your first defense against weather. A single broken tooth can let in a steady drip along the seam.
Frequently Asked Questions
Can you fix a tent zipper without replacing it?
Yes, if the problem is a loose slider or a jam from a bent tooth. Tighten the slider with pliers or realign the tooth with a credit card edge. If teeth are missing or the slider is cracked, you must replace parts.
What is the best lubricant for a tent zipper?
dry, silicone-based zipper lubricant. It doesn’t attract dirt or degrade nylon. Do not use WD-40, candle wax, or petroleum jelly, they gum up and attract debris.
How do you find the right replacement slider for your tent?
Look for a number stamped on the back of your old slider (like #3 or #5). Contact your tent’s manufacturer with that number and your tent model. Companies like Big Agnes sell exact replacements for their YKK zippers.
Is it worth repairing a tent zipper, or should you just buy a new tent?
Repair it. A new slider costs a few dollars and takes 20 minutes. A comparable new tent costs hundreds. Only consider replacement if the fabric around the zipper is also torn or degraded.
Why does my zipper keep splitting open after I zip it?
The slider is too loose. The channel has widened from use and no longer presses the teeth together tightly. Use pliers to gently squeeze the front and back of the slider together until the zipper holds.
Before You Go
A broken zipper doesn’t mean a dead tent. Match the fix to the failure: squeeze a loose slider, realign a bent tooth, or order a model-specific replacement part. Remember that duct tape is a short-term bandage that fails in the cold, and forcing a stuck slider is the one move that turns a simple jam into a trip-ending tear.
Keep sand out, store the zippers closed, and give the tracks a silicone rub once a season. That’s the difference between a zipper that lasts a decade and one that quits on a rainy night. Your tent camping equipment is only as reliable as its moving parts.
