How To Build A Tarp Tent
This post contains affiliate links. As an Amazon Associate, we earn from qualifying purchases.
To build a tarp tent, select a durable tarp material such as silnylon for heavy rain or polyethylene for UV protection, and gather essential gear like ultralight stakes, high-quality guylines, and a mallet. Set up your tarp by staking the corners tightly, using trekking poles to raise the center, and positioning it with a slope to channel rainwater away. Later in the article, you’ll find detailed instructions on knots, tensioning techniques, and advanced setup options to enhance your tarp tent experience.
Essential Facts in 30 Seconds
- Select a durable tarp material suited for weather conditions, such as silicone-coated nylon for rain or silnylon for wind.
- Securely stake tarp corners to create a stable base and slope for rainwater runoff.
- Use trekking poles at tie-outs to raise the tarp center, improving ventilation and headroom.
- Attach and tighten quality guylines to maintain shape and prevent water entry; check stability regularly.
- Use knots like the bowline and taut-line hitch for secure and adjustable guyline attachments.
Selecting the Right Tarp Material
Select tarp material based on the environment and how you’ll use it. Nylon is light and stretchy, perfect for backpacking trips. Polyester resists UV rays better but weighs more. For strong and durable tarps, pick high-denier fabrics like Cordura or Robic nylon. They’re tough without being heavy.
Check the waterproof coatings next. Silicone coatings keep water out and last long without stretching. Polyurethane (PU) coatings add weight and wear out faster. Polyester tarps with PVC coatings hold water well but can feel bulky. It’s important to note that the waterproof rating of your tarp will determine its effectiveness in heavy rain.
Look at the hydrostatic head rating to judge waterproofness. A rating of 5000mm or higher means excellent water protection. A tarp also provides moisture protection by creating a barrier against rising moisture during rain.
Balance weight, strength, and water resistance. Choose the tarp that fits your needs best.
Essential Supplies for Your Tarp Tent
Building a strong tarp tent needs the right supplies. Use high-quality guylines to keep tension tight and resist wind. Pair these with small, light micro line locks. Carry extra cord for repairs or new setups.
Pick ultralight aluminum stakes that match your soil. Bring a stake mallet to push them in fast. Trekking poles work well as supports. Strong branches also make good poles. Remember that tent stakes are essential for providing stability against wind and rain.
Protect the ground with a waterproof footprint to stay dry. Pack a repair kit for quick fixes. Use light stuff sacks to keep gear neat and easy to carry. Additionally, using a tarp can act as a moisture barrier, enhancing your overall camping experience by keeping the tent interior dry.
Follow these tips to keep your tarp tent safe and ready on every trip.
Basic Setup Techniques for Tarp Tents
Start by staking the corners of your tarp tent tightly. Keep the tarp firm to avoid flapping in the wind.
Use trekking poles at the tie-outs to lift the tarp center. This step gives you more headroom and better air flow.
Attach guylines to the entrance and pull them tight. This keeps the tent’s shape and stops wind or rain from getting inside.
A well-set tarp tent stays strong and dry during your trip.
Stake Initial Corners
Staking the first corners of your tarp tent sets a strong base.
Place each stake at a 45-degree angle for better grip. Push the stakes outward from the corners. Keep the stake lines at a 90-degree angle to hold the tarp tight. This spreads the tension and stops sagging. Additionally, ensure you select appropriate stakes based on terrain type for optimal stability.
Secure two corners on one side first. Then, pull the tarp tight and stake the opposite corners. Use a knot like the taut-line hitch to adjust tension easily.
Push stakes deep, especially in soft soil, to avoid pull-out. Check and tighten the lines often to keep your tent strong against wind. Additionally, ensure the tarp creates a sloped surface to direct rainwater away from the tent.
Raise Tarp Center
Raise the center of your tarp tent to build a strong shelter. Use trekking poles to lift the tarp’s ridgeline tie-outs. Change pole angles to set the height and get more headroom.
Plant poles firmly in the ground. Tie guy lines from the poles to the ground to hold them steady. Keep guy lines tight to stop the tarp from sagging. This keeps your shelter dry and comfortable.
No trekking poles? Use strong branches or camera tripods instead. Check the ground to make sure it can hold the poles well. Adjust your setup to match the weather and terrain for best results.
Secure Entrance Properly
Secure your tarp tent entrance well. Stake down corners opposite the entrance first. This keeps the tarp steady.
Tie guylines to these corners. Pull them tight for extra strength.
Place a strong branch or trekking pole to form the doorframe. Fix it with stakes for support.
Move stakes and guylines to adjust entrance size. This gives you more space inside.
Tighten flaps using guidelines and stakes. This stops wind and rain from coming in.
Check your setup often, especially when weather changes. Keep your shelter safe and strong all trip long.
Popular Shelter Configurations
The A-Frame tarp shelter is very popular. It stands strong and is easy to build. Rain and wind slide off its sloped roof well. This makes it good for many weather types.
The teepee tarp shelter gives you more headroom. It also creates a warm, cozy space. This setup helps you stay comfortable outdoors.
Both designs suit different needs and conditions. Try them to see which fits you best.
A-Frame Shelter Setup
The A-frame shelter ranks as a top choice for tarp camping. It offers simple setup and strong protection.
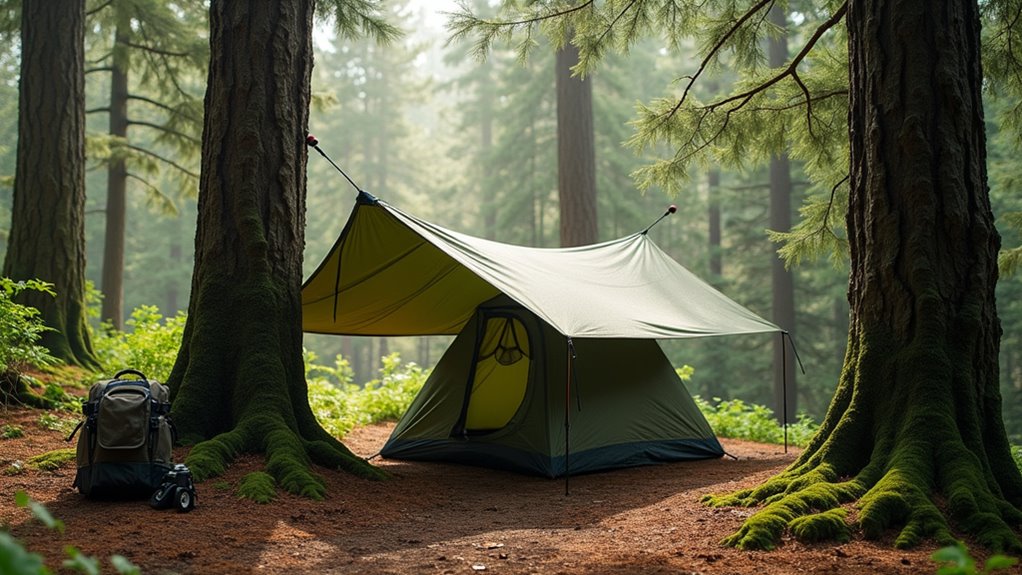
First, stake down two corners along one edge of your tarp to form a straight base line. Next, place trekking poles at the center of the front and back edges. Tilt these poles outward to make a ridge line in the middle. Tie guylines to the poles for extra strength. Ensure to create a ridgeline to prevent water pooling underneath the tarp to maximize its effectiveness against rain.
Set the pole height near 125 cm to allow good headroom and space inside. This design resists wind well and adapts to different weather conditions. Guy ropes are essential for ensuring your tarp tent remains stable during adverse weather.
Tighten the guylines firmly to stop flapping and avoid water pooling. This keeps your shelter sturdy and dry for a comfortable camping trip.
Teepee Configuration Advantages
The teepee shelter offers many clear benefits for campers. It has a large inside space that fits several people comfortably. The tall center pole gives plenty of headroom to stand and move around.
Its cone shape quickly sheds rain and wind, keeping the inside dry and safe. Ventilation is excellent thanks to vents at the top and open sides.
Setting up takes just one pole and a few steps, saving time and effort. The teepee also looks nice, adding charm to your campsite.
This design helps you enjoy nature with comfort and ease.
Knots and Tensioning for Stability
Stability keeps your tarp tent strong and safe. Use the bowline knot to make a firm loop at tarp corners. This knot stays tight and doesn’t slip. Properly secured tent pegs are essential for maintaining the tent’s structure.
The taut-line hitch works well on guylines. Slide it to tighten or loosen the tension easily. The adjustable guyline hitch also helps with quick changes in tension.
Add the prusik knot on the ridgeline. It holds tight under pressure but slides when loose. Finish with half hitches to lock the knots securely. Guy ropes are essential for maintaining the stability of your tarp tent.
Check your knots often, especially during wind or rain. Good knots make your tarp tent last longer and stand up to bad weather. Simple knots, big difference!
Material and Weather Considerations
Select tarp tent materials based on the weather you expect. Heavy rain needs silicone-coated nylon or polyethylene. These materials shed water well. Dyneema Composite Fabrics (DCF) are light and waterproof, perfect for ultralight gear.
Strong winds call for durable fabrics like silnylon, which resists tears. Sun exposure breaks down some fabrics quickly. Polyethylene resists UV rays better than nylon. Nylon needs extra treatment to last long in the sun.
Balance weight and toughness. Heavy materials resist rough weather but add weight to your pack. Your fabric choice affects how long your tarp tent lasts and how well it protects you.
Pick smart, stay safe.
Frequently Asked Questions
How Do I Choose the Right Tarp Size for My Needs?
Start by measuring the area you want to cover. Add extra space for overlap and movement. Think about how many people will use the tarp. Bigger groups need larger tarps. Check the weather forecast. Strong winds or heavy rain require stronger, bigger tarps. Consider tarp material too. Thick, waterproof tarps offer better protection. Lightweight tarps work for mild weather and small jobs. Choose a size that fits your activities and protects you well.
Can I Use a Tarp Tent in Winter Conditions?
Tarp tents work in winter but need careful setup and extra insulation. Tarp material is light but not strong against heavy snow or wind. Traditional winter tents handle cold and storms better. Use thick sleeping pads and warm bags inside for comfort. Keep snow off tarp edges to stop water leaks. Check weather before camping. With right gear and care, tarp tents can keep you safe in cold weather.
What Are the Best Locations for Tarp Tent Setup?
The best places for tarp tents have trees or rocks nearby to tie ropes. Flat ground helps keep the tent steady and comfortable. Find spots shielded from strong winds to stay warm. Avoid low areas near streams to prevent water from flooding the tent. Campsites with natural windbreaks, like hills or bushes, work well. Dry, firm soil stops the tarp from sinking. These tips make your camping safe and cozy.
How Do I Maintain and Clean My Tarp Tent?
Keep your tarp tent clean by using a soft sponge and mild soap with water. Rinse well to remove all soap. Let it dry fully before storing to stop mold and mildew. Check zippers and hooks often for any damage. Fix small tears quickly to avoid bigger problems. Store your tent in a cool, dry place. This care helps your tent last many camping trips.
Are There Any Safety Tips for Tarp Tent Camping?
Camping with a tarp tent needs careful attention to safety. Always keep fire far from your tarp. Flames can burn it quickly. Pick a spot that shields you from strong wind and rain. Use strong ropes and stakes to hold your tarp tight. Watch the sky often. Weather can change fast. Carry a first aid kit and a flashlight. Stay close to your campfire, and put it out before sleep. These tips help you enjoy camping safely and happily.
Conclusion
Building a tarp tent improves your outdoor trips a lot. Use the right materials: a strong tarp, ropes, and sturdy stakes. Learn simple knots like the taut-line hitch for a tight hold. Set up your tarp in different shapes for sun, wind, or rain. For example, an A-frame shape works well in rain. A lean-to style blocks wind from one side. Adjust your tarp’s height to stay dry and cool. Practice these steps before your trip. This way, you get a strong shelter that keeps you safe and comfy. Ready for any weather, your tarp tent will make camping better.