
How to Make a Tent Warmer: A Camper’s Physics Guide
This post contains affiliate links. As an Amazon Associate, we earn from qualifying purchases.
To make a tent warmer, you must systematically defeat heat loss through the floor, walls, and air. Start with a sleeping pad rated R-6 or higher, add a reflective layer, and use a double-tarp roof. The most overlooked trick is managing air density with a cold air sink trench. Heating your body directly is always safer and more effective than trying to heat the tent’s air.
I’ve woken up with ice coating the inside of my tent more times than I’d like to admit. It’s a special kind of cold that seeps into your bones because standard advice, just get a better sleeping bag, misses the point entirely. Staying warm is a battle fought on four fronts: conduction from the ground, convection through the walls, radiation to the night sky, and the cold air pooling around you.
This isn’t about buying the most expensive gear. It’s about understanding a few principles of physics and applying them in the right order. I’ll walk you through the system that’s kept me cozy down to -10°F, from the non-negotiable gear spec to the weird body hack that uses a hydration bladder.
Key Takeaways
- Your sleeping pad’s R-value is non-negotiable. For freezing temps, you need an R-6 minimum; the ground steals heat four times faster than air.
- Insulate in the correct order: floor first, then walls/roof, then manage internal air. A 4 cm thick closed-cell foam pad under your inflatable is the best starting point.
- Create a cold air sink. Dig a 1–2 foot deep trench at your tent entrance to draw the densest, coldest air away from where you sleep.
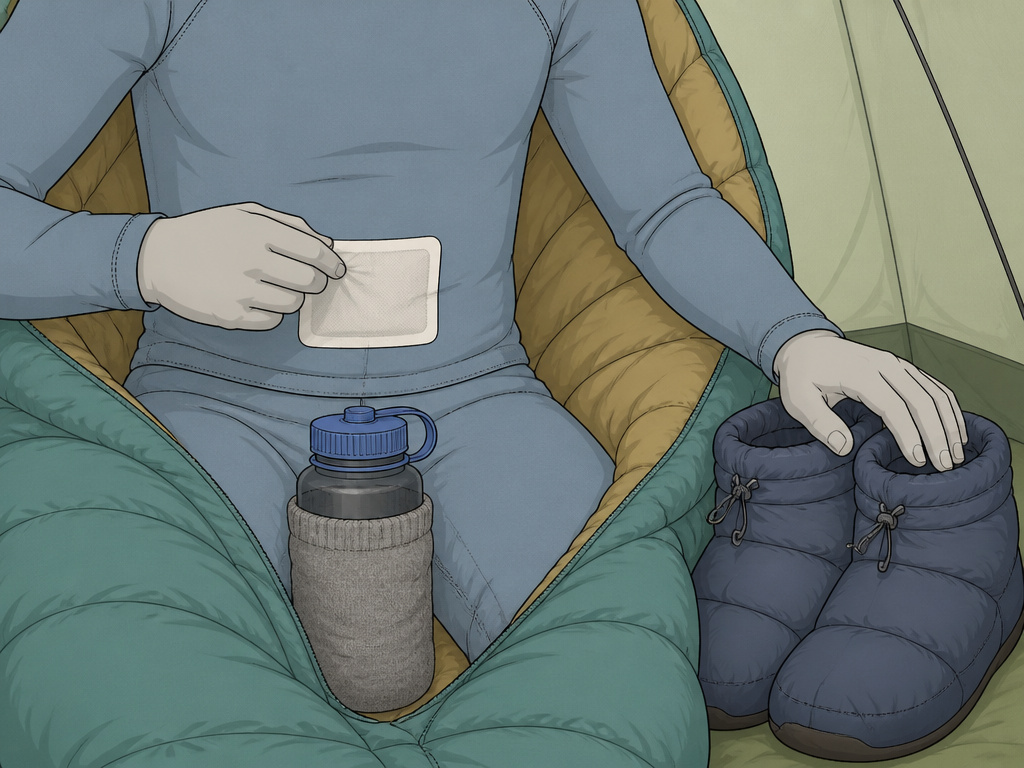
- Heat your body, not your tent. A hot water bottle between your thighs or adhesive body warmers on your core are safer and more effective than portable heaters.
- Never compromise ventilation for warmth. Trapped moisture from your breath will condense, soak your insulation, and make you colder by morning.
Is Your Sleeping Pad Lying to You?
The biggest revelation in my cold-weather camping career was that my prized -20°F sleeping bag was almost irrelevant if I was lying on the wrong pad. Insulation only works when it has loft. Your body weight compresses the fill in your sleeping bag beneath you, creating a direct thermal bridge to the frozen earth.
A sleeping bag’s temperature rating assumes proper use of an insulated sleeping pad. For spring and fall camping, an R-4 pad is suitable, while winter camping typically requires a higher R-value.
The number you must trust is the R-value, a measure of thermal resistance. I treat the manufacturer’s rating as a starting point and add a buffer. My rule is to aim for an R-value 2 points higher than the consensus suggests for a given temperature range.
| Conditions & Temp Range | Minimum R-Value You Need | My Real-World Setup |
|---|---|---|
| Chilly 3-Season (40-50°F) | R-4 | Nemo Tensor Insulated (R-4.2) |
| Winter Camping (20-32°F) | R-6 | Therm-a-Rest NeoAir XTherm (R-6.9) stacked on a Z Lite Sol foam pad |
| Extreme Cold (Below 0°F) | R-8+ | XTherm on Z Lite Sol, plus a reflective SOL Heatsheet blanket in between |
The stacking method is key. My go-to for anything below freezing is the Therm-a-Rest Z Lite Sol (Large) foam pad topped with an inflatable like the Nemo Tensor. The foam’s egg-carton texture stops the slick inflatable from sliding, and it provides a fail-safe if the inflatable pops. For a serious boost, I tape a reflective emergency blanket, shiny-side up, between the two pads. It sounds fussy, but it reflects a surprising amount of radiant heat back at you.
Common mistake: Relying solely on an inflatable pad’s R-value in sub-freezing temps. The air inside can still convect cold from the ground, creating a cold spot under your hips that wakes you up shivering around 2 AM.
How Do You Stop the Walls from Stealing Heat?
Your tent’s thin nylon or polyester walls offer almost no insulation. Wind strips heat away (convection), and the material radiates your body heat out into the cold night sky. The goal isn’t to create a sealed oven, but a still air buffer.
The most effective method I’ve used is the double-wall tarp system. It’s a bit of extra work, but on a clear, still winter night, the difference is palpable. You’re creating a dead air space, just like double-pane windows.
1. Pitch your tent and rain fly normally.
2. String a separate ridgeline between two trees, several feet above your tent’s peak.
3. Drape a second, larger tarp over this high line, ensuring it doesn’t touch your rain fly.
4. Stake out the corners tightly, maintaining a 4–6 inch gap between the two layers.
This air gap is a terrible conductor of heat and kills wind chill. If you don’t have a second tarp, you can insulate from the inside with a dedicated thermal liner or even wool blankets hung with clips to maintain a small air space.
The ventilation trade-off is real. You need airflow to exhaust the moisture from your breath, but that air carries heat. The solution is controlled, high venting. Crack open the vents at the very top of your tent or rain fly. Warm, moist air rises and escapes there, while colder, drier air is drawn in through smaller openings lower down. This is why well-designed four-season tents have complex venting systems, they manage moisture without creating a draft on your face.
What’s the One Physics Trick for Colder Air?
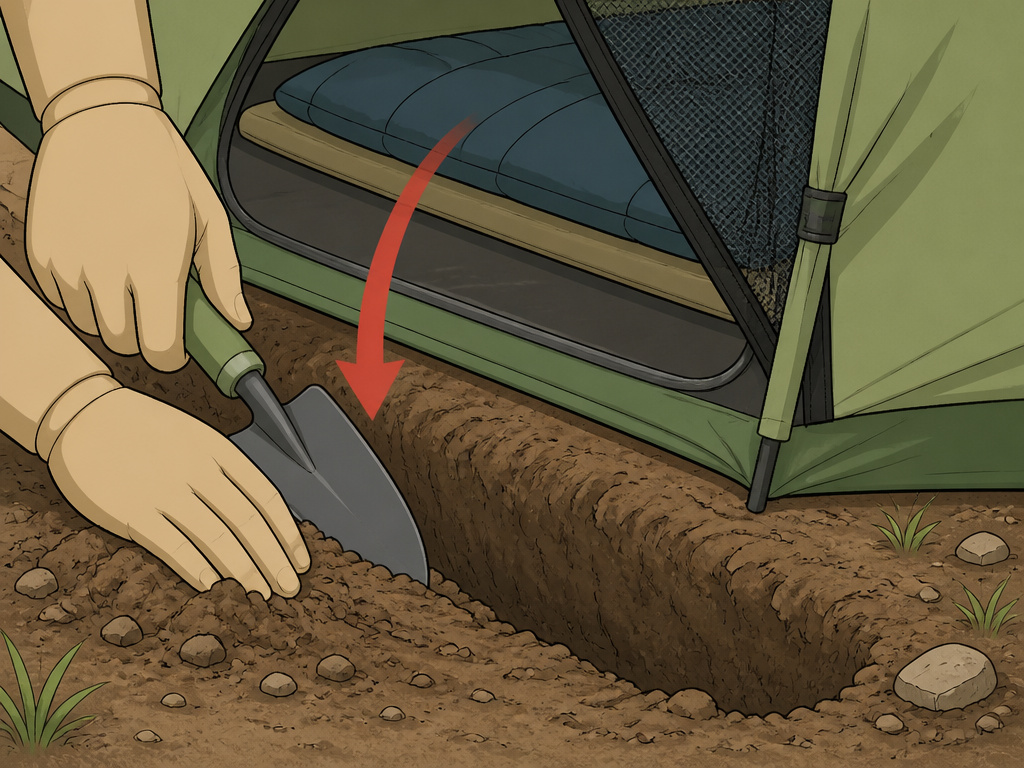
Cold air is denser than warm air, so it sinks and pools at the lowest point. If your tent floor is flat, you’re sleeping in the coldest part of your shelter. You can hack this by giving that cold air somewhere else to go.
I learned about the cold air sink the hard way, shivering in a frost-lined tent in the Scottish Cairngorms. My buddy, an ex-mountain rescue volunteer, took one look at my perfect, flat pitch and said, “You’ve built a cold bath.” He grabbed my trowel and dug a trench about 18 inches deep and a foot wide just outside the vestibule. Within an hour, the temperature at chest level felt noticeably warmer. The science is simple: the coldest air naturally settles into this pit.
- Location: Just outside the tent door or inside a large vestibule.
- Dimensions: Aim for 1-2 feet deep, a foot wide, and roughly the width of your tent.
- Alternative for Rocky Ground: If digging is impossible, build a low wall with your backpack, stuff sacks, or even snow blocks to create a “dam” that traps cold air in a designated zone.
This technique is brutally effective on calm, clear nights when radiant cooling is most intense. For true winter camping, snow is your friend. Packing snow high around your tent’s walls or digging a snow trench to pitch your tent inside provides incredible wind protection and insulation. It turns your shelter into a quasi-igloo.
Can You Safely Add Heat Inside a Tent?
The dream of a toasty warm tent air is dangerous. Propane and catalytic heaters consume oxygen and produce carbon monoxide and water vapor. One canister of propane might last four to seven hours, but you must keep a vent wide open, which defeats the purpose. The resulting condensation will drizzle back onto you and your gear by morning.
The safer, smarter strategy is to heat your body and your immediate micro-climate inside your sleeping system. Your goal is to become a self-sufficient furnace.
Pre-heat yourself. Your sleeping bag is a thermos, not a microwave. If you crawl in cold, you’ll stay cold. About ten minutes before bed, do 20 jumping jacks, some air squats, or jog in place. Get your blood flowing, then get into your bag before you break a sweat.
Master the hot water bottle. Fill a sturdy Nalgene bottle with hot (not boiling) water, wrap it in a sock, and place it between your thighs. The femoral arteries are close to the surface there, so the heat warms your blood directly. It’s good for 2-3 hours of warmth, just enough to get you to sleep. I always check for leaks first by shaking it over the sink.
Adhesive body warmers are a secret weapon. I keep a stash of these in my first-aid kit. Stick one to the inside of your base layer over your core (never directly on skin). They take about 45 minutes to peak but then last over 12 hours. On a brutal trip in Wyoming, I even stuck one to the back of my phone to keep the battery from dying. For your feet, consider down booties like the Western Mountaineering Flash Booties. They weigh nothing and are a luxury that feels like a necessity.
What Gear Actually Moves the Needle?
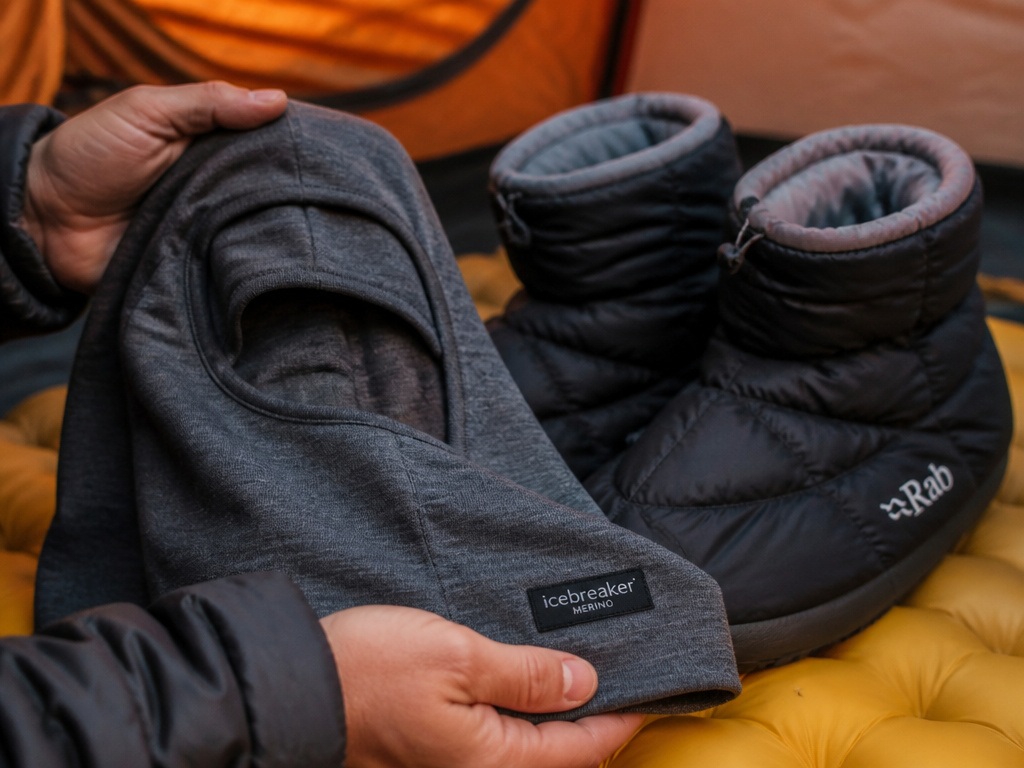
Beyond the basics, a few specific pieces of tent camping equipment deliver disproportionate warmth for their weight and cost. This isn’t about gimmicks, but targeted solutions.
- A High-Quality Balaclava: I swore off them for years, too itchy. Then I tried a Smartwool Merino 250 Balaclava. The merino didn’t itch, and I could pull it down to my neck if I overheated. My head stays warm without the claustrophobia of a cinched mummy hood.
- Vapor Barrier Liners (VBLs): This is advanced, controversial, but wildly effective for multi-day winter trips. It’s a waterproof liner you wear inside your bag. It stops your perspiration from soaking your bag’s insulation, keeping it dry and lofted for days. You’ll feel clammy, but you’ll be warm.
- Tent-Specific Layering: Your sleep layers differ from your hike layers. Avoid wearing your waterproof hardshell to bed, it traps all your sweat. My system is a Patagonia Capilene Midweight base layer, an Arc’teryx Atom LT Hoody (synthetic, so it dries fast), and thick wool socks I only put on after my feet are completely dry.
- The Right Tent for the Job: Your efforts are amplified or undermined by your shelter. A single-wall Dyneema tent like the Zpacks Duplex is lightweight but a condensation magnet. A true four-season tent like a Hilleberg or a canvas tent with a stove jack is designed to retain heat and manage moisture in cold weather.
TL;DR: Invest in a balaclava and down booties after you’ve solved your pad situation. Your head and feet are your body’s thermostats.
Frequently Asked Questions
Can I use a portable heater in my tent?
Only electric heaters designed for indoor use, and only if you have a guaranteed, safe power source like a campground electrical hookup. Never use a propane, butane, or fuel-burning heater inside a sealed tent. They pose a severe risk of carbon monoxide poisoning and fire. The Wilderness Medicine Institute’s 2024 report on cold-weather injury prevention explicitly warns against their use in enclosed shelters.
Does putting a blanket under my sleeping pad really help?
Absolutely. A YouTube tester did a side-by-side comparison, putting a blanket under the pad on one side of the tent and nothing on the other. The blanket side was noticeably warmer. It adds loft and traps air, boosting your overall R-value. Any dense fabric, like a wool blanket or even a folded rug, works.
What’s the best way to reduce condensation while staying warm?
Vent high, insulate low. Always keep the vents at the peak of your tent or rain fly cracked open to let moist air escape. Use a double-wall tent if possible, and avoid bringing wet gear or snow inside. If you wake up to condensation, wipe it down with a microfiber towel before it freezes.
How much warmer does a tent liner make it?
dedicated thermal liner can increase the interior temperature by 5-10°F by creating a still air buffer and reflecting radiant heat back. The effect is more pronounced in smaller tents and in dry, cold conditions versus damp, humid ones.
Do I need a special tent for winter?
For camping in snow, high winds, or well below freezing, a true four-season tent is necessary. They have stronger poles, more robust fabrics, and less mesh to retain heat. For chilly nights in fall or spring, a three-season tent with the techniques here is often sufficient.
The Bottom Line
Warming a tent is a system, not a single product. Start from the ground up: get a pad with an R-value of at least 6, and stack a foam pad underneath for insurance. Buffer your walls with a double tarp or liner, and use a cold air sink to manage the physics of temperature inside your shelter.
Forget the sleeping bag’s temperature rating first and look at your pad’s R-value. That’s your foundation. From there, heat your body directly with a hot water bottle and keep your head and feet meticulously warm and dry. Finally, never seal your tent completely, strategic ventilation is what separates a damp, miserable night from a dry, cold, but manageable one. With this system, you’re not just surviving the cold; you’re outsmarting it.
