
Do You Need a Tent Footprint? | The Real Protection Test
This post contains affiliate links. As an Amazon Associate, we earn from qualifying purchases.
A tent footprint is a protective groundsheet, but you don’t always need one. The decision comes down to three factors: your tent floor’s denier and waterproof rating, the abrasiveness of your typical campsites, and whether the added cost and weight are worth the insurance for your specific shelter. Floors rated under 50 denier or 3,000mm hydrostatic head benefit most, while a 75D floor on a grassy site gets almost no practical protection from a thin extra layer.
People get this wrong because they treat a footprint as universal gear. They buy the manufacturer’s $70 accessory for a $500 tent without checking the specs first, adding 8 ounces for a benefit that real abrasion tests show is marginal after the first 20 nights. The sales pitch is about protection, but the math is about value.
This guide walks through the puncture and waterproofing data from actual fabric tests, breaks down the weight and cost trade-offs of popular tents, and gives you a clear decision tree. You will know exactly when a footprint is cheap insurance and when it is a pointless upsell.
Key Takeaways
- Tent floor durability is measured in denier (fabric thickness) and hydrostatic head (waterproof rating). Floors below 50D or 3,000mm need a footprint; most 75D+ floors do not.
- Independent abrasion testing simulating 160 nights of use showed a 20% reduction in waterproofing for an unprotected tent floor, while the protected floor maintained its rating.
- A footprint sized larger than your tent floor will channel rainwater underneath it, creating a pool under your sleeping bag. It must be 2-3 inches smaller on all sides.
- The “Fast Fly” setup—using just the footprint, poles, and rainfly—is a legitimate weight-saving strategy for experienced backpackers in fair weather, not just a marketing gimmick.
- Alternatives like Tyvek or polycryo window film cost a fraction of a branded footprint and weigh less, but they are louder, less packable, and require more careful site preparation.
The Real-World Puncture and Waterproof Tests
Most advice is theoretical. One YouTube creator ran fabric samples through a homemade abrasion rig and a hydrostatic pressure tester. The results change the cost-benefit math.
The puncture test was straightforward. A pointed stick needed 13 pounds of force to pierce a single layer of common tent floor fabric. Doubling the fabric with a footprint underneath increased the required force to 30 pounds. That is a real gain. It is also a gain you can replicate by spending thirty seconds clearing your site of sticks and sharp rocks before pitching.
The waterproofing test was more revealing. He pressurized a water column against the fabric. A single layer failed at about 20 PSI, equating to a 14,000mm hydrostatic head. The double layer with a footprint failed at 22 PSI.
A single layer of budget tent fabric withstands nearly 20 PSI of water pressure. The average person standing on one foot exerts about 8 PSI. You would need to drive a car onto your tent floor to push water through it. Adding a footprint bumped the failure point by only 10%.
That 10% increase is meaningless for real-world use. Your tent floor is already over-engineered for the pressure a sleeping body applies. The waterproof coating, not the fabric itself, is the weak link. Abrasion wears that coating off.
Where Footprints Actually Matter: The Abrasion Timeline
The real threat is not a sudden puncture. It is the slow grind of dirt, sand, and grit over dozens of nights. The same tester built a rig to simulate a sleeper moving 20 times per night. He ran fabric samples with and without a footprint through cycles representing 20, 40, 60, and up to 160 nights of use.
The unprotected fabric showed a 20% drop in hydrostatic head performance after just 20 simulated nights. Its performance continued to degrade. The sample protected by a footprint showed no measurable loss until after 60 nights, and the degradation was slower.
TL;DR: A footprint does not make your tent bulletproof. It acts as a sacrificial layer that preserves the factory waterproof coating on your tent’s actual floor through dozens of trips. For a frequently used tent on abrasive ground, that is the entire value proposition.
The 3-Question Footprint Decision Tree
Forget the generic yes/no. Answer these three questions in order.
What is your tent floor’s denier and hydrostatic head rating? This is the single most important spec. Find it on the manufacturer’s website or the tent’s stuff sack.
* High Need (Buy a footprint): Floors rated below 50 denier (like the 10D Gossamer Gear The Two) or with a hydrostatic head under 3,000mm.
* Low Need (Skip it): Floors rated 75D or higher (like the REI Half Dome 2 Plus) with a 3,000mm+ rating. A 300D floor is practically truck tarp material.
What surfaces do you camp on most often? A footprint is friction insurance.
* High Need: Gravel pads, sandy deserts, rocky alpine sites, or established campgrounds with compacted, abrasive soil.
* Low Need: Grassy lawns, forest duff, pine needles, or sandy beaches (if you shake the tent out).
What is the footprint’s cost and weight relative to your tent? This is the value check.
| Tent Model | Tent Floor Spec | Tent Price | OEM Footprint Price | Footprint Weight | Verdict |
| :— | :— | :— | :— | :— | :— |
| Nemo Hornet 2P | 30D / 1,200mm | ~$500 | $70 | 7.8 oz | Worth it. Protects a thin, expensive floor. |
| MSR Access | 68D / 3,000mm | ~$450 | ~$80 | ~12 oz | Skip it. Rugged floor, heavy footprint. |
| Big Agnes Copper Spur | 68D / 1,500mm | ~$600 | ~$90 | ~10 oz | Maybe. Pricey tent, but the floor is moderately durable. |
Common mistake: Buying a footprint for a tent with a 75D floor because the sales page suggested it — you add half a pound and spend $80 to protect a floor that is already tougher than the footprint.
If you camp 30 nights a year on mountain granite, a footprint for any tent is wise. If you car camp three weekends a summer on grass, it is a waste. Your answers place you on that spectrum.
How to Choose (or Make) the Right Groundsheet
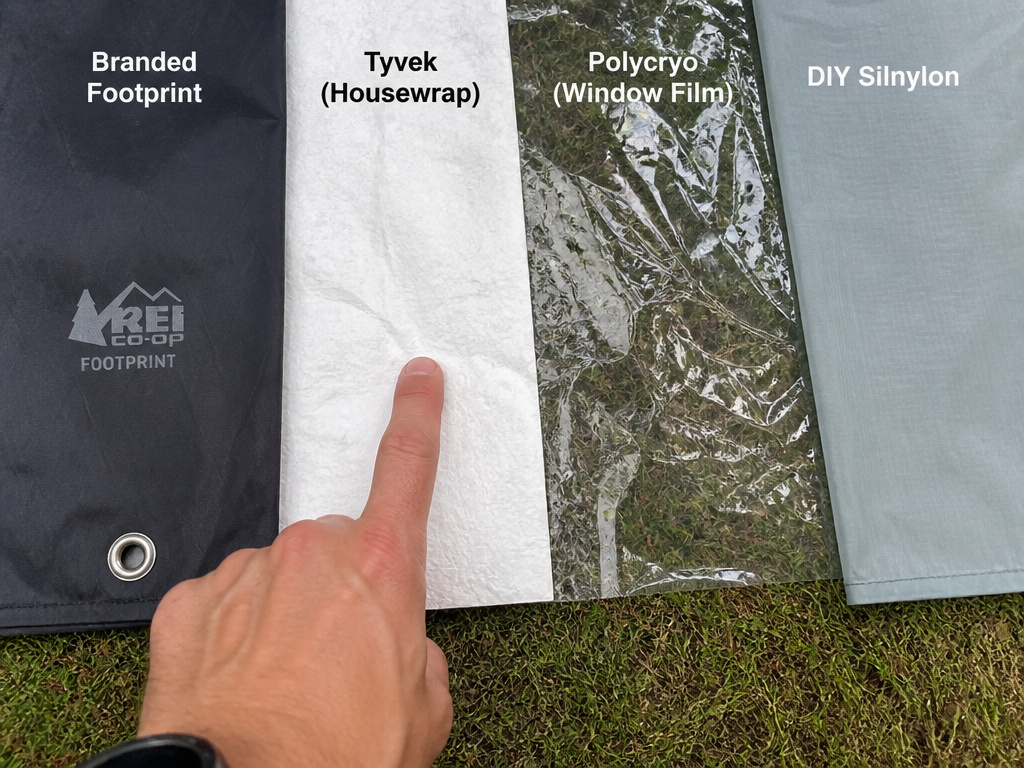
If you answered “yes” to the decision tree, you have options beyond the manufacturer’s branded accessory.
Brand-Specific Footprints are cut to exact dimensions and often have grommets to attach directly to your tent poles. They are convenient, guaranteed to fit, and the most expensive. The Nemo Hornet Dragonfly Osmo footprint is a classic example.
Tyvek is the builder’s wrap material. It is cheap, incredibly tough, and waterproof. A 3′ x 6′ sheet weighs about 5 ounces and costs under $20. The downsides are that it is stiff, noisy, and looks like you are sleeping on a house. Wash and dry it three times to soften it.
Polycryo Window Wrap is the ultralight choice. A 3′ x 6′ sheet weighs about 1 ounce and costs $5. It is a crinkly plastic film that provides a clean, waterproof barrier but offers almost zero puncture protection. You must clear the site meticulously.
DIY Silnylon/Polyester involves buying coated fabric and sewing a simple rectangle. This is the middle ground for weight, cost, and durability, but requires a sewing machine and skill.
| Material | Cost (approx.) | Weight (3’x6′) | Pros | Cons |
|---|---|---|---|---|
| OEM Footprint | $50 – $100 | 7 – 16 oz | Perfect fit, attachment points | Expensive, often heaviest |
| Tyvek | $15 – $25 | ~5 oz | Cheap, extremely durable, waterproof | Stiff, noisy, not packable |
| Polycryo | $5 | ~1 oz | Ultralight, waterproof, cheap | No puncture protection, tears easily, noisy |
| DIY Silnylon | $20 – $40 | ~3 oz | Customizable, good balance | Requires sewing, time investment |
Your choice here impacts your entire camping gear essentials list, as an extra pound on your shelter is a pound not spent on a better sleeping pad or more food.
The Correct Way to Use a Footprint (And Two Ways to Mess It Up)
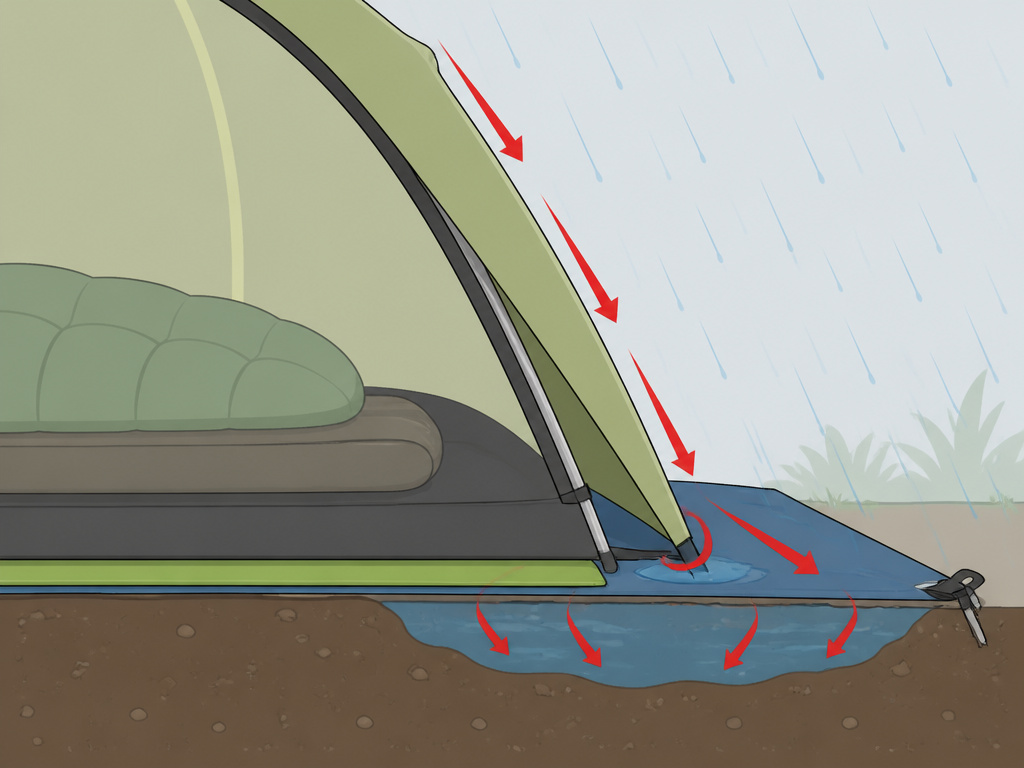
Using a footprint wrong can cause more problems than not using one at all. The rule is simple: the footprint must be smaller than your tent floor.
If the footprint extends beyond the tent’s edges, rain will hit the footprint, run under your tent, and pool beneath you. You have built a water-collection system. Tuck any visible edges underneath the tent body.
- Clear the site of sharp debris. This is non-negotiable, even with a footprint.
- Lay the footprint flat, aligning it with the tent’s door orientation if it is asymmetrical.
- Pitch your tent directly on top, ensuring no part of the footprint peeks out.
- If in doubt, err on the side of the footprint being too small. A 2-inch gap around the perimeter is ideal.
Common mistake: Using a blue poly tarp from the hardware store as a footprint — it is too large, collects water, and is often heavier than your entire tent. If you go this route, cut it to size.
A legitimate advanced use is the Fast Fly setup. Some tents, like many from Nemo and Big Agnes, allow you to pitch only the rainfly and poles directly onto the footprint’s attachment points, leaving the tent body at home. This can save a pound or more. It turns the footprint from mere protection into a functional part of your lightweight backpacking tents system. Only attempt this in predictable, dry weather.
When a Footprint is a Waste of Money
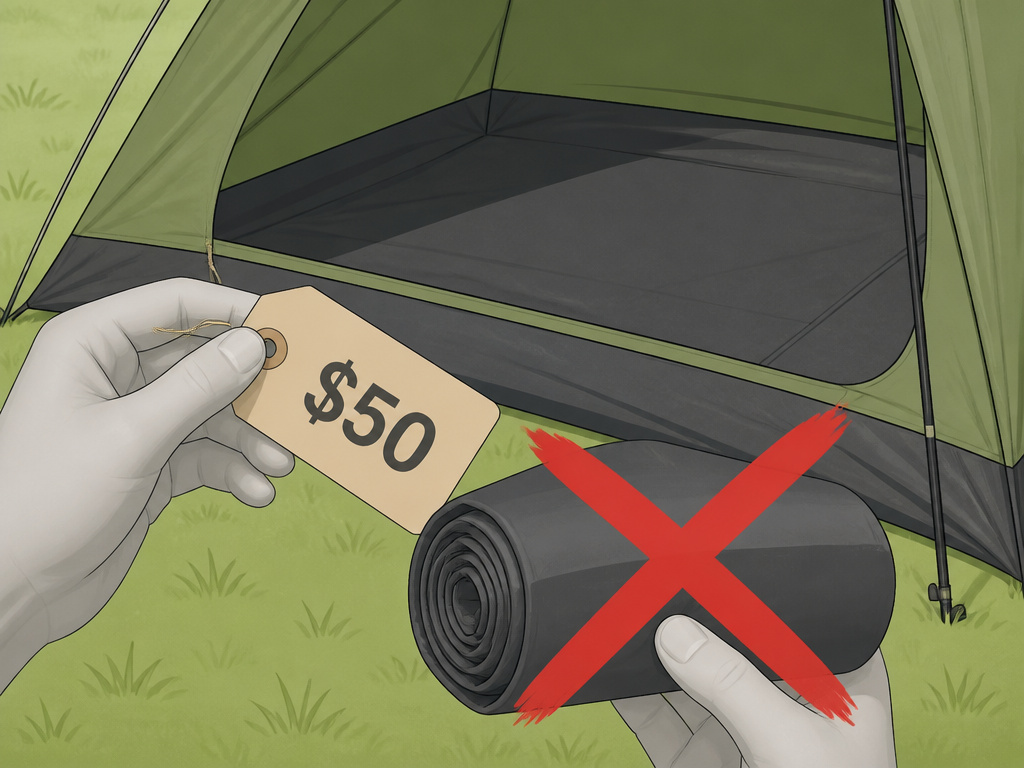
For many campers, the answer to “do you need a tent footprint” is a flat no. You can invest that $70 and 8 ounces elsewhere in your kit.
Your tent has a rugged floor. A 75D or higher denier floor, like on many car camping tents or durable two-person tents, is a tank. The footprint fabric is often thinner and less durable than the floor it is supposed to protect. You are adding a weaker layer.
You primarily car camp or use established sites. The ground is often manicured grass or soft dirt. The abrasion risk is minimal. Your money is better spent on higher-quality essential tent camping accessories like a better sleeping pad or lantern.
You own a budget tent. If your shelter is one of the capable budget tents under $100, a $50 footprint costs half as much as the tent itself. When the floor eventually wears out, you can replace the entire tent for less than the cumulative cost of multiple footprints.
The calculus shifts if you upgrade to a high-end, ultralight shelter. Suddenly, protecting a $500, 30D floor with a $70 footprint makes economic sense. But for a $150, 68D tent? Probably not.
Frequently Asked Questions
Does a footprint make your tent more waterproof?
Barely. Modern tent floors have a hydrostatic head rating (e.g., 3,000mm) that far exceeds real-world pressure. A footprint might add a negligible 10% more resistance, but the primary benefit is keeping the tent’s own waterproof coating intact by taking the abrasion.
Can I use a tarp instead of a footprint?
Yes, but cut it to size. A full-sized tarp will channel water under your tent. A trimmed piece of heavy-duty polycryo or Tyvek works well and is a staple of many camping setup checklist hacks.
Do footprints reduce condensation?
The theory is that they create a vapor barrier, separating the cold, damp ground from the tent floor. In practice, the effect is minor compared to proper ventilation. A footprint will not fix condensation in a poorly vented tent.
How much smaller should a footprint be than the tent?
Aim for a footprint that is 2 to 3 inches smaller on all sides than the tent’s floor dimensions. If your tent floor is 7’x5′, your footprint should be roughly 6’6″ x 4’6″. This prevents rain capture.
The Bottom Line
A footprint is not a mandatory piece of camping equipment upgrades. It is situational insurance. For a thick-floored car-camping tent on soft ground, it is dead weight. For a thin, expensive ultralight shelter on the abrasive granite of the High Sierra, it is essential.
Check your tent’s floor denier first. If it is 50D or higher, you can likely skip it and spend your money on a warmer sleeping bag or a more comfortable pad. If you are eyeing a storm-ready tent with a beefy floor, the footprint is often redundant. But if you have invested in a fragile, high-performance shelter, that extra layer is the cheapest way to guarantee it survives the hundred nights you plan to use it.
