
How To Clean Your Tent: The Unspoken 24-Hour Mildew Rule
This post contains affiliate links. As an Amazon Associate, we earn from qualifying purchases.
Clean your tent by hand-washing it in a tub with lukewarm water and a gear-specific cleaner like Nikwax Tech Wash, then letting it air-dry completely before storage. Never machine wash or dry a tent, and avoid harsh detergents, they strip the waterproof coatings that keep you dry.
Most people hose their tent down and call it clean. That leaves salt, sweat, and body oils on the fabric, which attract moisture and start a chemical breakdown called hydrolysis. Your tent gets sticky, then it leaks.
This guide is for anyone who’s found a musty smell in their stuff sack or seen dark spots on their rainfly. We’ll cover the right cleaner, the exact drying timeline that prevents mold, and how to re-waterproof a tent that’s lost its bead. It’s not complicated, but skipping one step costs you a season.
Key Takeaways
- Mildew starts growing on a stored wet tent in as little as 24 hours in warm weather, per the MSR Tents Manual.
- Use a gear-specific cleaner like Nikwax Tech Wash; dish soap and laundry detergent leave residues that attract dirt and degrade waterproof membranes.
- Dry the tent completely in a shaded, breezy spot, direct sun UV weakens nylon and polyester fibers, especially at higher elevations.
- Match your re-proofing product to your tent’s coating: seam sealer for polyurethane (PU) seams, spray-on for durable water repellent (DWR) fabrics.
- Store the tent loosely in a breathable cotton bag or a large pillowcase, never compressed in its stuff sack long-term.
What happens if you store a wet tent?
The MSR Tents Manual states that storing a wet tent for “as little as 24 hours in warm weather” is enough for mildew to start. That mildew feeds on the fabric and the waterproof coating, causing premature breakdown. It’s not just about smell, it’s structural rot.
The longer-term killer is hydrolysis. This is a chemical reaction where prolonged exposure to moisture breaks down the polyurethane (PU) waterproof layer. The coating becomes soft, sticky, and eventually turns to a gummy paste that transfers onto your gear. Once hydrolysis starts, the tent is no longer waterproof. You can’t wash it off.
Common mistake: Stuffing a damp tent into its sack after a rainy trip, mildew spots appear inside two weeks, and the rainfly will feel tacky to the touch by next season.
UV damage is the third silent killer. The sun’s rays, particularly intense at higher elevations, cause tent fabric to fade, lose tensile strength, and become brittle. A rainfly left in direct sun for a season will tear like tissue paper in the next windstorm. The MSR manual explicitly notes that UV damage is not covered under warranty.
TL;DR: A wet tent stored for a day can mildew. Stored damp for months, the waterproof coating turns to gum via hydrolysis. Sun exposure weakens the fabric itself.
The 5-step wash (and why your bathtub is the only tool you need)
You need a bathtub, a gear cleaner, and an afternoon. A washing machine will destroy the waterproof tapes and laminates. A pressure washer will force water through the seams. The bathtub method is gentle, controlled, and lets you inspect every square inch.
Step 1: Shake, brush, and inspect
Set the tent up in your yard or shake it vigorously over a trash can. Pay close attention to the zippers, sand and grit left in the teeth will grind down the coils and cause failure. Use a soft-bristled brush, like an old toothbrush, to clean them.
Inspect the floor and rainfly for punctures, seam tape peeling, or areas where the waterproof coating is worn thin. These are spots you’ll target later with seam sealer or waterproofing spray. This is also the time to check all your tent camping accessories like guylines and stakes for damage.
Step 2: Fill the tub with lukewarm water and cleaner
Fill your bathtub with enough lukewarm water to fully submerge the tent. Never use hot water, it can delaminate tape and coatings. Add a gear-specific cleaner like Nikwax Tech Wash according to the bottle’s directions. These cleaners are formulated to rinse out completely without leaving a residue.
Dish soap, laundry detergent, or vinegar will leave a film that actually attracts more dirt and compromises the water-repellent finish. They are also harder to rinse out, requiring more refills of the tub.
Step 3: Submerge, soak, and agitate gently
Fully submerge the tent. Gently swish it around with your hands for 5-10 minutes, working the cleaner into the fabric. For stubborn stains like sap or mud, use a soft rag to spot-clean without scrubbing aggressively. Scrubbing can fray the fabric.
Let the tent soak for another 15-30 minutes. This soak loosens ground-in dirt and body oils that plain rinsing misses.
| Cleaning Agent | Best For | Risk If Used |
|---|---|---|
| Nikwax Tech Wash | All synthetic fabrics (nylon, polyester) | None when used as directed |
| Mild, non-detergent soap (e.g., Dr. Bronner’s) | Light soiling if gear cleaner unavailable | May leave slight residue |
| Dish soap (Dawn, etc.) | Not recommended | Leaves film that attracts dirt, strips DWR |
| Laundry Detergent | Not recommended | Contains brighteners & enzymes that degrade coatings |
| Vinegar Solution | Not recommended | Can damage seam tape adhesive |
Step 4: The critical rinse (until the water runs clear)
Drain the dirty, sudsy water. This is the time-consuming part. Refill the tub with clean, lukewarm water and swish the tent again. Drain and repeat. You must rinse until the water drains completely clear and no suds remain. Any leftover soap residue will become a dirt magnet.
I once shortcut this step after a muddy trip, thinking two rinses were enough. The next time I set up the tent, the rainfly had a faint, sticky feel and water stopped beading properly. It took a full re-treatment with Nikwax TX.Direct to fix it.
Press the water out of the tent gently. Do not wring or twist the fabric, this can damage the threads and laminate layers. Instead, press sections between your palms or roll the tent in a clean, absorbent towel.
Step 5: Dry it 100%, no shortcuts
Hang the tent in a shaded, well-ventilated area. A clothesline under a tree works. Never dry a tent in direct sunlight, the UV accelerates fiber degradation. If you must dry indoors, hang it in a garage or large room with a fan blowing.
Feel the seams, corners, and the bathtub floor, these are the last places to dry. The tent is not dry until every part feels room-temperature and crisp. This can take a full day, even in a breeze.
TL;DR: Hand-wash in a tub with gear cleaner, rinse until the water is clear, and dry completely in the shade. Skip the machine, skip the detergent, and never wring it out.
How do you re-waterproof a tent that’s leaking?
First, identify where the leak is and what type of waterproofing failed. Water inside the tent usually comes from one of three places: worn-out seam tape, a degraded durable water repellent (DWR) coating on the fabric face, or a punctured/abraded floor.
Seam leaks feel like a cold drip on your forehead at 2 a.m. Fabric leaks manifest as a general dampness or misting through the rainfly during a steady rain. Floor leaks are obvious, you wake up in a puddle.
For seam leaks on polyurethane (PU)-coated tents, you need a seam sealer like Gear Aid Seam Grip. Clean and dry the seam thoroughly, then apply a thin bead directly over the old tape. Let it cure for 24-48 hours. The Tatonka Tent Manual specifically advises using a seam sealer that matches your tent material.
For fabric that no longer beads water (water soaks in instead of rolling off), the DWR coating is worn. You need a spray-on waterproofing treatment like Nikwax TX.Direct. The Tatonka manual recommends spraying from a distance of 20–30 cm for even coverage. Apply it to a clean, dry tent and let it dry completely.
| Leak Symptom | Likely Cause | Fix | Timeline for Failure If Ignored |
|---|---|---|---|
| Cold drip at seam | Failed seam tape | Apply PU seam sealer (Gear Aid) | Next rainstorm |
| Fabric feels damp, no bead | Worn DWR coating | Spray-on DWR treatment (Nikwax) | Fabric wets out in 10 min of rain |
| Wet spot on tent floor | Abrasion or puncture | Patch kit (Tenacious Tape) | Groundsheet required forever |
| General moisture inside | Condensation | Increase ventilation, use a fan | Not a leak—a ventilation issue |
For larger areas or a complete refresh, consider a wash-in product like Nikwax Tent & Gear SolarProof. It’s a more involved process but can restore performance to an older tent. This is a worthwhile project for a quality canvas tent or a family camping tent you want to extend the life of.
TL;DR: Seam leak? Use seam sealer. Fabric not beading? Use a DWR spray. Spray from 20-30 cm away. Let it cure for a full day before packing.
The right way to dry and store your tent
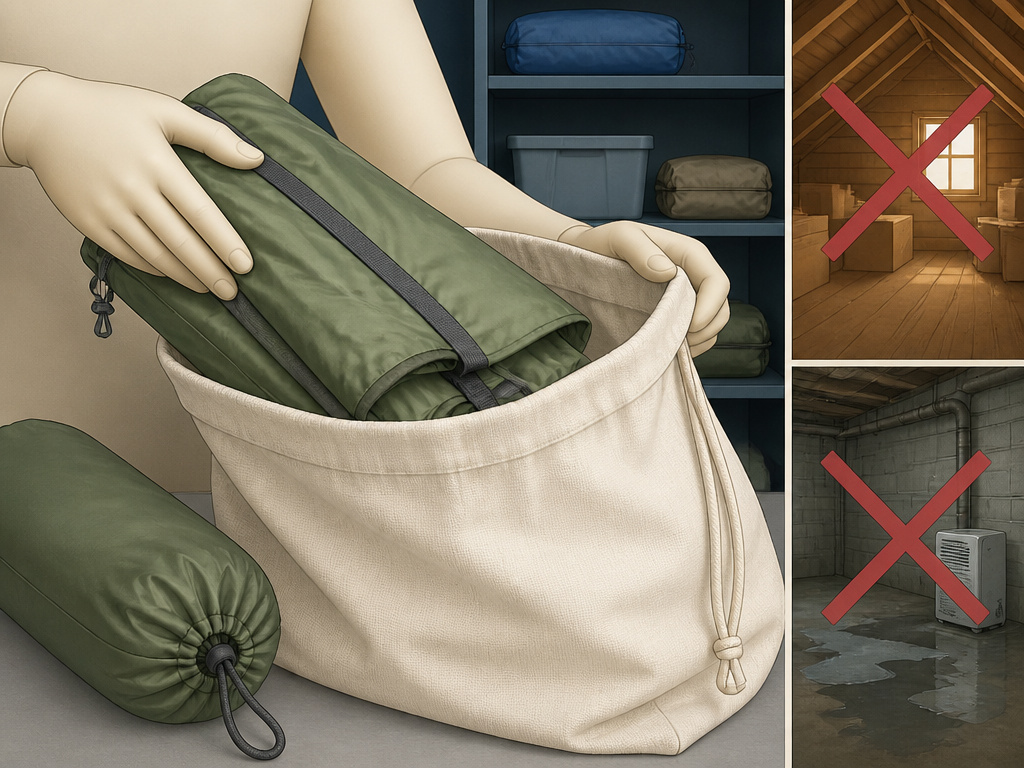
Drying is the most important step. Storage is what locks in your work. A single mistake here undoes everything.
Never, ever store a tent damp. If you must pack up a wet tent, the Tatonka Tent Manual has a specific sequence: unhook and pack the dry inner tent separately first, then take down the wet outer tent. When you get home, set up the outer tent first to dry, then hang the dry inner tent inside.
If you can’t dry it the same day, at a minimum take the tent out of its stuff sack and spread it in a dry place. Set it up fully the following day at the latest. Compressing wet fabric speeds up mildew growth and hydrolysis.
For long-term storage, ditch the stuff sack. The MSR Blog recommends storing your tent loosely in an oversized, breathable cotton bag, a mesh duffel, or even a large pillowcase. This allows air circulation and prevents the waterproof coatings from sticking to themselves. Store it in a cool, dry place out of direct sunlight, a closet shelf is perfect, a hot attic or damp basement is not.
This storage method applies to all tents, from pop-up beach tents to heavy-duty stand-up tents. The coatings need to breathe.
Common mistake: Leaving a tent compressed in its stuff sack over the winter, the PU coating can bond to the opposite side of the fabric, creating permanent sticky spots that attract dirt and tear easily.
TL;DR: Dry the tent 100% in the shade. Store it loose in a breathable bag (not the stuff sack) in a cool, dry closet. A wet tent packed for a week is a ruined tent.
What cleaning products should you avoid?
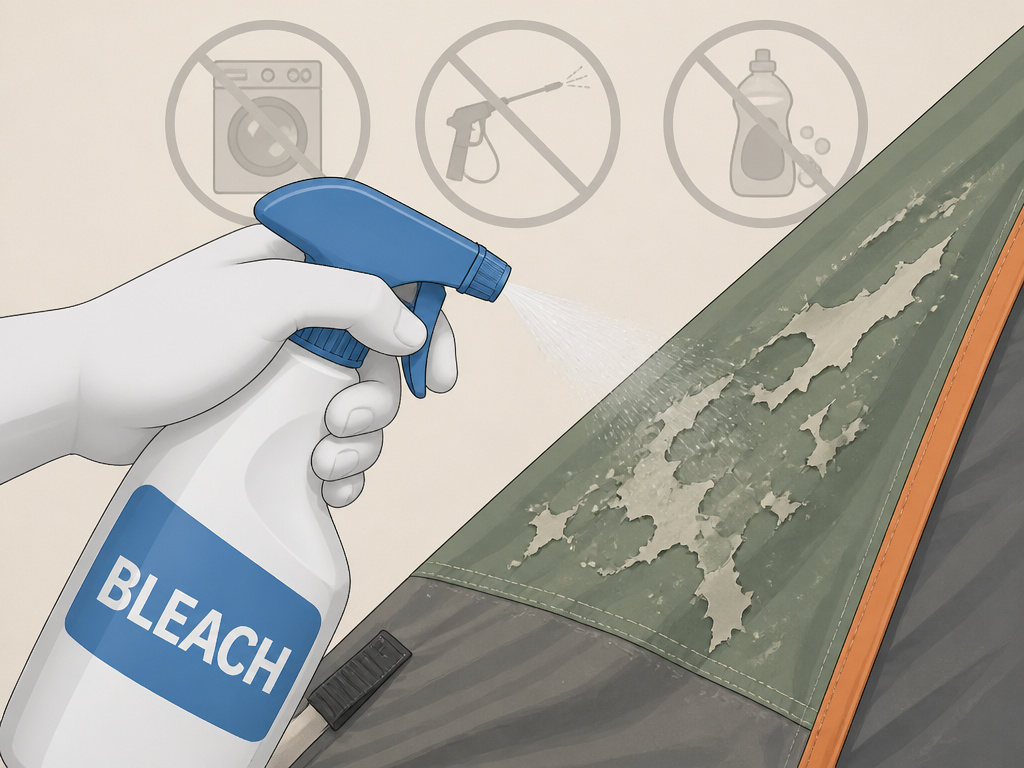
Your tent is not a jacket. It’s not a sleeping bag. It’s a laminated, coated, taped system. Harsh chemicals destroy it.
- Bleach or Stain Removers: These will break down the synthetic fibers (nylon, polyester) and dissolve the waterproof coatings. They cause irreversible fading and fabric weakness.
- Dish Soap & Laundry Detergent: As covered, they leave a residue that attracts dirt and strips the DWR. They also contain enzymes and brighteners that can degrade coatings over time.
- Pressure Washers: The high-pressure stream can force water through sealed seams, delaminate tape, and puncture lightweight fabric. It’s overkill.
- Machine Washers & Dryers: The agitation shreds seam tape, tears mesh, and melts coatings. The heat from a dryer can delaminate fabric layers instantly.
- Vinegar or Baking Soda “Solutions”: While mild, they can alter the pH on the fabric surface and affect the adhesion of DWR treatments and seam sealers. They offer no cleaning benefit over clean water and gear wash.
Stick with products designed for technical outdoor gear. Nikwax Tech Wash is the consensus pick because it’s non-detergent, biodegradable, and rinses clean. For a budget tent under $100, using the right cleaner is even more critical, the margins on waterproofing are thinner.
Frequently Asked Questions
Can I use Dawn dish soap to clean my tent?
No. Dish soap leaves a film that attracts dirt and compromises the water-repellent finish. It is also very difficult to rinse out completely. Use a gear-specific cleaner like Nikwax Tech Wash that is formulated to rinse clean without residue.
How often should I clean my tent?
Clean it at the end of every season, or immediately after any trip where it got excessively muddy, sandy, or exposed to saltwater (beach camping). For normal use, a once-a-year deep clean is sufficient to remove body oils and dirt that accelerate fabric breakdown.
Can I just hose my tent down?
Hosing removes loose dirt but does nothing for ground-in grime, body oils, or salt. These contaminants attract moisture and lead to hydrolysis, which breaks down the waterproof coating. A proper soak and wash is necessary for long-term maintenance.
My tent smells musty. Can I fix it?
Yes, but you must act immediately. Wash the tent with a gear cleaner, then dry it completely in the sun for a few hours. UV light kills mildew spores. Once dry, store it loosely. If the smell persists, a mild white vinegar solution (1 part vinegar to 4 parts water) sprayed on the affected area before a final rinse can help, but test on an inconspicuous area first as vinegar can affect some coatings.
Should I re-waterproof my tent every year?
Not necessarily. Re-waterproof only when the fabric no longer beads water. Spray a light mist of water on the rainfly. If it beads and rolls off, the DWR is fine. If it soaks in and darkens the fabric, it’s time for a re-treatment. Seam sealing is a repair activity, not regular maintenance, only re-seal if you see a leak.
The Bottom Line
Cleaning a tent is about preserving a system, not just washing fabric. The difference between a tent that lasts three seasons and one that lasts ten is this routine. Use the right cleaner, rinse until the water is clear, and dry it utterly before you even think about storage. Skip the stuff sack for a pillowcase. Your future dry, mildew-free self will thank you when the rain hits.
The real cost isn’t the bottle of Nikwax or the afternoon spent. It’s replacing a $300 tent because you stored it wet one time. Your tent camping equipment is an investment. This is the maintenance schedule.
