
How to Drape a Tent | The Right Way to Stop Rain and Wind
This post contains affiliate links. As an Amazon Associate, we earn from qualifying purchases.
To drape a tent, you match the rainfly to the pitched tent body using its specific attachment points. S-hooks, side-release buckles, or fabric loops, and then stake out the guy lines and pull-outs for a taut, weatherproof seal. The Coleman KENAI uses elastic loops with S-hooks at the fly corners, the Sierra Designs Stretch Dome uses ⅝” buckles at twelve points, and the Eureka N!ergy has a dedicated fly pole that runs side-to-side. Missing these connections lets wind and rain in.
Most people get this wrong by draping the fly on a loose tent body. The tent sags overnight, the attachment points strain, and by morning you have a wet sleeping bag from a misaligned door. The fly should be the final tightening layer, not the structural one.
This guide walks through the model-specific steps for Coleman, Eureka, and Sierra Designs tents. You’ll learn how to read your fly’s clues, set up for high wind, and spot the mistake that makes zippers stick.
Key Takeaways
- Stake the tent body first. A loose inner tent misaligns every fly connection point, guaranteeing a flap in the wind.
- Match the attachment system. Coleman uses S-hooks on elastic loops, Sierra Designs uses side-release buckles, and Eureka often uses a fly pole sleeve.
- A tight door zipper means an overtightened tent. Per Eureka manuals, if the door is hard to zip, you’ve staked the body or guy lines too taut.
- For high wind, add secondary guy lines. The Eureka N!ergy 1310 manual specifies adding a second line at each guy-out point and halfway down the mid-poles.
- Free-standing tents still need stakes in wind. The Sierra Designs Stretch Dome manual explicitly recommends staking the floor for safety in high winds.
The Three Rules for Draping Any Rainfly
Get these wrong and the rest doesn’t matter. The process isn’t complicated, but the order is non-negotiable.
Drape the rainfly over the fully pitched and staked tent frame, aligning any vestibule doors or colored markings with the correct tent end. Attach all manufacturer-provided connection points, hooks, buckles, or loops, before staking out the guy lines and pull-outs. A properly tensioned fly sheds water without straining the seams.
First, stake out the tent body. This seems obvious, but in a hurry on soft ground, it’s the step everyone wants to skip. The Eureka N!ergy 1310 manual is explicit: “With the tent properly staked, drape the fly over the frame.” If the inner tent isn’t anchored, the fly’s attachment points won’t line up. You’ll stretch the elastic loops or force the buckles, and the whole assembly will be loose. Wind finds that slack instantly.
Second, drape for alignment, not coverage. Look for visual cues. The Sierra Designs Stretch Dome manual says, “Drape the fly over the tent making sure the yellow vestibule door is over the end with the arch pole.” The Coleman KENAI manual notes the rainfly poles should cover the door and rear window. If your fly has a different color or texture on one side, that side usually faces down. Getting this backwards means the door won’t zip, or the vestibule will block a window.
Third, connect all points before staking guys. Start at the corners. The Coleman Sundome 2 uses elastic loops with S-hooks at the fly corners that clip to rings at the tent corners. Clip all four. Then work along the sides, attaching any mid-point loops or buckles. Only after every hook and loop is fastened should you extend the guy lines and stake them. This sequence allows the fly to settle evenly. Stake the guys at a 45-degree angle away from the tent. Tighten until the fabric is smooth, not bowstring-tight.
Common mistake: Staking and tightening guy lines before clipping all the fly’s attachment points, the uneven tension pulls one side of the fly higher than the other, creating a gap at the opposite corner that drips water inside all night.
TL;DR: Stake the tent, drape and align the fly, clip every connection point, then stake and tension the guy lines. That order prevents gaps.
How Your Tent’s Brand Changes the Steps
Not all flies attach the same way. Your tent’s manual holds the specifics, but here are the patterns for major brands.
Coleman Tents: The S-Hook System
Coleman designs, like the KENAI 10’x8’ and the Sundome 2, use a simple, reliable method. The rainfly has four elastic loops at its corners, each with a metal S-hook sewn in.
The process is mechanical. After draping the fly, you find the four fabric loops near the frame clips at each corner of the tent body. Hook the S-hook from the fly into that loop. The elastic provides take-up, so a perfect pitch isn’t critical. The Sundome 2 adds another layer: a top ridge pole that attaches to the underside of the fly with straps, and its tips insert into pockets on the fly. This stabilizes the peak.
Forget the S-hooks and the fly sits on the tent like a loose blanket. It slides off in a breeze. The elastic also has a lifespan, after a few seasons, it perishes and won’t retract. That’s when you get constant slack.
Eureka Tents: Fly Poles and Hook-and-Loop Tabs
Eureka models, like the N!ergy 1310, often incorporate a fly pole. This isn’t part of the main frame. It’s a separate pole that fits into a sleeve or pocket sewn into the hem of the rainfly, running side-to-side down the fly’s center. According to the N!ergy 1310 manual, you insert this pole after draping the fly. It adds vertical rigidity, creating a more pronounced air gap between fly and tent body for better ventilation and rain runoff.
The second feature is hook-and-loop fasteners (like Velcro) on the underside of the fly. These wrap around the tent’s main frame poles. They are secondary security, preventing the fly from shifting laterally. You attach them after the fly pole is seated. This system is common on many durable two-person tents designed for variable weather.
Sierra Designs and Mountaineering Tents: Buckle Networks
Expedition-style tents, like the Sierra Designs Stretch Dome Expedition AST, use a robust buckle system. The manual lists ⅝” side-release buckles at twelve specific points on the inside of the fly. You drape the fly, then methodically click each buckle onto its corresponding strap on the tent body.
This is a more precise, load-distributing system than hooks. It’s designed for high wind and snow load. The trade-off is time. Missing one buckle in the dark means a point load that can tear a stitch line over a stormy night. These tents are often lightweight two-man shelters built for performance, not convenience.
| Brand / Model | Primary Attachment | Key Feature | Risk If Skipped |
|---|---|---|---|
| Coleman KENAI/Sundome | Elastic loops with S-hooks | Simple, forgiving elasticity | Fly detaches in wind; corners lift and funnel rain inside |
| Eureka N!ergy | Fly pole sleeve + hook-and-loop tabs | Creates defined air gap; secondary security | Reduced ventilation; fly flaps against inner tent, causing condensation |
| Sierra Designs Stretch Dome | ⅝” side-release buckles (12 points) | Even load distribution; expedition-grade security | Point load stress on single buckle leads to seam failure in high wind |
How to Drape for High Wind and Rain
Fair weather camping is easy. The real test is when the weather turns. Manufacturer manuals have specific advice most campers never read.
The Eureka N!ergy 1310 manual has a dedicated high-wind procedure. For the 1310 model, you add a secondary guy line at each primary guy-out point on the fly. You also add a line halfway down each of the tan mid-poles. This creates a triangulated network that resists lifting and twisting forces. In the field, this looks like a spider web of lines around your tent. It’s not overkill if the forecast says gusts.
Before you start: In high wind, secure all loose gear inside the tent. When adding secondary guy lines, work with a partner, one person holds the fly taut while the other ties and stakes the line. A flying stake or a flapping line can cause injury.
For free-standing dome tents, the rule changes. The Sierra Designs Stretch Dome Expedition AST is technically free-standing. Its manual explicitly states that staking the floor is recommended for “greater safety and stability, especially in high winds.” The tent might not blow away, but a strong gust can roll it, with you inside. Always stake a free-standing tent in wind, even if the manual says you don’t have to.
Your guy line technique matters here. Use a taut-line hitch or a trucker’s hitch knot on each line. These knots allow you to cinch the line extremely tight, but more importantly, they let you adjust tension without untying. As the wind vibrates the tent, lines can loosen. A quick pull on the knot’s loop re-tensions it in seconds. Plastic line tighteners work, but they slip under sustained load. Knots don’t.
TL;DR: In high wind, add secondary guy lines per your manual’s diagram, stake every possible point (even on free-standing tents), and use adjustable knots, not plastic sliders.
The Gear That Makes Draping Easier (And What to Skip)
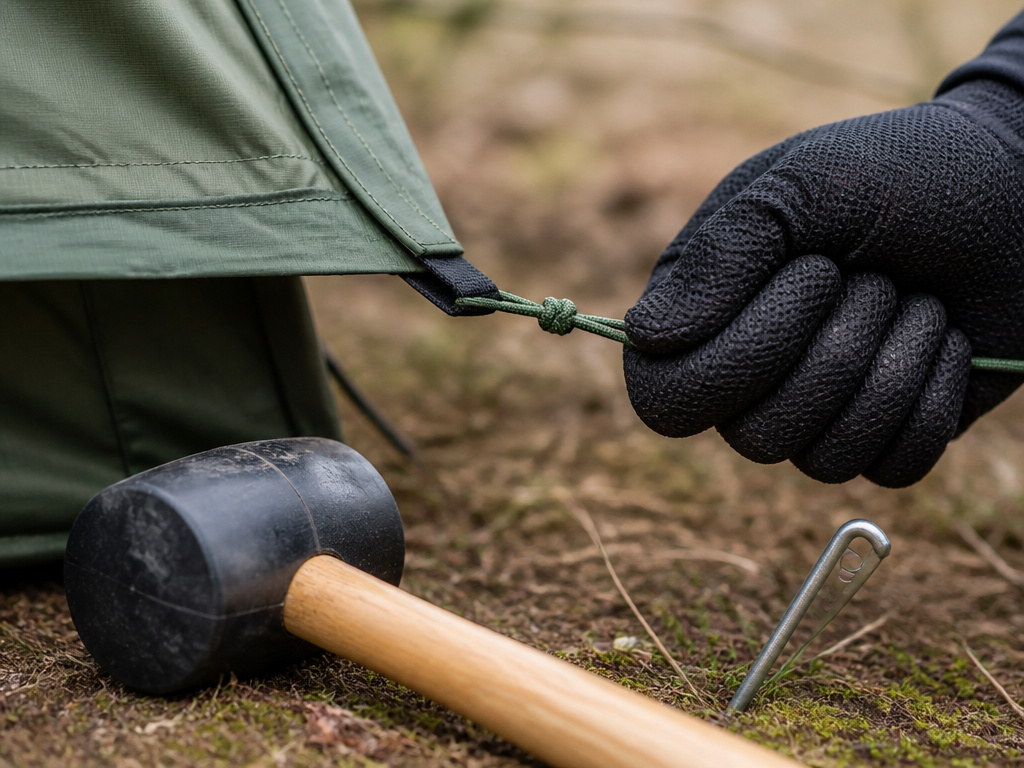
You don’t need much. A few specific tools turn a frustrating fight into a smooth routine.
- A Rubber Mallet (Not a Claw Hammer): For driving stakes into hard or rocky ground. The soft head won’t mushroom your stake tops. Skipping this and using a rock damages stakes and your hands.
- Extra 6mm Paracord: For adding those secondary guy lines or replacing a broken one. Cut 10-foot lengths. Storing pre-cut lengths in your essential tent gear bag saves time.
- Gloves with Grip: Lightweight cycling or sailing gloves. They protect your hands from rope burn when tensioning lines and keep your fingers warm in cold, wet conditions. Going barehanded means blisters when you need to re-stake at 3 a.m.
- A Headlamp with a Red Light Mode: For setting up or adjusting lines in the dark. White light blinds you and your camping neighbors. Red light preserves night vision and attracts fewer bugs.
What to skip? Aftermarket universal rainfly clips. They promise to fix any attachment system. In practice, they add failure points and often don’t match the OEM loop size or spacing. They also add weight and bulk to your pack. Stick with your tent’s original hardware. If a part breaks, contact the manufacturer for a direct replacement.
Investing in a good mallet and learning two knots is better than buying a bag of gadgets. This philosophy applies to all your camping equipment checklist items.
Frequently Asked Questions
Can you put a rainfly on a tent backwards?
Yes, and it causes immediate problems. The vestibule will cover a window, the door won’t align, and attachment points won’t reach. Most flies have a visual clue: a colored patch, a logo on one side, or a differently shaped door. The Sierra Designs manual points out the “yellow vestibule door.” Always check alignment before clipping anything.
How tight should tent guy lines be?
Tight enough to remove fabric slack, not tight enough to deform the tent frame. A good test: pluck a guy line like a guitar string. It should have a low, firm note, not a high-pitched twang. The Eureka manual gives a practical warning: if the tent door zipper becomes difficult to operate, the tent is over-tightened. Loosen the nearest stakes and guy lines.
Do you need a rainfly on a waterproof tent?
Yes. The tent body’s waterproof coating (its hydrostatic head rating) is for emergency rain shedding and condensation. The rainfly’s job is to take the brunt of the weather, creating a ventilated air gap that stops condensation from soaking the inner tent. Without a fly, a “waterproof” tent will wet out from the inside from your own breath and sweat long before the rain soaks through.
How do you attach a rainfly without clips?
If your fly uses a buckle or loop system without clips, follow the manual’s threading guide. Typically, you pass a strap from the tent body through a ladder-lock buckle or a ring on the fly, then back on itself. The key is even tension. Pull each strap sequentially, like tightening a lug nut pattern on a car wheel, to avoid pulling the fly off-center.
Can you use a tarp instead of a rainfly?
In a pinch, yes, but it’s a compromised solution. A tarp lacks the tailored fit, attachment points, and integrated venting of a proper rainfly. You’ll need extra cordage and stakes, and it will be noisier in wind. It’s a valid technique for lightweight tarp shelters, but for a dome tent, use the designed fly.
The Bottom Line
Draping a tent correctly is a five-minute task that saves a night of misery. Stake the inner tent first. Drape the fly using its visual markers. Clip every hook, buckle, and loop your model provides. Only then stake and tension the guy lines.
Remember the door zipper rule. If it gets hard to zip, you’ve gone too tight. In wind, add lines. Your tent’s manual isn’t a suggestion, it’s the blueprint from the engineers who tested it. Follow their steps for the shelter you paid for.
Now go pitch it in the backyard once before your trip. Muscle memory beats a flashlight read of the instructions any night.
