
How to Dry a Tent Properly to Prevent Mildew and Damage
This post contains affiliate links. As an Amazon Associate, we earn from qualifying purchases.
To properly dry a tent, you must remove all moisture from the fabric, seams, and storage bag before packing it away. This prevents mildew, which can start in just 24 hours, and hydrolysis, the chemical breakdown of waterproof coatings. Never use direct heat or a dryer, as this can void warranties and damage the material.
Most campers think a quick shake and a hopeful hour in the sun is enough. They pack the tent away with a faint dampness, only to discover a constellation of black mildew spots and a smell like a wet dog next season. That faint odor isn’t just unpleasant; it’s the sound of your investment rotting.
I’ve learned this lesson the hard way, and I’ve pored over manufacturer manuals to separate myth from mandate. This guide walks through the exact, non-negotiable steps to dry every type of tent, what to do when you’re forced to pack wet, and how to store your shelter so it’s ready for the next adventure.
Key Takeaways
- Mildew can begin forming on a wet, crumpled tent in as few as 24 hours, a specific failure timeline noted in the MSR owner’s manual.
- Never use a clothes dryer or direct heat source, especially on vinyl tents like Aztec models, as this explicitly voids fabric warranties.
- Separating the inner tent from the rainfly is the single most effective action to cut drying time and prevent trapped moisture.
- If you must pack a tent wet, your absolute deadline to dry it is the next day. Unroll it in a garage or hang it immediately.
- Store your tent loosely in a cool, dry place, compressing it in a stuff sack can crease and weaken waterproof coatings over time.
Why Is Drying a Tent So Critical?
The threat isn’t just a musty smell. It’s a two-pronged attack on your tent’s integrity. First, mildew stains fabric, creates permanent odors, and damages waterproof coatings. The MSR blog on tent care is clear: this damage is not covered under their limited warranty.
Second, prolonged moisture causes hydrolysis, a chemical process where water molecules break down the bonds in polyurethane (PU) waterproof coatings. This turns the coating sticky, then brittle, causing it to flake off. Your tent might look fine but will leak when you need it most.
Prolonged exposure to moisture causes hydrolysis, breaking down the waterproof layer. Storing a wet tent for as little as 24 hours in warm weather can lead to mildew formation, which stains, smells, and damages the waterproof coating. Mildew and moisture damage are not covered under warranty.
MSR Tents Owner’s Manual
The 24-hour clock starts the moment you zip a damp tent into its sack. This isn’t about being fussy; it’s about preserving gear that costs as much as a decent weekend getaway.
TL;DR: You have one day to dry a wet tent before mildew becomes a real, warranty-voiding threat. Unpack it first when you get home.
What’s the Best Way to Dry a Tent After a Trip?
Follow this sequence religiously. Skipping a step leaves moisture in a seam or stuff sack, which is all mildew needs to start its work.
Step 1: The Initial Shake-Down
Before you even think about hanging, give the tent a vigorous shake to dislodge dirt, leaves, and pine needles. Wipe the rainfly and footprint with a clean, dry microfiber towel. This removes surface water and grime that can trap humidity against the fabric.
Step 2: Separate Every Layer
This is the most overlooked step with the biggest payoff. Disconnect the inner tent from the rainfly if your model allows. An attached inner tent blocks airflow, creating a perfect pocket for condensation to linger. Hanging them separately can cut your drying time in half.
Step 3: Match Your Method to the Conditions
Your environment dictates the best approach. This decision matrix helps you choose.
| Drying Method | Best For | Pro Tip & Specific Risk |
|---|---|---|
| Outdoor Clothesline | Sunny, low-humidity days with a breeze. | Use a padded line to avoid abrasion. Risk: UV degradation if left for 6+ hours; pollen can settle on fabric if windy. |
| Indoor Hanging | Humid days, rain, or apartment living. | Use a Vornado air circulator on low, pointed at a wall opposite the tent. Risk: Stagnant air means the floor stays damp for 48+ hours, inviting mildew along welded seams. |
| Flat on a Clean Surface | Large family tents or stand-up tents with no hanging option. | Lay a clean tarp down first. Risk: Moisture can wick back into the tent if the surface (like concrete) isn’t perfectly dry. |
Never dry a tent on abrasive concrete or gravel. The grit grinds microscopic holes into the floor’s waterproof coating.
Common mistake: Pointing a fan directly at one spot on the tent fabric, this can drive moisture deeper into stitched seams instead of pulling it out. Aim for gentle, cross-ventilation across the entire surface.
Feel every seam, zipper, and the storage bag itself. These are the last places to dry. If any part feels cool or clammy to the touch, you’re not done. This is especially crucial for the heavy, slow-drying fabrics used in durable canvas tents.
What If You Have No Choice But to Pack It Wet?
Sometimes you’re racing a storm or breaking camp at dawn in a dew-soaked meadow. Manufacturer manuals have a contingency plan. The Tatonka manual advises setting the tent up again the same day, or at least spreading it out. Karsten Tents states you must unroll it to dry within 24 hours.
Your mission is to get air moving through it immediately. Hang it over a shower rod, drape it across dining chairs in a ventilated room, or lay it flat in a basement with a dehumidifier running.
My hubris cost me a rainfly on my 2019 Nemo Dagger 2P. After a downpour in the Gifford Pinchot, I crammed it wet into its sack. Three days later in my Portland garage, the smell was apocalyptic. I soaked it in a Nikwax Tech Wash and vinegar bath, but the mildew had already etched permanent grey constellations into the silnylon. Now, water beads less effectively there. I learned that “three-season” doesn’t mean “forgivable.”
Before you start: Handling a soaked tent indoors is a messy operation. Clear a space in a bathtub or garage first. Have old towels and a mop ready for the initial deluge to avoid water damage indoors.
How Do You Dry a Tent in High Humidity or Rain?
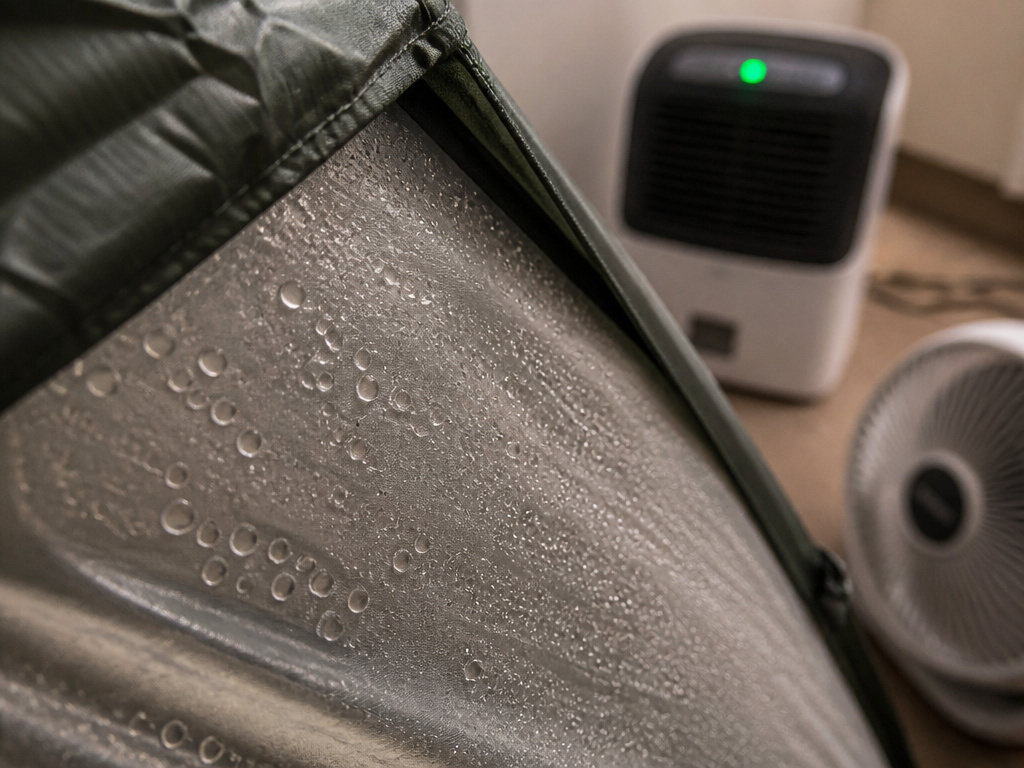
This is the trickiest scenario. The MSR manual notes a paradox: during periods of high humidity, increasing ventilation can sometimes draw more humid air into the tent, worsening condensation. When the air itself is saturated, drying becomes an indoor, controlled process.
This is where understanding your tent’s design pays off. A highly waterproof, non-breathable fabric will trap condensation more effectively. This is why the balance between waterproofing and breathability, as detailed in guides for storm-resistant tents, is key. In persistently damp climates, your best bet is creating a controlled drying environment indoors with fans and a dehumidifier.
The One Time I Thought I Was Smarter Than the Manual
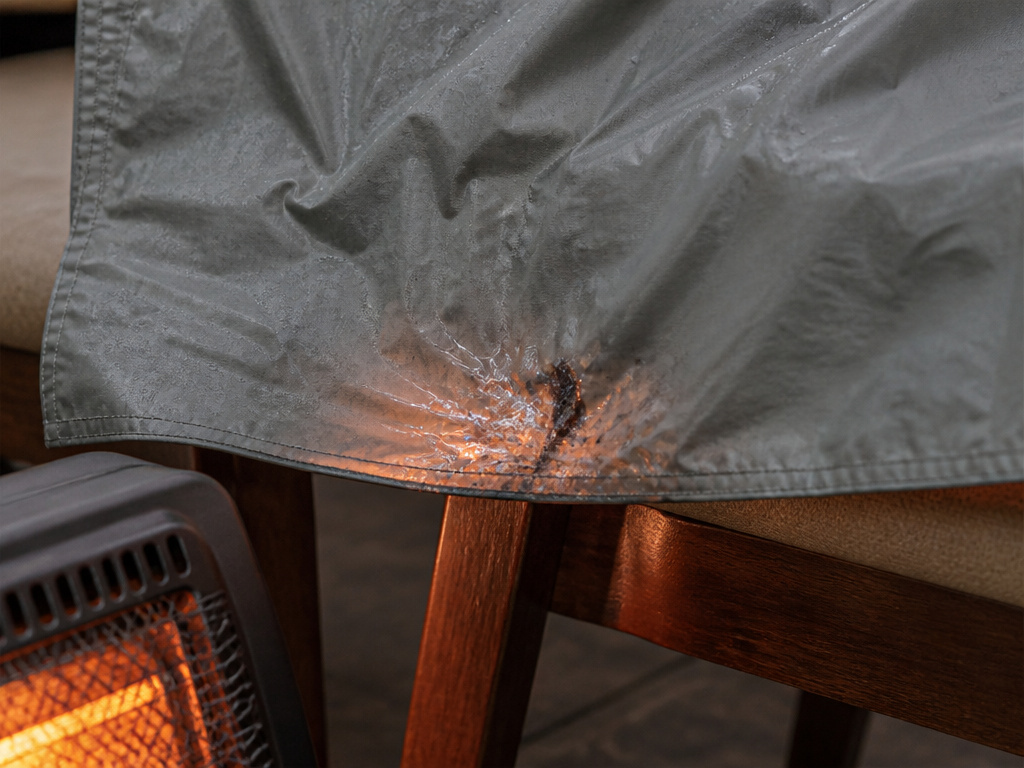
It was a Tuesday in my Seattle apartment, rain streaking the windows. My trusty old tent was damp from a weekend of coastal fog. The manual said “air dry,” but I was impatient. I thought, What’s the harm in a little warmth? I laid the rainfly over two chairs in front of a space heater set on low.
By Thursday, the faint scent of wet dog had morphed into a full-blown biological funk. More critically, the PU coating on the side facing the heater had turned slightly tacky. I’d accelerated hydrolysis with gentle heat. I spent $45 on MiraZyme, scrubbed the seams with a toothbrush, and still have two faint grey stains near the footbox. The lesson was expensive: air movement, not warmth, is the goal. Heat, even seemingly mild heat, is the enemy of synthetic coatings.
Building a Controlled “Dry Tent” for Perfect Results
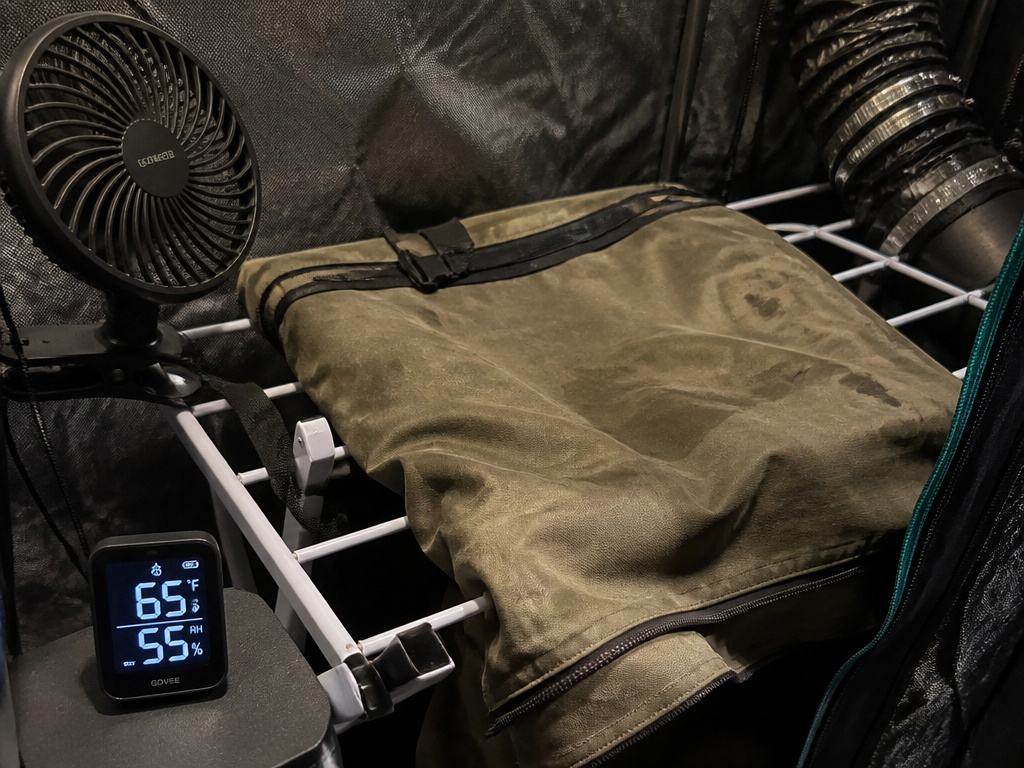
For gear enthusiasts, guides, or anyone in a perpetually humid climate, a dedicated drying environment guarantees results. This method adapts principles from horticulture, where controlling Vapor Pressure Deficit (VPD) is standard for a perfect, slow dry.
You need a spare storage space, a closet, a small grow tent, or even a corner sectioned off with a curtain. The goal is to create a dark area with constant, gentle airflow.
| Component | Purpose | Example & Notes |
|---|---|---|
| Inline Fan | Creates consistent air exchange. | An AC Infinity T4. Set to create slight negative pressure (walls bow in slightly). |
| Hygrometer | Monitors environment in real-time. | A Govee Bluetooth model. Aim for 60–70°F and 50–60% RH. |
| Air Circulator | Moves air inside without blasting fabric. | A small clip-on fan pointed at a wall. |
| Drying Rack | Maximizes surface area for hanging. | A collapsible laundry rack. |
This setup mimics a perfect, breezy porch day, regardless of the weather outside. It’s overkill for a single trip, but for anyone storing multiple canvas tents with stove jacks, which are notoriously slow to dry, it’s a worthwhile investment.
I skip the old “60/60 rule” and aim for a VPD of about 1.0–1.5 kPa. This scientific measure pulls moisture from the fabric at a steady, safe rate without shocking the materials. It’s the difference between sun-drying herbs and blasting them in a dehydrator.
How Should You Store a Completely Dry Tent?
A dry tent deserves a proper home. Never store it long-term compressed in its tight, nylon stuff sack. That constant pressure creases the waterproof coatings, leading to micro-cracks.
- Use a Loose Bag: Store the tent loosely in its larger storage sack, or better yet, an old cotton pillowcase or mesh laundry bag. This allows any residual moisture to escape.
- Find the Right Place: Choose a cool, dry, dark place. The Aztec Tent manual specifies an optimal storage temperature between 50°F and 70°F for their vinyl fabric. Avoid attics (extreme heat) and damp basements. A closet shelf is ideal.
- Check Accessories: Ensure all your essential camping gear is dry. A damp footprint or wet guylines stuffed in with the tent will sabotage your efforts.
Before you zip it up for the season, give your tent lighting and other accessories a check too. A systematic approach ensures everything is ready for your next spontaneous trip.
Frequently Asked Questions
Can I put my tent in the dryer to speed things up?
No. The tumbling action and high heat will melt seams, shrink fabric, and delaminate waterproof coatings. This explicitly voids warranties on products like Aztec Tents. The Aztec manual states use of commercial drying equipment voids the fabric warranty. Always air-dry.
How long does it take for a tent to dry completely?
With good airflow and separated layers, a tent can dry in 2–4 hours on a sunny, breezy day. Indoors with a fan, plan for 6–12 hours. Always do the “seam test”, if any stitch line feels cool, keep drying.
What’s the best way to clean mildew off a tent?
For active mildew, I use a 3:1 bath: three gallons of lukewarm water to one cup of distilled white vinegar, plus a 30ml capful of Nikwax Tech Wash. Gently scrub with a soft brush, then rinse thoroughly. For set-in stains, apply MiraZyme Odor Eliminator full-strength, let it sit for 10 minutes (no longer), then rinse. Dry the tent completely immediately after cleaning.
Is it okay to pack a tent slightly damp if I’m using it again tomorrow?
It’s a calculated risk. If you’re on a multi-night trip and the tent is only damp from condensation, shaking it out and loosely packing it is acceptable. However, the 24-hour mildew clock is still ticking. Air it out at your very first opportunity, and never store it long-term with any moisture.
Before You Go
Drying your tent isn’t a chore you can postpone. That 24-hour mildew timeline turns a damp stuff sack into a ticking time bomb for your gear. The process is straightforward: shake it, separate it, and circulate air around it until every seam is dry to the touch.
Invest those ten minutes when you get home. It saves you from the heartbreak of a ruined rainfly and the expense of a replacement. Store it loose and in the dark, and your shelter will be ready for countless more trails, storms, and those perfect, golden-hour evenings. Your future self, and your nose, will thank you.
