
How to Make a Tent Waterproof with Pro Seam Sealing Tips
This post contains affiliate links. As an Amazon Associate, we earn from qualifying purchases.
To make a tent waterproof, you must address three distinct layers: the sealed seams, the interior waterproof coating, and the exterior Durable Water Repellent (DWR) finish. Match the sealant to your tent’s fabric, silicone sealant for silicone nylon, polyurethane (PU) sealant for PU-coated polyester or nylon, and ensure the Hydrostatic Head (HH) rating of the refreshed coating meets at least 3,000mm.
Most people grab a can of spray and coat the outside. That only refreshes the DWR, which sheds water but isn’t waterproof. The real barrier is the polyurethane or silicone coating on the inside of the fabric, and the sealed seams that stop water from wicking through the stitch holes. Miss those, and you’re just polishing a leak.
This guide walks through the full process, from diagnosing if your wet tent is actually leaking to choosing the right sealant and applying it so it lasts more than one season.
Key Takeaways
- Tent waterproofing relies on three layers: sealed seams, an interior waterproof coating (PU or silicone), and an exterior DWR finish. Treating just one layer leaves the others vulnerable.
- Match your sealant to the fabric. Using silicone sealant on a PU-coated tent (or vice versa) creates a weak bond that peels within a season.
- A Hydrostatic Head (HH) rating of 3,000mm is the baseline for waterproofness. Coatings degrade over time; recoating restores this pressure resistance.
- Condensation inside a tent is often mistaken for a leak. Before sealing, rule out condensation by checking for droplets on the fly interior, not running water from seams.
- Seam taping is a factory process. Attempting to re-tape seams with a household iron melts the fabric. For failing tape, use liquid seam sealant or seek a professional service.
The Hydrostatic Head (HH) Rating That Decides Everything
Waterproof is not an absolute term. It’s measured in millimeters of water pressure, called the Hydrostatic Head (HH) rating. A piece of fabric with a 3,000mm HH rating can support a column of water three meters tall before it starts to seep through. Your tent’s flysheet and groundsheet have an HH rating from the factory, often between 1,500mm and 10,000mm.
The Hydrostatic Head (HH) rating quantifies a fabric’s waterproofness by measuring the height of a water column (in millimeters) it can support before leakage occurs. A rating of 3,000mm is considered the minimum baseline for a waterproof tent fly or groundsheet. Higher ratings (5,000–10,000mm) are typical for four-season or expedition-grade shelters.
Coatings degrade. UV exposure, repeated packing, and general wear thin the polyurethane or silicone layer on the inside of your tent. The HH rating drops. You might not notice until a steady rain finds the weak spot. Recoating the interior is the only way to restore that original pressure resistance.
TL;DR: Your tent’s waterproofness is a number, not a yes/no state. Recoating aims to restore the fabric’s HH rating to at least 3,000mm.
Is It a Leak or Just Condensation?
You wake up to a damp sleeping bag. Your first thought is the tent failed. Hold on. Interior moisture is more often condensation, warm, moist air from your breath hitting the cooler tent wall and turning to droplets. A leak behaves differently.
Leaks show as a defined wet spot or a trickle of water, usually tracing a seam or a specific point on the fabric. Condensation forms as a fine, even mist of droplets across large sections of the inner wall or fly interior. If you can wipe the moisture away with your hand and the fabric underneath is dry, it’s condensation. If the fabric itself is soaked and water pools, you have a leak.
Common mistake: Sealing a tent that’s suffering from condensation, you add weight and chemical smell without solving the wetness, which returns the next humid night.
Opening vents, cracking a door, or simply choosing a better-ventilated campsite fixes condensation. A leak requires the repair steps below. Diagnose first.
The Three-Layer Waterproofing Process
A waterproof tent is a system. Fixing it means servicing each component in the right order. You start clean, seal the seams, refresh the bulk waterproofing, and finish with the water-shedding layer.
| Layer | Function | What Degrades It | DIY Repair Method |
|---|---|---|---|
| Seam Sealing | Prevents water wicking through stitch holes | UV exposure, flexing, adhesive failure | Liquid seam sealant (Gear Aid Seam Grip SIL or McNett Seam Grip) |
| Waterproof Coating (PU/Silicone) | Blocks water penetration under pressure | Abrasion, UV, peeling, hydrolysis | Liquid urethane or silicone coating (Gear Aid Tent Floor Sealant) |
| Durable Water Repellent (DWR) | Causes water to bead and roll off the exterior | Dirt, oil, UV exposure | Spray-on or wash-in DWR treatment (Nikwax TX.Direct Spray-On) |
Skipping any layer leaves a path for water. The most common error is spraying DWR on the outside and calling it done. That’s like waxing a car with a broken windshield, it looks good until it rains.
Step 1: Clean Everything (The Non-Negotiable Foundation)
Dirt and oils are the enemy of adhesion. Any sealant or coating applied over grime will peel. Set the tent up completely, this is non-negotiable. You need to access every inch of fabric.
Use a soft brush and a non-detergent soap like Nikwax Tech Wash. Dish soap or laundry detergent leaves residues that harm waterproof coatings. Scrub gently, rinse thoroughly with a hose, and let the tent dry completely in the sun. A damp tent will trap moisture under the new sealant, causing mildewing.
The one step nobody skips? Drying. A tent that feels dry to the touch can still hold enough moisture in the seam tape or fabric weave to ruin the cure. Give it an extra hour in direct sun.
Step 2: Seal the Seams (The Precision Task)
Seams are the weakest point. Factory seam tape can delaminate after a few seasons. The professional re-taping process uses heat-sealing machines, brands like Terra Nova offer this service. Trying it with a household iron melts the fabric.
Your reliable DIY fix is liquid seam sealant. The catch? You must match the chemistry to your tent’s fabric.
- For silicone-coated nylon tents: Use a silicone-based sealant like Gear Aid Seam Grip SIL.
- For polyurethane (PU)-coated polyester or nylon tents: Use a PU-based sealant like McNett Seam Grip.
Applying the wrong type creates a bond that fails within months. Apply a thin, continuous bead along every stitched seam on the rainfly and the tent floor. Use a foam brush or the bottle’s applicator tip. Let it cure for a full 24 hours in a warm, dry place before moving on.
Step 3: Refresh the Waterproof Coating (The Messy One)
The interior of your tent fly and floor has a layer of polyurethane or silicone. When this coating gets thin, sticky, or chalky, it’s time for a refresh. For floors and PU-coated flies, a liquid urethane product like Gear Aid Tent Floor Sealant works.
Working on a tarp outdoors, apply the sealant in thin, even strokes with a paint brush. Thick globs take forever to dry and stay tacky. The smell is strong, ventilation is mandatory. Let it dry until it’s no longer sticky to a light touch. This can take several hours.
I tried the DIY mix of silicone sealant and mineral turpentine from an old YouTube tutorial on a backup tent. It worked, but the fabric stiffened noticeably and added a half-pound of weight. For a primary shelter, I’ll always use the purpose-made, breathable coatings.
Step 4: Reapply the DWR Finish (The Final Touch)
The Durable Water Repellent finish is the outermost layer. It doesn’t make the fabric waterproof, it makes water bead up and roll off, which keeps the fabric from becoming saturated and heavy. DWR wears off from dirt, abrasion, and UV.
After the interior coatings are fully dry, apply a DWR treatment like Nikwax TX.Direct Spray-On to the clean, dry exterior. Spray evenly, then work it into the fabric with a sponge. Let the tent dry completely, a full day in the sun is ideal, before packing it away. A damp DWR treatment can transfer onto other gear.
When Waterproofing Isn’t Worth the Effort
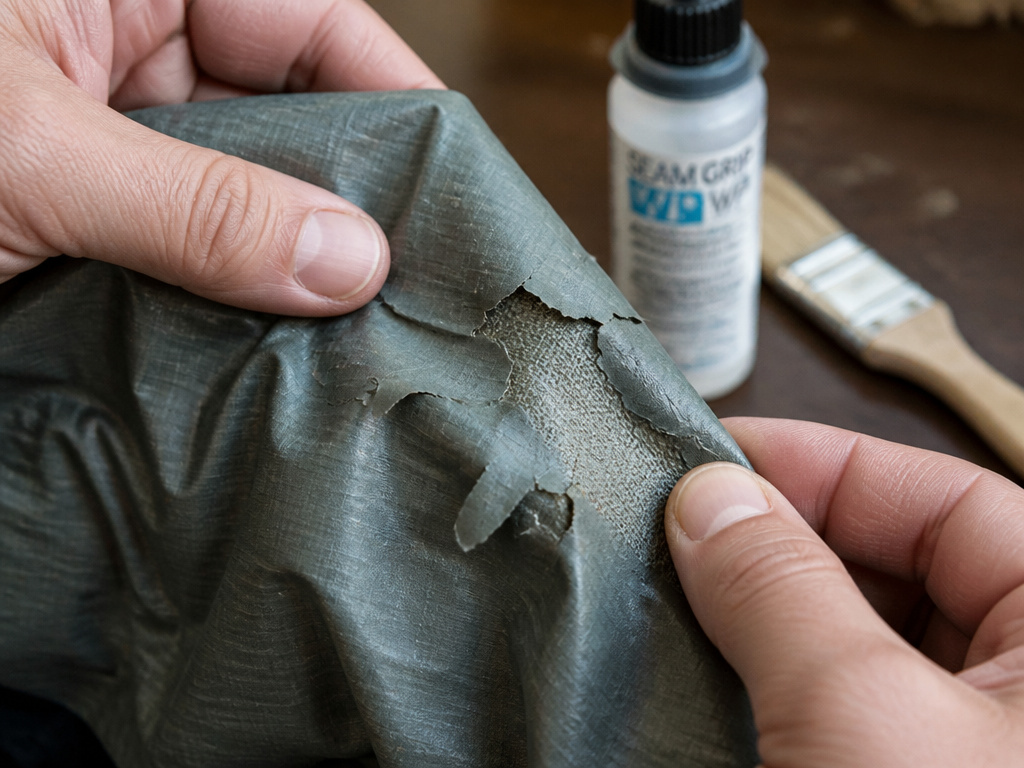
Not every tent deserves this labor. A cheap, poorly designed tent with a low initial HH rating (under 1,500mm) will never be trustworthy, no matter how much sealant you apply. The fabric itself is the bottleneck.
Similarly, if the polyurethane coating is flaking off in large sheets or the fabric has multiple punctures, you’re investing hours and materials into a losing battle. That money is better put toward a quality tents under $200 that starts with a robust waterproof rating. For those needing a bombproof shelter from the start, researching storm-resistant tent models is a smarter first move than a repair project.
Consider your other camping trip essentials too. A good repair kit is vital, but so is a shelter that won’t fail. Sometimes, an upgrade is the most effective repair.
Gear and Products That Actually Work
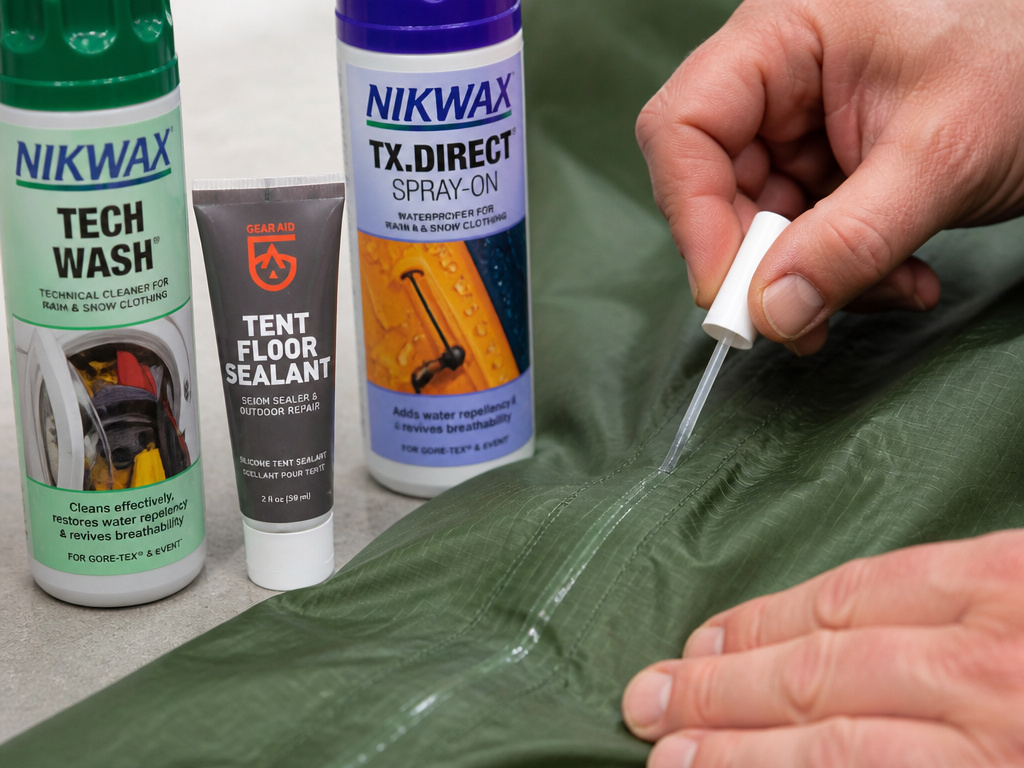
You don’t need a garage full of chemicals. A focused kit gets the job done.
- Cleanser: Nikwax Tech Wash. It cleans without harming waterproof coatings.
- Seam Sealant (Silicone): Gear Aid Seam Grip SIL. For silicone nylon tents.
- Seam Sealant (PU): McNett Seam Grip. For PU-coated polyester/nylon tents.
- Waterproof Coating: Gear Aid Tent Floor Sealant. Liquid urethane for floors and PU flies.
- DWR Treatment: Nikwax TX.Direct Spray-On. Easy application, reliable beading.
For those who prefer the heft and durability of traditional materials, maintaining canvas tents follows different rules, often involving specialized wax or spray treatments rather than liquid urethane.
Frequently Asked Questions
Can I use a waterproofing spray from the hardware store on my tent?
You can, but it’s suboptimal. General waterproofing sprays are often oil-based and can clog the fabric’s breathability. They also lack the specific chemistry to bond with technical fabrics like silicone nylon. Use products designed for outdoor gear.
How often should I waterproof my tent?
There’s no fixed schedule. Inspect it at the start of each season. If water stops beading on the fly, refresh the DWR. If the interior coating feels sticky or looks cracked, or if seams look dry, plan a full recoating. With moderate use, a full refresh might be needed every 2-4 years.
Will waterproofing make my tent heavier?
Yes, slightly. Liquid sealants add marginal weight. The trade-off is dry sleep. The weight gain from proper maintenance is far less than carrying a sopping-wet tent.
Can I waterproof a tent in one day?
No. The process requires thorough drying between stages, after washing, after seam sealing, and after the final DWR application. Rushing it traps moisture and causes coating failure. Plan for this to be a weekend project with good weather.
My tent floor feels sticky. Is that normal?
tacky feel means the polyurethane coating is breaking down through a process called hydrolysis. It’s common in older tents or those stored damp. Recoating with a liquid urethane sealant will solve it, but the fabric must be completely clean and dry first.
Before You Go
Waterproofing a tent is maintenance, not magic. It restores the engineered barriers that keep you dry: the sealed seams, the pressure-resistant interior coating, and the beading exterior finish. Match your chemicals to your fabric, let everything dry completely between steps, and don’t waste effort on a tent that was never built to keep the rain out.
A well-maintained tent lasts for years. Pair it with the right camping gear enhancements and you’ve got a reliable home base for any adventure. And if you find yourself constantly battling the elements, it might be time to explore four-season tent options designed for the challenge from the ground up.
