
How to Make Name Tents That Actually Stand Up
This post contains affiliate links. As an Amazon Associate, we earn from qualifying purchases.
To make a name tent, you need three things matched correctly: the right material (paper for indoors, laminated vinyl for outdoors), the correct folding dimensions (an 8.5″ x 11″ sheet folded into four equal sections works best), and a clear, large-font name on the front panel. The base should be about 1 inch wide for stability.
Most guides treat this like simple origami. They miss the part where a flimsy tent falls over every time someone bumps the table, or where a handwritten name vanishes from three feet away. You get a sea of identical white triangles, and nobody learns a thing.
This guide covers the physical build with specs from a teacher’s manual, the one-handed classroom challenge, digital templates that actually print right, and what material to grab when your event moves outside.
Key Takeaways
- The most stable paper fold uses an 8.5″ x 11″ sheet creased into four equal sections, a method documented in a teacher-instruction PowerPoint.
- For a name tent that stays upright, the base must be at least 1 inch wide. A narrower base tips over with the slightest table vibration.
- Use cardstock indoors. For any outdoor setting or near a heat source, switch to laminated vinyl or plastic sheets, paper warps in minutes.
- A common classroom icebreaker forces students to assemble a name tent using only their non-dominant hand within two minutes, highlighting the design’s simplicity.
- Digital tools like Google Docs or Microsoft Word let you set exact page dimensions before adding graphics, ensuring your template prints to scale.
What’s the Most Stable Way to Fold a Name Tent?
This isn’t a guesswork fold. A teacher-instruction resource from Slideserve.com spells out the exact dimensions for a classroom-proven method. Following these steps ensures every tent is identical, which matters for a professional event or an orderly classroom.
Folding an 8 1/2″ x 11″ paper in half (shorter edges together), then folding the bottom and top 8 1/2″ edges to the middle crease yields four sections, each measuring approximately 2 3/4″ x 8 1/2″. This creates a stable, multi-panel name tent.
- The Initial Crease: Lay your 8.5″ x 11″ sheet horizontally. Fold it in half by bringing the two shorter 8.5-inch edges together. Run your fingernail or a ruler along the fold to make it sharp. This center line is your guide. Unfold the paper so it lies flat again.
- Create the Four Panels: Fold the bottom edge of the paper up to that center crease. Align it perfectly and crease. Then, fold the top edge down to the same center crease. You should now see four equal rectangles, each roughly 2.75 inches tall.
- Form the Stand: The two center panels become the base. Fold them both downward along the existing creases so they form a foot. They should meet at a 90-degree angle to the front panel. Secure the inside seam with a small piece of clear tape for added stability.
- Write and Finalize: The front-top panel is for the name. Use a bold, sans-serif font if printing, or a dark marker if writing. The panel below it can hold a title or question. The two back panels are for notes or responses in a workshop.
| Panel Position | Purpose | Size (approx.) |
|---|---|---|
| Front Top | Primary Name | 2.75″ x 8.5″ |
| Front Bottom | Secondary Info | 2.75″ x 8.5″ |
| Back Top | Notes/Response | 2.75″ x 8.5″ |
| Back Bottom | Base (folded under) | 2.75″ x 8.5″ |
Common mistake: Making a soft, lazy crease, the tent will slump forward within an hour, forcing you to constantly straighten a sea of droopy signs.
TL;DR: Fold an 8.5×11 sheet into four equal panels; the two center panels fold down to make the stand; write big on the front.
How Do You Pick the Right Material?
Your material choice dictates the tent’s lifespan and where it can live. Grab the wrong paper and your tent will sag by the first coffee break.
- Printer Paper (20-lb): For temporary, single-use indoor events. It’s cheap and disposable. It will bend if handled roughly.
- Cardstock (65-lb to 110-lb): The standard for professional conferences and classrooms. It holds a crease, stands firmly, and can be reused. This is the most versatile pick for general use and pairs well with other camping equipment essentials.
- Laminated Vinyl/Plastic Sheets: Mandatory for outdoor events, summer camps, or venues with patio heaters. For outdoor-ready tents, I buy Avery Printable Vinyl Sheets (8.5″ x 11″, matte finish). They run through a standard printer and the matte surface takes Sharpie beautifully. For a heavier, no-printer option, C-Line’s 10-mil Bi-Color Self-Stick Laminating Sheets let you write on one side, see-through on the other.
Last spring, I was prepping name tents for a 50-person trailhead safety briefing for my @dacia_uk crew. In a rush, I printed all fifty on standard office paper. A gust of wind swept across the picnic tables, and half of them took flight like confused origami birds. We spent ten minutes chasing them down a hill. Now, for any outdoor meet-up, I use those Avery vinyl sheets, they stay put.
What If You Need to Make a Lot of Them Fast?
Of course, handwriting fifty names can turn your wrist to jelly. So you go digital, only to find your screen’s perfect template prints out doll-sized. Here’s the fix.
You must set the page dimensions before you add a single word. In Microsoft Word, go to Page Layout > Size > More Paper Sizes. For a folded tent, a common size is 3.5 inches wide by 4 inches tall. Set all margins to zero. Then, insert a vertical line down the center to show the fold. Add your text boxes, making the name’s font size at least twice as large as any other text.
Google Docs is less precise but works. Use the File > Page setup menu. Set to custom dimensions, like 8.5″ x 5.5″ for a half-sheet design. You can find pre-made, free name tent templates on Education.com that are ready to print and customize.
I once formatted fifty name tents in Word for a workshop without checking the printer settings. The default “Fit to Page” option shrunk everything by 15 percent. The names were a squint-inducing 8pt. When we laid them out, my co-organizer laughed and called them ‘tent gnomes.’ We had to hand-write replacements on the spot, a messy, 20-minute delay.
My rule? If I smell burnout, I outsource. For a 300-person outdoor festival, making them myself was a weekend gone. I ordered 300 double-sided, laminated tents from a local print shop. Cost: $120. Time saved: 14 hours. The tents survived a surprise rain shower. Sometimes, the best DIY is knowing when not to DIY.
TL;DR: Set exact page dimensions in your software, do a test print, and use a bold, large font. For huge jobs, consider professional printing.
Are There Any Fun or Unusual Techniques?
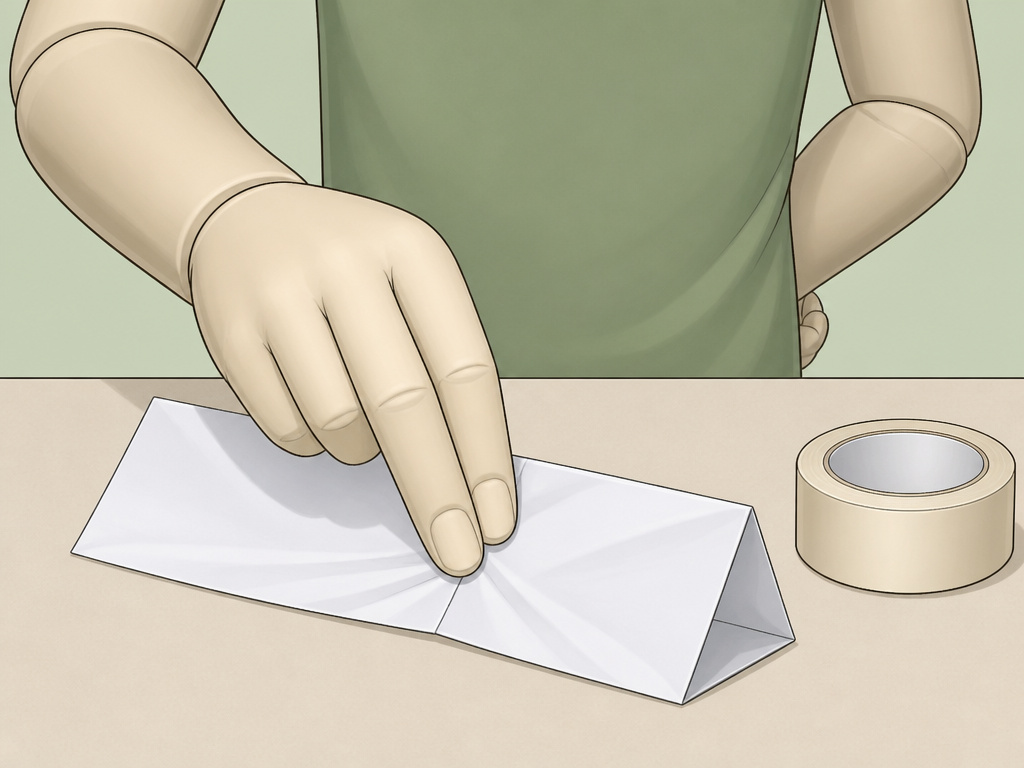
Teachers use a specific exercise to prove this design is intuitive. It’s outlined in the same Slideserve.com presentation. The goal is to build a name tent using only your non-dominant hand in two minutes.
You put your dominant hand behind your back. No help from a neighbor. You have to manage the paper, find the creases, and fold with your off-hand. It feels awkward. Most people rush and make sloppy folds.
The point isn’t to make a perfect tent. It’s to break the ice and level the playing field. Everyone struggles a bit. You get laughter, not anxiety. By the end, you have a functional tent and a shared experience. It works because the four-section fold is mechanical enough to follow even with limited dexterity.
If you’re running a workshop, try this. It takes the pressure off “making it pretty” and focuses on participation. Just have extra tape ready, off-hand taping is the real challenge.
How Do You Solve Common Name Tent Problems?
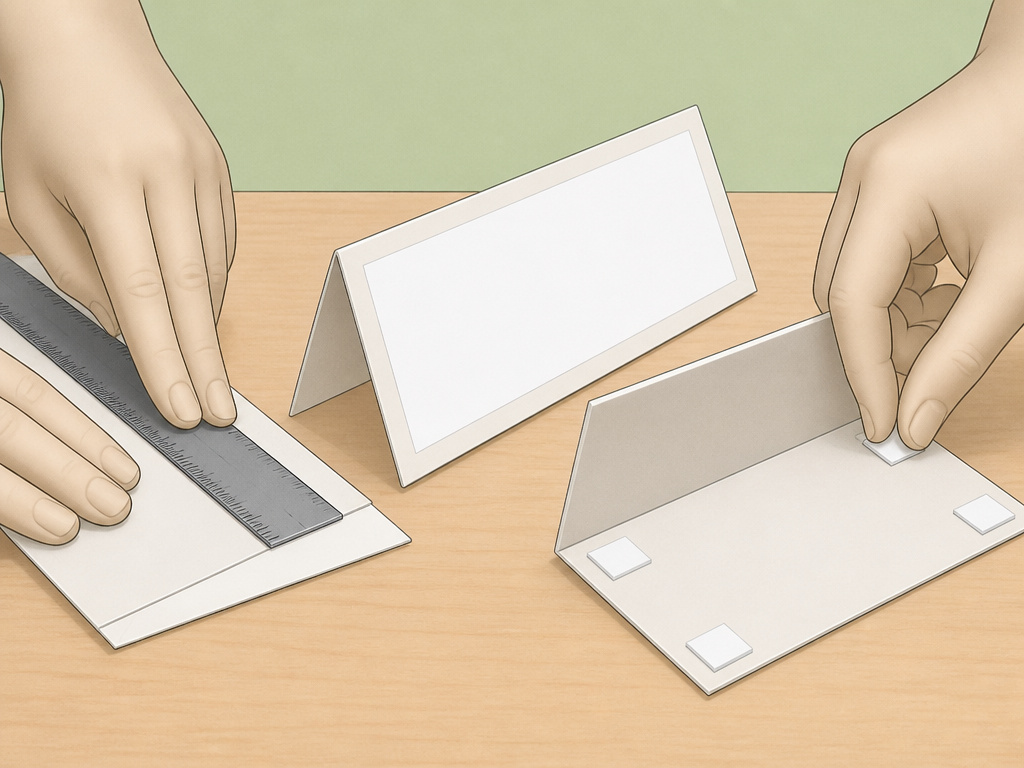
A bad tent has a clear symptom and a fix. Use this table to diagnose issues on the fly.
| Symptom | Likely Cause | Immediate Fix |
|---|---|---|
| Tent won’t stand up | Base too narrow (<1″) or soft fold. | Re-crease base with a ruler’s edge. Insert a small cardboard strip inside the base fold as a stiffener. |
| Name is hard to read | Font too small, thin, or low-contrast. | Use a bold, sans-serif font. Ensure name fills 60% of panel height. Black on white is best. |
| Tent slides on table | Lack of friction on a smooth surface. | Attach two small pieces of double-sided tape or a rubber adhesive pad (like museum putty) to the base. |
| Paper curls or warps | Humidity or material too thin. | Flatten under a heavy book. For future events, use heavier cardstock or laminated vinyl. |
Sometimes, the environment demands more than paper. If you’re dealing with extreme conditions, consider the same logic behind choosing specialized gear like portable air conditioners for tent climate control or durable canvas tents for basecamp, pick the material rated for the job.
Common mistake: Using indoor cardstock for an outdoor garden party, the first drizzle will cause the ink to run and the tent to collapse into a pulpy mess in under five minutes.
What About Sizing and Long-Term Storage?
Stability comes from proportions, not magic. The ideal size range is between 8.5″ wide by 2.75″ tall up to a full 8.5″ by 11″ sheet. The base width is the critical number. It must be at least 1 inch wide. A half-inch base will wobble and tip if someone taps the table.
Height also affects stability. A very tall, narrow tent acts like a sail. Keep the height-to-base ratio under 4:1 for indoor safety. For example, an 8-inch tall tent should have at least a 2-inch wide base. For large, visible setups like conferences, pairing your signage with good tent lighting solutions can enhance visibility for evening sessions.
Storage matters too. Keep unused tents unfolded and flat in a labeled file box or breathable plastic bin. Place them in a cool, dry area away from direct sunlight to prevent fading. Avoid attics or garages where temperature and humidity fluctuate. If they are laminated, you can wipe them clean and reuse them.
TL;DR: Make the base at least 1 inch wide, and match the tent’s height to its visibility needs. Store flat, cool, and dry.
Frequently Asked Questions
What size paper is best for name tents?
An 8.5″ x 11″ sheet is the standard. It provides the perfect proportions for folding into a stable, four-panel tent with a good base height. You can cut it down to a smaller size like 8.5″ x 5.5″ for a shorter tent, but keep the width for stability.
Can I make a name tent without tape or glue?
Yes, if you use the four-section fold method from sturdy cardstock. The friction of the folded panels locking together can be enough. For thinner paper or a more permanent setup, a small piece of clear tape inside the base fold guarantees it stays put.
How do I make name tents for an outdoor event?
Skip paper entirely. Use laminated vinyl sheets or plastic-coated cardstock. Write on them with permanent marker or dry-erase marker for reusability. Ensure the base is extra wide (at least 2 inches) to combat wind, and consider small weights like washers taped inside the base.
What’s the fastest way to make 100+ name tents?
Use a digital template in a word processor or design tool. Set up a mail-merge with your guest list to auto-populate names. Print on pre-scored cardstock if available, which folds neatly along pre-cut lines. Organize a folding assembly line with a few helpers.
Are there free templates I can use?
Yes. Education.com offers a free printable name tent template worksheet. Many teacher resource sites and template libraries provide downloadable files for Google Docs or Microsoft Word that you can customize.
How can I store name tents to reuse them?
Store them unfolded and flat in a labeled file box or plastic bin. Place them in a cool, dry area away from direct sunlight. If they are laminated, you can wipe them clean and store them stacked. Avoid attics or garages where temperature and humidity fluctuate.
The Bottom Line
Name tents seem trivial until you need a hundred of them by tomorrow. I learned this the hard way prepping for a trail-guide certification, the instructor took one look at our floppy paper tents and said, ‘If you can’t manage this detail, how will you manage a campsite?’ A well-made tent isn’t just signage; it’s a signal of preparedness.
Remember the core specs: 8.5×11 paper, four-section fold, a 1-inch base. Choose cardstock for indoors and switch to laminated vinyl the moment you step outside. If numbers are large, go digital and print. If time is zero, buy them.
A stable, readable name tent lets people connect names to faces without distraction or last-minute panic. That’s the whole point. Now you know how to build that connection reliably, whether you’re outfitting a classroom or gearing up for an adventure with your favorite lightweight tarp shelters.
