
How To Put Up A Tent Step By Step | The One Step Nobody Does
This post contains affiliate links. As an Amazon Associate, we earn from qualifying purchases.
To put up a tent step by step, you follow a universal sequence: lay the footprint and tent body, assemble and insert the poles, attach the rainfly, stake out the corners, tension everything, and finally check ventilation. The Coleman Kenai 10’x8′ manual specifies inserting its two shock-corded poles diagonally to form an “X”, a common dome-tent pattern. Skipping the footprint, as the MSR manual warns, accelerates floor wear from ground abrasion.
Most people get the order wrong. They stake everything down tight before the rainfly is on, or they clip poles to a tent body that’s sliding around on a loose tarp. The result is a saggy fly, a crooked door, and a night spent listening to flapping nylon.
This guide walks through the core seven-step process, then dives into the specifics that separate a okay pitch from a bomber one. We’ll cover what to do in wind, rain, and sand, and why practicing in your backyard isn’t just for beginners.
Key Takeaways
- Practice setting up your specific tent at home once. The Bureau of Land Management states this is crucial for identifying missing parts or confusing steps before you’re in a storm.
- Always use a footprint or ground tarp. It protects the tent floor from abrasion and moisture, and many models have color-coded tabs to ensure perfect alignment.
- In wind, stake the tent corners immediately after laying it out, then orient the side with the strongest pole structure into the wind, not just the smaller side.
- Drive stakes at a 45-degree angle with the top pointing away from the tent for maximum holding power in most soils, a technique endorsed by the Appalachian Mountain Club.
- After it rains, re-tension your rainfly. The nylon material stretches when wet, and a loose fly can sag onto the inner tent, causing leaks.
The Universal Tent Anatomy (And Your First Move)
You don’t need to know every tent design, but you must identify three things on yours before you start: the pole attachment method, the rainfly connection, and the stake loop layout. Look for sleeves (fabric tunnels) or clips (plastic buckles). Check if the rainfly attaches via clips, straps, or “S” hooks. Find the reinforced loops at each corner where the stake goes.
Your very first physical move is not unfolding the tent. It’s clearing your campsite. Kick aside pinecones, rocks, and sticks. Feel for hidden roots. A flat, clear patch about a foot larger than your tent’s footprint on all sides is the goal. This step prevents punctures, discomfort, and a lopsided pitch.
Before you start: Tent poles under tension can snap back if released incorrectly, risking eye injury. When connecting shock-corded sections, keep your face away from the joint. Stakes are sharp; never leave them lying on the ground pointed up. Always have a first-aid kit accessible.
The 7-Step Core Process (and the One Step Nobody Skips)
Follow this sequence exactly. Swapping steps is the root of most pitching problems.
1. Lay the Footprint and Tent Body
Unfold your ground tarp or footprint. If it has a shiny side, place that face up, it’s usually a waterproof coating. Lay your tent body on top, door facing your desired direction. Many modern systems, like some Coleman models, have color-coded tabs on the tarp and tent floor. Match them. This guarantees the door is where you think it is and the tarp isn’t sticking out to collect rainwater under the tent.
2. Assemble the Poles
Connect all shock-corded pole sections. The elastic cord inside should pull them together snugly. If a section feels stubborn, don’t force it, check for dirt or a bent end. For a classic dome like the Coleman Kenai, you’ll have two long poles. Assemble them completely before trying to insert them.
3. Insert Poles to Raise the Frame
This is where methods diverge. For sleeve tents, feed the pole tip through the fabric tunnel from one corner to the opposite corner. It requires patience, not force. For clip tents, simply click the pole into the plastic grommet at each corner. For the Kenai’s diagonal “X” pattern, you insert each pole end into a grommet on one corner, arch it across, and insert the other end into the diagonally opposite corner. The frame should pop up on its own.
4. Drape and Attach the Rainfly
Unfold the rainfly and identify its front, usually marked by a logo or a different vent shape. Drape it evenly over the erected frame. If your tent has matching color tags (e.g., a red tab on the fly and a red tab on the tent body), align them now. Then, connect the rainfly to the tent. This is often done with plastic “S” hooks or buckles that clip to loops near the base of the tent poles. Don’t tighten them fully yet.
5. Stake Out the Corners
Locate the reinforced stake loops at each corner of the tent body. Often, the rainfly has a corresponding loop. Thread a single stake through both loops. The debate is the angle.
| Staking Method | Recommended By | Best For | Risk If Wrong |
|---|---|---|---|
| 45° angle, top pointing away | Appalachian Mountain Club (AMC) | Most soil types, general use | Stake pulls out under lateral wind load |
| Fully vertical | REI Expert Advice | Very soft, loose soil (sand) | Less holding power in firm ground, easier to trip over |
I use the 45-degree angle. It presents more surface area of the stake to the soil, resisting pull-out. Drive the stake in until the loop is snug to the ground. If the soil is hard, use a mallet or a smooth rock.
6. Tension the Rainfly and Add Guylines
Now, go to each rainfly attachment point and tighten the strap or cord. You want the fly taut, with no loose fabric flapping. A properly tensioned fly should not touch the inner tent walls. Next, attach the guylines. These are the long cords that come with your tent. Tie them to the designated guyout points on the rainfly, usually small loops along the seams. Extend each guyline away from the tent and stake it out. This step is non-negotiable in wind.
7. Final Interior and Ventilation Check
Zip the doors shut, then go inside. Look up. The rainfly should be suspended with a clear air gap between it and the tent ceiling. This gap is critical for condensation management. Open any vents at the top or bottom of the tent or rainfly to promote airflow. A stuffy tent gets wet inside, even without rain.
TL;DR: Sequence is everything: tarp → tent → poles → fly → stake corners → tension fly/guylines → check vents. Stake at 45°.
Stakes, Guylines, and the Wind
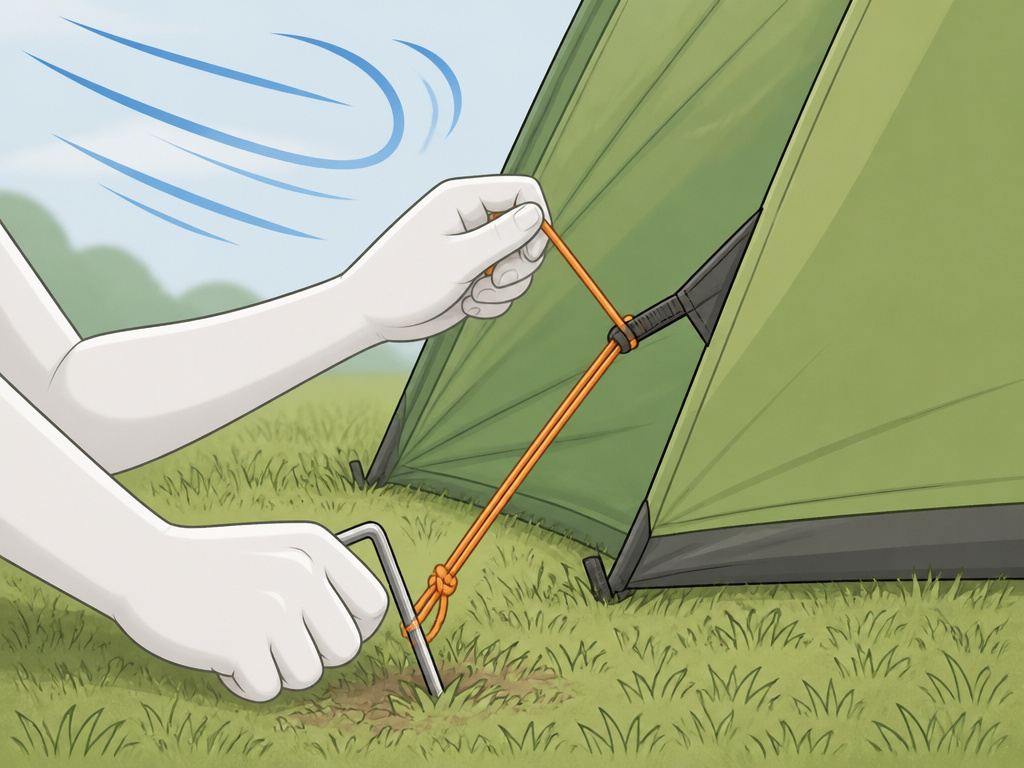
Guylines are your best friend in a breeze, and most people stash them in the bag unused. Attach them before you need them.
Common mistake: Staking the tent with the door facing into the wind for “fresh air”, the Coleman Kenai manual explicitly advises against this. The wind will funnel rain into the tent and strain the zipper.
In wind, your priority shifts. Stake the four corners the moment the tent body is laid out, even if you have to re-adjust later. This keeps the tent from becoming a runaway kite. Orient the tent so its strongest side, often the side with the most pole segments or a solid wall, faces the wind. Guy out that side first, using every attachment point. Then guy the leeward side. This creates a balanced, stable shape.
For extreme environments, standard stakes fail. In sand, use long, wide plastic sand anchors or bury a stuff sack filled with sand. In snow, deadman anchors (burying a stick or bag) are essential. Your standard tents for windy conditions are built with more guy points and stronger pole geometries for this reason.
The Rainfly: Your Real Shelter
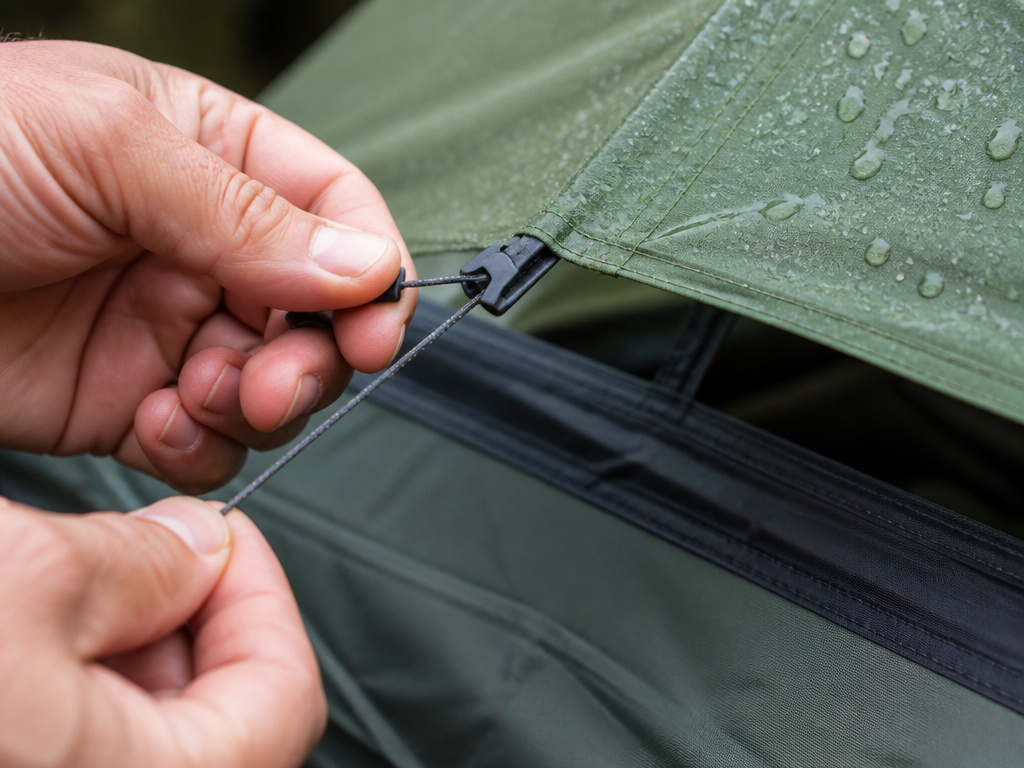
The tent body is mostly for privacy and bug protection. The rainfly is your waterproof shell. Its job is to shed water, and tension is how it does that.
A loose rainfly sags. When it sags, it can touch the inner tent wall. Fabric touching fabric wicks moisture inside via capillary action. You’ll get a drip right where the contact happens, and you’ll blame the tent’s waterproof rating when the real issue was your pitch.
Rainfly material stretches when wet. A pitch that was perfect at sunset will be slack by morning dew. Walk around your tent after a rain shower or heavy dew and re-tighten every strap and guyline.
Ventilation is the other half of staying dry. That gap between the fly and the tent body, the vestibule, isn’t just for gear. It’s an air channel. Ensure the fly is pitched high enough to allow air to flow up and out, carrying your breath’s moisture with it. Modern tent camping accessories often include extra pole clips or adjustable vents to enhance this airflow.
What To Do When Things Go Wrong
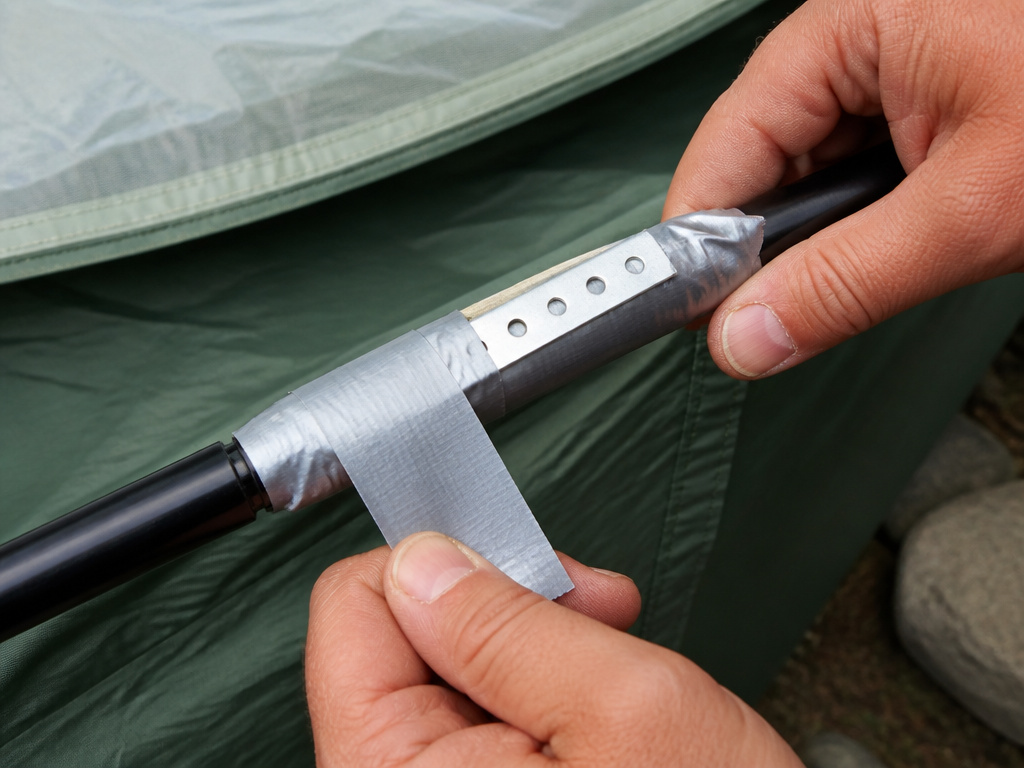
You’ve lost a stake. Use a sturdy stick, a tent peg from a discarded piece of gear, or a large rock tied to the guyline as a deadweight. You’ve broken a pole section. Most repair kits include a splint, a hollow metal sleeve that fits over the break. Tape it securely with duct tape or a dedicated pole repair tape. The tent won’t be as strong, but it will hold.
You’ve lost the instructions. This is why the BLM and every seasoned camper says to practice at home. If you’re already in the field, almost every major manufacturer (Coleman, MSR, REI) hosts PDF manuals on their website. Download it to your phone before your trip.
The most common issue is a missing footprint. If you didn’t bring one, use a cheap plastic tarp from a hardware store. Just make sure it’s smaller than the tent’s floor outline. If it extends beyond the edges, it will collect rainwater and channel it under your tent.
Gear Up: What You Actually Need
You can manage with just the tent, but a few items turn a struggle into a smooth operation.
| Tool | Purpose | Good-To-Have Alternative |
|---|---|---|
| Rubber Mallet | Driving stakes in hard ground | Smooth, heavy rock |
| Camping Knife | Cutting tangled guyline, trimming tarp | Small multi-tool scissors |
| Headlamp | Setting up after dark | Smartphone light (less ideal) |
| Extra Stakes & Guylines | Replacing lost/broken ones | Paracord and sticks |
| Small Broom | Sweeping debris from tent floor | Your hand |
A mallet is worth its weight. Trying to stomp a stake in with your heel often bends it. Your essential camping equipment checklist should include these items, not just the tent itself. For after-dark setups, good tent lighting is also a safety essential, not a luxury.
Frequently Asked Questions
What is the most common mistake when putting up a tent?
Not staking out the corners before raising the full frame or attaching the rainfly. On a breezy day, the tent body can catch wind like a sail, stressing the poles and making alignment impossible. Always secure at least two opposing corners the moment the tent is unfolded.
Should you put a tarp under your tent?
Yes, always. Use a manufactured footprint designed for your model or a plain tarp cut slightly smaller than the tent floor. This protects the tent floor from punctures and abrasion, significantly extending its life. The MSR tent manual explicitly highlights this for minimizing wear.
How do you put up a tent in the wind?
Stake the tent body corners immediately after laying it out. Erect the frame, then attach the rainfly while the tent is secured. Guy out the windward side first, using all available points. Orient the side with the most robust pole structure into the wind, not necessarily the lowest profile side.
How tight should tent guylines be?
Tight enough that they don’t sag, but not so tight they distort the rainfly’s shape or pull the stake from the ground. In windy conditions, they should be firm and hum slightly when plucked. In calm weather, they can be looser but still taut.
The Bottom Line
Putting up a tent is a mechanical skill, not a mystery. The process is the same for a budget tent as it is for a heavy-duty canvas shelter: clear ground, sequence the steps, tension everything, and manage the airflow. The difference between a good night and a miserable one often comes down to the three things you do before you even leave home: practicing the pitch, packing a mallet, and downloading the manual. Do those, and the campsite setup becomes ten minutes of straightforward work, not an hour of frustration. Then you can focus on the important stuff, like where to put the camp chair for the best sunset view.
