
How to Fold a Pop Up Tent Without the Fight
This post contains affiliate links. As an Amazon Associate, we earn from qualifying purchases.
To refold a pop-up tent, you must first collapse it into a long, narrow taco shape by folding each corner sequentially. Only then do you perform the figure-eight twist and secure the loops. Skipping this initial step leaves the frame bulky and traps air, guaranteeing a frustrating battle with the storage bag.
I’ll admit it: my first time folding an instant tent ended with me sitting cross-legged on the ground, wrestling a sprung bundle that looked more like modern art than camping gear. I’d missed the crucial first move. After snapping a pole on my Ozark Trail 10-Person Instant Cabin by forcing a twist, I learned the hard way that these tents have a specific, gentle logic.
This guide breaks down that logic. We’ll walk through the universal fold, troubleshoot the stubborn “won’t fit” moments with specific fixes, and cover the pre-fold checks that protect your investment. Because a smooth pack-up means more time for the important stuff, like that last marshmallow.
Key Takeaways
- The universal fold starts with creating a tight taco shape, not with the twist. This sequentially collapses the frame joints.
- If your folded tent refuses to fit in the bag, trapped air is almost always the culprit. The fix is to unroll it and crawl across the fabric.
- Always perform a quick damage and debris check before folding. A small tear or grit can cause major problems in storage.
- Wind and moisture are your enemies. Wait for calm air and never store a damp tent, mold can develop in under 48 hours.
- Different tents have quirks. Know your model’s specific features, like the BAGGU Popup Tent’s safety loop.
The Universal Fold: A Step-by-Step Guide
Forget the frantic spinning you see in campground bloopers. Folding a pop-up tent is a methodical process of guiding, not forcing, the flexible frame. This sequence works for most models, from simple pop-up tents for the beach to complex family cabins.
Lay the collapsed tent flat on a clean surface, roof facing up, with all doors and windows fully unzipped. Starting at one end, fold each corner over the next in sequence, forming a long, narrow arch. Place the base of this arch on the ground, fold the top down, then twist the resulting circle into a figure-eight and secure the loops.
Step 1: Prepare Your Space and Tent
Find a clean, flat area. A sharp rock or pine cone under the fabric acts as a pivot point during the fold, concentrating stress and potentially delaminating the waterproof coating on the tent floor. Flip the tent so the roof faces the sky, which orients the poles correctly. Unzip every closure, doors, windows, and vents. A sealed tent is an air mattress that will fight you.
Step 2: Create the Essential Taco Shape
Stand at one short end of the rectangular tent. Grab the bottom left or right corner. Bring the adjacent corner over it, aligning the poles. Continue this motion down the length of the tent, folding each new corner onto the stack. The tent will arch into a long, narrow taco shell. This step is non-negotiable; it guides all the frame joints into their natural collapsed position.
Step 3: Form the Preliminary Circle
Identify the side of the taco with the sewn-in base fabric or attached guylines, this is the “bottom.” Place this side firmly on the ground. Use your foot to pin it down, freeing your hands. Fold the top half of the taco down and inward toward the center. You should now have a rough, flat circle about three feet in diameter.
Step 4: Execute the Figure-Eight Twist
Grip the circle with both hands, palms facing each other. Push down firmly with your dominant hand while pulling up with the other in a smooth, controlled twisting motion. The frame will naturally form a figure-eight shape. Cross the two loops over each other. The official instructions for the BAGGU Popup Tent specify a “right hand over left hand motion” for this twist, which is a refined version of the universal step.
Step 5: Lock the Bundle and Pack
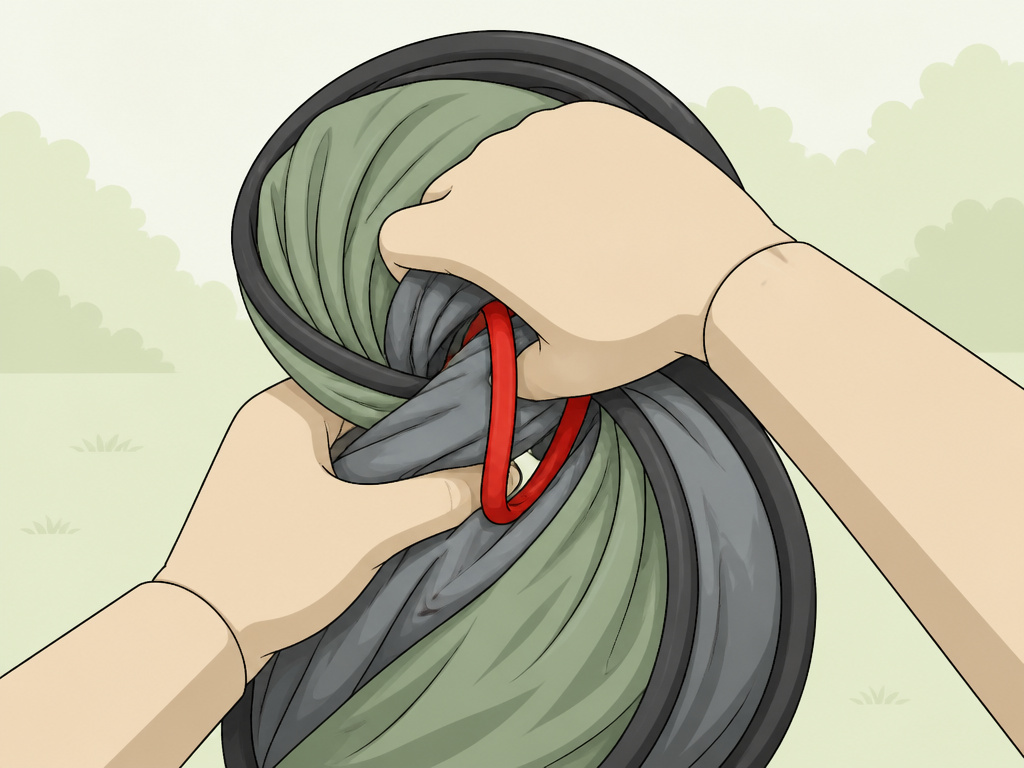
Many tents include a locking mechanism. The BAGGU uses an elastic “safety loop” sewn into its pouch. Thread this loop through both rigid loops of the twisted figure-eight to lock the bundle. Without this, the bundle can spring open inside your bag or car. Finally, slide the secured bundle into its storage pouch, ensuring no fabric is caught.
TL;DR: Flatten, fold corners into a taco, squash the taco into a circle, twist into a figure-eight, lock it, and pack. Unzipped doors are mandatory.
Why Won’t My Tent Fit in the Bag? (Troubleshooting)
You’ve followed the steps perfectly. The bundle looks right. Yet, it defiantly refuses to slide into its bag. This common frustration has a single, fixable cause nearly every time.
Common mistake: Forcing a bulky, springy bundle into the bag, this stresses seams and can bend pole joints. The problem is trapped air, and the fix takes two minutes.
Diagnosing and Fixing Trapped Air
A pop-up tent is essentially a fabric air bladder. When folded without evacuating the air, it becomes volumous and resistant. The solution isn’t more muscle; it’s a reset.
- Completely unroll the tent on a flat surface.
- Ensure all doors and windows are open.
- Get on your knees and slowly crawl across the fabric from one end to the other. Your body weight pushes the residual air out through the openings.
- Refold from scratch. The tent will be noticeably flatter and more compliant.
Handling Asymmetry and Resistance
If the tent feels lopsided or jams during the taco fold, you might be pressing the wrong spots. Don’t force it. Unfold, give the tent a light shake to let the frame settle, and restart the corner-folding sequence from the beginning. Forcing a joint can fatigue the plastic hub, leading to a failure when you least expect it, like in a stiff wind during your next trip.
When to Pause and Reassess
Environmental factors can defeat even perfect technique. If the wind is gusting, your tent becomes a sail. Trying to fold a sail is a losing battle. Wait for a lull, or move to the sheltered side of your car. This is critical for larger tents with standing room with more surface area. Similarly, if the tent is damp, pause your pack-up to dry it first, a lesson I learned after storing a slightly damp tent in my garage over a humid August. The resulting mildew smell took three washes with Nikwax Tech Wash to fade, and the tent never fully regained its water repellency.
Pre-Fold Inspection: The Three Dealbreakers
What you pack away is what you’ll unpack next season. Folding is the final step, but a quick inspection beforehand can prevent a ruined trip later. These three conditions must be addressed.
| Condition | Immediate Risk If Packed | Long-Term Consequence |
|---|---|---|
| Damp Fabric | Mold & mildew growth within 48-72 hours. | Permanent stains, foul odors, and degraded fabric integrity. |
| Dirt/Debris | Abrasion of fabric fibers along fold lines. | Attracts pests (ants, spiders) to nest in stored gear. |
| Small Tear | Tear propagation during next setup under stress. | A minor repair becomes a major patch job or renders the tent unusable. |
Never Store a Damp Tent
Moisture plus darkness equals mold. Always dry your tent completely in a shaded, breezy area before final storage. If packing up with morning dew, wipe the fly with a microfiber towel and leave the tent partially unzipped during transport to air out. Full drying at home is non-negotiable.
Shake Out the Grit
Give the tent floor a vigorous shake and brush off loose dirt, sand, and leaves. These particles act like sandpaper, grinding away at the fabric coatings and seam tape every time the tent is folded or unfolded. A clean tent is a durable tent, whether it’s one of the best tents under $200 or a premium model.
Patch Before You Pack
A small tear in mesh or fly will not fix itself. Applying a repair patch takes five minutes and saves the tent. For mesh and thin nylon, I carry Gear Aid Tenacious Tape Mini Rolls, the 1.5″ width is perfect. For a more permanent fix on a pole sleeve or thicker canvas, a Tear-Aid Patch Type A applied to a clean, dry surface is my go-to. Don’t use generic duct tape; the adhesive fails in temperature extremes.
Navigating Different Pop-Up Tent Designs
While the core taco-and-twist method is universal, specific tent models have their own personalities and features that require slight adjustments.
The BAGGU Safety Loop System
As noted in the BAGGU Popup Tent folding instructions, their specific “right hand over left hand motion” for the final twist and the included safety loop are integral to their design. That elastic loop isn’t an accessory; it’s a primary lock. Forgetting to thread it means your carefully folded bundle can pop open in your trunk, potentially damaging the fabric or itself.
Oversized Instant Cabin Tents
Large models like the Ozark Trail 10-Person are heavier and more cumbersome. The taco step is even more critical here because the longer frame has more joints that can bind. Work on a larger, cleaner area, and don’t hesitate to recruit a partner to hold one end steady while you form the taco. These spacious car camp tents reward a patient, methodical approach.
Budget and No-Name Pop-Ups
Inexpensive pop-ups often use thinner poles and less robust plastic joints. They can feel “sticky” or grind during the twist. If you feel resistance, a gentle wiggle of the connected poles as you fold can help them find their path. Forcing it is a direct route to a broken hub. This is a known compromise with many budget tents under $100, so extra care is warranted.
A perfect fold has a specific feel: a soft, satisfying click as the loops cross and lock, not a harsh crunch. The bundle should be symmetrical, with the two loops of the figure-eight roughly the same size. If it’s lopsided, that’s your cue to unfold and restart the taco step, your future self will thank you.
Pro Tips for a Frustration-Free Pack-Up
A few simple habits transform the folding process from a chore into a quick, reliable routine.
- Designate a Folding Spot: Consistently using a flat, clean area (a patch of grass, a garage floor) builds muscle memory. Your hands learn the exact pressure and motion for your specific tent.
- Listen and Look: A correctly folded bundle is symmetrical. Visually check the figure-eight loops are even. Listen for the soft click of the frame settling, not the sound of stressed plastic.
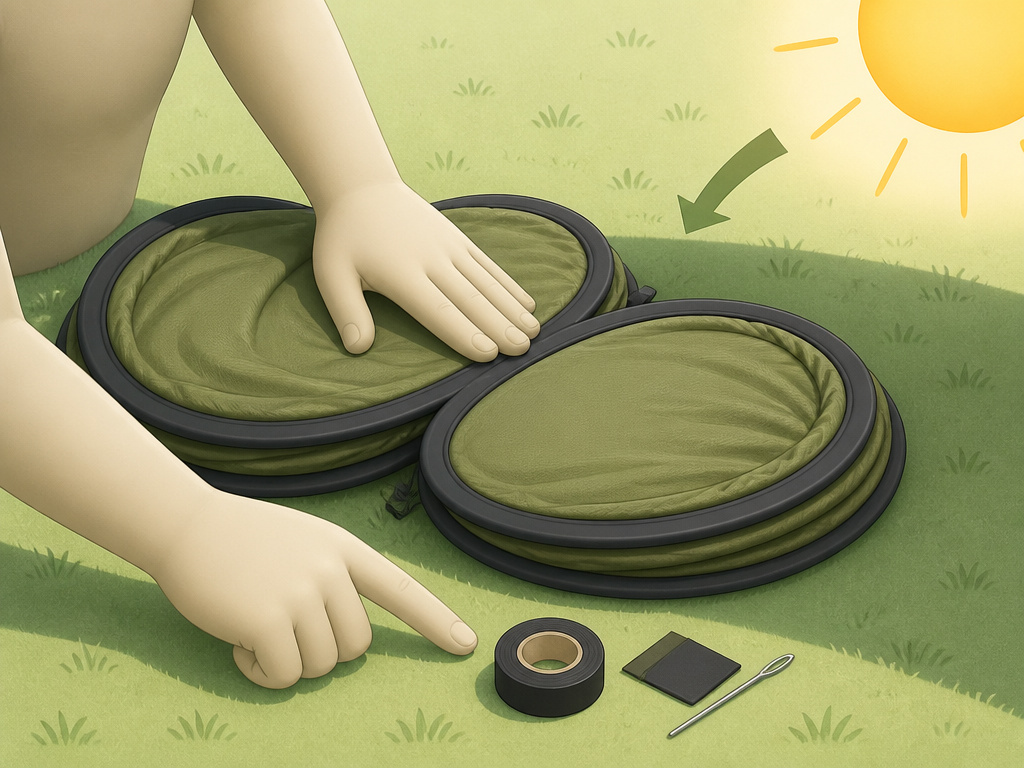
- Integrate Repairs: Keep a small repair kit in your tent camping equipment stash. Include Tenacious Tape, a needle and thread for larger tears, and a pole splint. Addressing issues immediately prevents them from ruining a trip.
- Consider the Environment: Beyond wind and moisture, also consider heat. Folding a tent in direct, hot sun can make the plastic joints more pliable and prone to deformation. Work in the shade when possible.
Before you start: Folding a pop-up tent involves manipulating spring-loaded poles under tension. Never force a joint that feels stuck, as this can cause sudden failure and potential injury from snapping plastic. Always ensure your folding area is clear of tripping hazards, and be mindful of fingers when crossing the figure-eight loops.
Frequently Asked Questions
What’s the one thing everyone does wrong when folding a pop-up tent?
They try to twist the tent from its fully open, flat state. This skips the essential “taco” step where the corners are folded sequentially. Without this, the frame joints are locked open, making the twist nearly impossible and putting dangerous stress on the poles.
Can I fold a large pop-up tent by myself?
Yes, the five-step method is designed for one person. The key technique is using your foot to firmly pin the “bottom” of the taco shape to the ground during the fold-in-half step. This stabilizes the tent and frees both your hands for the final twist.
How do I fold a tent in high wind?
The best advice is to wait for a lull. If you must proceed, position your body or vehicle as a windbreak. Fold the tent on the ground in the wind’s shadow, keeping the fabric as low as possible. Never try to lift and control a large, sail-like tent in a strong gust.
What is the elastic loop on my tent bag for?
That is a safety or locking loop. After you’ve twisted the tent into a figure-eight and crossed the loops, you thread this elastic loop through both rigid loops. This prevents the tightly wound bundle from springing apart inside the storage bag during transport, which can tear seams or warp the frame.
Is it okay to leave my pop-up tent set up in the backyard for weeks?
Prolonged UV exposure is the primary concern, as it breaks down fabric and coatings over time. If leaving it up for an extended period, use a UV-protective spray designed for outdoor fabrics and ensure it’s securely staked against wind. For long-term storage, it’s better to pack it away with your other tent camping accessories.
Before You Go
Mastering the pop-up tent fold transforms pack-up from a dreaded struggle into a quick, satisfying ritual. It’s not about strength; it’s about understanding the simple, engineered path the frame wants to take. The taco shape is that path.
Remember, the tent will tell you when you’re doing it wrong. Resistance, asymmetry, or a springy bundle are all signals to stop, diagnose, and reset, usually by releasing trapped air or checking your initial fold. With this method, even the bulkiest drive-up camping tents become manageable. A perfect pack means you’re one step closer to your next adventure, with gear that’s ready when you are.
