
The Correct Method For How To Repair A Tent Trailer Canvas
This post contains affiliate links. As an Amazon Associate, we earn from qualifying purchases.
Repair a tent trailer canvas by cleaning the area, cutting a rounded patch larger than the tear, and sealing it with a flexible fabric adhesive like Seam Grip WP, focusing the glue on the patch edges to prevent water wicking. A proper repair takes about 30 minutes of work but requires a full 24-hour cure before the canvas is folded or stressed.
Most people smear glue in the center of the patch. The edges stay loose. Water finds that microscopic gap, wicks underneath, and the whole patch peels off within a week of rain. You’re left with a soggy mess and a tear that’s now harder to fix.
This guide walks through the permanent fix, the one material mismatch that guarantees failure, and when to put the glue down and call a pro.
Key Takeaways
- Use Seam Grip WP for acrylic canvas and Tear-Aid Type B for vinyl. Getting this wrong means the patch will not bond and will peel.
- Round the patch corners. Square corners catch when you fold the canvas and are the first point of failure.
- Glue the edges first, then the center. A continuous bead on the perimeter seals the repair against water wicking.
- Duct tape is a 48-hour fix. It degrades with UV exposure and temperature swings, leaving a sticky residue that ruins the canvas for a proper repair later.
- Let it cure for 24 hours. Even if the glue is dry to the touch, the bond needs a full day to reach full strength before you fold or tension the canvas.
What You’re Really Fixing (Canvas vs. Vinyl)
Head to your local outdoor store and you’ll find a wall of adhesives. Grab the wrong one and your repair is dead on arrival. The repair depends entirely on your trailer’s skin material.
Older pop-ups and many budget models use vinyl. It feels like a heavy-duty shower curtain. Newer, higher-end trailers often use acrylic canvas, a woven fabric with a waterproof coating. Acrylic breathes better, reducing condensation, but it’s a different beast to patch.
Vinyl requires a vinyl-specific adhesive like Tear-Aid Type B or a clear vinyl cement. Acrylic canvas bonds with polyurethane-based glues like Seam Grip WP or McNett Outdoor Repair Gear. Using an acrylic glue on vinyl creates a weak, brittle bond that cracks when cold.
If you don’t know your material, find a hidden spot like a corner of the valence and do a burn test (carefully). Vinyl melts and smells like plastic. Acrylic canvas chars and smells like burning paper. Or check your trailer’s manual. This single piece of detective work saves a weekend.
TL;DR: Identify your material first. Vinyl needs vinyl glue. Acrylic needs polyurethane glue. Mix them and the patch fails.
The Tools That Actually Work (Skip the Hardware Store Kit)
A trip to the hardware store yields a generic “fabric repair” kit. It usually contains a square of grey felt and a tube of all-purpose cement. That kit is for patching a work jacket, not a tent trailer that flexes at 60 mph on the highway.
You need a kit designed for tensile strength and weatherproofing. The patch material must match the flexibility of your canvas, or it will act like a rigid scab that cracks under movement.
| Tool / Material | What It Does | Why The Cheap Version Fails |
|---|---|---|
| Flexible Patch Fabric | Provides a reinforcing layer that moves with the canvas. | Standard felt or nylon doesn’t stretch, creating a stress point that re-tears at the edge. |
| Specialized Fabric Glue | Bonds chemically to the specific material (vinyl or acrylic). | All-purpose cement dries rigid and loses adhesion in temperature extremes. |
| Rubbing Alcohol (90%+) | Degreases the surface without leaving a residue. | Soap and water leave a film; adhesive won’t stick to it. |
| Sharp Fabric Scissors | Creates clean, precise cuts on the patch. | Dull scissors fray the patch edges, giving water a path under the glue. |
A proper canvas repair kit from a trailer parts supplier includes material tested for this specific use. The glue is the star. For my own Coleman, I keep a tube of Seam Grip WP in my tent camping equipment bin. It’s saved two trips.
TL;DR: Buy a repair kit meant for tents or trailers, not a generic hardware store patch. The right glue is 90% of the battle.
The 3-Step Permanent Canvas Repair (Start to Finish)
This is the core. The goal isn’t just to cover the hole, but to create a monolithic seal that disappears into the original material.
1. Prep: Clean and Cut for the Long Haul
Turn the tear into a clean, dry surface. Use a liberal amount of rubbing alcohol on a clean cloth and scrub an area at least two inches wider than your planned patch. You’re removing dirt, mildew, and the silicone-based waterproofing spray that acts like glue repellent. Let it evaporate completely.
Cut your patch. Make it at least one inch larger than the tear on all sides. Then, take your scissors and round every corner. Sharp corners are peel-starters. This is non-negotiable.
Common mistake: Cutting the patch to the exact size of the tear — this provides zero overlap for the adhesive to grip. The patch will lift at the first fold, usually within three or four camping trips.
2. Glue: The Edge-Sealing Move Everyone Skips
Here’s the secret that most tutorials miss. Don’t just spread glue over the back of the patch.
Apply a thick, continuous bead of glue directly to the edges of the patch first. Press that bead down so it smooshes out, creating a sealed dike around the perimeter. Then spread a thin, even layer over the rest of the patch back. This edge-seal is what blocks water from capillary action.
If your glue instructions say to apply to both surfaces, do that. Wait a minute for it to get tacky. That tackiness is what creates a strong chemical bond, not just a sticky one.
3. Set and Cure: The Patience Tax
Press the patch down firmly, working from the center out to push air bubbles to the edges. Place a flat, heavy book on top. A weight ensures even pressure while it sets.
Now walk away for 24 hours. Not two. Not six. A full day. The surface may feel dry in an hour, but the bond deep in the fabric needs time to cross-link and reach full strength. Folding the canvas before this, even gently, can delaminate the patch from the inside. I learned this after a hasty repair on a Friday night before a trip. By Sunday morning, a new leak had started at the patch edge.
TL;DR: Clean with alcohol, cut a rounded patch, glue the edges first for a seal, weight it, and wait a full day before using.
When a Sewing Awl Makes It Worse (And When to Use One)
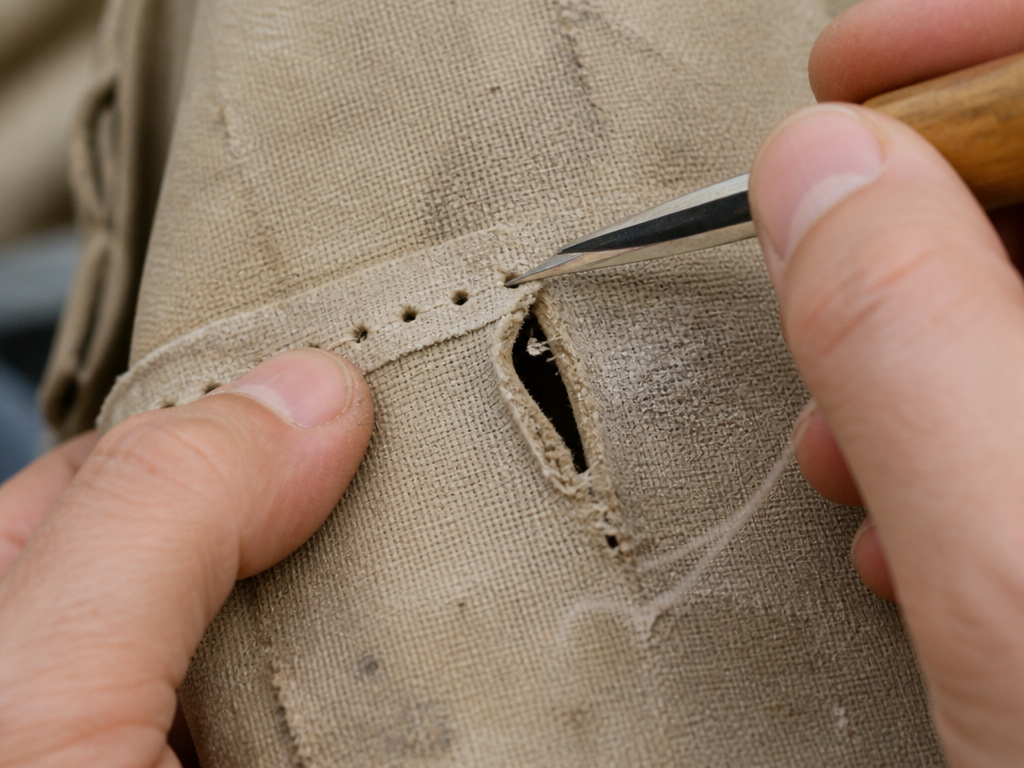
The idea is tempting: stitch it up like a sail. For a clean, straight tear on a flat, accessible seam, a sewing awl with heavy-duty UV-resistant thread can add mechanical strength. But it’s a niche tool for this job.
On a random puncture or a curved tear in the middle of a panel, an awl is often the wrong choice. Each puncture from the awl needle creates a new, smaller hole in the fabric. On aged, dry canvas, these micro-perforations can become the starting points for new tears. I’ve seen one report where an owner’s attempt to sew a small tear effectively created a perforated line that ripped straight across in a stiff wind.
I won’t recommend a sewing awl for most pop-up canvas repairs. The visual appeal of stitching is high, but the risk of creating a zipper of weakness in brittle fabric is higher. Glue spreads the stress across a wide area. A stitch concentrates it at each hole.
Reserve the awl for reinforcing a glued repair on a heavy-duty seam, or for repairing canvas gear like packs and duffels where flexibility is paramount. For your trailer’s walls and roof, adhesive is almost always the stronger, more waterproof solution.
The Duct Tape Trap and Other Temporary Fixes
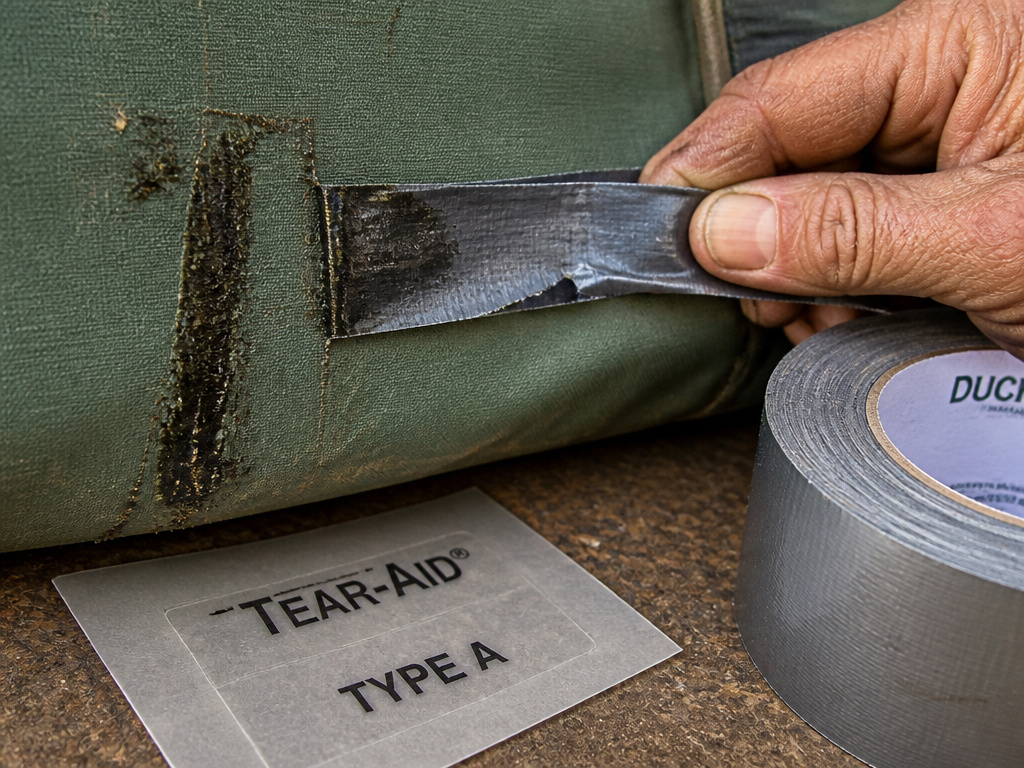
Duct tape works. For about 48 hours. It’s a fantastic get-me-home solution if a branch snags you on the road. But it is not a repair.
The adhesive on duct tape is not designed for long-term outdoor exposure. UV radiation breaks it down, turning it brittle. Temperature swings cause it to contract and expand, losing its grip. What you’re left with is a gummy, impossible-to-remove residue that any proper glue will refuse to stick to. Removing that residue requires harsh solvents that can damage the canvas’s waterproof coating.
If you must use a temporary fix, consider Tear-Aid Type A patches. They are a peel-and-stick vinyl specifically designed for temporary outdoor repairs and remove cleanly. But mark your calendar. A temporary fix forgotten becomes a permanent problem.
| Temporary Fix | Best For | Failure Timeline & Consequence |
|---|---|---|
| Duct Tape | Emergency, 2-day weather block. | Adhesive fails within a week; leaves residue that ruins the surface for a proper repair. |
| Tear-Aid Peel & Stick | Short-term seal (up to a month). | Can degrade and peel after 4-6 weeks of sun exposure, but removes cleanly. |
| Flexible Silicone Tape | Sealing around poles/zippers. | Can work for seasons if undisturbed, but is very visible and not a structural patch. |
Your goal is a permanent fix. Temporary solutions have a habit of becoming permanent eyesores.
When to Call a Professional (And When to DIY)
You can handle most small to medium tears. If the damage is a clean puncture or a tear under six inches, the DIY method here will outlast the rest of the trailer. But some problems are worth writing a check for.
Call a professional canvas shop if:
* The tear is along a major structural seam or where the canvas attaches to the trailer frame.
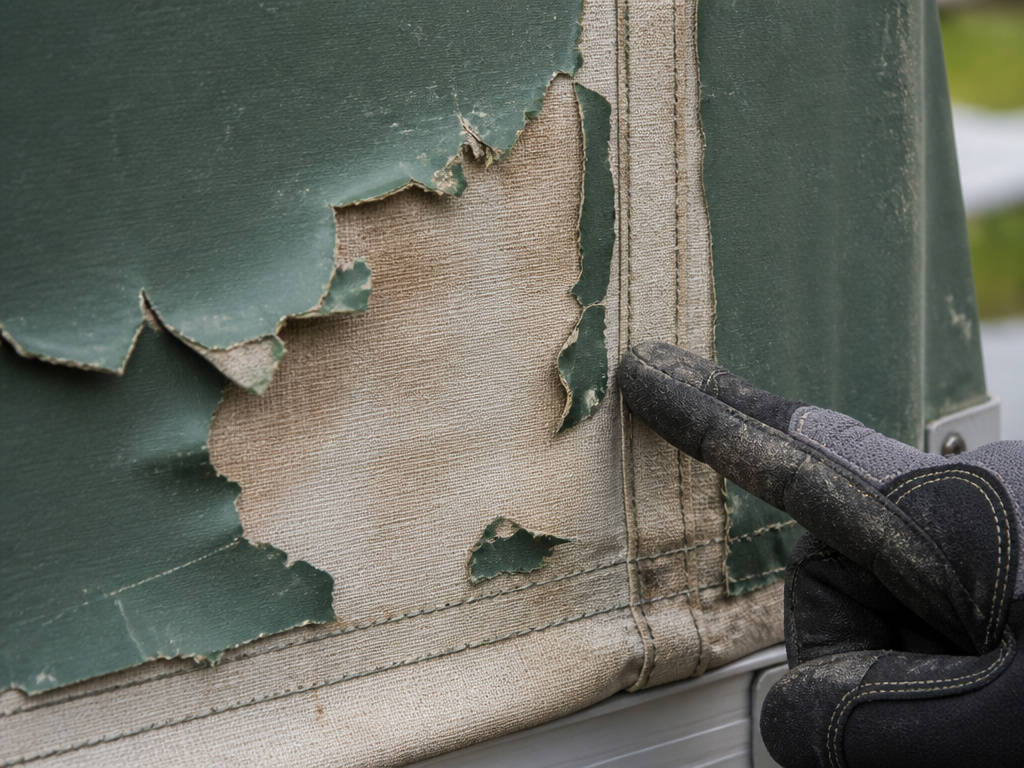
* There is extensive delamination (the waterproof coating is peeling away from the fabric in large sheets).
* You’ve attempted a repair that failed, and the area is now contaminated with old adhesive.
* The damage is on a complex curved section, like the corner of a Coleman tent trailer roof, where getting even pressure during curing is nearly impossible.
A pro has industrial sewing machines, high-frequency welders for vinyl, and bulk materials. They can often replace an entire panel or section with a factory-like finish. For the average owner, tackling a replacement canvas is a multi-day project fraught with alignment issues. Knowing when to step back saves your trailer and your sanity.
This is especially true for ensuring your shelter can handle the conditions it might face, much like choosing the right tents for heavy rain or high-wind tents from the start prevents failures.
Frequently Asked Questions
Can I use a regular needle and thread?
No. Household thread rots quickly outdoors and isn’t strong enough. Even heavy-duty thread lacks the UV resistance needed. If you must sew, use a dedicated awl with bonded nylon or polyester thread designed for marine or outdoor use, and always seal the stitches with a dab of your fabric glue.
How long will a glued canvas repair last?
properly executed repair with the correct materials should last for the remaining life of the canvas. I have patches on my older tent that are eight years old and still fully waterproof. The failure point is usually the surrounding canvas degrading, not the patch itself.
Will the repair be completely waterproof?
Yes, if you seal the edges. The key is the continuous bead of glue around the patch perimeter. This creates a dam that prevents water from wicking between the patch and the canvas. A patch with glue only in the center will leak.
Can I repair a canvas that’s moldy or mildewed?
You must kill and remove the mold first, or it will continue to eat the fabric underneath your patch. Scrub the area with a mixture of white vinegar and water, rinse thoroughly, and let it dry completely in the sun. The canvas must be bone-dry before you apply any adhesive.
Is it worth repairing an old, brittle canvas?
It depends on the overall condition. If the canvas is generally supple and this is an isolated tear, yes. If the entire fabric is dry, cracked, and failing in multiple spots, a repair is a stopgap. You’re better off budgeting for a full replacement, which restores the value and weatherproofing of your entire trailer.
Before You Go
Repairing your tent trailer canvas comes down to three things: matching the glue to your material, cutting a rounded patch, and sealing the edges first. Forget the duct tape. Skip the hardware store kit. The right canvas repair kit and 24 hours of patience get you a fix that lasts for years.
A good repair lets you forget about it. You’ll pack for your next trip thinking about trails and campfires, not that little spot on the roof. That’s the goal. Now go seal it up.
