
How To Set Up Your Neso Tent for Maximum Wind Stability
This post contains affiliate links. As an Amazon Associate, we earn from qualifying purchases.
To set up a Neso tent, you lay the fabric flat, fill four anchor bags with sand until they’re basketball-sized and weigh about 20 lbs each, pull them into a taut ‘X’ for tension, then insert the aluminum poles into the front grommets 1-2 feet from the corners. The pole length differs between the 7×7 ft Neso 1 (5.5 ft poles) and the 9×9 ft Neso Grande (6 ft 10 in poles), but the core tension-and-anchor process is the same.
People get this wrong by treating the anchor bags like an afterthought. They toss in a few handfuls of sand, wonder why the tent flaps like a loose sail in a 10 mph breeze, and then blame the product. The anchor bags are the entire foundation. Their weight and placement dictate whether you have a shaded oasis or a tangled mess in under an hour.
This guide walks through the exact steps, drawn from Neso’s official instructions and real beach tests, including the critical weight spec most articles skip and the pole-adjustment trick that stops a Neso from taking flight on a gusty day.
Key Takeaways
- Fill each anchor bag to the size of a regulation basketball, about 20 lbs of sand. Less than 15 lbs and the tent loses grip in a steady breeze.
- Create a perfect tension X by pulling opposite anchor bags away from the center. Wrinkles in the floor fabric mean the anchor bags are too close.
- For the Neso 1, use the 5.5 ft poles placed 1-2 ft from the front corners. For the Neso Grande, use the 6 ft 10 in poles with the same placement.
- On windy days, move poles to 2 ft from corners and 6 inches from the edge stitching to reduce the front “lip” that catches wind.
- Never leave a Neso erected for more than 24 hours continuously; the UPF 50+ nylon/lycra fabric degrades under prolonged UV exposure.
The Anchor Bag Trick Everyone Gets Wrong
Head to any beach with Neso tents and you’ll see the mistake within five minutes. Someone is wrestling a flapping canopy while their anchor bags sit half-empty, maybe 5 lbs each. The tent isn’t broken. The setup is.
Neso’s official setup guide specifies each anchor bag should be filled “to about the size of a basketball” and weigh 20 lbs. That’s not a gentle suggestion. It’s the minimum mass needed to counteract the lift created by wind flowing over the tent’s curved surface. A bag with 10 lbs of sand might hold on a dead-calm day. Add a 15 mph sea breeze and that bag will skip across the sand like a stone.
Fill each anchor bag until it’s roughly the size of a regulation basketball. This correlates to about 20 lbs of damp sand, which is the minimum weight required to keep the tent stable in coastal winds.
The second part is the pull. After filling, you don’t just drop the bags at the corners. You walk two opposite bags away from the center until the fabric between them is drum-tight. Then you do the same with the other pair, forming a crisp X. If the tent floor has wrinkles, your bags are too close together. That slack turns into billowing fabric the moment wind gets underneath.
TL;DR: Anchor bags need 20 lbs of sand each, pulled into a tight X to eliminate floor wrinkles. Light bags or a slack pull guarantee a shaky, noisy tent.
What’s in Your Neso Kit? (Neso 1 vs. Grande)
Before you even hit the sand, know which model you have. The setup principles are identical, but the parts are different sizes. Confusing them leads to a floppy Neso Grande or an overstretched Neso 1.
The Neso 1 is the original 7 ft by 7 ft square. Its package includes two 5.5 ft long rust-proof aluminum poles. The whole kit weighs 4 lbs and packs into a 19.5 inch long carry bag. It’s designed for two adults and a cooler, maybe a dog. The Neso Grande scales up to a 9 ft by 9 ft square, needing the longer 6 ft 10 inch poles to achieve the same roof pitch. It weighs 6.5 lbs but uses the same 19.5 inch carry bag, the fabric just packs down tighter.
Both use the same UPF 50+ water-resistant nylon and lycra blend fabric. This is key for your packing routine. That fabric is tough but not indestructible. Sharp rocks or shells in your anchor bags will puncture it. Always check the bag contents before filling.
| Model | Fabric Size | Pole Length | Total Weight | Best For |
|---|---|---|---|---|
| Neso 1 | 7 ft x 7 ft | 5.5 ft | 4 lbs | Couples, solo beach-goers, minimal gear |
| Neso Grande | 9 ft x 9 ft | 6 ft 10 in | 6.5 lbs | Families with kids, groups with chairs, extra gear space |
Choosing the right model is your first step toward a good setup. A Neso 1 feels cavernous for one person but perfect for two. The Grande is a group shelter. Trying to force a larger group into the smaller tent is one of the main reasons people end up needing additional tent camping accessories like extra shade sails or windbreaks.
Step-by-Step Neso Setup (Without the Flapping)
Follow this sequence exactly. The goal is a taut, stable shelter in under ten minutes, not a fifteen-minute fight with a nylon parachute.
1. Find Your Spot and Unpack
Lay the carry bag on a flat patch of sand, clear of sharp shells or driftwood. Unzip and pull out the fabric bundle, the two poles, and the four empty anchor bags. Unfold the tent completely and smooth it out flat, printed side up. This is your canvas.
2. Fill the Anchor Bags to the 20-Pound Mark
Take each anchor bag and open the wide mouth. Scoop sand into it. Don’t be gentle. Pack it in until the bag is full, round, and heavy. Heft it. It should feel substantial, about the weight of a large bag of dog food. If you have a shovel, use it. Doing this by hand for all four bags is the most strenuous part of the setup. This is where most easy beach tent setup competitors save time, but they sacrifice stability for that speed.
3. Create the Critical Tension X
Here’s the make-or-break moment. Grab the anchor bags at two opposite corners of the tent. Walk them directly away from the center, pulling the fabric tight between them. You should see it stretch and flatten. Set those bags down. Now grab the other two opposite bags and do the same, forming an X. Look at the tent floor. It should be smooth, with no ripples or slack pockets. If you see wrinkles, pick up one bag and pull it further out until they disappear.
Common mistake: Setting anchor bags too close to the tent corners, the fabric stays loose, catches wind easily, and the whole structure shimmies with every gust. Pull until the floor is smooth.
4. Assemble and Place the Poles
Take the two aluminum pole sections and snap them together. They should click firmly. Find the two grommets along what you’ve decided is the “front” of the tent (the side facing the water, usually). Insert the pointed end of a pole into each grommet. The pole should stand upright, leaning slightly outward.
Now, follow Neso’s golden rule: place the base of each pole 1 to 2 feet away from the corner stitching. Not right at the corner. This distance gives the canopy its classic slanted shape and prevents the pole from punching through the fabric if the wind pushes it. For the Neso 1, the 5.5 ft pole fits this 1-2 ft offset perfectly. For the Neso Grande, the longer 6 ft 10 in pole needs the same offset to achieve the proper height.
5. Final Adjustments and Wind Proofing
Stand back. Is the opening facing the view you want? Adjust the anchor bags slightly to rotate the whole tent if needed. Give the poles a gentle shake to dislodge any sand that got inside during assembly, it grinds down the inner joints.
If the wind is picking up, this is when you implement the wind fix. Move each pole from the standard 1-2 ft position to a full 2 ft from the corner and 6 inches from the side edge stitching. This reduces the size of the vertical “lip” at the front of the tent that acts like a sail. It’s a minor adjustment that makes a major difference in gusty conditions, a technique equally valuable for many wind-resistant beach tents.
Beating the Wind: Advanced Setup Tweaks
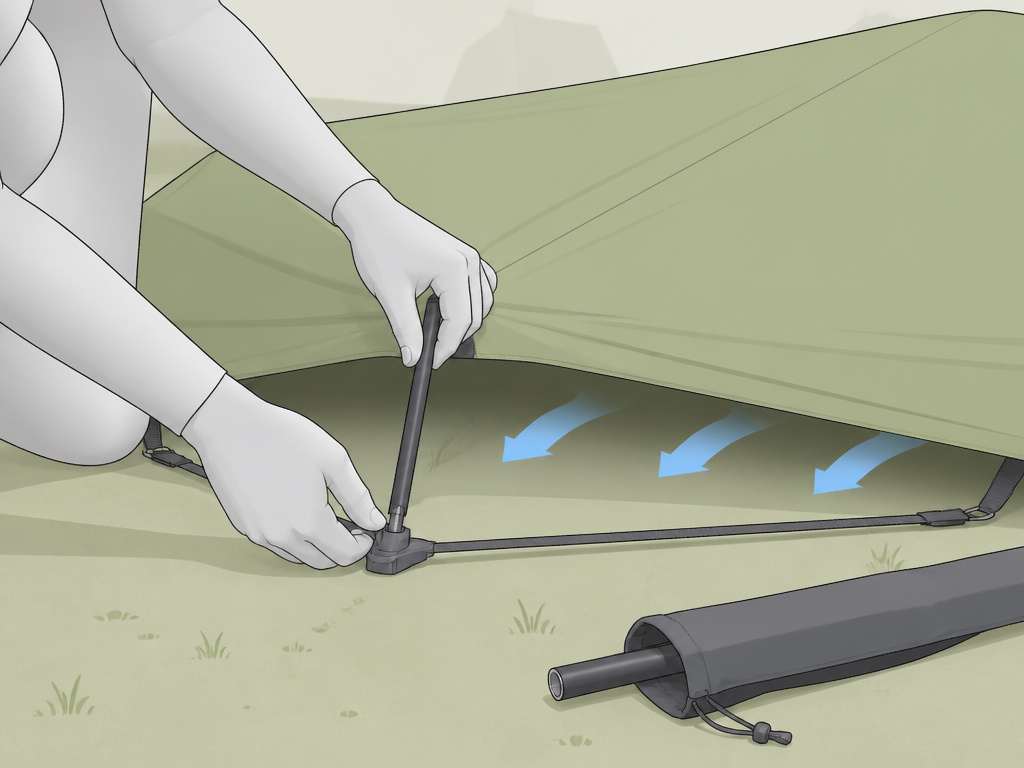
Sometimes standard procedure isn’t enough. On a blustery afternoon at a Great Lake or an Atlantic beach, you need the advanced playbook.
The primary tactic is reducing the tent’s wind profile. You’ve already moved the poles to the 2 ft / 6 inch position. Next, consider lowering the canopy. If your poles have multiple height settings (some aftermarket poles do), use a lower one. A lower, flatter roof presents less surface area to crosswinds.
For swirling, unpredictable winds, Neso’s official advice is to try using three or four poles. You can purchase extra poles separately. Deploying a third pole at the center of the front edge or even a fourth at the back can pin the fabric down more effectively, creating multiple smaller arches instead of one large, catch-all canopy. This is a more advanced setup reminiscent of stabilizing larger family camping tents in exposed sites.
If the tent is still struggling, the issue is almost always underground. The anchor bags have shifted or the sand underneath them has loosened. The fix is counterintuitive: take the poles down. Collapse the tent. Then, empty every anchor bag and refill it with even more sand, pack it denser than before. Repeat the tension X setup from scratch. The extra mass is often the only thing that works.
In swirling wind, try using 3 or 4 poles positioned to create an opening for wind to flow under the tent, relieving pressure instead of fighting it directly.
Care, Pack Down, and What Not to Do
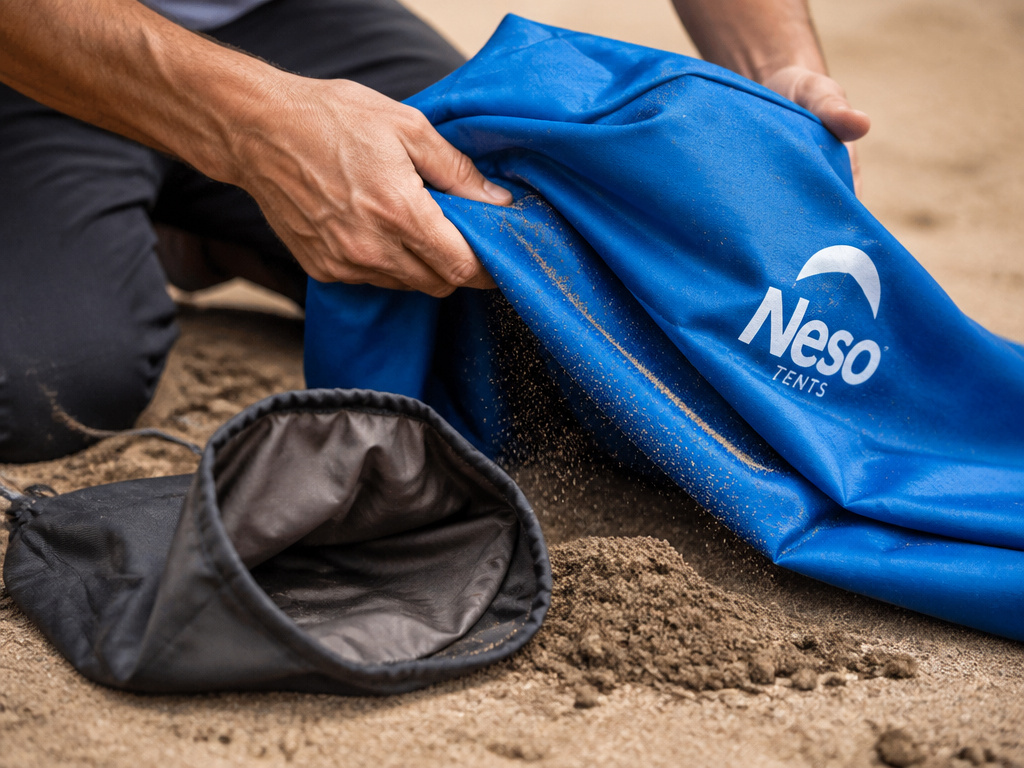
A Neso tent is durable, but its fabric has enemies: prolonged sun, salt, moisture, and sharp objects. Ignoring these turns a $200 shelter into a faded, mildewed rag in one season.
First, the 24-hour rule. Never leave your Neso erected for more than a day straight. The UPF 50+ coating on the nylon/lycra blend degrades under continuous ultraviolet exposure. You’ll notice the colors fading and the fabric becoming slightly brittle. This is a weekend shelter, not a permanent patio fixture.
Packing down is just as important as setting up. When the beach day is over:
1. Remove the poles and shake out all sand.
2. Empty each anchor bag completely. Turn them inside out and beat them to dislodge damp sand clumps.
3. Lay the tent fabric flat and fold it loosely, shaking it to remove surface sand. Do not roll it tightly around trapped grit, that acts like sandpaper on the inner seams.
4. Ensure everything is bone dry before placing it in the carry bag. Damp nylon in a sealed bag equals mildew, and that smell never comes out.
Finally, the ban list. Never put sharp rocks, broken shells, or pine cones in your anchor bags. The abrasive pressure from inside will wear through the fabric from the inside out. Don’t use the tent as a windbreak for an open fire, sparks melt nylon instantly. And while it’s water-resistant, a Neso is not a rain shelter during a downpour; water will eventually seep through the seams if the pressure is high enough.
Following these care steps extends the life of your shelter far beyond that of a typical budget tent option, making the initial investment pay off over many seasons.
Frequently Asked Questions
Can you set up a Neso tent on grass or gravel?
Yes, but you must adapt. The anchor bags need weight. On grass, fill them with gravel or small, smooth rocks from a landscaping store. On a gravel campsite, the bags can be filled with the site’s own gravel. Never use sharp, jagged rocks. The principle remains: 20 lbs per bag, pulled into a tension X.
How many people fit in a Neso Grande?
The Neso Grande’s 9×9 ft square can comfortably seat 4 adults in beach chairs with a cooler in the middle. It’s a social shade space, not a sleeping tent. For actual sleeping, you’d look at dedicated car camping tents with floors and walls.
My Neso tent is flapping noisily. What did I do wrong?
Check three things, in order: Anchor bag weight (are they at least basketball-sized?), tension (is the floor fabric wrinkle-free?), and pole placement (are they 1-2 ft from corners, or 2 ft/6 inches if it’s windy?). Flapping is always a symptom of loose fabric catching wind.
Can I buy replacement poles or anchor bags?
Yes. Neso sells replacement part kits directly through their website. It’s a good idea to have a spare anchor bag in your kit if you’re a frequent user; they can tear if dragged over rough surfaces.
Is a Neso tent good for camping?
Not for traditional camping. It has no floor, no bug netting, and no sealed seams for rain. It’s a brilliant day-shade shelter for the beach, park, or sports field. For overnight trips, your essential camping gear list must include a proper, enclosed tent.
How does it compare to a pop-up beach tent?
Neso trades speed for stability and pack size. A pop-up tent deploys in seconds but is often taller, catches more wind, and packs into a bulky circle. A Neso takes 5-10 minutes to set up correctly but packs into a slim 19.5 inch tube and, when anchored properly, holds firm in conditions that send pop-ups tumbling.
The Bottom Line
Setting up a Neso tent is a lesson in physics, not just following steps. The 20-lb anchor bag target exists because wind force is real. The 1-2 ft pole offset exists to manage tension. Skip these specifics and you have an expensive kite.
Start with the heavy bags. Pull the X tight. Place the poles with intention. That’s the sequence that works on a calm cove or a gusty Great Lakes beach. And when you’re done, pack it dry and clean. That care is what separates a shelter that lasts for years from one that’s retired after a single season. Now you know what most people on the beach don’t, go set up yours right.
