
How to Waterproof Your Tent With a Sealer That Lasts Longer
This post contains affiliate links. As an Amazon Associate, we earn from qualifying purchases.
Waterproofing your tent is a three-part job: seam sealing, refreshing the interior waterproof coating, and applying a Durable Water Repellent (DWR) spray to the exterior. The specific sealants and procedures are dictated by your tent’s fabric coating, polyurethane (PU) or silicone, and skipping any step invites leaks within a season.
Most people grab a can of spray and coat everything. That approach gums up factory-sealed seams and uses the wrong product on silicone fabric, which repels the treatment. You waste a weekend and the tent still leaks.
This guide walks through the diagnosis, the right products for your tent’s coating, and the sequence that keeps water out for years. We’ll also cover how to tell a real leak from normal condensation, because that mistake sends people down the wrong repair path every time.
Key Takeaways
- Factory-seam-taped tents from brands like MSR and Big Agnes don’t need full seam sealing. Only seal areas where the tape is peeling or missing.
- Use the wrong sealer on silicone-coated fabric and it will peel off within two weeks. Silicone requires a silicone-specific adhesive like Gear Aid Seam Grip SIL.
- Storing a tent wet for just 24 hours in warm weather can start mildew formation, and prolonged dampness causes hydrolysis, the permanent breakdown of the waterproof PU layer.
- A hydrostatic head (HH) rating of 3,000mm is the baseline for true waterproofness. Many budget tents have ratings under 1,500mm and will wet through in a sustained downpour.
- High ventilation during humid rain can actually increase condensation inside a double-wall tent by drawing more moisture-laden air through the canopy.
The Three-Step Process (And The Order That Matters)
You don’t just spray and pray. Waterproofing works in layers, from the inside out. Get the order wrong and you trap moisture against the fabric.
First, seal the seams from the inside. This blocks water that wicks through needle holes. Second, refresh the waterproof coating on the tent floor’s interior (for PU) or the rainfly’s exterior (for silicone). This layer stops liquid water from passing through the fabric itself. Third, apply a Durable Water Repellent (DWR) to the rainfly’s exterior. This causes water to bead up and roll off, taking pressure off the seams and coating.
Before you start: Work in a well-ventilated area, preferably outdoors. Sealants and sprays contain volatile organic compounds (VOCs). Wear nitrile gloves. Seam Grip bonds to skin and takes days to wear off. Protect surfaces with a drop cloth.
TL;DR: Clean, then seal seams from the inside, refresh the correct waterproof coating, and finish with DWR spray on the outside. That sequence locks water out.
Silicone vs. PU: The Coating That Decides Your Method
Rub the inside of your tent floor or the outside of your rainfly. A rubbery, slightly tacky feel means a polyurethane (PU) coating. A slick, almost dry feel means a silicone coating. This distinction dictates every product you’ll buy.
PU coatings are common on budget and mid-range tents. They are effective but degrade over time through a chemical process called hydrolysis, exposure to moisture, even in storage, breaks down the coating from the inside. Silicone coatings are found on higher-end and ultralight tents. They are more durable and UV-resistant, but they require specific, compatible sealants.
Using a standard PU seam sealer on silicone fabric is the most common mistake. The adhesive won’t bond. It forms a rubbery layer that peels off after the first rainstorm.
| Coating Type | Feel | Durability | Required Seam Sealer | Waterproofing Refresh Product |
|---|---|---|---|---|
| Polyurethane (PU) | Rubbery, slightly tacky | 3–5 years before hydrolysis degrades it | McNett Seam Grip (standard) | Liquid PU coating (e.g., ReviveX) applied to interior |
| Silicone | Slick, dry, less tacky | 5–10+ years, highly UV resistant | Gear Aid Seam Grip SIL (silicone-specific) | Silicone-based spray (e.g., Nikwax Tent & Gear Solarproof) applied to exterior |
How to Spot a Leak (And What’s Just Condensation)
Before you seal anything, make sure you’re fixing a leak and not mistaking condensation. In a double-wall tent, humid air from your breath passes through the inner canopy and condenses on the cooler inner surface of the rainfly. This is normal. Water droplets on the underside of the fly or dampness on the tent floor’s edges are almost always condensation.
A true leak has a different signature. Water comes through in a distinct drip or a focused damp spot on the inner tent wall or ceiling, often corresponding to a seam, zipper, or fabric patch above it. The best test is to set the tent up in your yard on a dry day and spray it down with a hose, section by section, while someone sits inside to pinpoint incoming water.
Common mistake: Sealing every seam on a factory-taped tent, you add weight, waste sealer, and can actually create a leak path by trapping moisture between the tape and your new seal. MSR’s manual states their tents are factory taped and only need spot-sealing if problems develop.
Step 1: The Deep Clean You Can’t Skip
Any dirt, oil, or old treatment will prevent new sealant from bonding. Set the tent up completely, rainfly, inner tent, footprint. Use a soft-bristled brush, mild soap like Dr. Bronner’s, and lukewarm water. Scrub every inch, focusing on seams and high-wear areas like the floor.
Rinse thoroughly with a hose or bucket. Soap residue blocks DWR. Let the tent dry completely for 24-48 hours in a shaded, breezy spot. Direct sun during drying accelerates UV damage to the fabric coatings.
- Mix a small amount of soap in a bucket.
- Scrub in circular motions, don’t scrub too hard on delicate coatings.
- Rinse until water runs clear off the fabric.
- Dry until no cool, damp spots remain when you press your hand against the fabric.
Step 2: Seam Sealing. Only Where It’s Needed
Check the seams on the rainfly and tent floor. If you see a smooth, thin strip of tape on the inside, that’s factory seam tape. If it’s intact and not peeling, leave it alone. Brands like MSR and Big Agnes use this tape, and adding sealant on top is unnecessary. If the tape is peeling or there’s no tape (common on older tents or certain models), you need to seal.
- Tape off the fabric on either side of the seam with painter’s tape. This gives you a clean line.
- Apply the correct sealer. For PU-coated fabrics, use McNett Seam Grip. For silicone-coated fabrics, use Gear Aid Seam Grip SIL. Apply a thin, continuous bead directly into the seam’s stitch line on the coated side of the fabric (the shiny side).
- Smooth it with a gloved finger or a small plastic spreader, pushing the sealant into the needle holes.
- Remove the tape immediately after smoothing, before the sealant sets.
- Let it cure for at least 24-48 hours in a warm, dry place. Don’t pack the tent until it’s fully dry to the touch and no longer tacky.
I sealed a friend’s expensive silicone-coated tent with standard Seam Grip after a weekend trip. It looked perfect. The next storm peeled the entire bead off like a rubber band, and we spent a miserable night mopping up a new leak. That mistake cost a tube of SIL and a whole afternoon of rework.
Step 3: Refreshing the Waterproof Coating
The waterproof coating on the fabric itself wears thin. For PU-coated tents (most common), this coating is on the inside. You refresh it by applying a liquid PU coating like ReviveX to the interior of the tent floor and lower walls. It soaks in and renews the barrier.
For silicone-coated tents, the treatment is on the outside. You use a spray-on product like Nikwax Tent & Gear Solarproof on the exterior of the rainfly. It bonds with the existing silicone layer.
- For PU Tents: Apply the liquid coating in a well-ventilated area. Use a sponge or foam brush for an even coat. It will look milky when wet and dry clear.
- For Silicone Tents: Hang the rainfly and spray evenly from about 6-8 inches away. Cover the entire surface in a sweeping motion.
Let the coating dry for the full time listed on the product, usually another 24-48 hours. Rushing this step is how you get a sticky, smelly tent that never fully cures.
Step 4: The Final Layer. DWR Spray
Durable Water Repellent (DWR) is your final, external defense. It doesn’t make the fabric waterproof; it makes it water-shedding. Water beads up and rolls off, which reduces the pressure on the seams and coating underneath. Apply a DWR spray like Nikwax TX.Direct or Gear Aid ReviveX to the completely dry exterior of the rainfly.
Spray evenly until the fabric is lightly saturated. Let it dry completely. Some products require heat-setting with a dryer on low heat, check the label. A good DWR treatment should last a full season of regular use.
What’s Your Tent’s Waterproof Rating?
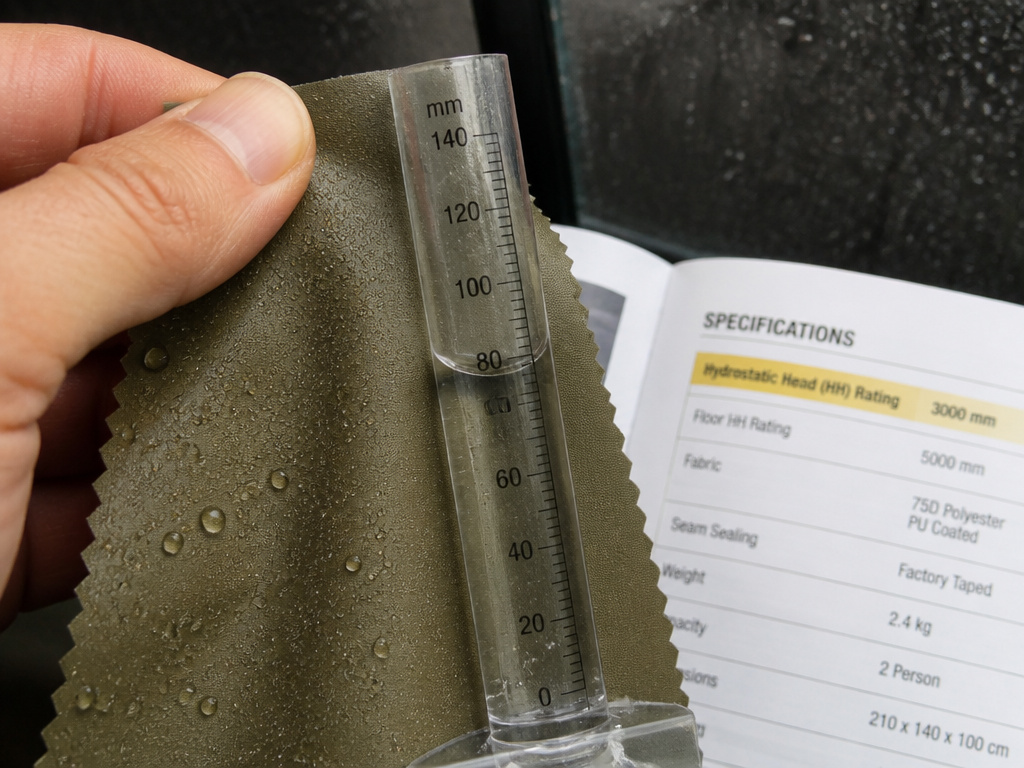
The hydrostatic head (HH) rating measures how much water pressure a fabric can withstand before it leaks. It’s measured in millimeters. According to the Tatonka tent manual, a rating of 1,500mm is considered waterproof by DIN standard. For serious rain, you want more.
- < 1,500mm: Water-resistant at best. Fine for dew or a light drizzle.
- 1,500–3,000mm: Standard for three-season tents. Handles moderate rain.
- 3,000–5,000mm: Good for heavy rain. The baseline for reliable tents for heavy rain.
- 5,000mm+: Expedition-grade. For prolonged storms.
If your tent’s rating is low, refreshing the coating and DWR is even more critical. No amount of sealing will make a 1,000mm fabric hold up in a monsoon.
When to Call It Quits and When to Repair
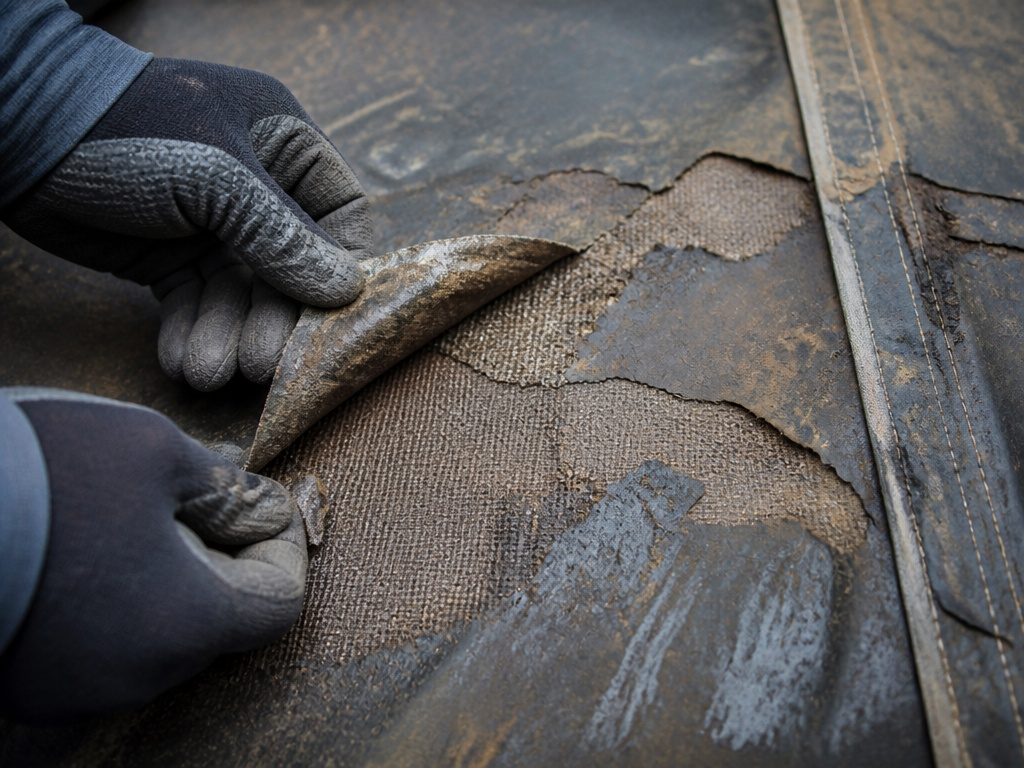
Waterproofing can’t resurrect a dead tent. If the PU coating is flaking off in large, sticky patches (delaminating), the fabric is losing its structural integrity. If silicone-coated fabric is fraying or torn, patching is possible but may not be cost-effective.
Big Agnes notes that peeling seam tape often signals the tent is “approaching the end of a long, productive life.” At that point, consider investing in a new shelter. For high-end Marmot tent models or durable canvas tents, professional repair might be worth it. For an affordable Naturehike tent, it’s often more economical to replace it.
| Symptom | Likely Cause | Can You Fix It? |
|---|---|---|
| Wet spots along seams | Failed seam tape or unsealed stitches | Yes, with seam sealing |
| Fabric feels damp overall, no drips | Worn-out DWR layer | Yes, with DWR spray |
| Sticky, flaky coating on tent floor | Hydrolysis — PU coating delaminating | No, the fabric is compromised |
| Leak from a single pinpoint hole | Fabric puncture | Yes, with a patch kit (Tenacious Tape) |
| Persistent moisture on inner tent walls/ceiling | Condensation, not a leak | Improve ventilation, use a footprint |
Storage: The Step That Prevents 90% of Problems
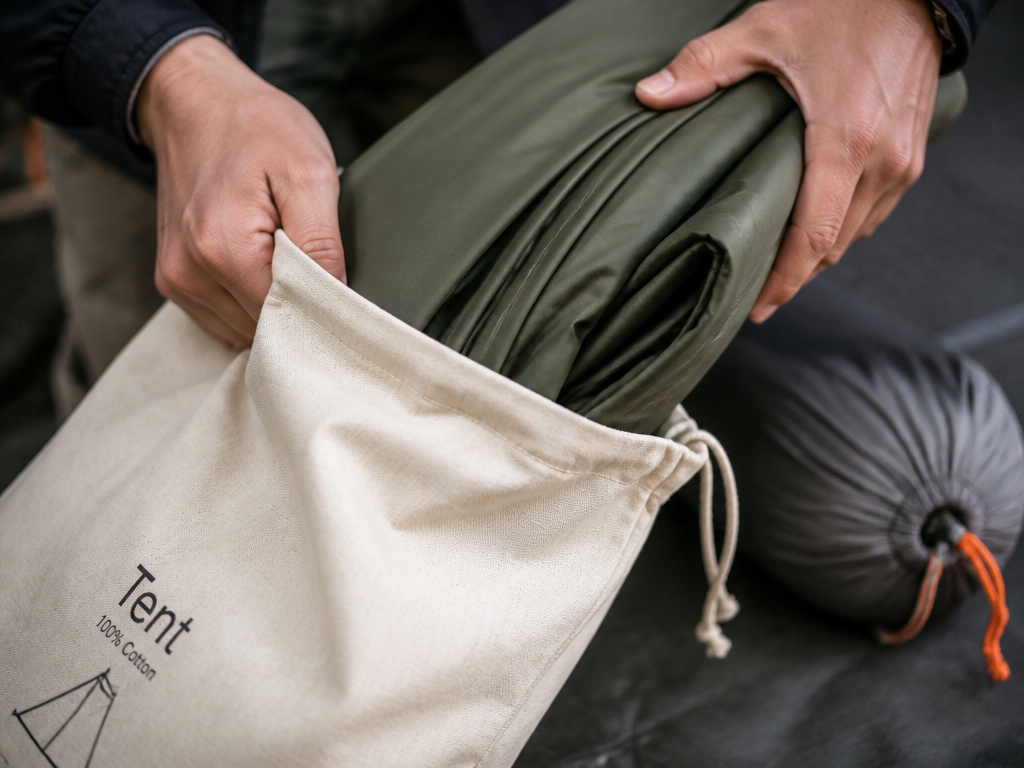
How you put the tent away determines its next performance. Never store a tent wet or damp. The MSR manual warns that storing a tent wet for as little as 24 hours in warm weather can start mildew. Worse, constant moisture causes hydrolysis, permanently destroying the PU coating from the inside out.
Dry the tent completely before packing it. If you must pack it wet, unpack and dry it the same day. For long-term storage, avoid attics and garages where temperature swings are extreme. Store the tent loosely in a large cotton sack or old pillowcase, not compressed in its stuff sack. Every few months, pull it out and let it air out.
This is part of good tent camping gear maintenance, right alongside checking your tent lighting and stove fuel.
Frequently Asked Questions
How often should I waterproof my tent?
Reapply DWR spray once a season or whenever water stops beading on the rainfly. Full seam sealing and coating refresh is needed every 2-4 years for PU tents, and potentially longer for silicone tents, depending on use.
Can I use a general waterproofing spray on my entire tent?
No. General sprays can gum up factory seam tape, zippers, and vents. They are also often incompatible with silicone-coated fabrics. Always use products formulated for your specific tent coating type.
Why is there water inside my tent after I just waterproofed it?
You’re likely seeing condensation, not a leak. In humid conditions, your breath creates moisture that condenses on the cooler rainfly. Increasing ventilation can help, but note that in very humid rain, more ventilation can sometimes draw in more moist air, making it worse.
Is it worth waterproofing an old tent?
It depends on the fabric’s condition. If the PU coating is flaking off (delaminating), waterproofing will not help, the fabric itself is failing. If the fabric is intact but just leaking at the seams, a thorough seal can extend its life for a few more seasons.
What’s the difference between waterproof and water-resistant?
Waterproof means no water passes through under a specified pressure (measured by HH rating). Water-resistant means it can shed light water for a short time but will eventually wet through. Most tent fabrics are waterproof; the DWR treatment makes them water-resistant on the surface.
The Bottom Line
Waterproofing isn’t a generic spray-down. It’s a diagnostic repair: identify your fabric coating, seal only the failing seams, refresh the correct interior or exterior coating, and finish with a DWR treatment. Skipping the clean or using the wrong sealer guarantees a repeat job. Store the tent dry and loose, and it will repay you with dry nights for seasons. Pair a well-maintained shelter with the right tent camping accessories and you’ve solved half the battle of camping comfort. For extreme conditions, start with a tent built for it, like the best high wind tents or dedicated tarp shelters. Good gear plus good maintenance beats a monsoon every time.
