
Master How to Stay Warm Camping in a Tent With These Tips
This post contains affiliate links. As an Amazon Associate, we earn from qualifying purchases.
Staying warm in a tent means blocking four heat-loss paths: conduction (ground), convection (air), radiation (your body), and evaporation (moisture). You need a high-R-value pad stack, a properly rated sleeping bag, dry layers, and rigorous moisture management. Skip any one, and you’ll be cold by dawn.
I learned this chain the hard way on a late-October trip to the Cairngorms. The forecast said 2°C, and I trusted my Therm-a-Rest NeoAir XLite (R-4.2) alone on the frozen ground. By 3 a.m., a deep, aching chill had seeped into my kidneys, sending me into spasms. I had to pack up and hike out, the trip ruined. The fix wasn’t a warmer bag, it was adding my old Therm-a-Rest Z-Lite Sol (R-2) underneath the next weekend. I slept soundly at -5°C.
Warmth isn’t about the most expensive bag. It’s about linking specific, reliable systems. Let’s build yours.
Key Takeaways
- Your sleeping pad is your primary defense. A pad with an R-value below 4 will drain your heat into the ground, no matter how good your bag is.
- Sleeping bag ratings are survival limits, not comfort promises. For a comfortable night, choose a bag rated 10–15°F (5–8°C) colder than your expected low.
- Moisture is a warmth thief. Condensation from breath, wet gear, or cooking soaks insulation, leading to evaporative cooling. Ventilation is mandatory.
- Warm your body, not the tent. A pre-sleep snack, light exercise, and a hot water bottle in your bag are vastly more effective than trying to heat the air.
- Site selection sets the baseline. Pitch on flat, dry ground, sheltered from wind. A spot under trees is often degrees warmer than an exposed field.
Is Your Sleeping Bag or Pad More Important for Warmth?
Most campers fixate on the sleeping bag. It’s the fluffy, comforting symbol of warmth. But it’s only half the equation, the half that fails if the foundation is weak.
Sleeping bag temperature ratings follow ISO/EN standards. The comfort rating is the temperature an average woman can sleep comfortably at, while the lower limit is for a cold man. For reliable three-season use, a bag rated to 20°F (-7°C) provides a critical safety buffer.
Your bag’s loft traps warm air. But if you’re losing heat downward into the ground faster than your body produces it, you’ll shiver. Conduction is the silent killer. This is why your pad’s R-value, its resistance to heat flow, is non-negotiable. According to manufacturer guides like Therm-a-Rest’s, an R-value of 1.0–1.5 is for summer; cold weather demands R-4 to R-6 or higher.
The most effective strategy isn’t one expensive pad, but a strategic stack. R-values are additive.
| Pad System | Example Setup | Total R-value | Best Use Case |
|---|---|---|---|
| Budget Stack | Therm-a-Rest Z-Lite Sol (R-2) + Standard Inflatable Pad (R-3) | ~R-5 | Fall/spring camping near freezing. |
| Winter-Ready | NEMO Tensor Alpine Insulated (R-4.8) + Gossamer Gear Thinlight (R-0.5) | ~R-5.3 | Reliable cold-weather performance with puncture backup. |
| Ultimate Insulation | Exped Dura 8R (R-8) solo, or two stacked foam pads. | R-8+ | Winter camping on snow or frozen ground. |
Common mistake: Using a summer-rated pad (R-1.5) for shoulder-season camping. The cold ground will sap your core heat within hours, leading to a deep, relentless chill that no bag can overcome.
Your clothing inside the bag is the final layer. It must be dry and loose. My go-to is a Smartwool Intraknit 250 Merino base layer, it wicks without the itch of cheaper wool. Avoid bulky puffies inside the bag; they compress the loft. A light fleece like the Patagonia R1 Air Zip-Neck is perfect.
TL;DR: Your pad is the foundation, your bag is the blanket. Pair a bag rated for temperatures 15°F below your expected low with a pad system of R-4 or higher.
What Should You Do Right Before Bed to Stay Warm?
Perfect gear is useless if you crawl into it already cold. Your body must enter the sleeping system as a warm thermal mass. This 20-minute ritual is what separates a rough night from solid sleep.
First, fuel the furnace. Eat a snack rich in fats and complex carbs right before bed, think a handful of nuts or a square of dark chocolate. Digestion generates heat (thermogenesis). Then, get your blood moving. Do 20-30 jumping jacks or a set of squats outside the tent. Stop when you feel warm, not sweaty.
Before you start: Never use a chemical hand warmer or portable propane heater inside a sealed tent. They consume oxygen and can produce odorless, deadly carbon monoxide. The fire and poisoning risk far outweighs any benefit. Use them for pre-warming outside only.
Now, prepare your bag. The classic hot water bottle trick is a game-saver. Fill a leak-proof Nalgene with hot (not boiling) water, wrap it in a thick sock like a Darn Tough hiker, and place it in the foot of your bag 10 minutes before you get in. It pre-warms the dead space with a faint, comforting smell of hot rubber and wool, a tiny hearth at your feet.
Finally, make a last trip to relieve your bladder. Your body wastes precious energy keeping a liter of urine at core temperature.
- Eat a high-fat snack. This stokes your internal furnace for hours.
- Do light exercise. Generate internal heat without sweating.
- Deploy a hot water bottle. Pre-warm the bag’s critical dead air space.
- Empty your bladder. Conserve metabolic heat for warming you, not waste.
Skipping this routine was my mistake on that Cairngorms trip. I crawled in cold and spent two hours shivering, waiting for my metabolism to catch up. Never again.
How Does Moisture Make You Cold in a Tent?
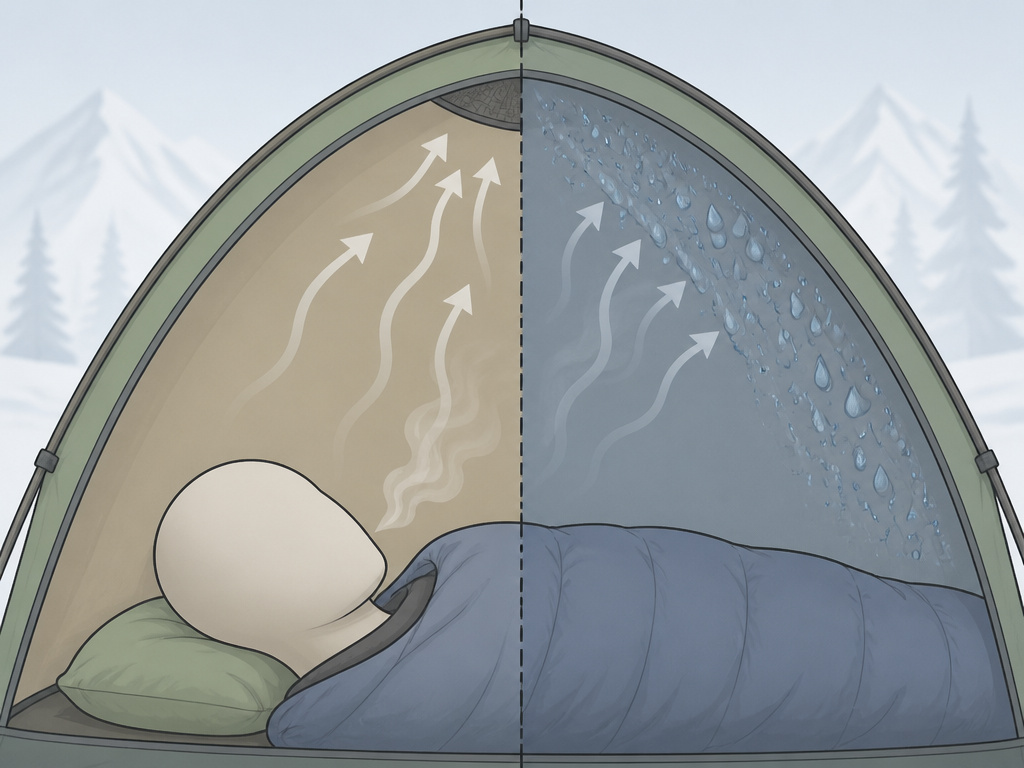
Okay, confession time. I used to think my breath wasn’t a big deal. Then, on a frosty morning in Snowdonia, I unzipped my bag to find the inside of my Hilleberg Nallo 2 GT’s fly coated in ice crystals. My mistake? Cinching the hood too tight. Your breath is a pint of water per night. A pint! So, let’s talk moisture.
Water vapor is your stealth enemy. Warm, moist air from your breath or body hits the cold tent wall and condenses into liquid. That water can drip on you, soak your bag’s shell, or re-evaporate, pulling heat from the air in the process.
I won’t cook inside a tent, period. On a rainy Lake District trip, we boiled pasta in the vestibule. The steam saturated the air, and within an hour, the inner tent was beaded with water. Our sleeping bag hoods felt damp, and the night turned clammy and cold.
Ventilation is the answer, not sealing. You must create an airflow path, even in the cold.
* Crack the top vent of your tent or rainfly.
* Ensure your rain fly isn’t sagging onto the inner tent, which creates a direct condensation bridge.
* If possible, leave the vestibule door slightly averted at the top.
| Moisture Source | Consequence | Timeline to Chill |
|---|---|---|
| Breath in a sealed tent | Condensation forms on walls, drips on bag. | 2–3 hours. You’ll feel a cold dampness by early morning. |
| Wet boots inside tent | Raises humidity, dampens air inside sleeping bag. | Almost immediate. Evaporative cooling starts right away. |
| Cooking in vestibule | Saturates tent air with warm vapor. | 1 hour. Gear feels damp; a pervasive chill sets in. |
| Face inside sleeping bag | Moisture condenses in hood insulation, reducing loft. | 4–5 hours. Bag feels less puffy and cooler by dawn. |
Common mistake: Bringing damp hiking clothes or boots into the sleeping area. They belong in the vestibule. And keep your mouth and nose outside the bag, wear a balaclava if your face is cold.
What Small Gear and Site Choices Make a Big Difference?
Your tent’s location is a fixed variable. Choose wrong, and you fight the elements all night. Look for natural windbreaks: a grove of trees or a gentle hill. Avoid valleys where cold air pools, these “frost pockets” can be several degrees colder. A flat, dry spot is always warmer than a sloped, damp one.
If you’re camping in consistently harsh conditions, investing in specialized shelter makes sense. A true four-season tent offers stability in high winds, while a tent for heavy rain provides superior waterproofing. For the ultimate in winter comfort, a dedicated hot tent with a safe wood-burning tent stove is transformative, but requires a compatible canvas tent with a stove jack.
Inside the tent, small, smart actions compound into real warmth.
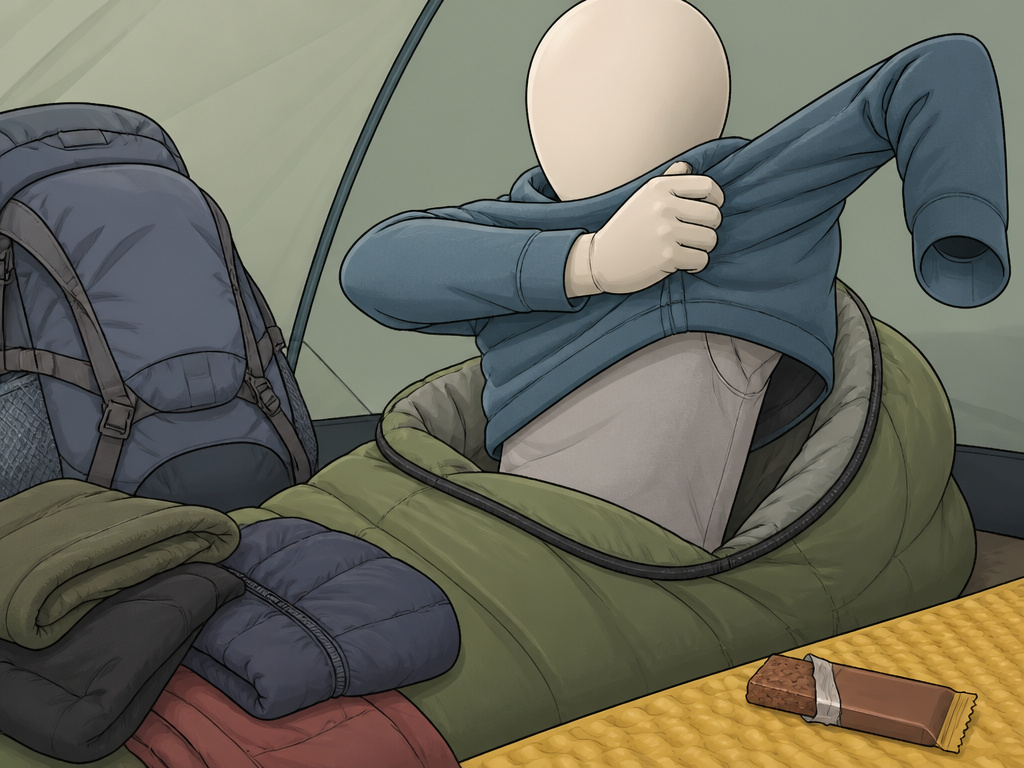
- Use the tent walls as insulation. Stuff your backpack and spare clothes along the tent walls. This creates dead air buffers that slow radiant heat loss to the cold fabric.
- Change clothes inside your bag. Fumbling with layers in the open tent air loses a huge amount of core heat. Do it inside the sleeping bag to contain the warmth.
- Keep electronics in your bag foot. Cold drains battery life rapidly. Storing your phone, headlamp, and power bank in the bottom of your bag preserves their charge.
- Have a midnight snack ready. A protein bar next to your pad lets you refuel without fully exiting your cocoon if you wake up cold.
Don’t overlook the value of reliable tent camping equipment and thoughtful tent camping accessories. A good headlamp with a red-light mode lets you make adjustments without ruining your night vision, and a dedicated hot water bottle is worth its weight in gold.
Frequently Asked Questions
What’s the one piece of gear I should upgrade first if I get cold?
Your sleeping pad. Check its R-value. If it’s below 3, adding a closed-cell foam pad like a Therm-a-Rest Z-Lite Sol underneath is the most cost-effective warmth upgrade you can make. It’s more critical than a new bag.
Can I safely use a battery-powered electric blanket?
While safer than combustion heaters, they are a single point of failure. If the battery dies, you lose all heat. They also encourage poor insulation habits. It’s better to invest in a proper high-R-value pad and bag system that works passively all night.
Why do I wake up cold at 3 a.m.?
Two reasons. First, your metabolic rate drops to its lowest around 3-4 a.m., producing less heat. Second, moisture from your breath has had time to accumulate in your insulation, reducing its loft and triggering evaporative cooling. This is why pre-warming and ventilation are critical.
Are down or synthetic bags better for cold, damp weather?
High-quality down offers superior warmth for its weight but loses loft when wet. Synthetic insulation, like PrimaLoft, retains more warmth when damp and dries faster. For wet, humid conditions where keeping gear perfectly dry is challenging, a synthetic bag is often the more reliable choice.
Is a larger tent colder?
Yes. A smaller tent has less air volume for your body to heat. A cozy two-person tent for solo use will be noticeably warmer than a cavernous family model. Minimize empty space around you.
Can I just wear more clothes inside my bag?
Only to a point. Wear dry, loose base and mid layers. Avoid bulky items like a puffy jacket, as they compress your bag’s loft, reducing its primary insulation. The bag’s loft should do most of the work.
The Bottom Line
Staying warm in a tent is a chain of systems, and the weakest link breaks it. Start from the ground up: ensure your pad stack has an R-value of 4 or higher. Match it with a bag rated for temperatures well below your forecast. Then, manage moisture like it’s your job, ventilate relentlessly and keep everything wet outside your sleeping area.
Your pre-sleep ritual is the glue that holds it together. Fuel your body, generate heat, and pre-warm your bag. Remember, you’re heating a person, not a tent.
If you’re building your kit from scratch, focus on versatile, high-value gear. Plenty of budget tents under $200 can handle three seasons, and durable canvas tents offer longevity. But your first investment should always be in the insulation that separates you from the earth. Master that, and you’ll sleep soundly through the coldest nights.
