
How to Make a Table Tent in Canva: A Designer’s Guide
This post contains affiliate links. As an Amazon Associate, we earn from qualifying purchases.
To make a table tent in Canva, start with a 4×6 or 5×7 inch template, design front and back panels separately, use Bulk Create for multiple cards, and always export as a PDF Print file with crop marks and bleed enabled. This final step ensures your printer cuts the cards correctly, preserving your design.
Most tutorials show you how to drag and drop elements. They don’t explain why your beautiful design arrives from the print shop with the edges chopped off. That quarter-inch margin matters. It’s the difference between a crisp, professional tent card and a frustrating misprint.
I’ve designed table tents for my Dacia Adventure crew’s trailhead dinners and outdoor gear pop-ups. The process mirrors setting up a reliable shelter: you need the right foundation (template size), sturdy materials (paper stock), and precise execution (print settings). This guide walks you through each step, grounded in the specifics that actually work.
Key Takeaways
- Export your final design as a PDF Print file with crop marks and bleed selected. This is the only format that guarantees accurate trimming.
- Use a 4×6 inch or 5×7 inch template. Canva’s own table tent template is 4×6 inches with a 3-inch depth, a perfect starting point.
- Employ Canva’s Bulk Create app to generate dozens of individualized cards from a spreadsheet in seconds.
- For QR codes, make them at least 1.5 inches square with a 0.15-inch blank border (the “quiet zone”) to ensure scannability.
- Print on 110lb cardstock for rigidity. Lighter paper will buckle, much like a tent pole made from weak aluminum.
What Size Should Your Canva Table Tent Be?
Choosing a template is your first critical decision. In Canva, search for “table tent” or “tent card.” You’ll see common sizes like 3×5, 4×6, 4×8, and 5×7 inches. Canva’s official table tent template is 4×6 inches with a 3-inch depth, which is a reliable standard.
A table tent is a bi-fold informational card placed on a table surface. Its standard sizes range from 4×6 to 5×7 inches, with a minimum recommended size of 4×4 inches for readability. The design must account for a central fold, creating two distinct panels for front and back content.
Anything smaller than 4×4 inches sacrifices legibility from a typical seated distance. A 5×7 inch template gives you more room for detailed menus or schedules, similar to how a larger tent footprint offers more living space. The extra inch provides tangible breathing room for your text and graphics.
TL;DR: Start with a 4×6 inch “table tent” template in Canva for a balanced, readable size.
How Do You Layout a Table Tent Design?
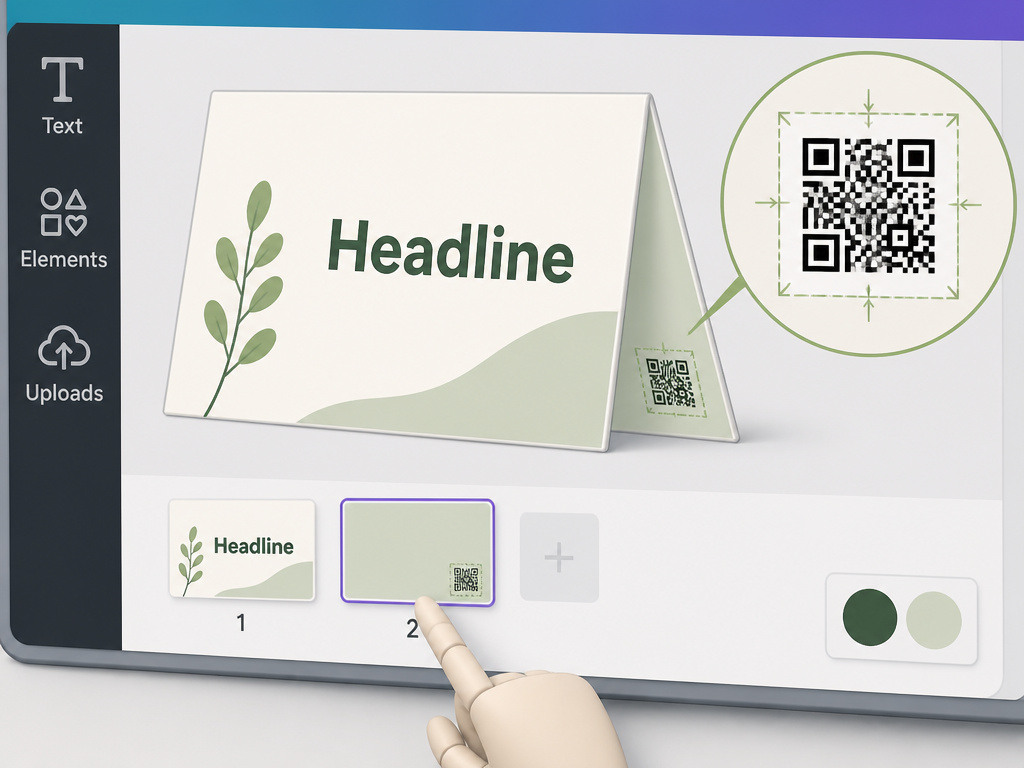
Laying out a table tent is like packing your backpack for a three-day hike—you need to know where everything is. The left-hand toolbar is your gear loft: Text is your map, Elements are your carabiners, Uploads is your dry bag. Start with your headline, your North Star, and build out from there.
I always set the main headline in a bold, sans-serif font like Bebas Neue at 30pt. Its even stroke weight holds up when printed small on textured stock, unlike thin-serif fonts that can vanish. This isn’t just adding text; it’s choosing armor for your message against the brutality of mass printing.
- Design the front panel first. This is the side facing your audience. Place your key message, logo, or QR code here.
- Add a second page for the back. Click the page icon in the bottom panel. Create a complementary design or mirror the layout.
- Size your QR code correctly. If you use one, make it at least 1.5 x 1.5 inches. I recommend 2 inches for easier scanning. Leave a blank “quiet zone” margin of at least 0.15 inches on all sides, as specified by QR code experts.
- Stick to a simple color palette. Two or three colors prevent visual clutter. For professional printing, design in the CMYK color profile from the start.
Common mistake: Designing a single, tall graphic for a portrait-oriented template — the software assumes a flat card, not a folded tent. The result is a fold that cuts through your central image, ruining the layout. Always design two separate panels.
| Design Element | Best Practice | Consequence of Ignoring |
|---|---|---|
| Font Size | Headline: 30-36pt, Body: 14-16pt | Text becomes illegible from a table distance. |
| QR Code Size | Minimum 1.5” x 1.5”, 0.15” quiet zone | Phones fail to scan, making the code useless. |
| Color Profile | CMYK for professional print jobs | Colors print muted and off-brand (blues turn purple). |
| Image Resolution | 300 DPI minimum for all graphics | Images appear blurry or pixelated when printed. |
TL;DR: Design front and back as separate pages. Use large, robust fonts and size your QR code generously with a clear border.
Can You Automate Making Multiple Tent Cards?
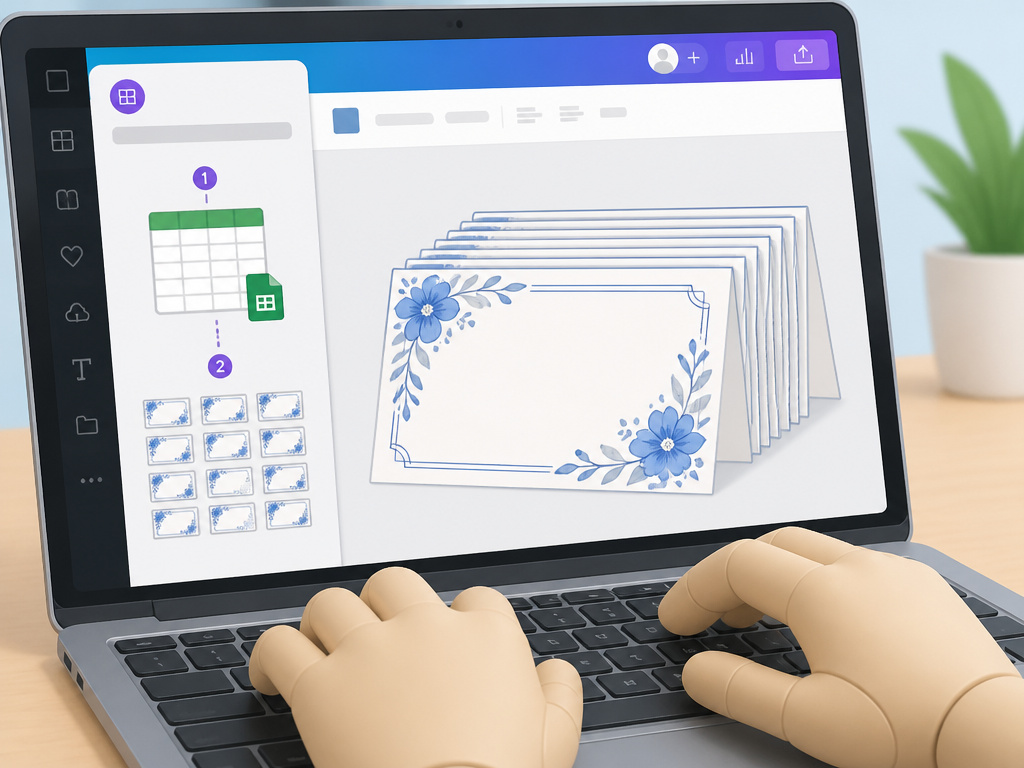
Manually typing names and table numbers into fifty individual cards is a soul-crushing task. Canva’s Bulk Create app, found in the Apps panel, automates it instantly. For my crew’s fundraiser dinners, I use it to generate place cards for 80 guests in under two minutes.
The process is straightforward. Prepare a spreadsheet (CSV or Excel) with columns like “Guest_Name” and “Table_Number.” Clean your data—remove extra spaces and standardize capitalization. A messy spreadsheet leads to messy cards.
Inside the Bulk Create app, upload your file. Canva will prompt you to specify the data range. Once connected, return to your design. Right-click on a text box placeholder and select “Connect data.” Choose the corresponding column from your spreadsheet. Repeat for any other dynamic fields. Click “Generate,” and Canva populates a new, perfectly formatted card for every row of data.
Check the first few generated cards. Longer names can cause text overflow. Adjust the font size or text box width on your master design page, and the change applies to all linked cards. This automation is a game-changer for event organizers, much like having a reliable checklist for your camping gear essentials.
Common mistake: Uploading a spreadsheet with inconsistent data formatting — extra spaces or mixed case names appear on every tent card. Spend two minutes using the TRIM and PROPER functions in Excel before uploading.
TL;DR: Use the Bulk Create app with a cleaned spreadsheet to generate dozens of uniform tent cards in one click, saving hours of manual work.
What Paper and Print Specifications Are Critical?
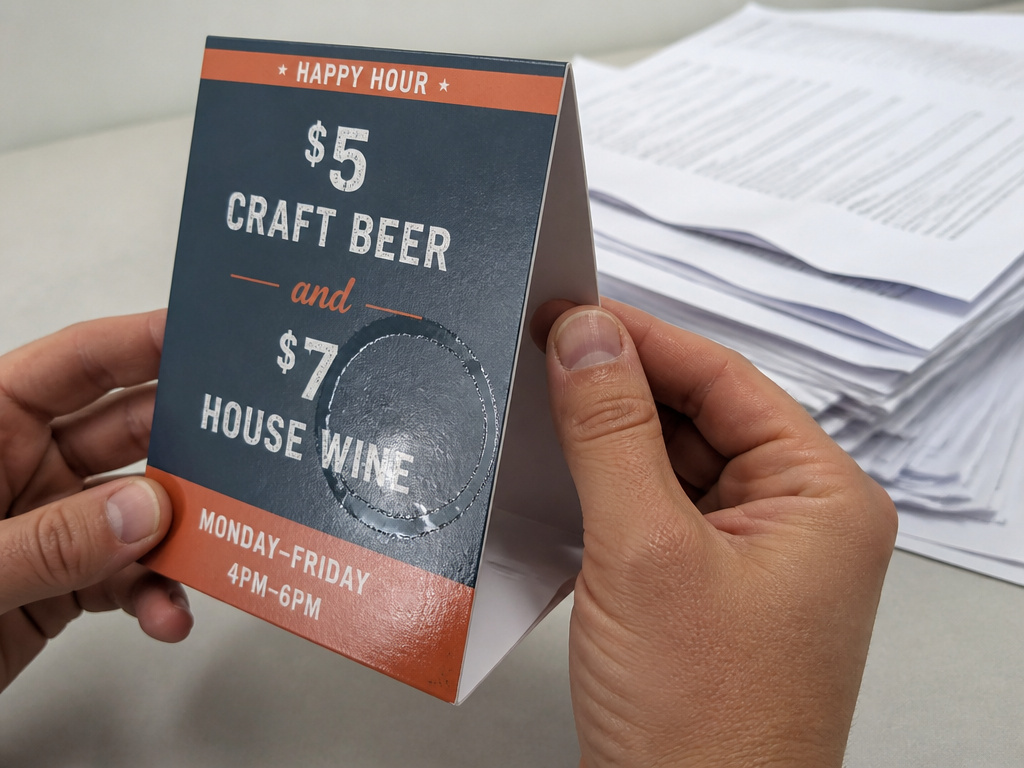
Your design is only half the battle. The physical medium determines whether your tent stands proud or slumps. For a standard 4×6 inch table tent, 110lb cardstock is the sweet spot. It’s thick enough to hold a crisp fold and rigid enough to stand on its own.
Last year, for my crew’s trailhead dinner, I used 80lb text weight because I was used to ultralight tent fabrics. The result was a disaster—the cards flopped over in the mountain lodge humidity like a wet tarp, scattering table numbers. Now I insist on 110lb cardstock for the same rigidity as my favorite tent poles.
Home printers can handle 110lb cardstock if you feed sheets singly. For larger batches, I upload my PDF to a service like Printful and select their ‘110lb Premium Cardstock’ option, or for a local rush job, I take the file to the FedEx Office on Main Street and specify their Xerox Versant press for color accuracy. This isn’t just “a printer”; it’s choosing the right tool for the trail.
| Paper Weight | Feel & Use | Best For |
|---|---|---|
| 80lb Text | Like a heavy brochure; flimsy | Single-sided flyers, not standing tents. |
| 110lb Cardstock | Like a stiff postcard; robust | Perfect for table tents. Holds its shape. |
| 130lb Cover | Like a thick business card; rigid | Over-engineered. Difficult to fold cleanly. |
Talk to your printer about finish. A light gloss or matte laminate protects against condensation rings from drinks. For a rustic vibe, an uncoated, textured stock might fit better, though it absorbs ink, softening colors. This choice impacts durability, similar to selecting materials for canvas tents.
TL;DR: Print on 110lb cardstock for optimal rigidity. For professional results, use a print service with specified stock options.
How Do You Export the Design Correctly for Printing?
This step is where most DIY projects fail. You click Share, select Download, and pick PNG for its perceived quality. PNG and JPEG are for screens. Printers speak PDF.
Select “PDF Print” as your file type. Before downloading, check the “Crop marks and bleed” box. Crop marks are guide lines for the cutting machine. Bleed is an extra margin of design (typically 0.125 inches) extending beyond those marks. It guarantees no white edges appear if the cut is slightly off.
Exporting as a PDF Print file with crop marks and bleed preserves vector layers, fonts, and image resolution at 300 DPI. A PNG flattens everything into rasterized pixels, which can appear fuzzy at print resolution. The PDF is the printer’s native language.
If printing at home, you can sometimes skip bleed if your printer has a borderless setting. For any professional job, it’s mandatory. I’ve seen batches of cards where the last letter of every headline was sliced off because this step was missed. The precision required here mirrors the attention needed when setting up complex tent camping accessories.
TL;DR: Always export your final file as a PDF Print with crop marks and bleed enabled. This is the single most important technical step.
What Are the Most Common Problems and Fixes?
Your text overflows in the Bulk Create preview. This happens when the master text box is too small for longer names. Return to your original design page and widen the text box. Bulk Create will update all linked cards automatically.
Your colors look dull on screen after switching to CMYK. That’s normal. CMYK has a smaller color gamut than RGB. Vibrant neon blues and greens often convert to subtler shades. You can preview this in Canva Pro, or simply accept that print colors are more muted. This is especially relevant for designs used in bright environments, like those for pop-up beach tents where sun exposure is a factor.
The printer reports low file resolution. You likely uploaded a resized PNG or JPEG. Go back to your Canva design, confirm you’re using the correct template size (e.g., 4×6 inches at 300 DPI), and re-export as a PDF Print. That format locks in the resolution. For detailed graphics, always start with high-resolution source images.
Your table tent won’t stand up. The fold is weak. Score the fold line lightly with a bone folder or the back of a butter knife before folding. Folding thick cardstock without scoring cracks the surface fibers, weakening the spine. A sharp crease makes all the difference, akin to a proper setup for stand-up tents where structural integrity is key.
Frequently Asked Questions
What is the best size for a Canva table tent?
The most functional size is 4×6 inches. It offers ample space for text and graphics while remaining stable. A 5×7 inch size is better for menus or detailed information. Never use a template smaller than 4×4 inches for readability.
Can I print Canva table tents at home?
Yes, if your printer handles cardstock. Use the PDF Print export, select “Borderless Printing” in your printer dialog if available, and feed sheets one at a time to avoid jams. For color accuracy and large quantities, a professional print shop is more reliable.
Why does my text get cut off when I print?
You exported as a PNG or JPEG without crop marks and bleed. Printers use those marks to guide their cuts. Without them, they trim to the visible edge of your design, often slicing off the outer 0.125 inches. Always use PDF Print with bleed.
How do I make a QR code on a table tent scannable?
Make the QR code at least 1.5 inches by 1.5 inches. Ensure a solid, light-colored margin (quiet zone) of at least 0.15 inches on all sides. Test the scan with your phone before finalizing the print file.
What’s the fastest way to make 50 place cards for a wedding?
Use Canva’s Bulk Create app. Prepare a spreadsheet with “Name” and “Table” columns. Upload it in the app, connect the data fields to your template’s text boxes, and click Generate. All cards are created instantly in the same design.
The Bottom Line
A great table tent is a small piece of precise communication. It needs the right foundation (template size), sturdy construction (paper stock), and flawless execution (print settings). Start with a 4×6 or 5×7 inch template. Design with print in mind: large fonts, high-contrast colors, and properly sized QR codes. Use Bulk Create to save hours on batch jobs. And never forget to export as a PDF Print with crop marks and bleed.
The same meticulous approach you’d apply to choosing budget tents under $100 or portable tent air conditioners pays off here. It transforms a simple folded card into a reliable, professional tool. Your information will be seen, your brand will look sharp, and your message will stand tall.
