
How To Construct A Tent And Avoid The 45-Degree Guy Rope Failure
This post contains affiliate links. As an Amazon Associate, we earn from qualifying purchases.
To construct a tent, you match the site to the shelter, square the footprint using diagonal measurements or the 3-4-5 method, and secure every stake at a 45-degree angle pointing away from the tent. The IFAI handbook states a stake driven straight into the ground loses about 30% of its holding power compared to one angled correctly, which is why tents collapse in sideways wind gusts after a rain softens the soil.
Most guides tell you to read the manual and stake it down. They skip the part where the manual itself says opinions on stake distance vary widely, and that a 45-degree guy line angle is the difference between a pole snapping and a pole staying put. You can follow every step and still wake up with a wall on your face if you miss that angle.
This guide walks through the process for a standard dome or cabin tent, then covers the edge cases for large pole tents and tarp shelters. The goal isn’t just a standing tent. It’s a tent that stays standing when the weather turns.
Key Takeaways
- Square with diagonals, not guesswork. For any rectangular tent, measure corner-to-corner diagonals and adjust until they’re equal. A 40′ x 80′ tent has a diagonal of 89.44′, guessing that is a recipe for a parallelogram shelter.
- Stake at 45 degrees, always. A stake driven straight down pulls out with significantly less force. Angle every stake so it points away from the tent, which uses the soil’s shear strength to hold.
- Guy lines are for compression, not decoration. Attach and tension them. The correct pull angle keeps side poles in compression and prevents them from “jumping” under wind lift. Skip this, and the frame fails at the joints.
- Check tension every 3–7 days for long-term setups. Fabric stretches, stakes settle, and guy lines slacken. The IFAI procedural handbook recommends this check cycle for tents left standing over a week.
- Pre-stake large or obstructed tents. If you can’t stretch the tent into place fully, lay out the perimeter with tape measures first, square the corners, then place the tent over the pre-set stakes.
The One Step Everyone Skips (And Why It Matters)
You stake the corners. You pull the lines tight. The tent looks perfect. Then a 20-mph crosswind hits at 3 a.m., and a side pole buckles inward.
The failure point is almost never the pole itself. It’s the guy rope attached to it. Most people run the guy line straight out from the tent wall to a stake. That creates a purely lateral pull. In a wind lift scenario, that lateral pull does nothing to counteract the upward force on the pole. The pole can actually lift out of its socket.
For wind lift forces, the guy rope must be at an angle that keeps side poles in compression and prevents them from jumping. A 45-degree pull angle produces vertical forces on the stake equal to lateral forces.
The physics is simple. A 45-degree angle splits the force vector. Half the tension from the guy line pulls down on the stake, half pulls horizontally back toward the tent. That downward component is what pins the pole foot to the ground. Without it, the pole is free to pivot at the base.
TL;DR: Guy lines angled at 45 degrees create a downward force that locks poles in place. Straight-out guy lines only pull sideways, letting poles lift in wind.
How to Square a 40′ x 80′ Tent Without a Laser
For a backyard dome, eyeballing square is fine. For anything larger than a 10’x10′ cabin tent, eyeballing fails. The human eye is terrible at judging right angles on that scale. You end up with a trapezoid, and the door won’t zip.
You have two proven methods. The first is the diagonal formula from the Textile Institute tent safety handbook. For a square-end tent, the diagonal length (C) is the square root of (length² + width²). For a 40′ x 80′ tent, that’s √(40² + 80²) = √(1600 + 6400) = √8000 = 89.44 feet. Measure both diagonals and adjust your corner stakes until each tape reads 89.44 feet. They must match.
The second method is the 3-4-5 triangle, also outlined in the same handbook. It’s better for long, narrow tents where a 90-foot tape measure is impractical. Here’s how it works for that 40′ x 80′ tent:
| Side | Measurement | Action |
|---|---|---|
| “Four” side | 40 ft | Lay out your first two corners along the 40-foot width. |
| “Three” side | 30 ft | From one corner, measure 30 feet down the length of the tent. |
| “Five” side | 50 ft | The distance from this 30-foot mark back to the opposite corner should be 50 feet. Adjust the corner until it is. |
Both methods achieve the same thing: a geometrically square footprint. The diagonal method is absolute. The 3-4-5 method is a proportional check that works with any tape measure.
Common mistake: Staking corners before squaring, you lock in a mistake and have to pull every stake to fix a single corner. Stake loosely, square, then drive them home.
Stake Distance: The Industry Argument Nobody Settled
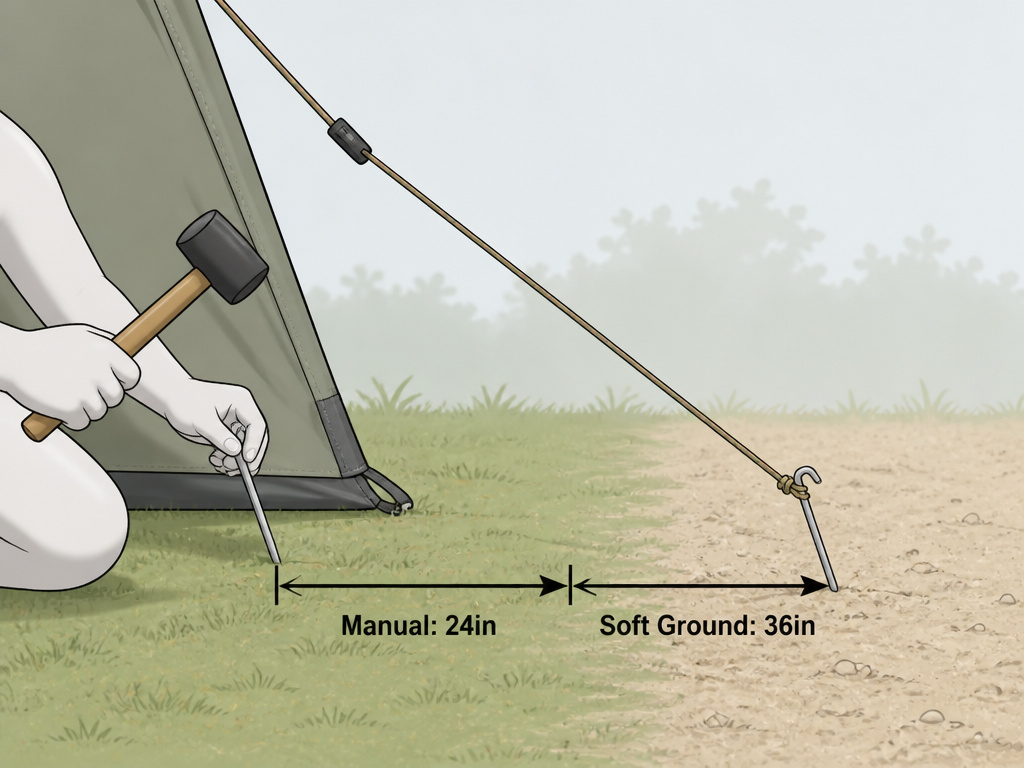
How far from the tent should the stake go? You’ll get a different answer from every veteran. The tent installation and maintenance guide notes plainly: “Opinions vary widely on what the proper distance is from the base of the pole to the stake.”
Manufacturers print a number on their instructions. For the Coleman Kenai 10’x8′, it’s about 18 inches. For the TentCraft 10×10 E-Series Frame Tent, it’s 24 inches. Those distances are calculated for the specific pole height and guy line angle of that model.
The variable they can’t account for is your ground. Sandy soil needs a longer stake distance to achieve the same holding power as clay. The handbook’s solution is a safety factor between 1.5 and 2.0 for staking. In practice, that means if the manual says 24 inches, you add 50% and place the stake 36 inches out on soft ground.
Common mistake: Placing all stakes at the manual’s distance on soft, rain-soaked soil, the stake holds during setup but pulls free after the fabric absorbs moisture and wind loads the structure overnight.
The stake isn’t just an anchor. It’s a lever. The farther out you place it, the more mechanical advantage you have to resist the tent pulling it straight up. But go too far, and the guy line angle shallows, losing that critical downward force component. It’s a balance.
For most family camping tents, start with the manual’s distance. If the ground is soft, move the stake out another 6-8 inches and re-tension the line.
The 7-Step Walkthrough for a Standard Dome or Cabin Tent
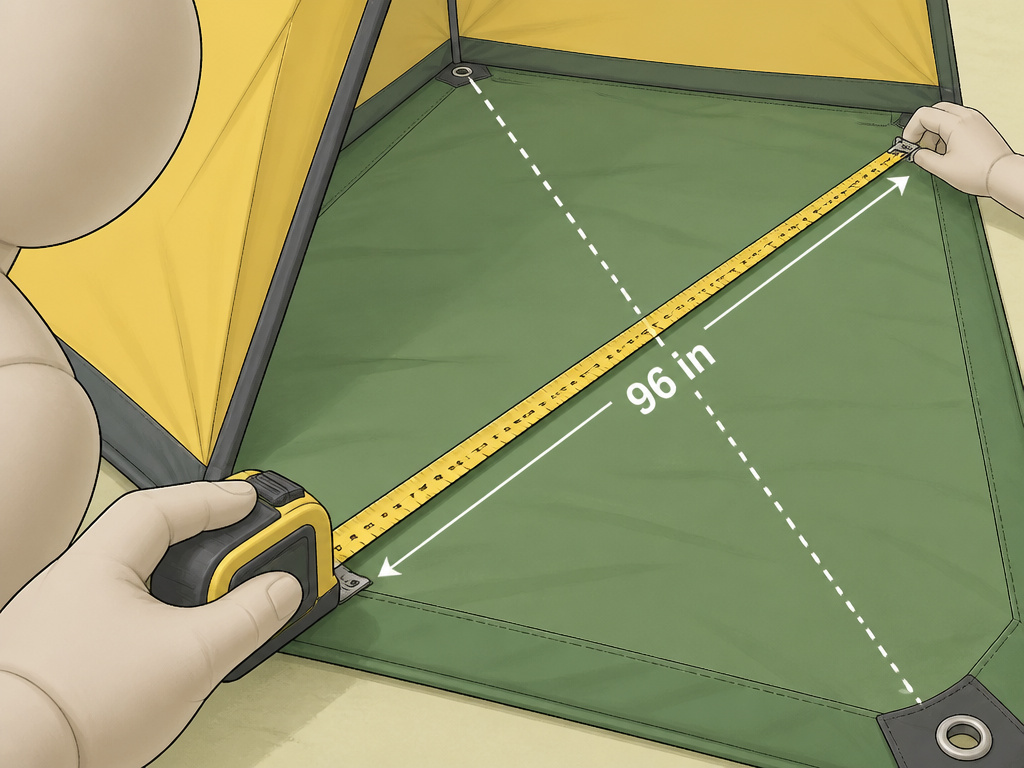
Follow this sequence. Skipping steps 3 and 5 is what causes mid-storm rebuilds.
Before you start: Clear the area of sharp rocks, pinecones, and sticks. A flat, gentle slope for water runoff is ideal, but a slope steeper than a few degrees will tilt sleeping platforms and pool water. Always check overhead for dead branches.
- Lay the footprint or tent body flat. Unfold it on the cleared ground. Align the door with your desired view or, more importantly, away from the prevailing wind direction. Smooth out any major folds.
- Assemble the poles. Connect the sections, listening for the click or watching the elastic cord tension. Gently feed the pole ends into the grommets at the tent corners or slide the poles through the sleeves. As you go, lift the tent structure, don’t drag the fabric.
- Raise the structure and secure corners. Lift the central hub or apex until the poles click into their full arch. Now, take four stakes and loosely secure the four corner grommets. Don’t hammer them in yet. This is just to keep the tent from blowing over while you square it.
- Square the tent. This is the step everyone rushes. Grab your tape measure. Measure from one front corner to the opposite rear corner. Note the distance. Measure the other diagonal. Adjust the loosely staked corners until both diagonal measurements are equal. For a perfect square, they must match.
- Drive all stakes at a 45-degree angle away from the tent. Once square, fully secure every stake loop and guy line point. Every single stake should be driven into the ground at a 45-degree angle, with the top pointing away from the tent. A stake driven straight down pulls out with 30% less force.
- Attach and tension the guy lines. Clip them to their designated loops. Pull them taut and stake them out, maintaining that 45-degree pull angle from the tent wall. The fabric should be snug, not drum-tight. Overtightening bends aluminum poles and stresses plastic hubs.
- Final walk-around. Walk the perimeter. Check each stake is solid. Re-tension any lines that look loose. Look for fabric sagging between poles, that’s a water pool waiting to happen.
TL;DR: Assemble poles on a flat footprint, stake corners loosely, square with a tape measure, then drive all stakes at 45 degrees outward before tensioning guy lines.
What To Do When the Ground Fights Back
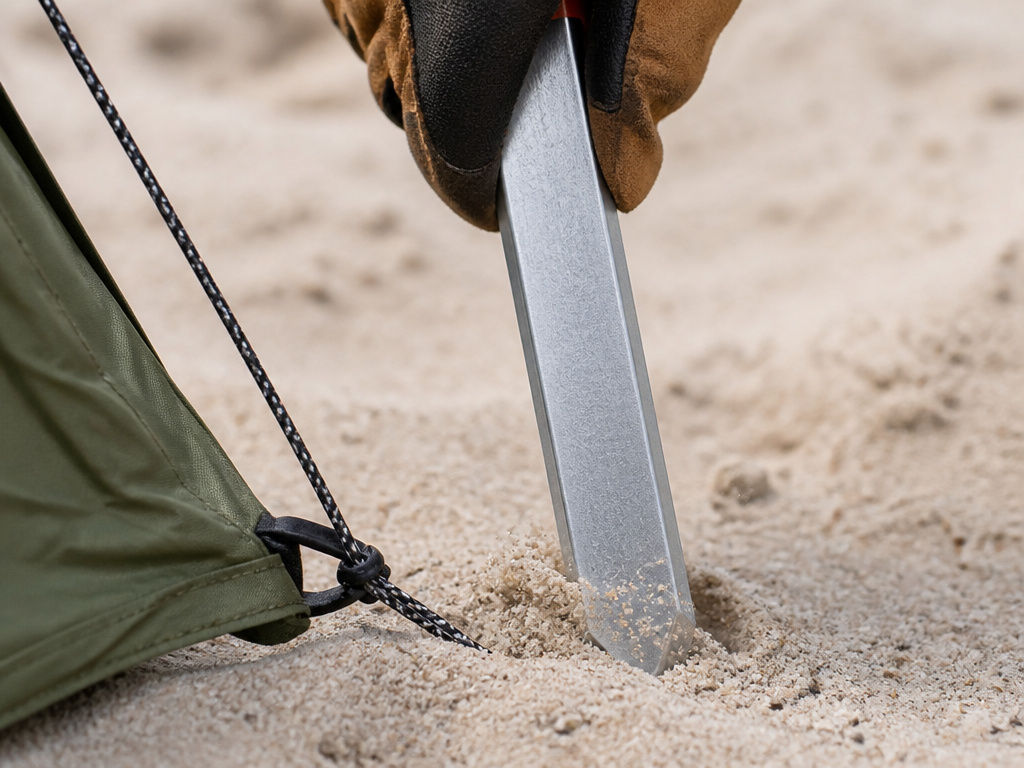
Not every site is a perfect lawn. Here’s how to adapt.
Hard, Rocky Ground: Plastic or thin steel stakes bend. Use 10-inch steel nail stakes or rock pegs. If you can’t drive a stake, use large rocks or logs as deadmen. Tie the guy line to the rock, bury it, and pile more rocks on top.
Soft Sand or Mud: Standard stakes pull out with minimal force. Switch to 12-inch screw-in sand stakes or long, wide plastic stakes. Bury a deadman anchor, a stick or bundle of sticks, horizontally a foot deep and tie off to that. Increase the stake distance by 50% to improve leverage.
Slopes: Pitch the tent so the head of your sleeping area is uphill. Use longer stakes on the downhill side and consider guying out the uphill side to trees or extra stakes to prevent sliding.
Long-Term Stays (Over a Week): The official USAP tent guidelines for polar operations emphasize re-tensioning. Fabric stretches, stakes settle, and guy lines slacken. Walk the perimeter every three to seven days and take up any slack. This is non-negotiable for canvas shelters and other heavy materials that sag over time.
Pole Tents, Frame Tents, and Tarps: The Exceptions
The dome-tent rules change when the structure does.
Pole Tents (Like the Tent & Table Standard Pole Tent): These use a central pole and external guy lines. The key is getting the pole perfectly vertical. Use a small level on the pole. The guy lines don’t just stabilize; they hold the entire canopy up. Tension them evenly in a star pattern.
Frame Tents (Like the TentCraft E-Series): The frame is self-supporting. Your job is to keep it from walking. Stake every leg, not just the corners. Then, add guy lines at the midpoints of the long sides if wind is forecast. The frame can rack (twist) if only the corners are secured.
Tarp Shelters: The YouTube method works: stake two corners, prop the center with a pole or stick, then stake the remaining corners and tension the lines. The mistake is not creating enough pitch for runoff. If the center sags, rain pools and the tarp collapses. Always aim for a steep angle. For a minimalist camping setup, a tarp shelter is versatile, but it demands perfect geometry.
| Shelter Type | Critical Difference | Most Common Mistake |
|---|---|---|
| Dome/Cabin Tent | Square the footprint first | Staking corners tight before squaring |
| Pole Tent | Central pole must be perfectly vertical | Uneven guy line tension pulling pole off-plumb |
| Frame Tent | Every leg must be staked | Securing only corners, letting frame rack in wind |
| Tarp Shelter | Steep pitch prevents water pooling | Creating a shallow “rain bowl” that collects water |
Frequently Asked Questions
How tight should the tent fabric be?
Snug, not drum-tight. You should be able to pinch a small fold of fabric between poles. If the fabric is stretched so tight it shines, the seams are under maximum stress and will tear in a strong wind. A little slack allows the material to flex.
Can I set up a tent by myself?
Yes, but it’s harder with larger tents. For a family-sized cabin tent, lay everything out first. Assemble the poles inside the tent body while it’s flat on the ground. Then, walk around the perimeter, inserting each pole end into its grommet as you go. Finally, lift the center. For a pop-up tent, it’s a one-person job.
What’s the single biggest reason tents collapse in calm weather?
Stakes pulling out. This almost always happens because they were driven straight down, not angled. When the ground gets wet, the stake loses friction and slides out. Angling the stake uses the soil’s shear strength along its length, which is much harder to overcome.
Do I need a footprint?
For most modern tents with a bathtub floor, no. The floor material is tough. A footprint protects the floor from abrasion and makes cleanup easier. For ultralight backpacking shelters for two, a footprint is often sold separately and is worth the weight for groundsheet protection.
How do I secure a tent on a wooden deck or concrete?
You can’t stake into it. Use weights: fill gallon jugs with water or sand and tie guy lines to them. For decks, some campers use special deck anchors that screw into the wood. For concrete, look for freestanding tents with standing room that don’t require staking, or use heavy sandbags on each leg.
Before You Go
A tent that goes up in ten minutes but falls over in a breeze wasn’t constructed. It was just assembled. The difference is in the five minutes you spend with a tape measure and a mallet, checking diagonals and driving stakes at that 45-degree angle.
The tent camping gear you bring matters, but how you use it matters more. That angled stake, the squared footprint, the tensioned guy line, these aren’t suggestions. They’re the physics that keep the rain off your head and the poles over your head. Ignore them, and you’re just hoping the weather holds. Follow them, and you’ve built a shelter.
