
How To Close A Tent Properly To Stop Mold Growth In 48 Hours
This post contains affiliate links. As an Amazon Associate, we earn from qualifying purchases.
Closing a tent correctly requires matching three things: the tent type (rooftop, pop-up, or traditional), a manufacturer-specific sequence for poles and windows, and a final moisture check before the bag zipper seals. The sequence varies by design, but missing the moisture check voids most canvas warranties and starts mold growth in under 48 hours.
Most people zip the doors, yank the poles, and stuff the bag. They get away with it until the morning they unzip a musty, stained tent that smells like a damp basement. The problem isn’t the act of closing. It’s the three things you do, or skip, in the five minutes after you think you’re done.
This guide walks through the closing sequences for rooftop, pop-up, and traditional tents, pulling steps directly from OEM manuals most owners never read. You’ll learn the specific failure points for each type and the one non-negotiable rule that keeps your tent dry for a decade.
Key Takeaways
- Never use gas struts as handles on a rooftop tent, the Intrepid Camp Gear manual states this bends the rod and causes gas leaks, voiding the warranty.
- A wet tent sealed for 48 hours is the threshold for mold spores to germinate on canvas and polyester, per textile degradation studies.
- For hard-shell rooftop tents, fold the ventilation support bars flat before closing the lid; forcing the shell shut over an upright bar dents the TPU window on the first try.
- Remove all telescopic poles and ladders from inside a pop-up tent before closing; storing them inside crushes the fabric and can puncture the rainfly.
- Always perform a post-trip hardware check after driving off-road; vibration loosens frame screws within 10-20 miles, per the Intrepid manual.
Before You Start: The 5-Second Safety Scan
Before you start: A collapsing pole can snap back and strike your face, keep your head to the side, not over the pole. A rooftop tent’s gas strut can fail suddenly if used as a handle, dropping the heavy shell on your hands. A wet tent bag zipped shut breeds mold you’ll smell next trip.
Clear the interior completely. That means every sock, headlamp, and granola bar wrapper. A single tent stake left inside a folded pop-up tent can wear a hole straight through the floor fabric after one drive home. Check under the mattress pad in a rooftop tent. Check the corners in a traditional dome.
Feel the tent fabric, especially the floor and rainfly. If it’s damp from dew or a morning drizzle, you have a choice. You can pack it now and absolutely must unpack it the minute you get home. Or you can wait for the sun to do its job. The Canvas Camping Tents warranty guide is blunt: storing a damp tent voids the coverage.
The 3-Tent Closing Sequence (Rooftop, Pop-Up, Canvas)
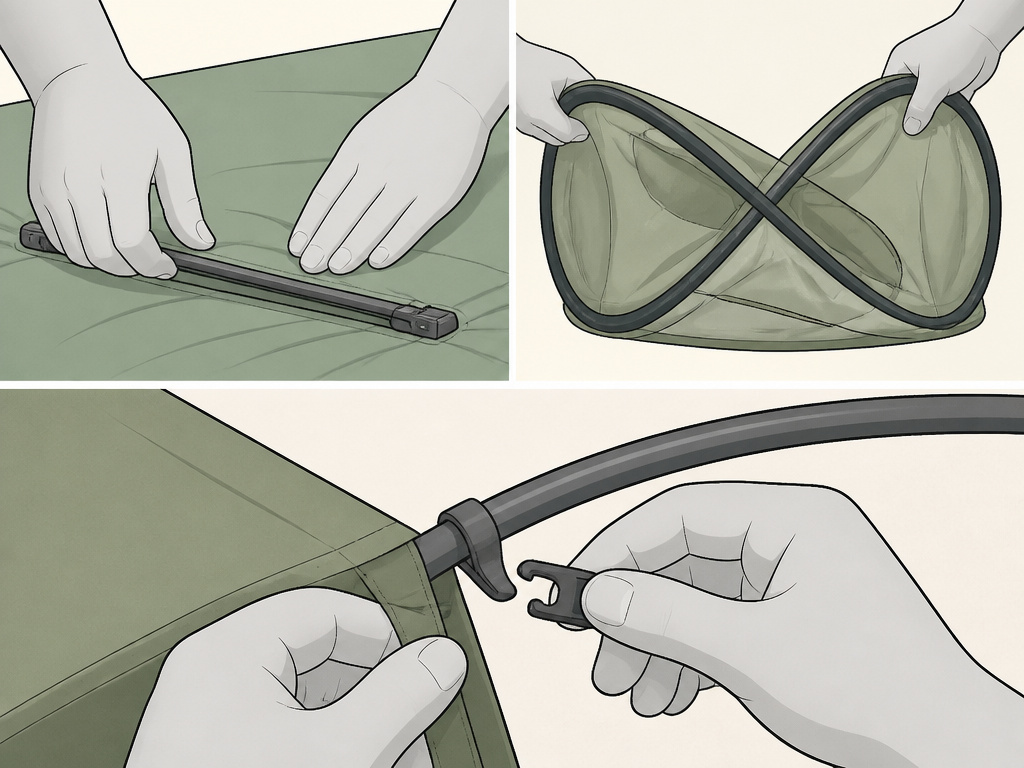
Closing a backpacking dome is different from closing a hard-shell rooftop tent. The core mistake is using the same muscle memory for all three. Match the sequence to the type.
How do you close a hard-shell rooftop tent without breaking the windows?
Rooftop tents fail in specific, expensive ways. The Intrepid Camp Gear GEO 2.5-3.0 manual details a sequence that prevents the two most common warranty claims.
First, remove everything that isn’t part of the shell. That includes the removable door frame support bar. The manual says to lay it flat on the mattress, standing it upright risks stamping a permanent crease into the foam. Take out all tent camping accessories like hanging lanterns or gear lofts.
Next, address the windows. The top ventilation support bar and side ventilation bars must be folded down. If you try to close the shell with a bar still propping a window open, the rigid edge of the shell will press directly against the flexible TPU window panel. The result is a permanent dent or crease that weakens the material.
Fold all ventilation support bars flat against the mattress before pulling the shell closed. Forcing the lid over an upright bar dents the TPU window on the first attempt.
Zip up the doors and windows from the bottom upward. The Intrepid manual specifies leaving the bottom zipper puller (often red) about 50% closed during heavy rain travel to prevent water ingress while allowing slight air circulation. For normal closure, zip it fully.
Now for the actual close. Use the designated closing strap, not the gas struts. The manual explicitly warns that using the gas struts as handles causes rod bending and gas leakage, which is considered user error. Pull the strap steadily, letting air escape from the tent body. Closing too quickly traps air, which fights you and stresses the fabric.
| Step | Rooftop Tent Specifics | Risk If Skipped |
|---|---|---|
| Remove support bar | Place flat on mattress, not upright | Permanent mattress crease |
| Fold ventilation bars | Lay all bars flat before closing lid | Dented or torn TPU window |
| Use closing strap | Pull steadily, allow air to escape | Stressed fabric, gas strut failure |
| Zip sequence | Bottom to top, red zipper 50% for rain | Water ingress during travel |
| Post-close check | Ensure latches fully engage | Shell opening at highway speed |
TL;DR: Remove internal bars, fold ventilation supports flat, use the strap (not the struts) to close, and zip bottom-to-top. The gas strut is not a handle.
What’s the right way to collapse a pop-up tent?
Pop-up tents rely on flexible poles sewn into the fabric. The force that makes them spring open is also the force that breaks them during closing if you fight the geometry.
Start by ensuring all windows and doors are zipped. Unzip just one door about halfway, this gives trapped air an escape route as you collapse the frame. If you skip this, you’re fighting an air mattress.
Undo all Velcro tabs or buckles connecting the fabric to the frame. On models like the TEDPOP 4P, there are buckles on each side of the extension panel that must be unlocked before folding. Forcing the fold with buckles still locked strains the stitching.
Now, collapse the frame. This usually involves bringing two opposite corners together, then the other two, creating a figure-eight or taco shape. Follow the natural flex of the poles. Never twist or force a pole against its bend, that’s how you hear the sickening snap of a fiberglass rod breaking inside its sleeve.
Once flat, fold the fabric along its natural panel lines. Don’t just bunch it into a ball. A neat fold along the seams prevents sharp, permanent creases in the waterproof coating. Finally, secure the bundle with its included straps or stuff sack.
Common mistake: Storing telescopic poles or ladders inside a collapsed pop-up tent, the TEDPOP 4P manual says this causes severe fabric damage from pressure points during transport.
TL;DR: Unzip a door for air escape, release all buckles, collapse with the frame’s natural flex, fold along seams, and never store poles inside.
What is the traditional pole-and-peg tent sequence?
For standard dome, tunnel, or canvas tents, the process is methodical. The goal is to avoid bending poles and straining fabric.
- Remove all stakes and guylines. Pull stakes straight up to avoid bending them. Coil guylines loosely; tight coils kink the cord.
- Detach the fly. Unclip or unthread the rainfly from the inner tent. Shake it off to remove leaves and debris. Fold it loosely.
- Collapse the poles. Push elastic cords out of the end grommets, then collapse each section. Don’t let the sections snap together, control the descent. Store them in their pole bag immediately.
- Collapse the inner tent. Let the structure gently fall. Starting at one end, fold the tent along its sewn floor panels, pushing air out as you go.
- Combine and pack. Place the folded inner tent in the storage sack, then the fly, then the pole bag, then the stake bag. This order protects the tent fabric from hard objects.
Skipping step one, leaving a single stake clipped to a guyline, means that stake rattles around inside the storage bag. After three trips, it’s rubbed a hole through your rainfly.
The One Step Nobody Does (But Should)
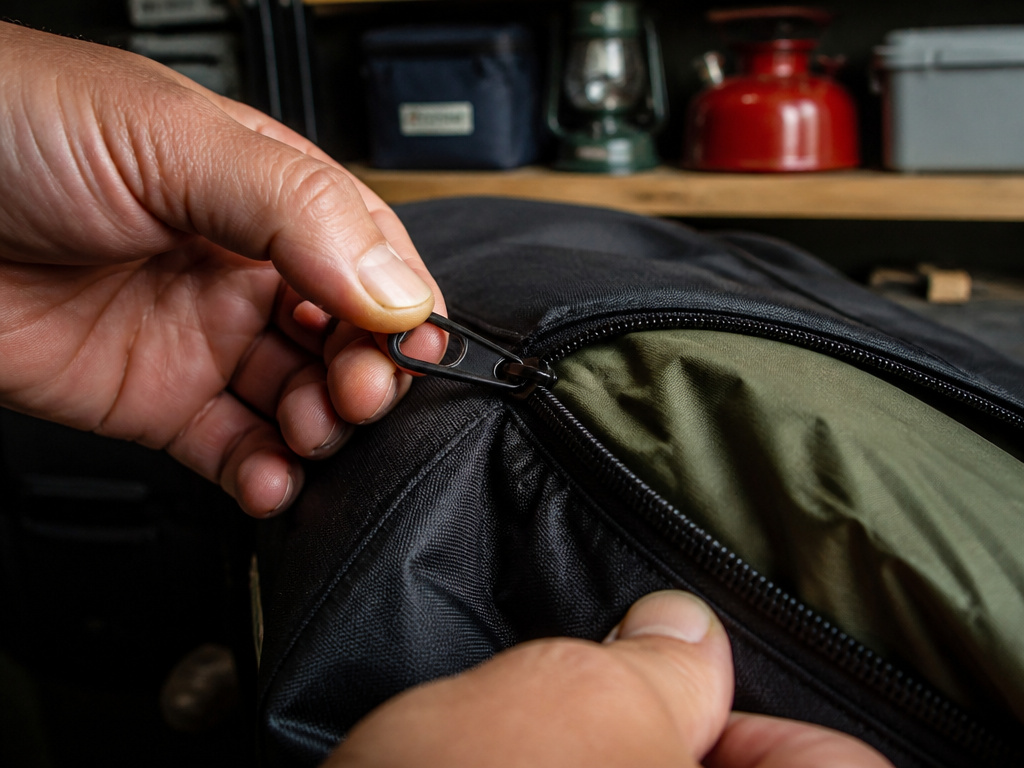
You’ve zipped, folded, and bagged. Most people stop here. The tent is closed. This is the mistake.
The final step happens after you’ve moved the tent to its storage location, whether that’s a garage shelf, a car trunk, or a basement corner. You must open the bag’s zipper or loosen the compression sack for at least an hour. Why? Residual moisture.
Even a tent that feels dry to the touch holds humidity in the seams, the stitch lines, and the foam of a rooftop tent mattress. Sealing that in a black bag sitting in a warm car trunk creates a perfect incubator. The Canvas Camping Tents warranty guide states that mold can form in a shockingly short time, voiding the warranty outright.
A tent sealed while damp grows mold in 48 hours. The smell arrives on your next trip, and the stains never fully leave.
For a rooftop tent that saw rain or snow, the Intrepid manual advises opening it for a few hours at home to let moisture evaporate. For any tent, if you can’t dry it fully in the field, this post-storage airing is non-negotiable. It’s the difference between a tent that lasts ten seasons and one that’s musty by season three.
Post-Closure Checks Before You Drive Away
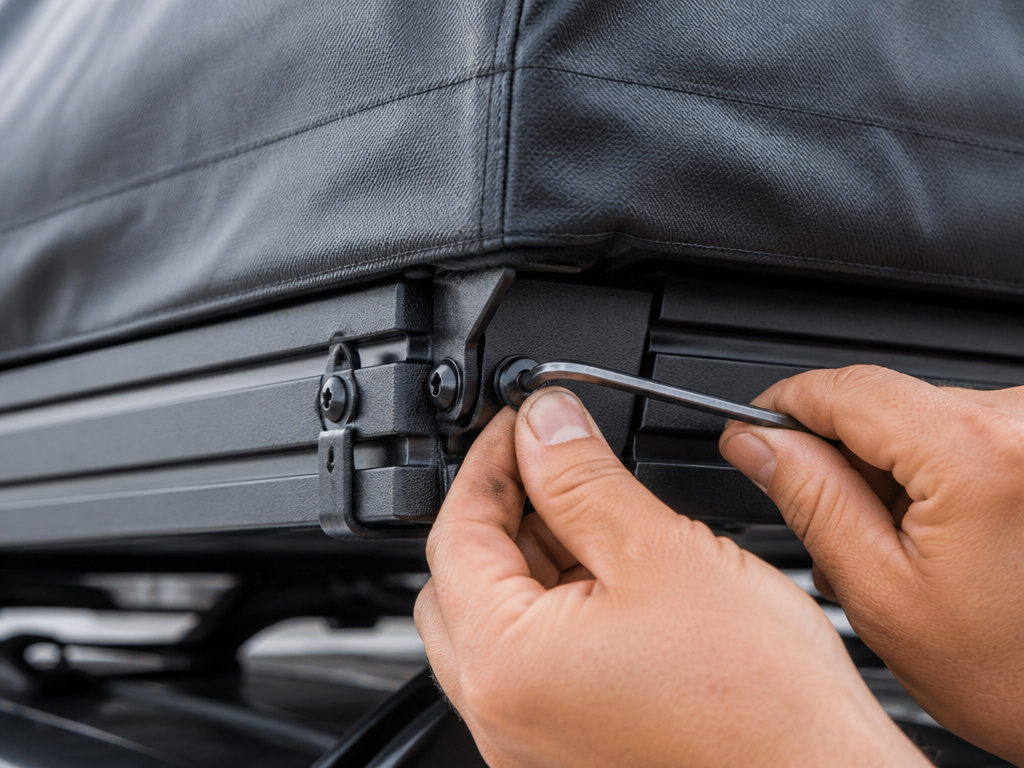
Closing the tent isn’t the end of the job. Two final checks prevent road hazards and long-term damage.
The Angle Check. For rooftop tents, eye the installed angle. If the back is lower than the front, it creates drag and excessive stress on the crossbars at high speed. The Intrepid manual warns this is a common cause of premature wear. An unlevel tent also lets water pool on the cover during rain.
The Hardware Check. After any off-road trip, or after the first 10-20 miles of driving with a new tent, check all the frame screws underneath. Vibration and gravity work them loose. The manual says to check again after every off-road outing. A loose screw today is a lost component next month.
Also, listen. If you hear new rattles or whistles while driving, pull over and inspect. Something isn’t secure. This is especially critical for heavy rain tents and high wind tents designed for severe weather, their security is everything.
How should you store a closed tent long-term?
Long-term storage is where good closing habits pay off. The rules shift from daily routine to preservation.
First, store the tent indoors. A garage is fine; a damp shed or outdoor locker is not. The TEDPOP 4P manual advises a cushioned surface away from heavy foot traffic. Keep it off concrete floors, which can wick moisture. Hang it if possible, or place it on a shelf.
Second, protect it from pests. Mice and insects see a fabric bag as nesting material. Avoid leaving the tent exposed where rodents can access it. A plastic storage tote is a good outer layer defense.
Finally, make a calendar note. Every three months, take the tent out, unzip the bag, and let it air for an afternoon. This breaks any moisture cycle and lets the fabrics breathe. It’s the best way to guarantee a fresh, ready-to-go shelter when the next season starts.
For tent camping equipment like this, longevity comes from these small, consistent acts of care.
Frequently Asked Questions
How tight should the straps be on a tent storage bag?
Snug, but not tight enough to compress the folded fabric into a hard brick. You should be able to press a finger into the side of the bag. Over-tightening crushes the waterproof coatings on the fabric folds, creating micro-cracks that leak later.
Can you close a tent when it’s wet?
You can, but you must unpack and dry it immediately upon reaching your next destination or home. The Canvas Camping Tents warranty guide is clear: storing a damp tent, even for a short time, causes mold, odor, and fabric deterioration. The clock starts the moment you zip the bag.
Why does my pop-up tent fight me when I try to close it?
You’re trapping air inside. Always unzip one door or window partially before collapsing the frame. The trapped air has nowhere to go, turning the tent into a balloon. That extra pressure strains the flexible poles and can rip stitching.
Do I need to clean the tent before closing it?
Brush off loose dirt, leaves, and debris. A quick sweep with a soft-bristle brush prevents grit from grinding into the fabric during storage. Don’t use soap or hose it down unless you have hours for it to fully dry afterward. For stand-up tents with more floor space, this step is crucial to avoid grinding in dirt.
How do I stop mold from growing in my stored tent?
The only surefire method is to never store it damp. If it gets wet, dry it completely before packing. As a last resort, if you must pack it damp, unpack it within 24 hours and air it thoroughly. Use a fan in a garage to circulate air around the spread-out fabric. Mold spores germinate in warmth and humidity, deny them both.
The Bottom Line
Closing a tent correctly is a five-minute investment that adds years to its life. The sequence changes, rooftop, pop-up, or traditional, but the principles don’t: clear it, zip it, collapse it with the grain, and never trap moisture. That final airing-out step is what separates a tent that’s ready for next weekend from one that smells like regret.
Listen to the manuals. The warnings about gas struts, window bars, and 48-hour mold are written after thousands of warranty returns. Your gear doesn’t need to be babied. It just needs you to follow the simple, specific rules its engineers already printed for you.
