
How to Pack a Tent in a Backpack | The Stuff-and-Separate Method
This post contains affiliate links. As an Amazon Associate, we earn from qualifying purchases.
To pack a tent in a backpack, you must separate its components and use your pack’s volume efficiently, not the tent’s own stuff sack. The Stuff-and-Separate method involves ditching the manufacturer’s tight stuff sack, loosely stuffing the tent body and rainfly into the main pack compartment to fill gaps, and securing the poles and stakes externally or in designated pockets. This approach saves space, protects the tent’s waterproof coating from crease damage, and makes unpacking faster.
Most people get this wrong because they treat the tent’s stuff sack as a sacred packing unit. They wrestle the entire rolled bundle into their pack, creating a rigid cylinder that wastes space and strains seams. The tent wants to be loose fabric, not a rolled burrito.
This guide covers the step-by-step Stuff-and-Separate method, explains where each component belongs, details what to do if your tent is wet, and outlines the long-term storage mistake that permanently ruins waterproof coatings.
Key Takeaways
- Ditch the manufacturer’s stuff sack immediately; it’s for retail, not for trail packing.
- Stuff the tent body and rainfly loosely into your pack’s main compartment to fill dead space and prevent permanent creases in the waterproof coating.
- Store tent poles vertically in a side pocket or compression strap; store stakes in a small bag at the bottom of a front pocket.
- If your tent is wet, pack it in a separate waterproof bag (opening up) inside your pack, or strap the wet rainfly outside in a mesh pocket.
- For long-term storage at home, use a large, breathable cotton or mesh bag, never the tight stuff sack.
Why the Factory Stuff Sack Is Your First Mistake
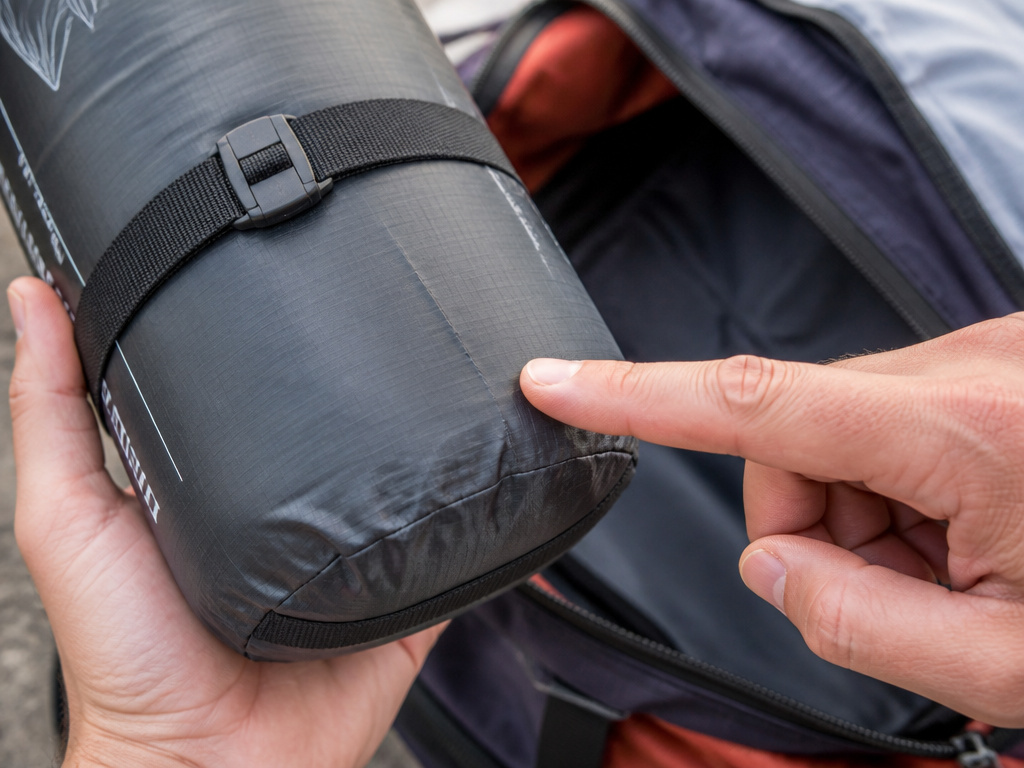
That neat, cylindrical bag your tent came in is a lie. It’s designed to look compact on a store shelf, not to live efficiently inside your backpack. Forcing the tent to stay in that tight roll does three things, all of them bad.
First, it creates a single, rigid shape that refuses to conform to the curves of your pack. You waste space around it. Second, the constant tension along the same folds puts stress on the tent’s seams and, more critically, on the polyurethane (PU) waterproof coating laminated to the fabric. Third, it turns your tent into the last thing you can access at camp. You have to unpack half your gear to reach it.
Common mistake: Storing a tent compressed in its factory stuff sack for months, the constant pressure along the same creases causes the PU coating to crack and flake off, a process called hydrolysis that is irreversible.
The factory sack has one legitimate use: keeping the tent organized in your gear closet at home, but only if it’s stored loosely inside. On the trail, its job is done.
Step-by-Step: The Stuff-and-Separate Method
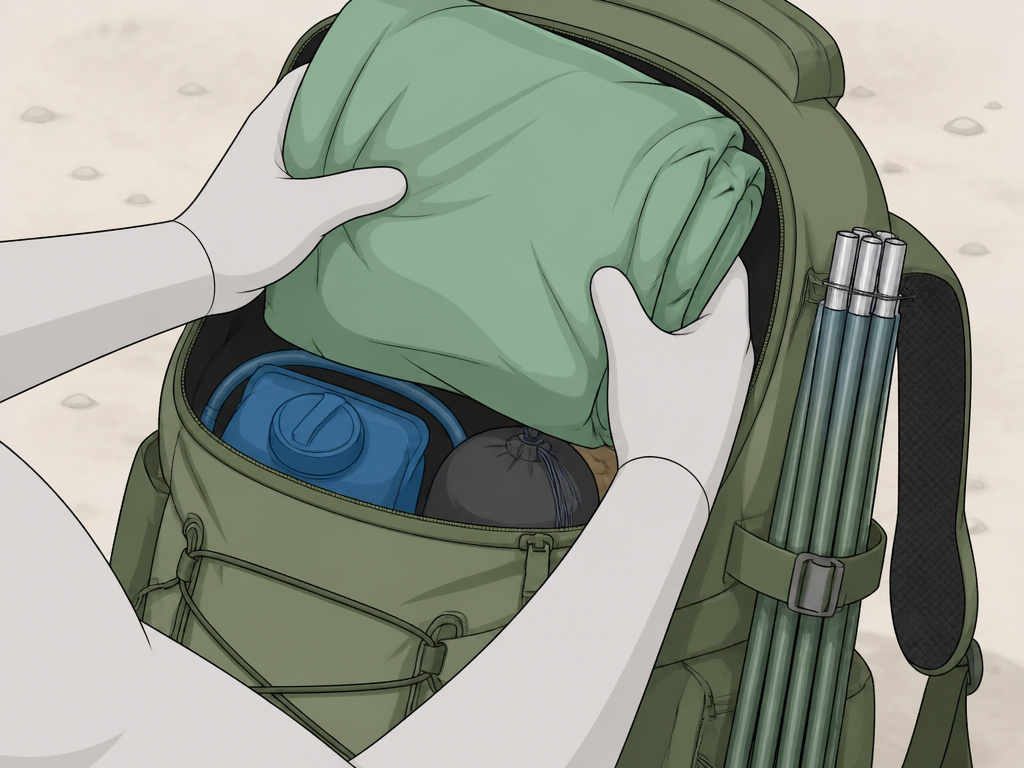
Follow this sequence every time you break camp. It takes two minutes and becomes automatic.
Step 1: Empty the sack. Pull everything out of the manufacturer’s stuff sack and lay the components on your groundsheet or a clean patch of grass. You now have four piles: tent body, rainfly, poles, stakes.
Step 2: Shake and fold lightly. Give the tent body and rainfly a good shake to dislodge any dirt, pine needles, or insects. Fold them loosely in half or thirds, no tight rolling. The goal is a soft, malleable bundle.
Step 3: Stuff, don’t roll. Open your backpack’s main compartment. Place your sleeping bag or other soft gear at the bottom. Now, take the bundled tent body and rainfly and push them into the pack. Don’t aim for a specific spot; let the fabric fill the voids around your water reservoir, cook kit, and clothing sack. This is the “stuff” part. The fabric conforms, eliminating dead air space.
Step 4: Secure the poles. Collapse the tent poles and secure them vertically along the outside of your pack. The ideal spot is a side compression strap or a dedicated side pocket. This keeps the long, rigid objects out of your main compartment and balances the pack’s weight.
Step 5: Bag the stakes. Gather all stakes and put them in a small stuff sack, a ziplock bag, or even a sock. This prevents them from poking holes in your pack or getting lost. Place this bag at the very bottom of a front pocket or in a designated “sharp things” pocket.
TL;DR: Ditch the tight sack, stuff the fabric loosely into your pack’s main compartment to fill gaps, and store poles and stakes externally. This method saves space, protects the tent, and makes setup faster.
Where to Pack Each Component
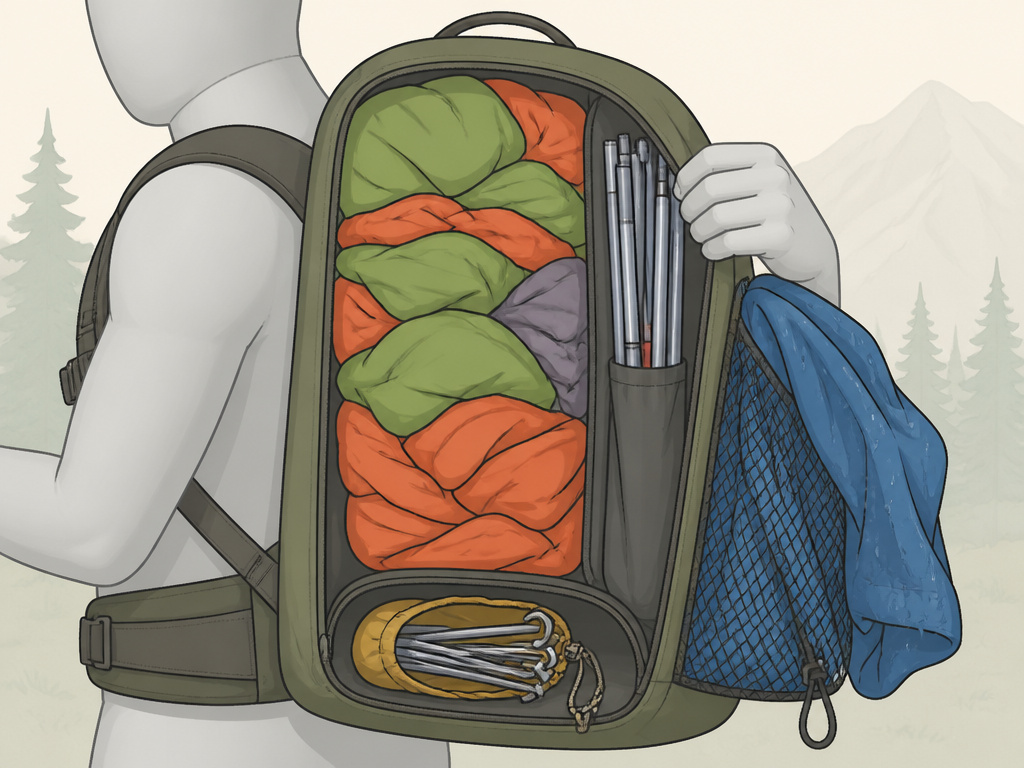
Location matters for weight distribution, accessibility, and gear protection. A well-packed bag carries better.
| Component | Ideal Location | Why This Works |
|---|---|---|
| Tent Body & Rainfly | Main compartment, stuffed around other gear | Conforms to pack shape, fills dead space, prevents permanent creases in fabric. |
| Tent Poles | Vertical side pocket or under side compression strap | Keeps long, rigid items external for better weight balance and easier access. |
| Tent Stakes | Bottom of a front pocket, in a small bag | Isolates sharp points from other gear; the bottom location keeps them from shifting. |
| Wet Rainfly | External mesh pocket or strapped under pack lid | Allows airflow for drying during the hike; keeps moisture out of the main pack. |
For internal frame packs, the tent fabric belongs in the middle of the main compartment, against your back. This positions the densest weight close to your spine for stability. With external frame packs, you can often lash the tent bundle directly to the frame itself, but I still recommend separating components, stuff the fabric inside and strap the poles to the frame.
If you’re comparing ultralight 2-person tents to heavier models, remember that the packing principle is the same. A lighter tent just gives you more flexibility to pack it higher or lower in your load.
What If Your Tent Is Wet?
You will eventually pack a wet tent. Morning dew, a surprise rain shower, or a condensation-soaked fly demands a different protocol. Doing it wrong leads to mildew and that sour, basement smell that never leaves the fabric.
The rule is simple: wet fabric never goes inside the main pack with dry gear. Moisture will wick into everything else.
Here’s your two-option playbook.
Option 1: Internal quarantine. If the entire tent is damp, you need a waterproof liner. A dry sack is perfect, but a heavy-duty trash bag works. Place the wet tent body and fly inside the bag, squeeze out as much air as you can, and twist the top closed. Put this sealed bag at the very top of your pack’s main compartment. The “top” part is critical, it’s the first thing you’ll pull out when you stop, letting you set up the wet tent to dry immediately.
Option 2: External dry-out. If only the rainfly is wet, strap it to the outside. Most packs have a large stretchy mesh pocket on the back or side. Stuff the wet fly there, ensuring it’s spread out as much as possible to catch the wind. The sun and airflow during your hike will start the drying process. This is a prime advantage of modern backpacking tents for two with separate rainflies, you can isolate the wet component.
Never pack a wet tent in its stuff sack and leave it in your car or gear closet. Mildew can germinate in as little as 24 hours in a warm, dark, damp environment. The resulting mold stains fabric and, worse, triggers a chemical reaction called hydrolysis in polyurethane coatings, turning them into a sticky, flaky mess that cannot be repaired.
As soon as you get home or to your next dry camp, the very first task is to hang the tent completely, every seam, every corner, until it’s bone dry.
Splitting the Load with a Partner
One of the smartest moves for duo trips is to split the tent. It’s a simple weight distribution trick that feels revolutionary the first time you do it.
A typical three-pound two-person backpacking tent might break down like this: the tent body weighs 20 ounces, the rainfly and poles weigh 28 ounces combined, and the stakes are a few ounces. One person carries the 20-ounce tent body in their pack. The other carries the poles and fly. The stakes can go with either person.
This does two things. It frees up a significant chunk of space in each person’s pack, making room for more food, water, or comfort items. It also balances the load more evenly between you, which can reduce fatigue on a long trek. Just agree on who is carrying which piece before you start stuffing your packs.
The Critical Difference: Trail Packing vs. Home Storage
How you pack your tent for a three-day hike should be completely different from how you store it for three months. Confusing these two is how good gear gets ruined.
For the trail, use the Stuff-and-Separate method described above. Compression is your friend because it maximizes space. The tent will only be packed tightly for a few days at a time.
For home storage, compression is the enemy. You must let the fabric relax. This is where that factory stuff sack fails utterly.
Store your tent loosely in a large, breathable bag. An old pillowcase, a mesh laundry bag, or a dedicated oversized cotton storage sack is perfect. The goal is to let air circulate and to eliminate all points of constant pressure on the fabric and coatings.
Hang this bag in a cool, dry, dark place, a closet shelf is ideal. Avoid hot attics or damp basements. Before you store it, ensure the tent is completely clean and dry. Any leftover dirt or moisture becomes a permanent problem.
Choosing the Right Bag for the Job
You don’t need fancy gear, but having the right containers makes the system foolproof.
- For wet tent quarantine: A 20-liter dry sack is the perfect size for most two-person tents. It seals out moisture and can be compressed down. A contractor-grade trash bag is a capable, disposable alternative.
- For stake storage: A small stuff sack or a durable ziplock bag keeps them contained and identifiable.
- For long-term storage: A large mesh or cotton bag is non-negotiable. It costs a few dollars and will extend the life of your tent by years.
If you’re shopping for a new shelter, consider that the best lightweight two-person tents often come with minimalist stuff sacks that are easier to ditch. The pack size on the spec sheet is less important than how the tent actually conforms inside your loaded pack.
Frequently Asked Questions
Can I just keep my tent in its original stuff sack?
You can, but you shouldn’t. That sack forces the tent into a tight cylinder that wastes pack space and stresses the waterproof coating along permanent crease lines. It’s designed for store display, not for functional backpacking.
How do I pack a tent in a backpack without a stuff sack?
Use the Stuff-and-Separate method. Loosely stuff the tent body and rainfly into your pack’s main compartment to fill gaps around other gear. Store the poles vertically in a side pocket and the stakes in a small bag at the bottom of a front pocket. The pack itself becomes the “sack.”
What’s the best way to pack a wet tent?
Isolate it immediately. Place the wet tent fabric inside a waterproof bag (like a dry sack or trash bag), squeeze out the air, and seal it. Pack this bag at the very top of your main compartment or strap a wet rainfly to an external mesh pocket. Dry the tent completely at your very next opportunity.
Where should tent poles go in a backpack?
The best place is vertically in a side compression strap or side pocket. This keeps the long, rigid poles outside your main compartment, improving weight distribution and protecting your other gear from punctures. For compact backpacking shelters with shorter poles, a front pocket might also work.
Is it better to roll or stuff a tent?
For backpacking, stuffing is almost always better. Rolling, especially tight rolling, creates consistent stress points on the fabric and coatings. Stuffing allows the fabric to conform to the irregular spaces in your pack, filling voids and spreading out the stress randomly. The one exception might be for very large, heavy canvas tents that don’t fit otherwise.
The Bottom Line
Packing a tent is not about fitting a sausage into a tube. It’s about treating the fabric as a flexible filler for your backpack and the poles and stakes as external tools. Ditch the manufacturer’s stuff sack as soon as you leave the parking lot. Stuff the tent body loosely into your pack’s core. Secure the poles on the side and the stakes in a bottom pocket.
When the tent is wet, quarantine it in a waterproof bag. When you get home, store it loose in a breathable cotton sack. This method saves space on the trail and saves your tent’s waterproof coating for years of use. It turns a chore into a two-minute ritual that makes every camp setup faster and every hike more comfortable. Your back and your tent will thank you.
