
How to Collapse a Tent Properly: Expert Tips & Techniques
This post contains affiliate links. As an Amazon Associate, we earn from qualifying purchases.
To collapse a tent correctly, reverse your setup: clear gear, open vents, detach the rainfly, remove stakes by the stake (never the fabric), collapse poles by pushing sections together, then loosely roll the tent body. Always ensure the tent is completely dry before long-term storage to prevent mold.
The moment you decide to pull a stake by its fabric loop, you’ve already lost. I’ve seen more tents die from takedown haste than from storm damage. This guide is the reverse of setup: it’s a damage-control drill. We’ll cover the sunny-day ideal, but more importantly, the muddy, rain-slashed reality, like how to handle a tent when the poles are frozen, a trick I learned the hard way on a frigid Adirondacks trip.
Key Takeaways
- Pull the stake itself, not the tent’s loop. Yanking the fabric concentrates force on a few stitches, which can tear instantly, as noted in the Eureka Sunrise manual.
- Collapse poles by pushing sections together. Pulling on shock-corded poles, a common error, forces sections apart and can damage the internal cord or end caps.
- A damp tent stored for just two days can sprout mold. If you must pack it wet, loosely roll it and commit to drying it fully within 24 hours of getting home.
- Roll your tent for home storage; never fold it in the same sharp crease repeatedly. This prevents cracking the waterproof coating.
- Store your tent loosely in a breathable cotton sack or large box, not compressed in its original stuff sack, to preserve fabric and seam integrity.
Why Is the Takedown Sequence So Critical?
Rushing the breakdown seems harmless until you’re facing a ripped loop or a snapped pole section. The correct sequence isn’t just tidy; it systematically removes tension and prevents you from fighting the tent’s structure. Doing steps out of order, like pulling stakes before detaching the rainfly, leaves the tent under uneven stress, making everything harder and risking damage.
Proper tent takedown is a reverse-engineering of the pitch, designed to systematically release structural tension and isolate components for safe handling, thereby preventing fabric tears, pole damage, and hardware failure.
Ignoring the manual’s sequence is how I nearly ruined my first serious backpacking tent, a Marmot Tungsten 2P. I was tired, it was getting dark, and I yanked a pole from its sleeve. The sudden release sent two sections separating inside the fabric tunnel. I spent 45 minutes with a headlamp in my teeth, fishing for the lost piece with a stick. The MSR Tents Owner’s Manual explicitly warns against this: “Push, don’t pull, your poles through the sleeves. Pulling the poles will cause sections to separate and potentially damage the pole or your tent fabric.”
TL;DR: Follow the reverse order of setup to safely release tension and handle each component separately.
What’s the Step-by-Step Process for a Dry, Sunny Day?
This is the ideal scenario. The goal is a clean, organized pack-out that sets you up for an easy next pitch.
Before you start: Ensure no gear is left inside. A forgotten knife or carabiner can puncture the floor. Check that the area is clear of sharp sticks and rocks that could snag the fabric.
- Empty and Ventilate. Get every single item out. Then, open all doors and windows. This isn’t just for airing out; it releases the internal air pressure and lets the fabric go completely slack. A taut tent is your enemy during takedown.
- Detach the Rainfly and Guylines. Unclip every buckle and undo every strap. Untie all guylines, coiling them neatly as you go. If your fly is a separate piece, shake it off and consider packing it in its own sack or a different compartment of your pack.
- Remove the Stakes. The Right Way. This is the most common failure point. Work your way around the perimeter. For each stake, wiggle it side-to-side to loosen the soil, then pull it straight up by the stake itself. The generic Home Depot Product Manual states it in all caps: “NEVER PULL ON THE TENT TO REMOVE STAKES AS THIS COULD RESULT IN PROPERTY DAMAGE OR PERSONAL INJURY.” Drop stakes into a dedicated bag so you don’t lose one.
- Collapse the Poles. For clip-style attachments, unclip every single one first. For pole sleeves, push the pole through the sleeve toward the center of the tent; never pull it out. For the collapse itself, pinch two pole sections together to release the shock cord’s tension, then gently push them together. Let the cord do the work.
- Fold Loosely, Then Roll. Lay the tent body as flat as possible. Fold it loosely into a long, manageable rectangle, varying the fold lines from your last trip. Then, starting at the end opposite the door, roll it up gently. Avoid stuffing, which creates sharp, random creases.
This method works for most standard dome and cabin tents, from affordable Naturehike models to premium Marmot tents. The principles are universal.
How Do You Handle a Soaking Wet Tent?
The golden rule is “never store a tent wet,” but sometimes you have no choice. The real-world procedure is about damage control.
| Condition | Immediate Action | At-Home Imperative |
|---|---|---|
| Heavy Dew/Condensation | Shake vigorously, wipe interior with a microfiber towel, pack loosely. | Hang in a ventilated space (garage, shower rod) within 12 hours. |
| Rain-Soaked Fabric | Shake off excess water, loosely roll (do not stuff!), keep separate from dry gear in a trash bag. | Erect in a dry space with fans circulating air within 24 hours. |
| Muddy Footprint | Wipe down with a damp cloth or use a soft brush on-site. Pack loosely. | Hose off, scrub gently with water and a soft brush, dry completely. |
The Kodiak Canvas Swag Tent owner’s manual provides the definitive advice for this scenario: “If you must take the tent down while still wet or damp, loosely roll it for transport. After transport, immediately unroll and set up or hang out to dry thoroughly before long-term storage.” That word “loosely” is critical. A tight roll traps moisture and heat, creating a perfect incubator for mold.
For some technical shelters like the Exped Vela I Extreme, the instructions offer a clever workaround: you can disassemble and pack the inner canopy dry while leaving the rainfly out. For the next setup, you pitch the wet fly first, then hang the dry inner.
Common mistake: Stuffing a damp tent tightly into its sack for the drive home, this concentrates moisture and heat, guaranteeing mildew growth in under 48 hours. I learned this with a pricey Big Agnes Copper Spur HV UL2 after a sudden downpour. A week later, the smell of wet dog and dirt was permanent, along with a map of black mildew spots. A professional cleaning couldn’t fully restore it.
Never use soap or detergent unless absolutely necessary. The Kodiak manual warns that soaps “can damage the water-repellant treatment of the canvas.” For synthetic tents, a residue-free tech cleaner like Nikwax Tech Wash is a safer bet for a deep clean.
Are There Different Rules for Canvas and Synthetic Tents?
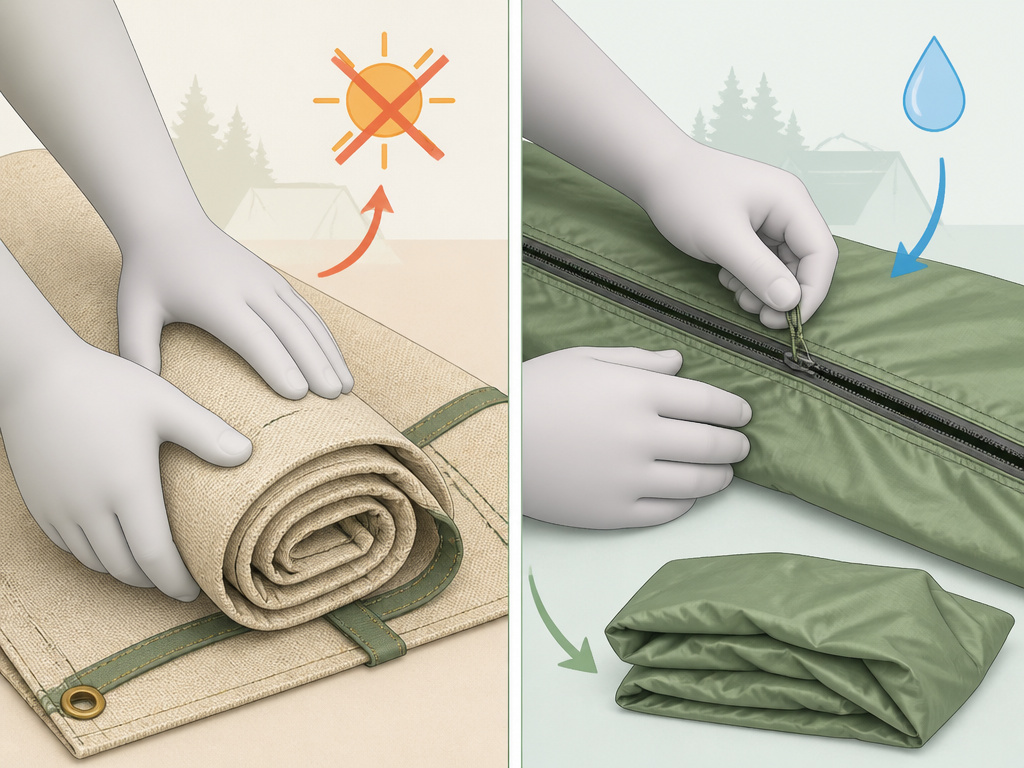
Absolutely. The materials have different vulnerabilities, and treating a canvas tent like a nylon one (or vice versa) can ruin it.
Caring for Canvas Tents
Heavy-duty canvas tents are durable but require specific care. They are breathable and can absorb moisture.
* Dry-Only Storage is Non-Negotiable. The Kodiak manual is absolute: “Your tent must be completely dry, inside and out, before storage!… Storing a wet or damp tent, even for a short time, can ruin it and void the warranty.” Condensation counts as damp.
* Roll, Don’t Fold. The manual specifies to “roll the tent from head to foot.” This prevents creating permanent crease lines that weaken the canvas fibers over time.
* Cleaning and Re-treatment. “Hose down with water and wipe with a cloth.” For retreating, use only a silicone-based repellent like Kiwi Camp Dry® Heavy Duty Silicone Waterproofing Spray. Other treatments can clog the fabric’s pores.
Caring for Synthetic Tents
Most modern dome, pop-up tents, and ultralight tarp tents are made from nylon or polyester.
* Beware of Coating Creep. The waterproof coating on the underside can become sticky if stored in a hot, compressed state. Always store loosely.
* UV is an Enemy. While drying, avoid prolonged direct sunlight, which degrades fibers and coatings faster than rain.
* Zipper Care is Key. Before collapsing, ensure all zippers are fully closed. A caught zipper during a forceful fold will break teeth or shred fabric.
Understanding these differences is part of choosing the right shelter, whether you’re shopping for durable canvas tents or lightweight two-man tents for the trail.
How Can You Avoid Breaking Poles and Hardware?
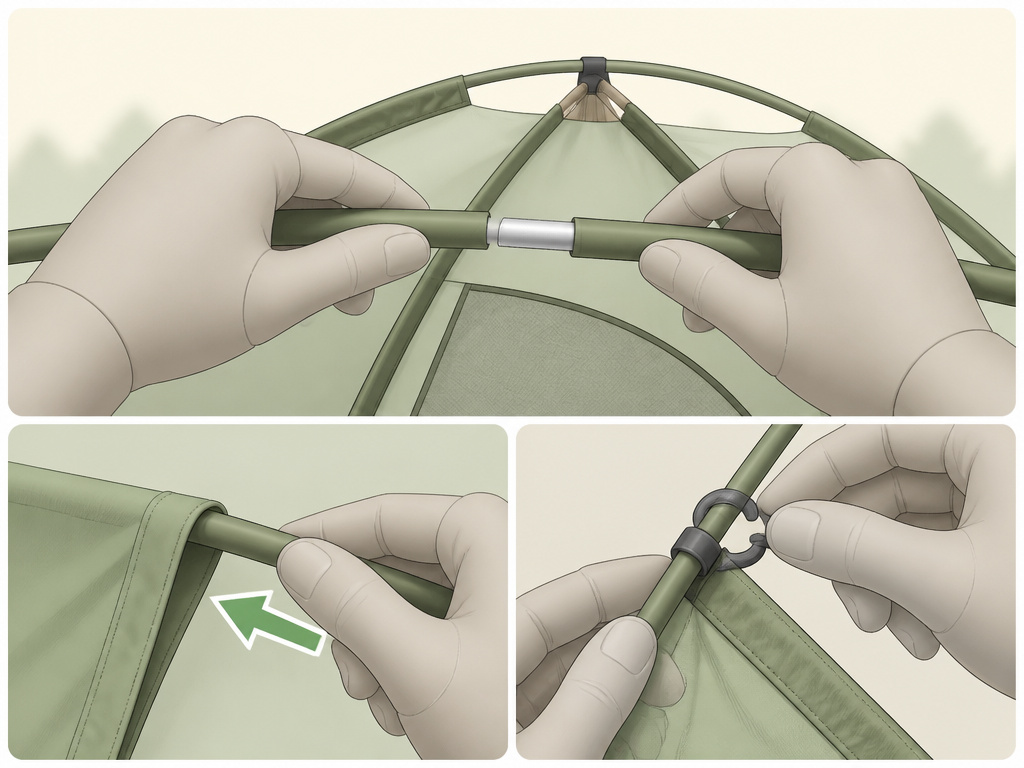
Nearly all pole damage happens during setup or takedown, not in a storm. The hardware is more fragile than the fabric.
Shock Cord and Pole Care
The elastic cord inside keeps sections together. The MSR manual cautions: “When unfolding and folding, do not allow the shock cord to pull and snap the ends together. This can damage the pole ends.” Guide poles together gently, hand-over-hand.
Sleeves vs. Clips: Different Techniques
- Pole Sleeves: You feed the pole through a fabric tunnel. Remember: Push, don’t pull. Pulling creates friction that can separate pole sections inside the sleeve.
- Clips: These are simpler but stress points. Always unclip each one from the pole before attempting to collapse the frame. Folding a pole with a clip still attached can crack the plastic.
A simple maintenance routine extends the life of all your tent camping gear. After each trip, I give poles a quick wipe-down to remove grit that can grind at the joints.
| Component | Failure Mode | Correct Technique |
|---|---|---|
| Shock Cord | Letting poles snap together stretches or frays the cord. | Guide poles together gently, controlling the tension. |
| Pole in Sleeve | Pulling the pole out separates sections inside the fabric. | Push the pole through the sleeve toward the tent’s center. |
| Plastic Clip | Folding pole with clip attached cracks the clip. | Unclip fully from the pole before collapsing the structure. |
| Stake | Pulling by the tent loop tears stitches or fabric. | Wiggle stake, then pull it straight up by its body. |
What’s the Best Way to Pack a Tent for Long-Term Storage?
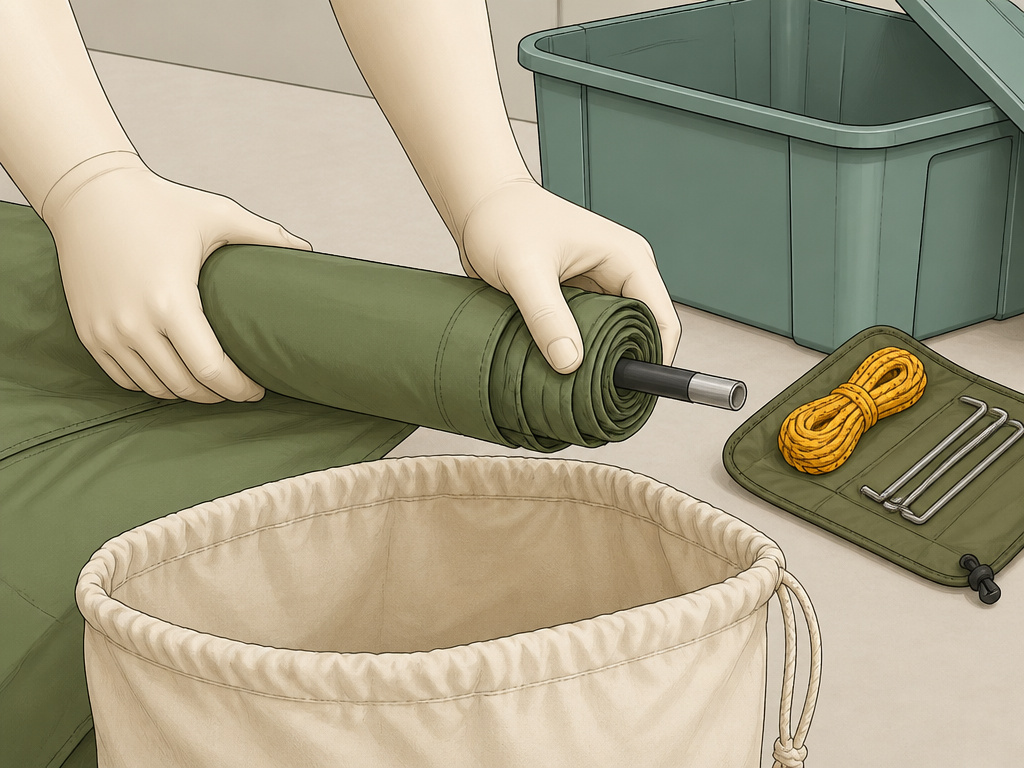
How you put the tent away at home determines its lifespan over winters and decades. The stuff sack is for transport, not for storage.
Forget Folding. Always roll for home storage. Folding in the same sharp pattern every time creates permanent stress lines where the waterproof coating will eventually crack. Rolling varies the bend points. This applies to everything from compact tents to large stand-up tents.
Upgrade Your Storage Bag. Get a large, breathable cotton storage sack or use a plastic tub without sealing it airtight. The tent needs to breathe. Compressing it tightly in its original sack for months stresses seams and fabric memory. If space is an issue, just leave the compression straps on your stuff sack completely loose.
Create a Safe Storage Environment. Keep your tent in a cool, dry place away from direct sunlight. Never store it with:
* Insect Repellent: DEET-based sprays can melt synthetic fabrics and coatings.
* Stoves or Fuel: Fumes can permeate fabric and are a fire hazard.
* Sharp Objects: This includes loose tent stakes or tools. Use dedicated organizers for your tent accessories.
A well-maintained tent is a reliable shelter for years. The difference between a tent that lasts three seasons and one that lasts a decade often comes down to these final ten minutes of care.
Frequently Asked Questions
Do you fold or roll a tent for storage?
I roll mine for home storage, it saves the coating from cracking on sharp creases. But for my bulky, old car-camping tent? I sometimes fold it loosely because it’s too large to roll neatly. The real enemy is the same sharp crease, year after year. So, roll if you can, fold loosely if you must, but never crease sharply.
What’s the trick to collapsing a pop-up tent?
Clear the interior first. Then, find the central hub, usually a button or collar. You often need to twist or push this hub downward while simultaneously folding the legs inward. It should collapse in on itself. Never force it; if it resists, check for fabric caught in the joints.
Is it okay to leave a tent in its bag all year?
You can, but don’t leave it tightly compressed. The original stuff sack is designed for transport, not for months of storage. For long-term health, transfer it to a larger, breathable bag like an old pillowcase or a dedicated oversized storage sack to reduce stress on the seams.
How long does it take for mold to grow on a wet tent?
Mold spores can begin to germinate in under 48 hours in a warm, damp environment. The smell, a sour, earthy odor, is often the first sign. Once set in, mildew causes permanent stains and degrades fabric strength and waterproofing.
Can you fix a shock cord that has lost its tension?
Yes, it’s a common repair. You’ll need a replacement shock cord and a repair sleeve or end cap. It’s a manageable DIY project with online tutorials, or many outdoor repair shops like Rainy Pass Repair offer the service for a reasonable fee.
What Actually Matters
Collapsing a tent isn’t about speed; it’s about reversing the setup with intention. The core principles are simple but absolute: pull the stake, not the tent. Push the pole, don’t yank it. And treat moisture as the ultimate enemy. A dry, loosely rolled tent, stored with care, will be your reliable shelter for countless adventures. Rush it, and you’re just borrowing time until your next gear purchase. For more on choosing a shelter that fits your style, explore our guides on the best two-person tents for couples or durable canvas tents for basecamp luxury.
