
How to Decorate a Tent for a Wedding with Key Safety Rules
This post contains affiliate links. As an Amazon Associate, we earn from qualifying purchases.
To decorate a tent for a wedding, you must solve three problems in order: secure anchoring against wind, layered lighting for mood and visibility, and soft fabric treatments to hide the industrial frame. The specific numbers matter, 18-inch stakes, 6-8 strands of 48-foot lights for a 20×40 space, and 108-inch wide chiffon draping, because guessing leads to a blowdown, a dark cavern, or a budget blown on the wrong supplies.
Most people start with the Pinterest board. They buy miles of fairy lights and bolt the fabric to the frame before the tent is even pegged down. That’s the mistake. You’re building a temporary venue, not a dollhouse. The wind doesn’t care about your color scheme. The local inspector will shut you down if your 800-square-foot structure lacks a permit. This guide walks through the non-negotiable safety specs first, then layers on the magic that makes it a wedding.
Key Takeaways
- Permits start at 400 sq. ft. The NFPA 101 Life Safety Code triggers review there, but your city might require one for a tent as small as 200 sq. ft. Call your building department before you spend a dollar.
- Anchor points are not suggestions. For a standard 20×40 tent, you need a minimum of 12 anchor points, one every 10 feet. On grass, that’s 18-inch steel stakes driven at 45 degrees. On pavement, you need 100 lbs of water ballast or concrete per point.
- Lighting is a two-layer system. Overhead ambient lighting (string lights) provides the glow. Separate task and accent lighting (uplights, lanterns) define spaces and prevent shadows where people eat and mingle.
- Fabric width is critical. Sheer draping fabric comes in a standard 108-inch width. Buying narrower 54-inch fabric means double the seams, double the work, and a cheap look.
- Climate control is part of decor. A sweltering tent is a decorated failure. Factor in industrial fans for summer or portable radiant heaters for autumn before you block airflow with drapes.
The First Rule: Anchor Before You Adorn
Your tent is a sail. A 20×40 frame tent can catch over 5,000 pounds of wind force in a 30 mph gust. OSHA guidelines mandate that anchoring systems must be rated for local wind speed, but most rental companies provide only the minimum for a calm day. You are responsible for the upgrade.
Common mistake: Staking only at the corners, the center of each wall bows inward in a crosswind, and the entire structure can shuffle several feet across the lawn, shearing guy lines and collapsing a corner.
The math is simple. You need one stake-and-guy-rope anchor every 10 feet along each side. A 20×40 tent has a 120-foot perimeter. That’s 12 anchor points minimum. For each point on grass, use a 18-inch steel stake driven at a 45-degree angle away from the tent. Pull the rope tight until the tent’s sidewall is firm, not drum-tight. You should get about 1/2 inch of flex when you push on the fabric.
In areas with regular winds above 25 mph, or if you’re on the coast, switch to 24-inch stakes. The extra length matters. In sandy soil, you’ll need screw-in auger anchors or longer stakes.
| Surface Type | Anchor Solution | Minimum Weight/Stake | Failure If Skipped |
|---|---|---|---|
| Grass / Soil | 18-inch steel stake, 45-degree angle | N/A | Tent walks in wind, sidewalls collapse onto guests within an hour of a breeze. |
| Hard Surface (asphalt, concrete) | Water ballast tanks or concrete blocks | 100 lbs per anchor point | Tent lifts at a corner in a gust; frame joints buckle, causing a partial collapse. |
| Sandy / Soft Soil | 24-inch screw-in auger anchor | N/A | Stake pulls out vertically; tent tumbles like a kite. |
TL;DR: One anchor every 10 feet. 18-inch stakes on grass, 100-lb weights on pavement. Skip this, and your decor becomes dangerous debris.
For large events, the choice of a shelter is foundational. You’re not just picking a canopy; you’re selecting the venue’s bones. This is where understanding different structures pays off. A sturdy frame from a reputable supplier of large-capacity tents is designed for this load, while a flimsy party tent is not. The principles of anchoring a wedding tent are the same as securing any temporary shelter, much like ensuring a spacious car camp tent can handle a mountain squall.
Lighting: Your Tent’s Atmosphere Engine
Lighting a wedding tent is not about brightness. It’s about eliminating harsh shadows and casting a warm, flattering glow. You need two distinct systems: ambient lighting for overall illumination and accent lighting for visual interest and task areas. Mixing them up is how you get a space that’s either blinding or gloomy.
Ambient lighting means overhead string lights. For a 20×40 tent, you’ll need 6 to 8 strands of 48-foot café or bistro string lights with Edison bulbs. Space them about 2 feet apart, running perpendicular to the long side of the tent. This creates a grid. Plug them into a GFCI-protected circuit with a heavy-duty outdoor extension cord. Never daisy-chain more than three strands.
Warm white lighting, with a color temperature of 2,700–3,000K, makes skin tones look healthy and food appear appetizing. Cool white LEDs (5000K+) feel like a parking lot.
Accent lighting defines the space. This is where you get creative.
– Uplights: Battery-powered LED uplights cost $15-$25 each. Place them behind plants, at the base of columns, or along the tent walls to wash the ceiling with color. Six to eight units for a 20×40 tent is a good start.
– Fairy Lights: For weaving into draping or lining centerpieces, use 33-foot strands of warm-white LED fairy lights. They’re low-heat and safe near fabric.
– Paper Lanterns: Use a mix of 6-inch, 8-inch, and 12-inch paper lanterns clustered at varying heights over the dance floor or dessert table. Hang them with clear fishing line.
| Lighting Type | Best Use Case | Quantity for 20×40 Tent | Power Source |
|---|---|---|---|
| Edison String Lights | Overhead ambient grid | 6–8 strands (48-foot each) | GFCI Outdoor Outlet |
| Battery LED Uplights | Washing walls, highlighting decor | 6–8 units | Rechargeable Battery |
| Warm White Fairy Lights | Weaving in drapes, lining tables | 10–12 strands (33-foot each) | Battery or Outlet |
| Paper Lantern Cluster | Dance floor or focal point accent | 20–30 lanterns (mixed sizes) | N/A (passive) |
Your lighting plan is part of your broader essential camping gear mindset. It’s about creating a functional, inviting environment after dark. The same careful planning applies when choosing tent lighting solutions for a camping trip, you need reliable, atmospheric light that doesn’t fail.
Draping and Fabric: The Soft Architecture
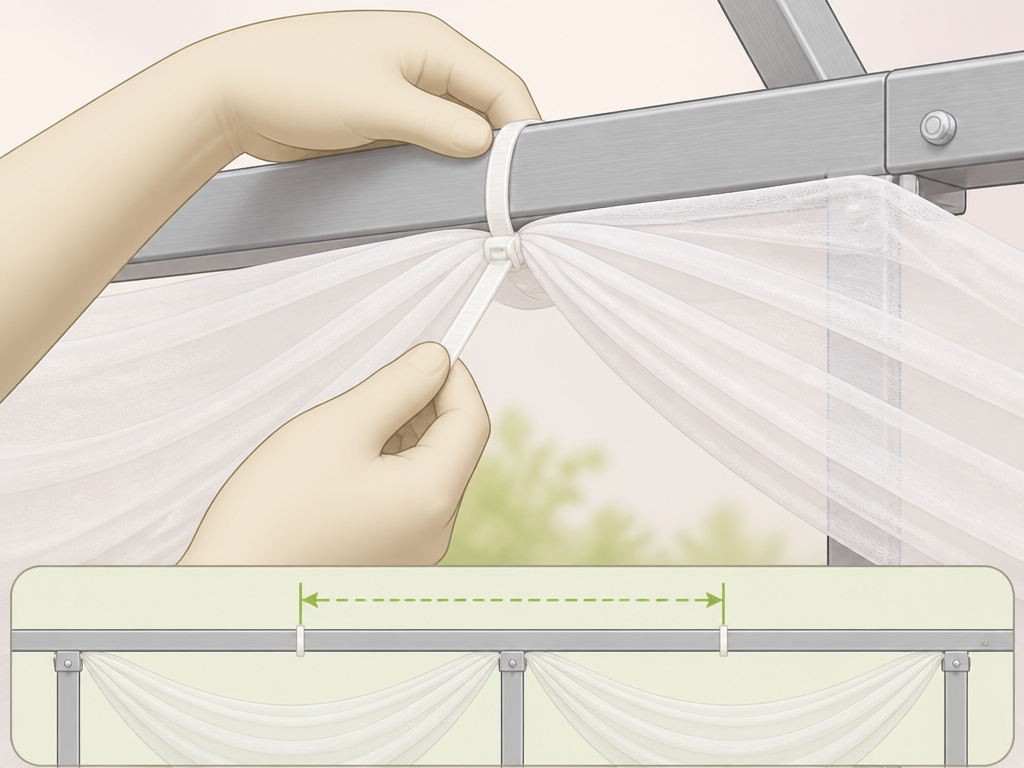
The tent frame is industrial. Your job is to hide it. Draping fabric transforms aluminum poles and taut vinyl into a soft, romantic ceiling. The key is fabric width and attachment points.
Sheer fabric like chiffon or voile is the standard. It diffuses light beautifully and moves slightly in the breeze. Buy it 108 inches wide (that’s 9 feet). This width allows you to drape from the center peak down to the side without a seam. It costs $2-$5 per yard. You’ll need about 50 yards for a 20×40 tent to create a basic swag pattern.
Attach the fabric to the frame using cable zip ties. Poke a small hole in the fabric hem, loop the zip tie through, and secure it to the frame’s crossbar. Do not use duct tape or glue, it will fail as humidity changes, and it ruins the rental tent. Space your attachment points every 4-5 feet along each crossbar.
For a more dramatic effect, create a “starfield” ceiling. Drape a base layer of white chiffon. Then, pin or glue small battery-operated LED tea lights to the underside of the fabric at random intervals before you hoist it. When the overhead lights dim, the ceiling twinkles.
TL;DR: Use 108-inch wide chiffon, attach with zip ties every 4-5 feet. Narrow fabric looks amateurish.
Flooring, Layout, and Focal Points
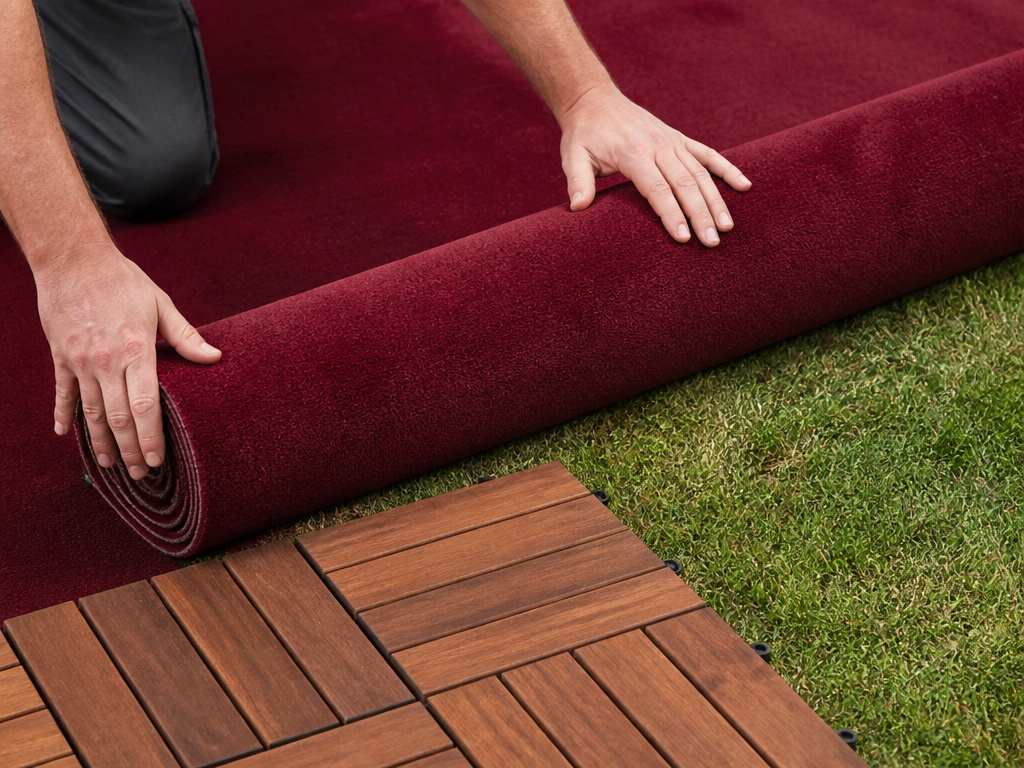
A bare grass floor is a problem. It’s uneven, damp, and ruins heels. Your options, in order of cost and formality:
1. Event Carpet: Rolls out, provides a uniform surface, moderate cost. Feels formal.
2. Interlocking Deck Tiles: Creates a solid, level dance floor. High cost, high impact.
3. Natural (Mown Grass): Only for ultra-casual, dry-weather weddings. Have a backup plan.
Lay out your space with traffic flow in mind. The entrance should not dump guests into the back of the dining area. Create a clear path to the bar, then the seating, then the dance floor. Use furniture, portable tent AC units, or decorative screens to subtly direct movement.
Every tent needs a focal point. This is where you spend your visual budget.
– Sweetheart or Head Table: Frame it with a 6×8 foot faux greenery panel ($80-$150). Flank it with two larger uplights.
– Ceremony Arch: A simple wooden arch built from 2x4s costs $40-$80 in lumber. Drape it with the same fabric and lights used inside the tent for cohesion.
– Dance Floor: Define it with a perimeter of low-voltage LED rope lights or a canopy of hanging lanterns.
These focal points are your “wow” moments. The rest of the decor should support them, not compete.
Weatherproofing and Comfort Details
Your beautiful tent is a microclimate. On a sunny day, it becomes a greenhouse. On a cool night, it’s a wind tunnel. Decoration includes managing these conditions.
For hot summer weddings, rent industrial pedestal fans. Place them at ground level to pull in cool air, not at head height to blast guests. Consider a portable air conditioners for smaller, enclosed tent styles if the budget allows. For chilly autumn evenings, portable radiant propane heaters are safe for tent use (no open flame). Place them around the perimeter, never under draping.
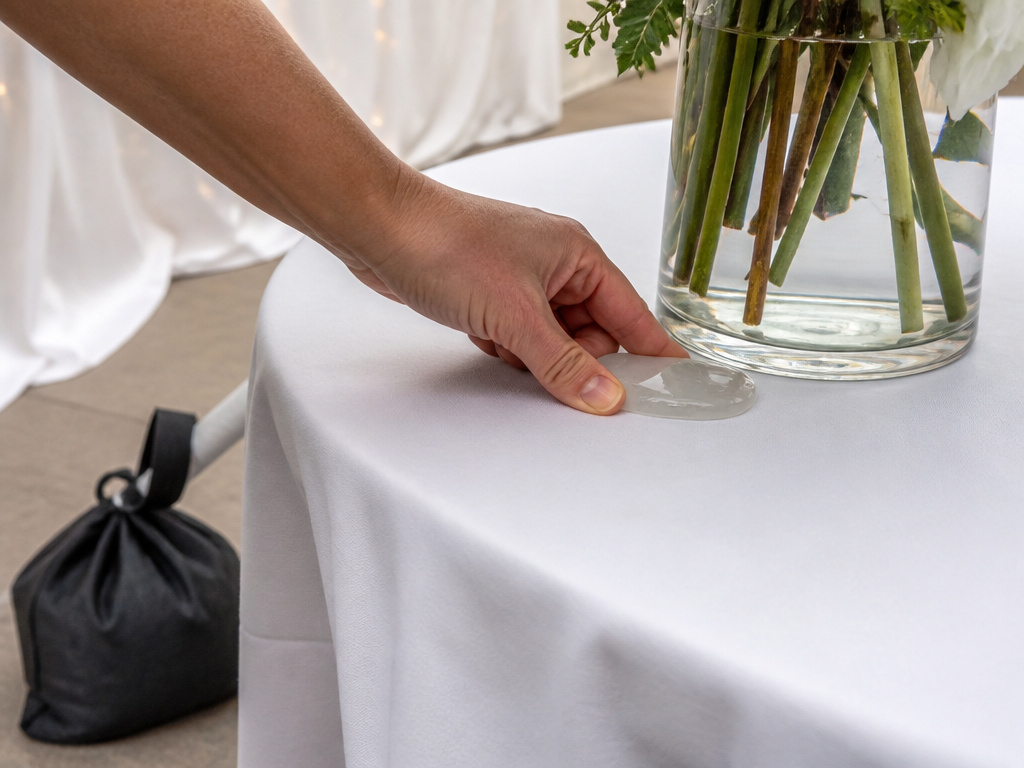
All your decor must be secure. Anchor centerpieces with museum putty. Use sandbags or weights for freestanding decor like signage or planters. Assume a gust will test everything.
Common mistake: Using candles in glass hurricanes without a solid base, a wobbly table plus a dancing crowd equals a fire hazard in a fabric-lined space. Use flameless LED candle replacements instead.
This attention to comfort is what separates a good event from a great one. It’s the same philosophy behind selecting the right tent camping accessories, you’re solving for real-world conditions to keep people happy.
Permits, Power, and the Pre-Event Walkthrough
This is the boring, vital part. Ignore it and your event doesn’t happen.
Permits: The threshold is often 400 square feet, citing NFPA 101. A 20×40 tent is 800 sq. ft., you will likely need a permit. Your tent fabric may also need NFPA 701 flame resistance certification. The rental company should provide this documentation. Call your local building department 8 weeks out.
Power: You cannot run a caterer’s hotbox, a band’s PA, 500 lights, and a coffee station on two household circuits. You need a dedicated generator or a heavy-duty power drop from the main service. Map every outlet and device. Add a 30% buffer.
The day before the wedding, do a full walkthrough with your planner or a trusted friend. Turn on all lights at dusk. Check for dark spots. Walk the perimeter and tug every stake. Look at the tent from the guest arrival point. Does it look inviting? Does it look safe? That’s your final exam.
Frequently Asked Questions
What is the best lighting for a wedding tent?
combination of warm white overhead string lights (2700-3000K) for general glow and battery-powered LED uplights for accenting walls and decor. Avoid cool white LEDs; they create a harsh, unflattering light.
How much does it cost to decorate a wedding tent?
Budget $800-$3,000+ for DIY decor, excluding the tent rental and flooring. Costs include lighting ($200-$600), fabric draping ($100-$300), focal point materials ($150-$500), and accent pieces like lanterns or uplights. Professional design services start around $2,500.
Can you hang things from a tent ceiling?
Yes, but only from the structural frame points (crossbars, center poles) using zip ties or carabiners. Never puncture the tent fabric or hang heavy items from the ceiling vinyl, which can tear or sag. Always distribute weight evenly.
How do you keep a wedding tent warm?
Use portable radiant propane heaters placed around the perimeter of the tent, ensuring they are never under draping or too close to guests. For a more consistent solution, some companies offer temporary heating systems that duct warm air into the space.
What size tent do I need for 100 guests?
For a seated dinner and dance floor, you’ll need approximately a 30×40 tent (1200 sq. ft.). This allows about 12 sq. ft. per person for tables, chairs, buffet, bar, and dancing space. Always round up.
The Bottom Line
Decorating a wedding tent is a construction project disguised as a design project. The sequence is non-negotiable: secure it, light it, then soften it. Your local wind speed and permit office matter more than your Pinterest palette. The specs are your friends, 18-inch stakes, 108-inch fabric, 2700K lights. Get those right, and the magic you layer on top has a solid foundation. Forget them, and you’re just decorating a problem.
