
How to Decorate a Tent Without Regrets
This post contains affiliate links. As an Amazon Associate, we earn from qualifying purchases.
To decorate a tent successfully, you must choose gear that battles condensation, respects your tent’s sloped geometry, and survives real weather. It’s not about replicating a living room, but creating a durable, cozy camp home that won’t fail you by the second night.
Most guides sell you a fantasy. I’m here to give you the reality, forged from my own mistakes under leaky rainflies and in bone-dry batteries. Your decor needs to work with the wild, not against it.
This is a practical blueprint. We’ll cover the four tent types that dictate your entire plan, the specific lighting models that actually last, the rug materials that won’t ruin, and the non-negotiable safety checks. I’ll use my own failures, and a few victories, to show you what works when the sun goes down and the humidity rolls in.
Key Takeaways
- Your tent’s walls are the boss. A dome tent’s steep slope means decor lives only in the dead center. Fight it, and you get a soggy, damaged mess.
- LED is your only lighting choice. I killed a set of Duracell Optimum batteries in under two hours by daisy-chaining fairy lights. A single, quality LED strand will glow all weekend.
- Rugs must be cleanable, not just cute. A deep-pile rug is a moisture trap. For glamping or frequent use, a polypropylene flatweave like an IKEA STOENSE shakes clean and won’t mildew.
- Condensation is the silent decor killer. Anything touching the tent fabric, a wool blanket, a tapestry, will be soaking wet by morning. Always maintain a 3-inch gap.
- Do a full dress rehearsal at home. Assemble your entire lighting scheme for an hour. You’ll discover the weak battery, the faulty clip, and the trip hazard before you’re fumbling in the dark.
What Type of Tent Are You Decorating?
Look, your tent’s geometry is boss. You can’t fight a dome tent’s sloping walls. I’ve tried, and all I got was a damp, crumpled tapestry. Work with the walls you’ve got, not the ones you wish you had.
The usable height in a standard three-person dome tent slopes from roughly 40 inches at the peak to under 12 inches at the edges. Placing any item taller than 10 inches off-center forces it against the tent wall, where morning condensation will soak it and constant pressure can stress the seam stitching over multiple trips.
Backpacking Tents (Dome/Geodesic)
With their steeply sloped walls and minimal peak height, decor here is purely functional. I use a single Black Diamond Orbit LED lantern hung from the ceiling loop. That’s it. Any wall hanging will rub against the rainfly. Floor space is too precious for a rug. Your color scheme comes from your sleeping bag and a compressible pillow with a bright cover. It looks intentional without costing you an ounce of pack weight.
Cabin Tents
Models like the REI Co-op Kingdom 6 offer near-vertical walls and standing room. This is your true canvas. You can hang lightweight tapestries with clips, run string lights along the ridge pole, and even use a narrow storage unit. The vertical space lets you create “zones” for sleeping, lounging, and gear. Just remember: the walls are still fabric. Never use pins or strong tape that can compromise the waterproof coating.
Bell Tents & Glamping Tents
Designed for aesthetics, their high central peak invites a focal point. Think a low wooden crate as a table, a large area rug, and fabric draped from the center pole. The foundation for this look is often a set of durable canvas shelters. The key for any rental operation, as noted by outfitters, is that every textile must withstand frequent commercial washing. Delicate items need not apply.
Popup Beach Tents & Canopies
These are for day use. Decoration is about sun shade and wind resistance. Use weighted, waterproof banners or flags. Anything electrical is a liability near sand and water. Keep it simple, colorful, and secure. A good pop-up beach tent is perfect for quick ambiance but falls apart if you overcomplicate it.
TL;DR: Match your ambition to your tent’s shape. Dome tents get one light; cabin tents get zoned layouts; bell tents get a central statement; pop-ups get simple, weighted accents.
How Do You Choose Lighting That Won’t Die?
Lighting sets the mood and is the most common point of failure. The wrong choice leaves you in the dark, literally.
Battery-Powered LED String Lights
These are the universal winner. I rely on the Coleman 48ft LED String Lights (model 2000022411). The frosted bulbs diffuse a warmer, gentler light than the clear ones, and they’re rated for outdoor use.
* Why they work: LEDs are cool-running and miserly with power. The plastic casing shields the circuits from humidity.
* My mistake: Last summer, I linked four strands of similar lights in my Big Agnes Copper Spur HV UL2 for a “fairy grove” effect. The Duracell Optimum batteries, advertised for 50 hours, died before we finished dinner. The manual’s runtime assumes one strand, not a daisy chain. Now I use a single strand and a LuminAID as backup.
Lanterns for Task and Ambiance
A soft-glow lantern serves dual purpose. My go-to is the LuminAID PackLite Nova. It’s lightweight, waterproof, and can be hung or placed.
* Placement rule: Never put a lantern on the tent floor. It will get kicked. Use a carabiner on a ceiling loop. Sound obvious? You’d think. But I’ve watched a perfectly good Black Diamond Orbit lantern get kicked across the tent, twice, because someone forgot the ‘hang it’ rule.
The High-Risk Zone: Fairy Lights & Paper
Battery-operated fairy lights are fine if they’re LED. Paper lanterns are a terrible idea. I watched a friend’s store-bought paper lantern disintegrate into a pulpy mess during a single humid night in the Adirondacks. The glue failed, and the paper absorbed condensation until it tore.
* If you must: Only use battery-powered LED fairy lights inside a durable, fabric-covered lantern shade. Never leave paper exposed to tent air.
| Lighting Type | Best For | Real-World Failure Mode |
|---|---|---|
| LED String Lights | Ambient mood, all-night glow | Daisy-chaining strands triples drain; weak alkalines die in <4 hrs. |
| Battery Lantern (LED) | Portable task light, hanging glow | Left on overnight drains pack; hard drops can crack lens housing. |
| Incandescent String | Not recommended | Drains 3 AA batteries in ~3 hours; heats fabric to unsafe temps. |
| Paper Lantern | Not recommended | Disintegrates from humidity within one night; glue fails. |
| Candles/Flame | Never use inside a tent | Fire hazard; wax ruins sleeping bags (a reported incident); carbon monoxide risk. |
Common mistake: Draping string lights directly across the tent’s roof panel. Even slight weight can create a low spot where rainwater pools during a storm, stressing the seam and leading to a drip.
Attachment is Everything
Use miniature plastic spring clips or Command Outdoor Clips (model CPC2-4PK). Weave lights along the tent’s existing seams or guy lines. This keeps wires off the wall fabric, preventing conductive moisture buildup. Never use duct tape, it leaves residue and degrades coatings, or pins, which puncture the waterproof layer.
What Textiles Actually Work in a Tent?
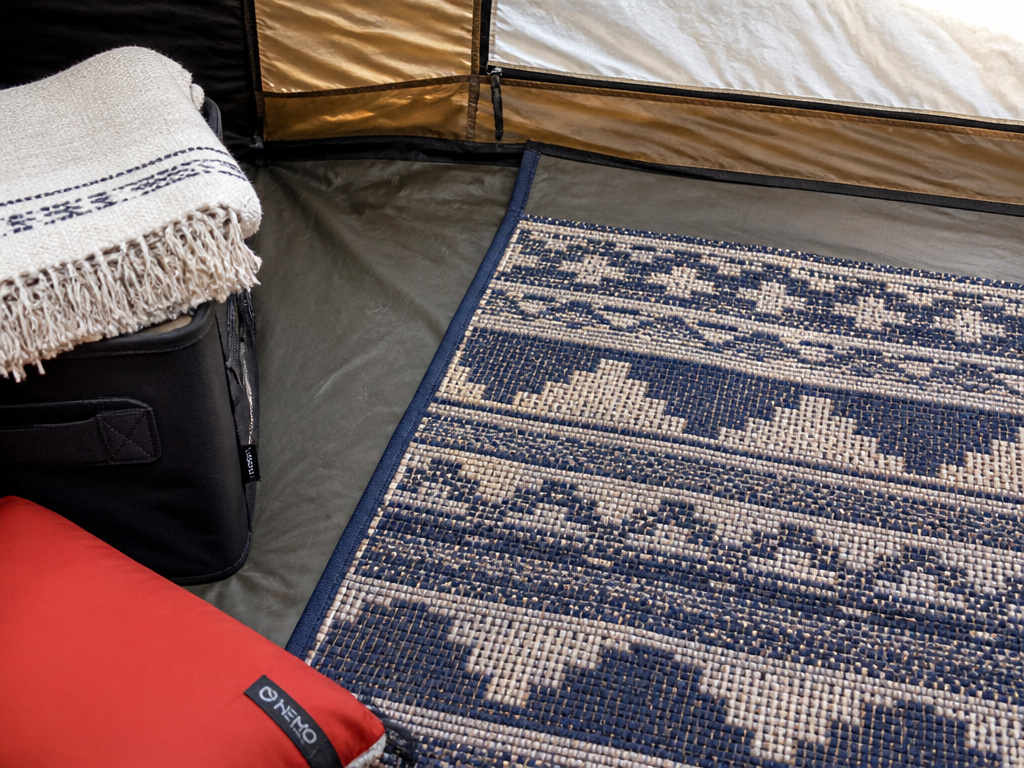
Soft textiles make a tent feel like home. They also absorb moisture, trap dirt, and can mildew in your gear bag overnight. Your choices need to balance coziness with camp practicality.
The Right Rug
A rug defines the space. The ideal one is flat-woven, like a polypropylene flatweave (IKEA’s STOENSE is a classic), and sized to leave a 6-inch border of tent floor around the edge.
* Why the border? It keeps the rug’s edges from curling against the tent wall, where condensation will wick moisture into the fibers. A damp rug is heavy, smelly, and a pain to dry.
* Glamping rental rule: Outfitters insist rugs must be “shake out, spot clean, commercial washer.” A deep-pile shag rug fails on all counts. It traps moisture and debris, becoming a matted mess after one weekend.
Blankets and Throws
Keep them on top of sleeping bags or folded on a bin. Never hang them as wall decor.
* The consequence: I hung a beautiful wool blanket for ambiance in my spacious car camp model. Morning condensation added 20% to its weight. It took two full sunny days to dry and carried a musty smell for weeks.
* A better trick: Drape a lightweight cotton throw over your packed gear in a collapsible bin. It hides clutter and adds texture without the moisture risk.
Pillows
Your safest textile upgrade. Skip standard bed pillows. Use compressible camping pillows with removable, washable covers. A bright cover is your easy pop of color.
Where to Shop
Your local home goods store often has suitable indoor-outdoor rugs. For specialized, packable tent camping accessories like compact blankets, outdoor retailers have optimized options.
How Do You Manage Storage and Surfaces?
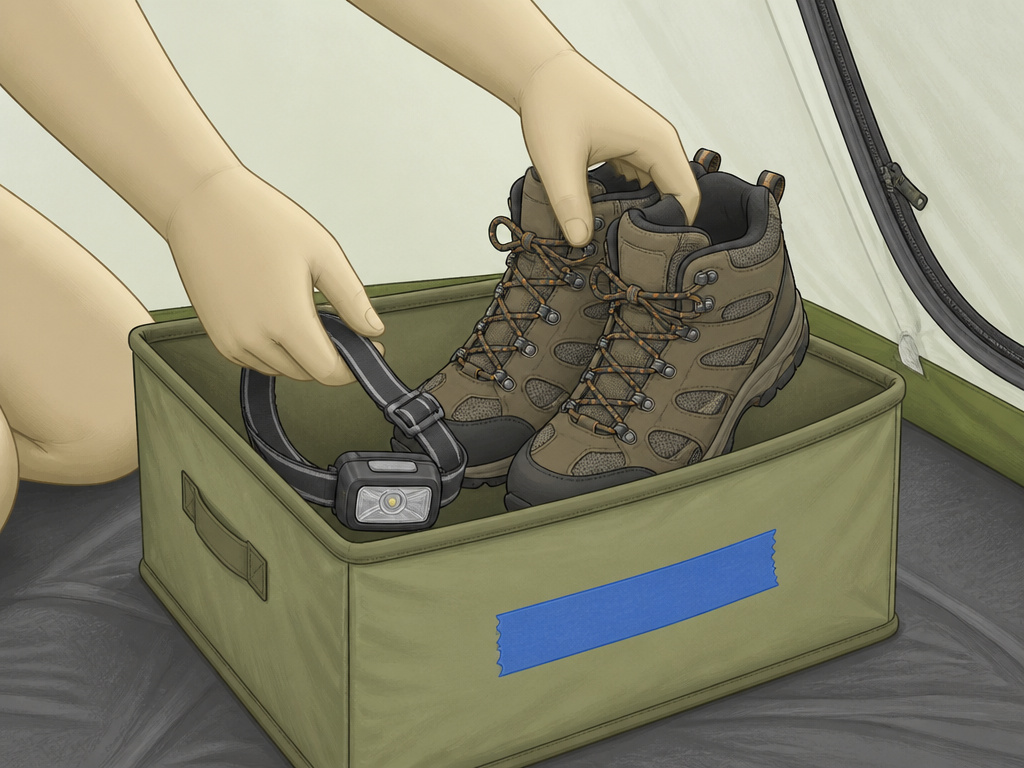
Decor isn’t just what you see; it’s how you manage what you don’t see. Clutter murders ambiance faster than a dead battery.
- Designate a “Landing Zone” Bin. Right inside the door, place a collapsible bin for shoes, headlamps, and dog leashes. It contains the mess before it spreads.
- Label Everything with Colored Tape. A small red stripe for kitchen gear, blue for clothes. If you skip this, you’ll be digging through every bin for the spatula at dusk, spilling contents and frustrating everyone.
- Create a Stable Central Surface. In a bell tent or large cabin, a wooden fruit crate or folding camp table acts as an anchor for a lantern or coffee.
- Use Built-In Lofts Wisely. Don’t overload the mesh pockets with heavy items. They’re for small, frequent-use things: glasses, phones, a book.
- Enforce the “One Home” Rule. Every item gets a single, designated spot. Headlamps go in the left loft. Water bottles live in the door bin. This prevents the frantic, light-destroying search after dark.
Before you start: Tent fabrics are flammable, and battery failures can overheat. Use only cool-running LED lights rated for outdoor use. Secure all wires away from door zippers and high-traffic areas to prevent snagging and falls. Never leave powered lighting unattended while the tent is empty.
What Are the Non-Negotiable Safety Checks?
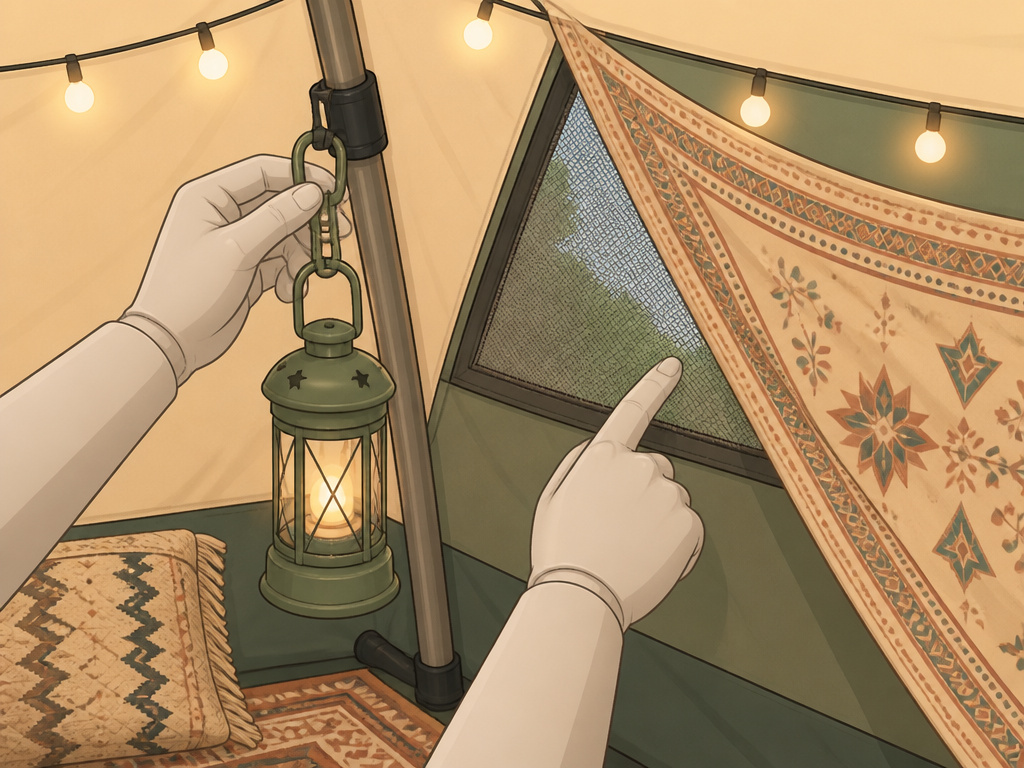
A beautiful tent is useless if it’s hazardous. Run this list after your decor is set, before you zip up for the night.
- Ventilation Check: Are any mesh windows or vents blocked by a tapestry or storage bin? Blocked airflow skyrockets condensation.
- Trip Hazard Scan: Walk the interior in low light. Secure any curled rug corners or cords stretched across a path.
- Heat Test: Feel the housing of any battery-operated device after 30 minutes of use. Is it warm? Overheating electronics are a fire risk, turn them off.
- Attachment Tug: Give every clipped or hung item a gentle pull. A Command hook failing at 3 AM is annoying; a heavier item falling is dangerous.
- Weather Prep: If rain is forecast, ensure all decor is clear of the walls where water might seep. Is anything tall pressing against the roof, creating a potential water pocket?
Common mistake: Using regular household Command strips instead of Outdoor Clips. The generic ones often fail in high humidity, dropping your decorative tent lanterns onto sleeping campers.
How Does Glamping Change the Rules?
Decorating your own tent for a weekend is one thing. Setting up a large family tent for a commercial glamping operation is another. The principles scale, but the stakes are higher.
Durability is Everything
Every item must survive dozens of guests. This means metal-frame fairy lights over plastic, commercial-grade indoor-outdoor rugs, and blankets with reinforced edges. Delicate items are a liability.
Cleanability Dictates Choice
As noted in the glamping guide from Wilderness Resource, textiles must withstand frequent washing. A white cotton duvet cover shows every scuff. A darker, patterned, bleach-safe fabric is smarter. Rugs need a weekly commercial wash cycle.
Permanent Storage Changes Materials
You can’t pack and unpack between guests. Many glamping setups have permanent decks, built-in furniture, and on-site storage. This means your decor items must weather the elements full-time, pushing you toward weather-resistant woods, powder-coated metals, and UV-stable fabrics.
The Takeaway
If you’re building a repeatable setup for a family camping shelter you’ll use often, or for a rental business, invest in durable, cleanable items from the start. It costs more upfront but saves endless replacement costs and labor.
Frequently Asked Questions
What’s the fastest way to make a tent feel cozy?
Clip a single strand of warm-white LED string lights along the ceiling seam and roll out a solid-color, flat-weave rug. These two elements transform the space instantly with minimal risk. Everything else is a bonus.
How do you hang things without damaging the tent?
Use miniature plastic spring clips, Command Outdoor Clips, or carabiners on existing loops. Never use tape, glue, pins, or staples. They peel coatings, puncture waterproof layers, and leave residues.
Can I use my home decorations in a tent?
You can, but you’ll regret it. Household paper banners, delicate pillows, and plug-in lights aren’t built for humidity, condensation, or packing. They’ll fail. It’s more cost-effective to buy a few dedicated pieces of camping gear for decoration meant for the outdoors.
What should you absolutely avoid?
Avoid open flames, paper decor, items with small detachable parts (choking hazard), heavy wall hangings, and any electrical item not rated for outdoor use. Also, mind the power draw if you’re running a portable air conditioner, overload a circuit and you’re back in the dark ages.
Is decorating a backpacking tent worth the weight?
For pure function, no. For morale on a long, rainy trip, a tiny colorful item can be worth it. A single bright stuff sack or a mini LED lantern can make a cramped space feel intentional without adding real pack weight.
The Bottom Line
Decorating a tent bridges the gap between survival and enjoyment. The goal isn’t to replicate your living room, but to create a functional, inviting camp home that withstands the real world.
Remember your three anchors: Lighting must be LED and home-tested. Textiles must handle moisture and be cleanable. Layout must respect your tent’s geometry and safety. Your list of camping setup essentials should now include a few decor staples, clips, a rug, LED lights, as vital as your sleeping bag.
Pack your decor in its own bag. Set it up first when you arrive. Working in a pleasantly lit, defined space turns unpacking from a chore into part of the adventure. And when you’re done, everything packs away neatly, ready to make the next site feel like home.
