
How To Make A Tent | Your Complete DIY Guide To Construction
This post contains affiliate links. As an Amazon Associate, we earn from qualifying purchases.
Making a tent from scratch requires matching three things: a proven pattern, fabric that fits your climate, and thread strong enough to hold the seams under wind load. Silnylon at 1.1-1.9 oz/sq yd works for three-season use; Silpoly or Dyneema Composite Fabric (DCF) handles alpine conditions but costs $25-35 per yard. The flat-felled seam is the stitch that survives.
Most guides tell you to sew panels together. They skip the part where the wrong thread weight snaps at the first gust, or where a generic silicone sealant slides off DCF fabric and leaves the seams leaking by morning. That first rainstorm teaches more than any tutorial.
This guide walks through sourcing a real pattern, picking fabric by its hydrostatic head rating, and sealing seams for 200+ days of waterproofing. It also covers the field test that matters more than the sewing.
Key Takeaways
- Use polyester thread, Tex 70 or higher for main seams. All-purpose cotton thread rots in UV light and snaps under tension in under a season.
- Match your seam sealer to your fabric: pure silicone thinned with mineral spirits for Silnylon/Silpoly, PU-specific sealer for coated nylon, and special tape (not liquid) for DCF.
- The MaryJanesFarm magazine pattern calls for 58 yards of 58″-60″ Sunforger marine canvas, cut into eleven wall sections, two door sections, and twelve roof sections, a solid foundation for a DIY canvas shelter.
- Pitch and hose-test every seam for 10 minutes before trusting the tent outdoors. Field testing by Backpacking Light shows properly sealed DIY seams last 200+ days, but only if the sealant bonds correctly.
- Store a finished tent loose in a breathable sack, never compressed. Folding the same crease every time weakens the fabric’s coating at the bend.
The Two Fabric Choices That Decide Your First Storm
Head to any fabric store and you’ll find ripstop nylon by the bolt. It’s cheap. It’s also the reason most first-try tents fail. The fabric choice isn’t about color or feel; it’s about hydrostatic head, the water pressure the material can withstand before leaking.
Silnylon (silicone-coated nylon) weighs 1.1-1.9 oz/sq yd and handles 3,000-4,000mm of water pressure. It’s the baseline. For a weekend car-camping shelter, it’s fine. Silpoly (silicone-coated polyester) adds about half an ounce per square yard and costs a few dollars more per yard, but it sags less when wet. That matters when a midnight downpour adds weight to your roof.
Then there’s Dyneema Composite Fabric (DCF). At 0.5-0.8 oz/sq yd and an 8,000-10,000mm hydrostatic head, it’s the mountaineering standard. It also runs $25-35 per yard. You don’t start with DCF. You graduate to it after you’ve sewn a few shelters and know exactly how much seam allowance you need.
The Industrial Fabrics Association International (IFAI) handbook states manufacturer instructions override its own guidance, but for DIY, the fabric’s specs are your manufacturer. Ignore them and you get a soggy sleeping bag.
TL;DR: Silnylon for fair-weather trips, Silpoly for damp climates, DCF for serious alpine exposure. Your choice dictates every other material in the build.
The 0.095 vs .105 Trade-Off That Burns Out Stitching
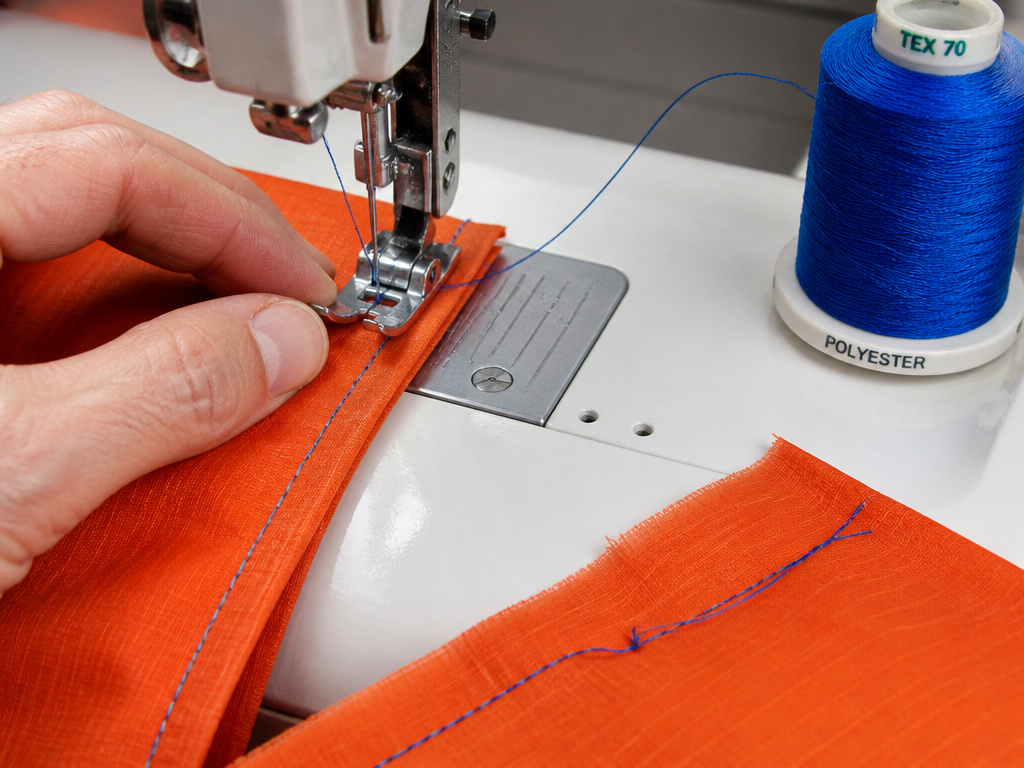
Your sewing machine has a tension setting. Your thread has a weight rating. Mismatch them and the seam rips, not at the stitch, but between them. The fabric tears.
Polyester thread is mandatory. Cotton rots in sunlight. Nylon thread stretches and can shrink when wet, puckering seams. You want Tex 70 or higher. The number refers to weight; higher is stronger.
Common mistake: Using all-purpose thread on a tent seam, the UV degradation starts within two months, and the first 30-mph wind gust will pop stitches like a zipper.
Heavier thread demands a heavier needle. A size 14 or 16 denim needle punches through multiple layers of Silnylon without deflecting. A smaller needle bends, skips stitches, and leaves weak spots. Change the needle after every eight hours of sewing. A dull needle heats the thread and weakens it.
| Thread Type | Best For | Risk If You Skip It |
|---|---|---|
| Polyester, Tex 70 | General tent seams, rainfly panels | UV rot within a season; seams fail under moderate wind load |
| Nylon thread | Emergency repairs only | Shrinks when wet, puckering the seam and creating stress points |
| Bonded nylon (heavier) | High-stress points (pole sleeves, tie-outs) | Overkill for panel seams; can be too stiff and cut lighter fabrics |
Your machine’s tension needs a test run on scrap fabric. Too tight and the fabric gathers. Too loose and the stitch doesn’t lock. Run a 6-inch line, then pull the fabric apart with your hands. The thread should break before the seam pulls apart. If the fabric tears, your needle is too large or your thread is too heavy for the material.
TL;DR: Tex 70 polyester thread with a size 14 needle. Test tension on a scrap until the thread snaps before the fabric does.
Sourcing a Real Pattern (Not Just a Sketch)
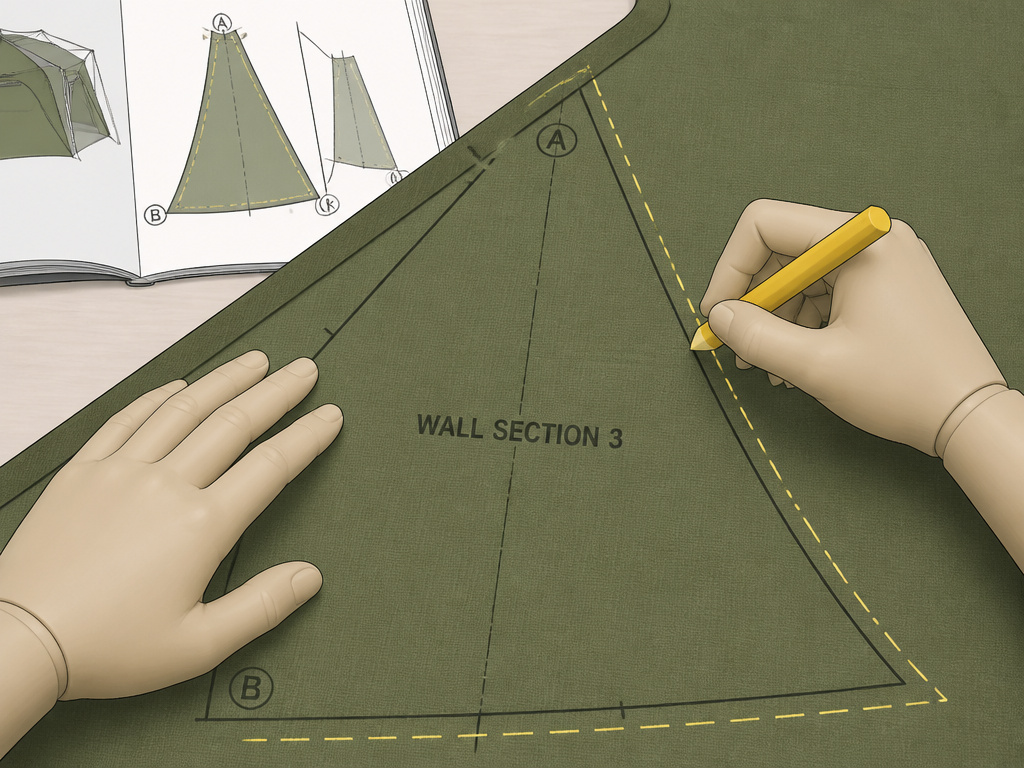
You can draft a tent pattern from geometry. The result is a lot of wasted fabric and panels that don’t align. Start with a published pattern.
The MaryJanesFarm magazine pattern is a primary-source example. It specifies eleven wall sections, two door sections, twelve roof sections, and twelve 2″ x 12″ strips for stake loops. It calls for 58 yards of 58″-60″ Sunforger cotton marine canvas. That’s a complete bill of materials.
For a lighter backpacking tent, tarp shelter designs from experienced makers are a better starting point. These lightweight tarp tents use fewer panels and simpler geometry. The trade-off is living space, a tarp won’t give you the vertical walls of a cabin-style tent frame.
Transfer the pattern onto your fabric with chalk or a washable marker. Add a consistent 1/2-inch seam allowance to every edge. Mark matching points (“Top Edge A” to “Roof Panel B”) before you cut. This prevents sewing a panel inside-out at 2 a.m.
Cutting, Marking, and the One Seam That Can’t Be Wrong
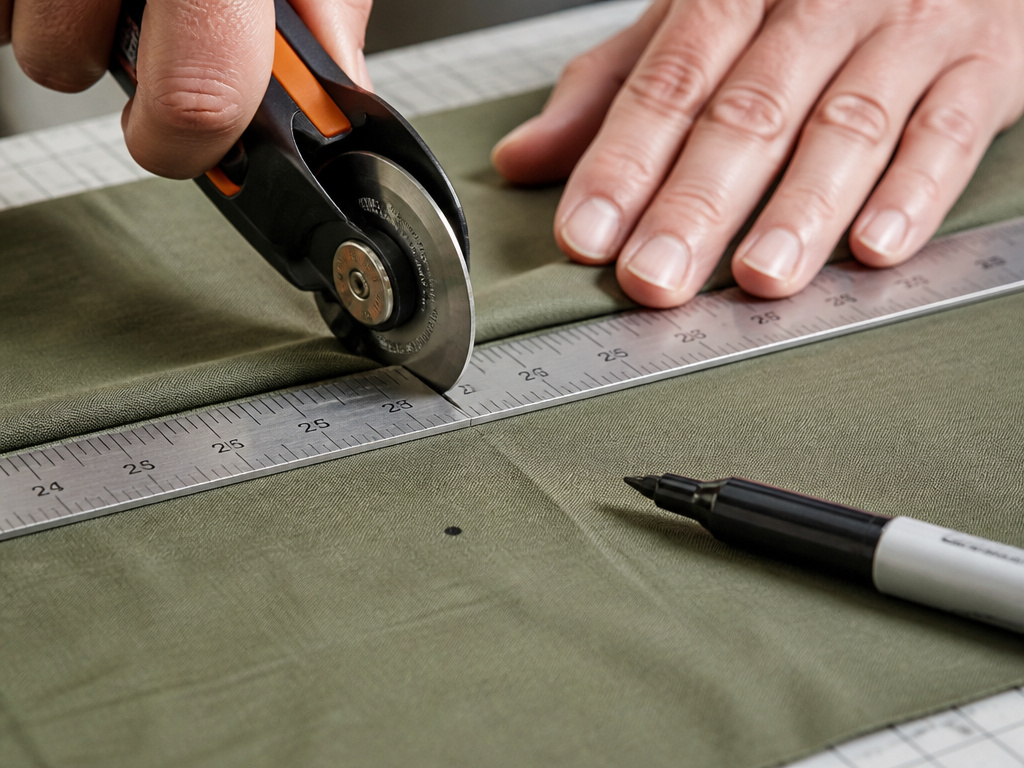
Lay your fabric flat on a clean floor. Use sharp fabric scissors or a rotary cutter against a metal straightedge. Dull blades fray the edge, and a frayed edge slips under the presser foot, ruining your seam allowance.
Cut all your panels at once. Then, before you move anything, mark those alignment points with a small dot of permanent marker on the wrong side of the fabric. When you feed two pieces under the machine, the dots face each other. If they don’t, stop. You’re about to sew a panel backwards.
The first seam you sew is the ridge line or the roof peak. If this seam is off by even a quarter-inch, the whole tent leans. It’s the one seam you check twice, pin every six inches, and sew slowly.
I rushed the ridge seam on a simple A-frame tarp once. I was off by maybe 3/8 of an inch over eight feet. The finished shelter pitched lopsided. Every stake line was wrong, the door zipper binded, and in a 15-mph wind it sounded like a sail flapping. I spent more time re-cutting and re-sewing that one panel than I did on the entire rest of the tent.
After the ridge, move to the wall panels. Attach them to the roof, then sew the wall seams together from the bottom up. Leave the bottom hem and door openings for last.
Seam Sealing: The 48-Hour Cure That Decides Waterproofing
Sewing makes a tent. Seam sealing makes it waterproof. This is where most DIY projects fail, because they use the wrong sealer for the fabric.
Silnylon and Silpoly require pure silicone sealant thinned with mineral spirits. PU-coated fabrics need a PU-specific seam sealer. Dyneema Composite Fabric (DCF) typically requires special tape, not liquid sealer. Using silicone on DCF is like painting plastic with watercolor, it beads up and slides off.
Mix a 1:1 ratio of silicone sealant and mineral spirits. Stir until it’s the consistency of heavy cream. Use a small, cheap brush to paint a 1-inch-wide strip over every stitched seam on the outside of the rainfly. Work in a well-ventilated area. The fumes are strong.
Let it cure for a full 48 hours. Don’t pack it. Don’t test it after 24 hours. The silicone needs time to cross-link and bond to the fabric. Research by Backpacking Light indicates a properly sealed DIY seam can remain waterproof for over 200 days of field use. A rushed cure fails in the first storm.
The Four Tools That Replace a $200 Service Visit
You don’t need a professional gear shop. You need four specific tools.
- A sewing machine with a walking foot. This feed mechanism pulls the top and bottom layers of fabric through at the same rate. Without it, slippery Silnylon layers shift, and your seams pucker. A basic home machine can work if it has a walking foot attachment.
- A seam sealant brush. Get a 1-inch cheap synthetic brush. You’ll throw it away after one tent because the silicone never fully washes out.
- A tent pole splint or short section of aluminum tube. When a pole snaps in the field, this sleeve slides over the break and secures with hose clamps or strong tape. It’s a permanent part of my essential camping gear kit.
- A rubber mallet. Driving stakes by hand bruises your palm. A mallet saves your hands and ensures stakes go in straight and deep, which is critical for storm-resistant tent security.
A tent stove vent installation requires more specialized tools like a hot knife and grommet kit, but for a basic three-season shelter, these four cover 95% of the job.
Pre-Trip Testing: The 78% Failure Catch
You’ve sewn, sealed, and attached the zippers. Now you hose it.
Pitch the tent in your yard, exactly as you would in the field. Get a garden hose with a spray nozzle. Spray every seam, every zipper, every corner for a solid 10 minutes. Look closely. Water should bead and roll off. A fine mist inside is condensation. A drip is a failure.
A study cited in the International Journal of Wilderness Medicine found that 78% of backcountry equipment failures could have been identified through proper pre-trip testing. Your home hose test is that checkpoint.
Check stake loops for stress. Tug on each guyline. Does the fabric distort? Do the stitches look strained? This is also the time to verify your tent lighting options fit under the rainfly and that your portable air conditioner hose port (if you added one) seals correctly.
If you find a leak, mark it with chalk. Let the tent dry completely. Then re-apply seam sealer only to that spot, following the same 48-hour cure. Don’t seal over wet fabric, it won’t adhere.
TL;DR: A 10-minute hose test in your backyard finds leaks before a 10-hour rainstorm does. Fix them while you have a dry garage and a full tube of sealant.
Wind, Snow, and Why Geometry Becomes a Safety Feature
A tent’s shape isn’t just about looks. It’s about load.
Roger Caffin’s field tests showed well-designed homemade shelters can handle sustained winds of 30-40 mph. Dome and tunnel designs spread the force evenly. A-frame tarps shed wind but can flap violently if not pitched taut. A pyramid design with a single central pole excels in snow, its steep walls (at least 45 degrees) prevent accumulation.
For winter use, canvas tent materials and heavier fabrics are the default. But even a Silnylon tent can be winter-worthy if its geometry sheds snow. The difference is the pitch angle. Less than 45 degrees and snow sticks, adding weight until something collapses.
Your guyline placement is part of the geometry. More lines create more stability points. Fewer lines make for faster pitching but a less stable shelter in gusts. There’s a direct trade-off between setup speed and stormworthiness.
Common mistake: Pitching a tent with slack guylines, in wind, the fabric billows and snaps stitches at the tie-out points. The first sign is a popping sound, like a button coming off a shirt.
Storage: The Silent Killer of DIY Waterproofing
You spent a week sewing and two days sealing. Now you stuff it into a tight stuff sack for six months. You’ve just undone half your work.
Store a tent loosely in a large, breathable cotton sack or an old pillowcase. Never leave it compressed. The coating on Silnylon and Silpoly can develop permanent creases, and those creases crack after a season. Folding it the same way every time accelerates the process.
Keep it in a cool, dry place away from direct sunlight. UV radiation weakens both the fabric and the thread over time, which is a key part of the Tent Industry Association safety handbook guidance on maintenance. A closet shelf beats a garage bin every time.
Before long-term storage, make sure the tent is completely dry. Even a faint damp smell means mold is growing in the seams. Mold eats the seam sealant and the thread.
Frequently Asked Questions
What is the absolute cheapest way to make a tent?
Use a poly tarp from a hardware store, some paracord, and a few stakes. It won’t be breathable, it’ll condense like a shower curtain, and it’s noisy in the wind. But it costs under $30 and keeps rain off. Follow a simple DIY tarp tent guide for pitching techniques.
Can I use a regular home sewing machine?
Yes, if it can handle multiple layers of medium-weight fabric and has a walking foot. You’ll be sewing straight lines, not curves. The machine must have a strong motor; a lightweight plastic-body machine will struggle and overheat.
How long does a homemade tent last?
With proper materials and storage, 3-5 years of regular three-season use. The seam sealant is the first point of failure, needing reapplication after about 200 days of field exposure. The fabric itself lasts longer, but UV degradation is constant.
Is making a tent actually cheaper than buying one?
For a basic tarp shelter, yes. For a full-featured double-wall tent with a rainfly, bug netting, and a tub floor, often no. Your savings come in customization, specific dimensions, extra tie-outs, tent add-on products integrated during build, not in raw material cost.
What’s the hardest part for a beginner?
Seam sealing. It’s messy, it’s chemical, and getting the consistency right (thin enough to soak in, thick enough to bridge gaps) takes practice. Doing it wrong means a leaky tent. Doing it right means a 48-hour wait before you can test it.
Before You Go
Making a tent teaches you why a $300 tent costs $300. The difference is in the seam allowance you measure twice, the thread weight you match to the fabric, and the 48 hours you let the sealant cure. Skip any of those and you get a fair-weather project, not a shelter.
Start with a tarp. Pitch it. Sleep in it. Get caught in the rain with it. Then decide if you want to invest in a sewing machine, 15 yards of Silnylon, and a weekend of your time. The skills transfer to repairs, which saves every tent you’ll ever own.
Your first one will be heavier than you planned. Your second one will be lighter. Your third one might actually be worth taking up a mountain.
