
How to Patch a Tent: A Hiker’s Guide to Durable Repairs
This post contains affiliate links. As an Amazon Associate, we earn from qualifying purchases.
To patch a tent correctly, you need the right adhesive patch, a meticulously clean surface, and full cure time. Match Tenacious Tape to nylon and polyester rainflies, and use transparent Tear Aid Type A for mesh. Cut a patch at least one inch larger than the damage, round the corners, and apply it to a dry, alcohol-cleaned surface. For a waterproof seal, finish with a flexible sealant like Seam Grip and let it cure for 24 hours.
I’ve lost count of the tents I’ve patched. Sometimes it’s a pine branch on a gusty night in the Lakes; other times, it’s the slow wear of a packed pole tip. The moment you see that tear, the temptation is to grab the nearest roll of duct tape. Resist it. That sticky residue is the ghost of repairs future, haunting your gear and making a proper fix impossible. A real repair isn’t a cover-up, it’s a restoration, bonding new material to old so it moves as one.
Let’s get our hands dirty. I’m splitting this into two mindsets: the ‘oh-crap’ field fix to get you dry until morning, and the ‘this-better-last’ garage job you’ll trust for seasons. We’ll use advice straight from the engineers at Big Agnes and MSR, and we’ll talk about the smell of isopropyl and the faint hope you remembered the seam sealer brush.
Key Takeaways
- Duct tape is a trip-ending mistake. Its adhesive degrades with UV and temperature, leaving a gummy film that blocks any proper patch from ever sticking.
- Tenacious Tape forms a permanent bond with nylon and polyester, making it the gold standard for rainflies. For mesh, Tear Aid Type A is transparent, flexible, and won’t clog the weave.
- Isopropyl alcohol cleaning isn’t optional. Skin oils and dirt repel adhesive; skipping this step is why most patches peel within a week.
- A patch must extend a full inch beyond all edges of the tear. A smaller patch concentrates stress, letting the tear simply run around it.
- Waterproofing requires a flexible sealant like Seam Grip feathered around the patch edges. Cure time is 24 hours, less, and it stays tacky, collecting dirt and pine needles.
What’s the Best Tape for Patching a Tent?
Your tent is a collection of different materials, each with its own personality. The rainfly is a taut, coated synthetic designed to shed water. The inner body is lighter and more breathable. The mesh is a loose weave for ventilation. Slapping the same fix on all three is a recipe for a second failure.
Tenacious Tape bonds permanently to nylon, plastic, and rubber. Its adhesive is designed for high-tension, waterproof applications on synthetic fabrics.
For rainflies and tent bodies, Tenacious Tape is the undisputed champion. MSR engineers specifically call it out for forming a permanent bond with nylon. It’s strong, comes in colors, and handles the stretch of a pitched fly. Its only downside is stiffness; on flexible mesh, it can act like a tiny sail, pulling at surrounding fibers.
For mesh holes and lightweight inner fabric, you need Tear Aid Type A. Big Agnes recommends it for its feather-light, transparent, and flexible properties. The adhesive grips without bleeding through the weave, making the repair nearly invisible and preserving airflow. It’s the difference between a repair and a replacement panel.
| Patch Type | Ideal Use Case | Key Strength | Critical Limitation |
|---|---|---|---|
| Tenacious Tape | Coated rainflies, tent bodies, floors. | Permanent chemical bond with synthetics; extremely high tensile strength. | Too rigid for mesh; can create a hard stress point in flexible fabric. |
| Tear Aid Type A | Mesh panels, lightweight inner walls, gear loft fabric. | Transparent, highly flexible, adhesive won’t clog mesh pores. | Lacks the sheer strength for high-tension areas like a taut rainfly corner. |
| Seam Grip Sealant | Sealing the perimeter of patches on waterproof surfaces. | Creates a flexible, waterproof gasket that moves with the fabric. | Applied too thickly, it remains tacky for weeks, collecting debris. |
Common mistake: Using duct tape on mesh, the adhesive liquefies with heat, seeps through the weave overnight, and glues strands together into a solid, non-breathing mess.
TL;DR: Tenacious Tape for the tough, waterproof jobs; Tear Aid for the delicate, breathable ones. They are not interchangeable.
How Do You Execute a Reliable Field Repair?
The tear happens miles in, the sky is darkening, and you just need to stay dry tonight. This is about a functional, fast fix using what’s in a decent kit, not a forever solution. I keep a pre-cut, rounded oval of Tenacious Tape in my first-aid kit for this panic. (It’s from that time on an AllTrails route near Coniston where I fumbled with scissors in the dark. Not recommended.)
- Dry and Clean (As Best You Can). Get the area as dry as possible with a bandana. If you have an alcohol wipe in your kit, use it. This removes surface grime and body oils, giving the adhesive a fighting chance.
- Cut a Generous, Rounded Patch. Use your knife or scissors to cut a patch that covers the tear with extra margin. Round the corners decisively. Sharp angles catch on pack straps and tent bags, giving the peel a starting point.
- Apply to the Outside. Stick the patch to the exterior, smoothing from the center out to push air bubbles to the edges. If it’s raining, work under your vestibule or a jacket held overhead. Adhesive on wet fabric is a guaranteed fail.
- Sandwich for Security. If you can access the inside of the tear, apply a second patch to create a stress-distributing sandwich. This is a great use for those smaller tent camping accessories like repair swatches.
- Mark It as Temporary. This fix is for survival. The adhesive hasn’t cured under ideal conditions. Plan to redo the repair properly at home, just as you would service other camping trip essentials after a tough trip.
Last season, during a downpour on the West Highland Way, I slapped a Tenacious Tape patch on my MSR Hubba Hubba NX rainfly without proper cleaning. The patch held for a day, then peeled, soaking my sleeping bag. I learned the hard way that my @dacia_uk crew’s rule, “alcohol wipe or regret”, exists for a reason.
TL;DR: A field repair is a bridge, not a destination. Dry, clean, patch, and plan to do it right later.
What Does a Permanent, Weatherproof Repair Look Like?
This is the garage or sunny-backyard project. It’s what the brands intend, and it’s what will last for seasons. The core principle from the U.S. Army technical manual TM-10-8340-243-13-P is clear: fabric should be clean and dry, and repairs are best done when the tent is not in use. Rushing this guarantees a second, more frustrating failure.
Before you start: Isopropyl alcohol will damage waterproof coatings. Use it only on the immediate, damaged area you are patching. Never clean your entire rainfly with it, as MSR warns this strips the DWR finish.
- Gather Precision Tools. You need your tape, sharp scissors (I use Fiskars 5” Micro-Tip), 70% isopropyl alcohol, clean lint-free cloths, and Seam Grip SIL or WP (more on that choice later). A dull scissors frays the tape edge, creating a peel point.
- Clean Meticulously. Soak a cloth and scrub the area on both sides, extending well beyond your patch boundary. You’re removing silicone, dirt, and skin oils that repel adhesive. Let it evaporate completely. This step separates a two-year repair from a two-week one.
- Cut with Intention. Follow NEMO’s rule: patch must cover the hole plus one inch of good fabric on all sides. Draw the shape on the backing, cut, and round the corners. A circle or oval has no single point for a peel force to attack.
- Apply the Outer Patch. Peel the backing slowly, position it over the tear, and lower it down. Don’t slide it. Press firmly from the center outward, you’ll feel the adhesive grab with a faint squeak. Burnish the edges with a spoon handle.
- Apply the Inner Patch. For rainflies or high-stress areas, apply a second, identical patch to the inside. This sandwich construction is critical for repairs on high wind tents or areas under constant tension, effectively halving the stress on each adhesive layer.
- Seal the Edges. For waterproof fabrics only. Apply a thin bead of the correct Seam Grip (SIL for silicone-coated nylon, WP for polyurethane) around the patch perimeter. Use a cheap brush to feather it out. A smooth, feathered edge sheds water; a thick, bumpy bead creates a dam.
- Cure with Absolute Patience. Let the repair sit flat for 24 hours. The sealant needs a full day to vulcanize. Testing it early weakens the bond. This patience is as crucial for a heavy rain tent repair as the tape itself.
How is Patching Mesh Different?
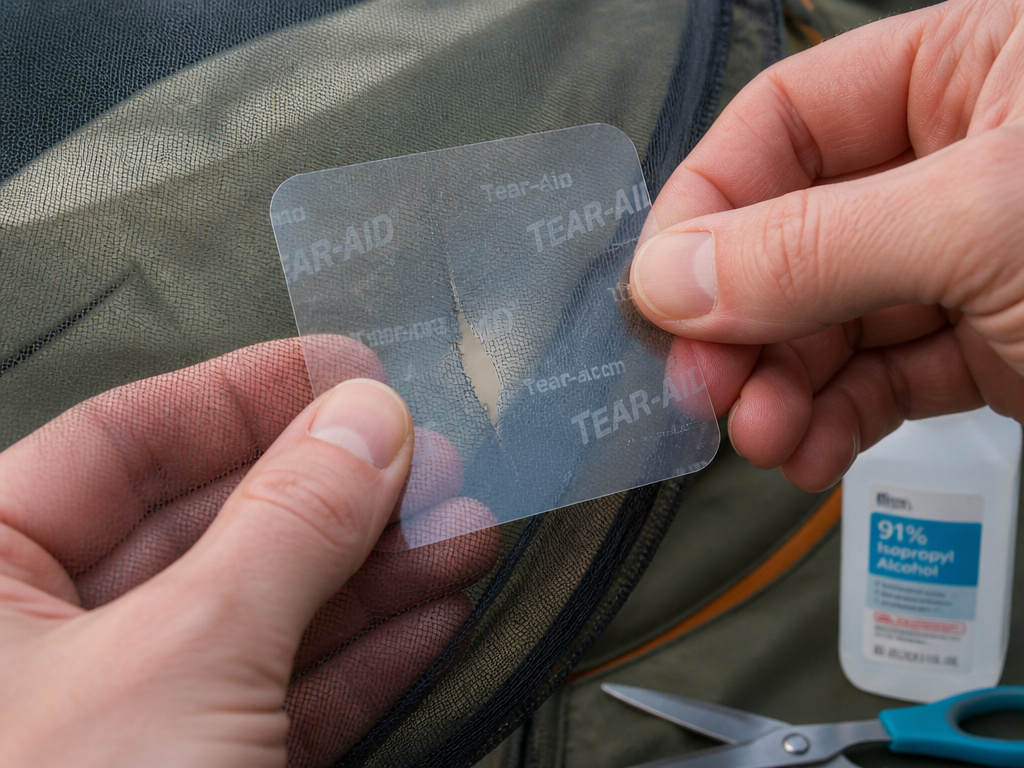
Mesh repair seems simpler, which is why most people botch it with a blob of sealant or a too-small piece of tape. The goal isn’t just to cover a hole; it’s to restore the weave without creating a dead spot for condensation.
Big Agnes has the perfect method: use two patches of Tear Aid Type A to sandwich the damaged mesh. The transparency keeps your view of the stars, and the flexibility means the patch moves with the breeze.
Cut two patches larger than the hole. Clean the mesh with alcohol, yes, even mesh has manufacturing residues. Apply one patch to the front, smooth it, then apply the second directly to the back, aligning carefully. The sandwich locks the torn strands in place.
Common mistake: Using liquid Seam Grip on mesh, it clogs the pores, creating a solid, non-breathing spot where condensation will pool and drip instead of passing through.
When Should You Avoid Stitching a Tear?
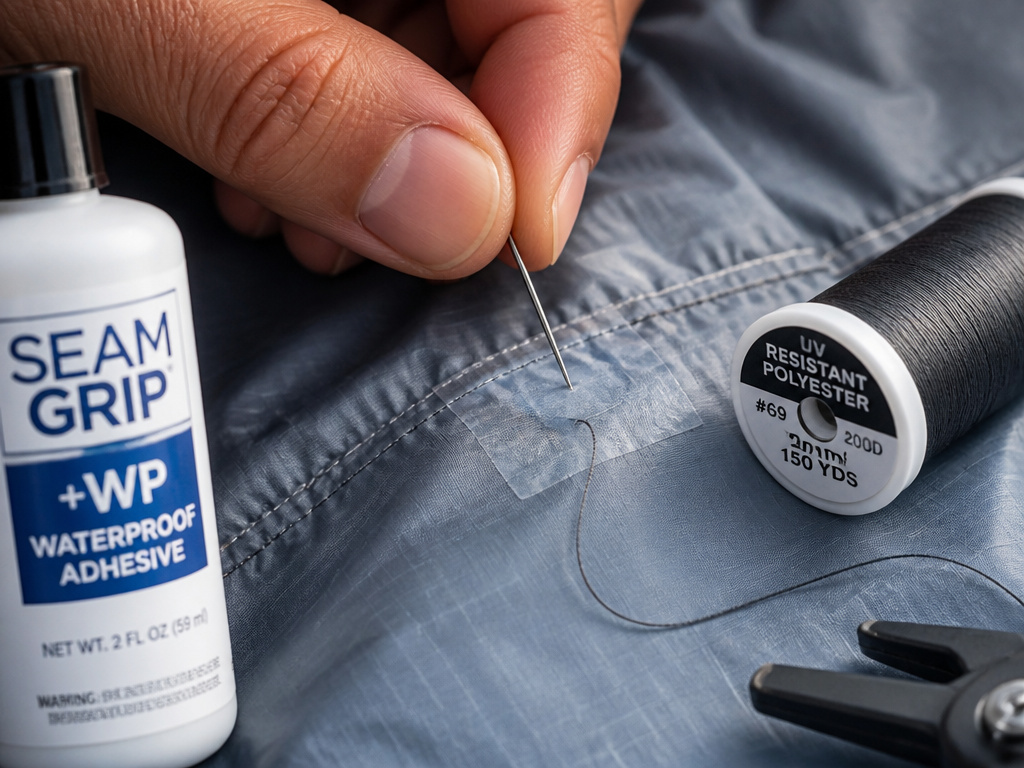
The old-school instinct to sew a tear is often the worst thing you can do for modern lightweight tents. MSR’s engineers state stitching should be a last resort because each needle puncture creates a new stress point and a potential leak path in waterproof fabric.
If you must stitch, say, a long tear where tape alone can’t hold alignment, do it only after applying a tape patch. The tape does the sealing and takes the load; a few stitches just keep the edges neat. Use UV-resistant polyester thread and then seal every single stitch hole with Seam Grip on both sides. It’s a tedious process, which is why tape is king for modern synthetics. For owners of traditional canvas tents, the calculus is different, as stitching is part of the original, robust construction.
What About Damaged Waterproof Coatings?
A specific edge case: you’ve used alcohol to clean a patch area on your rainfly, and now that spot “wets out” (soaks through) while the rest beads water. You’ve likely compromised the DWR (Durable Water Repellent) coating.
This isn’t a patch failure, but it needs fixing. You can revive the localized area with a DWR treatment like Nikwax TX.Direct Spray-On. Apply it sparingly only to the cleaned patch zone, following the product instructions. This restores the water-beading action without needing to treat the entire fly.
| Repair Scenario | Primary Fix | Secondary Consideration | Tool for the Job |
|---|---|---|---|
| Small Rainfly Tear | Tenacious Tape patch, inside & out. | Seal perimeter with Seam Grip. | Seam sealer brush for a feathered edge. |
| Mesh Hole | Tear Aid Type A sandwich patch. | Ensure patches are aligned on both sides. | Rounded scissors for patch shaping. |
| Tent Floor Puncture | Tenacious Tape sandwich patch. | Use a footprint thereafter to protect repair. | Heavy-duty tape for high abrasion area. |
| Compromised DWR Coating | Localized DWR re-treatment (e.g., Nikwax). | Apply only to cleaned patch area. | Spray-on applicator. |
A smooth, professional repair isn’t about skill, it’s about the right, cheap tool. A $3 seam sealer brush turns a globby sealant job into a clean, feathered edge that sheds water instantly.
TL;DR: Match your solution to the specific failure. A patch fixes the hole; a brush and DWR spray fix the side effects of the repair.
Frequently Asked Questions
Can I use Gorilla Tape or duct tape in a pinch?
You can, but you’re choosing a future problem. These tapes leave a tenacious residue that makes a proper Tenacious Tape bond impossible. If you use them, plan to cut away that tape and a margin of fabric later, applying your real patch over a larger, clean area.
How long will a proper Tenacious Tape repair last?
Applied correctly to a clean, dry surface, the repair often outlasts the surrounding fabric. I have patches on a 7-year-old tent that are still perfect. Failure usually comes from the patch edge catching and peeling, not the adhesive letting go.
Can I patch a tent while it’s wet or damp?
Absolutely not. The U.S. Army technical manual specifies fabric should be dry. Moisture prevents the adhesive from bonding directly to the fibers; it sticks to the surface water instead. When that evaporates, the bond fails. Always dry the tent completely first.
My patch is on but it’s still leaking. Why?
You likely didn’t seal the edges. On a rainfly, water can wick under the tape through the fabric’s weave. The solution is a flexible sealant like Seam Grip brushed around the patch perimeter, creating a watertight gasket.
Is it worth repairing an old, cheap tent?
If the poles, zippers, and main fabric are sound, a patch is far cheaper than a new tent. But if you’re facing multiple failures or the fabric is brittle, your effort is better spent on a new shelter. Our guides on budget tents under $100 or tents under $200 can point you to cost-effective replacements that might offer more space, like stand-up tents for car camping comfort.
How do I repair a hole in a tent floor?
Use the same permanent method, but always employ a sandwich patch with Tenacious Tape for maximum strength against abrasion. After repairing, using a footprint becomes non-negotiable to protect that area, a good practice for all car camping tents that see rough ground.
The Bottom Line
Patching a tent isn’t a hack; it’s a craft. It’s choosing a material that becomes part of the fabric’s story, not a blot on it. The formula is simple but unforgiving: the right tape, a surgically clean surface, and the patience to let chemistry do its work.
Skip the cleaning or cut the cure time short, and you’ll be redoing the job after the next storm, often with less viable fabric to work with. Do it right once, with the smell of isopropyl in the air and a good podcast on, and that patch will be the most reliable square foot of your shelter for years to come. Your tent, and your dry sleep, are worth that single hour of focused care.
