How To Set Up Tarp Over Tent
This post contains affiliate links. As an Amazon Associate, we earn from qualifying purchases.
To set up a tarp over your tent, start by selecting a flat, well-drained spot and securing a ridgeline between two sturdy points. Then, drape the tarp over the ridgeline, making sure it is taut and angled to direct rain away from the tent entrance. Next, stake down all corners firmly, maintaining a slope to ensure effective water runoff. Further details and alternative shelter configurations will be explained later in the article for those interested in more information.
Essential Facts in 30 Seconds
- Choose a flat, well-drained area to prevent water pooling under the tarp.
- Use a strong, waterproof tarp with appropriate stakes, guylines, and cords.
- Tie a ridgeline between two sturdy points and keep the tarp taut with adjustable knots.
- Securely stake down all tarp corners using grommets or tie-out loops to avoid damage.
- Set the tarp at a 30 to 45-degree angle facing the wind to direct rain away from the tent.
Choosing the Right Location for Your Tarp
Setting up your tarp in the right place keeps you safe and dry. Find flat or gently sloping ground to stop water from pooling under your tent. Stay away from low spots where rain collects. Soft soil needs extra care to hold stakes firmly.
Clear rocks, roots, and sticks from under your tarp. These can poke through and hurt you or your gear. Properly anchoring your tarp is essential for preventing water pooling underneath.
Look for strong trees or poles nearby to tie tarp corners. Space them so the tarp slopes about 30 degrees. This angle helps rain slide right off.
Point the tarp so rain and wind blow away from the tent’s door. This way, you stay warm and dry inside. Using a tarp also acts as a protective barrier from sharp objects on the ground, ensuring a safer camping experience.
Following these steps makes camping safer and more fun.
Preparing Your Tarp for Setup
Pick a strong tarp made of ripstop nylon or polyester. These materials stand up well to wind and rain.
Gather stakes, guylines, and cords before starting. Make sure all your gear is ready to avoid delays. A good tarp and tools make setup fast and easy.
Stay safe and enjoy your outdoor adventure.
Tarp Material Selection
Select the right tarp material to protect your tent from weather.
Vinyl tarps last long, block water, and resist sun damage. They work great in harsh weather.
Polyethylene tarps cost less and handle mild weather well.
Canvas tarps let air pass and resist some water but aren’t fully waterproof.
Mesh tarps offer shade and airflow in hot places but don’t stop rain.
Think about the weather and how you plan to use the tarp. Match these needs with the tarp’s strength and features.
This way, you pick the best tarp for your trip.
Prepping Tarp Components
Preparing tarp parts helps you set up fast and easy. Gather strong pegs or stakes that fit the ground. Use tough cord like 550 paracord for ridgelines and guylines. Tie cords to each tarp corner before you start.
Add Prusik knots on edges to move ropes easily. Check all hardware for damage or wear. Keep ridgelines and guylines neat to stop tangles.
Practice important knots like taut-line hitch and clove hitch. Know these knots well before camping. This prep saves time and keeps you ready for any weather.
Tarp Rigging Techniques for Stability
Keep your tarp strong and steady with good rigging. Tie a ridgeline between two strong points. Use a prusik knot to adjust the line tightness easily. Pull the tarp tight using adjustable knots and secure anchors. A tight tarp stands firm against wind and rain. This method helps you stay dry and safe outdoors. Additionally, ensure that the tarp is secured with stakes to prevent it from flapping in strong winds.
Ridge-line Setup Method
Setting up a tarp starts with a strong ridgeline. Pick two sturdy trees or poles spaced to fit your tarp. Use knots like the Bowline or Taut Line Hitch to tie the ridgeline tightly. The right peg choice significantly impacts your tarp setup, ensuring it stays secure during adverse weather conditions.
The Nasar knot works well to adjust tension easily. Keep the ridgeline tight and high to stop sagging. Pass cord through the tarp’s tie-out loops and make a slipped overhand loop to secure it around the ridgeline. Spread the tarp evenly so it hangs without rubbing or damage. It’s important to ensure the tarp is taut but allows for rain runoff to prevent water pooling.
Check your knots often to keep them secure and safe.
Adjustable Tension Techniques
Start by tying a strong ridgeline. Next, use adjustable tension techniques to keep your tarp steady. Knowing a few knots helps a lot. Properly securing your tarp with tent tie downs can further enhance its stability against wind and rain.
| Technique | Description |
|---|---|
| Prusik Knot | Slides but locks tight when pulled hard. |
| Bowline Knot | Makes a loop that won’t get stuck. |
| Trucker’s Hitch | Acts like a pulley to pull tight easily. |
| Half Hitch | Quick knot for small tension changes. |
Add shock cords to these knots. It absorbs movement and keeps your tarp tight. Mastering these knots makes your tarp strong and ready for wind or rain. Your outdoor time stays dry and comfortable. Additionally, using guy ropes can enhance the stability of your tarp setup during windy conditions.
Guyline Anchoring Strategies
Set up your tarp with strong guyline anchoring for steady shelter. Pick firm ground for stakes. Push stakes in at a 45-degree angle toward the tarp. This holds the tarp tight. Properly staked tents will also provide added stability to your tarp setup.
Use trees or rocks as anchors if the soil is loose. Tie guylines with bowline knots for fixed loops. Use clove hitches to make quick adjustments. Bright cords help you see guylines in low light.
Try a 2:1 pulley system to pull guylines tighter with less effort. Space guylines evenly around the tarp to spread tension. Check the angles and tightness often. This stops your tarp from flapping or collapsing in wind and rain.
Incorporating guy ropes into your setup enhances stability and ensures your tarp remains secure.
Good setup means better shelter and less hassle.
Corner Setup and Attachment Methods
Setting up tarp corners well keeps your shelter strong and steady. Stake down all four corners flat on the ground. This shows the shape and size of your shelter. Space corners to get the right height and wind protection. Use grommets or tie-out loops to secure stakes tightly. Reinforce corners to stop tearing when pulled hard.
Wrap paracord around trees if you can’t stake straight. Use taut-line hitch knots to keep lines tight and safe. Pass tent stakes through corner loops and push them deep into the ground. Tie guy lines to corner loops with trucker’s hitch knots for easy tension changes.
A well-secured tarp enhances protection from wind and rain during your camping experience. Check corners often to keep the tarp tight and stable. Fold loose corners under the tarp to stop wind from flapping them. This makes your shelter last longer in bad weather.
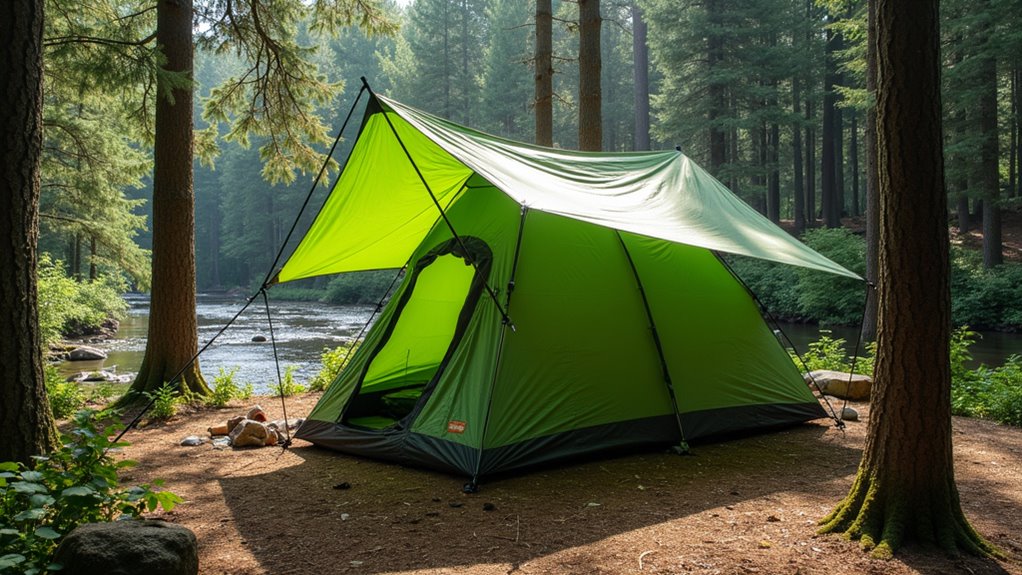
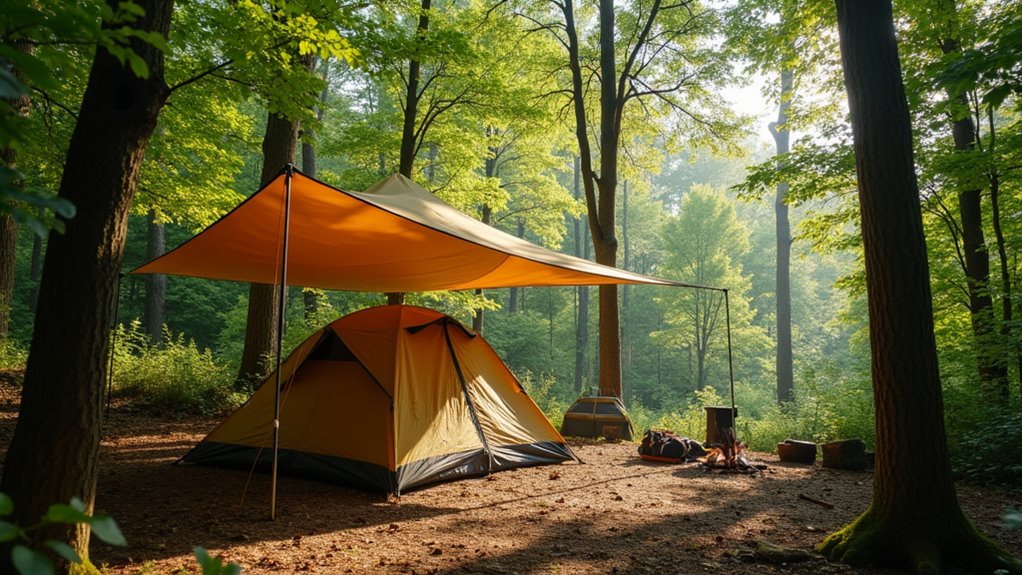
Popular Tarp Shelter Configurations
Planning outdoor trips means knowing popular tarp shelter types. The A Frame Shelter stands out. It protects two people well and allows air to flow. Stake the corners, use trekking poles, and adjust height easily.
Need extra space? The Flying A Frame lifts the front edges. This helps air move and gives nice views.
The C Fly Shelter combines tarp and groundsheet. It keeps your gear dry and guards against weather.
For strong storms, the Star Tent fully closes in. It keeps you and your gear safe and dry.
The Stealth Shelter stays low. It hides well and blocks wind.
Each type suits different needs. Pick one based on weather and group size. Enjoy camping with comfort and safety.
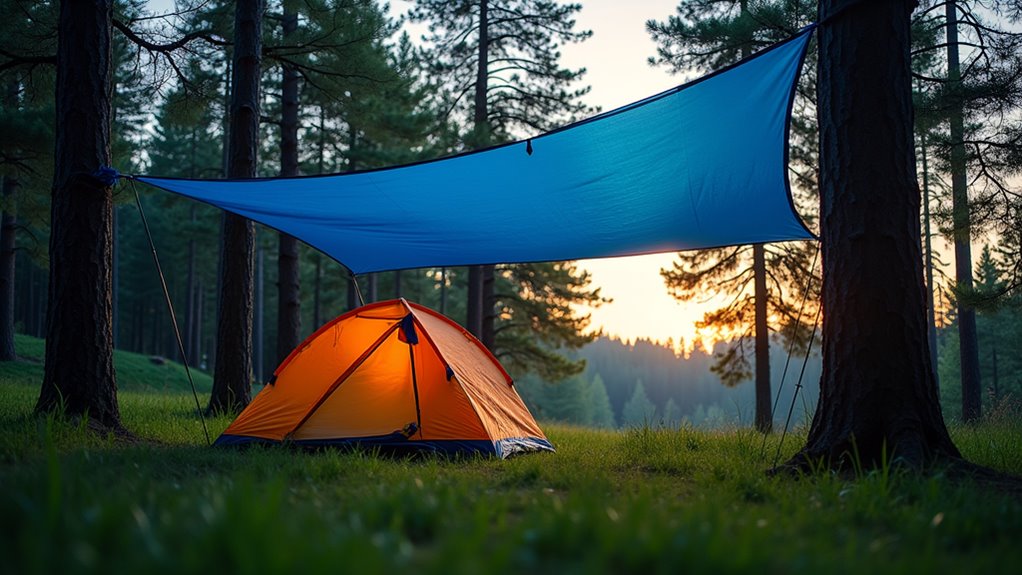
Weather Considerations for Effective Drainage
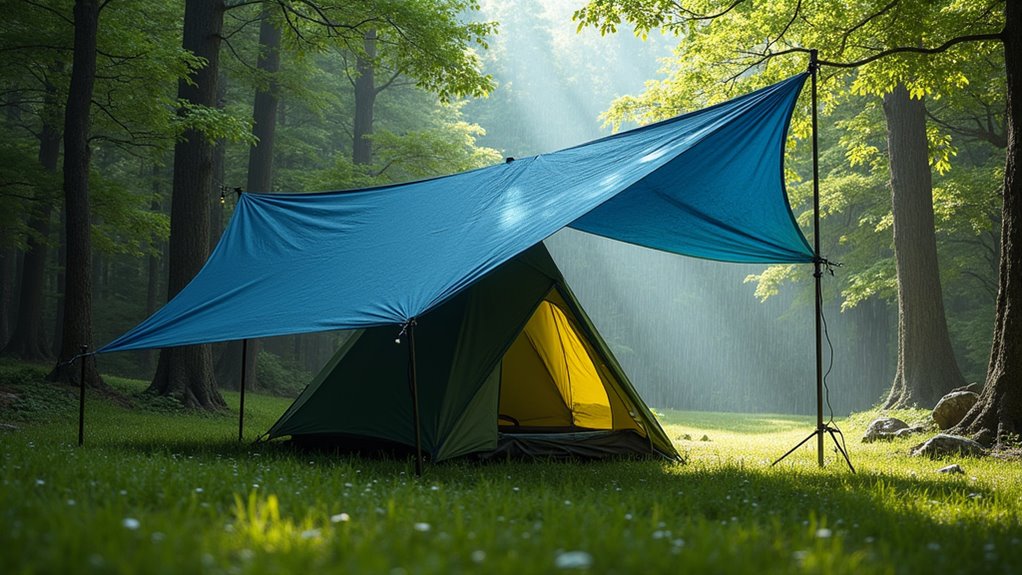
Effective drainage is key to a good tarp setup over your tent. Poor drainage causes discomfort and can damage gear. Make sure the tarp is bigger than the tent. This helps water run off easily. Set the tarp at a slope of 30 to 45 degrees. Steeper slopes shed rain faster.
Place the tarp so it faces the wind. Lower the side where the wind blows to guide rain away. Pick a campsite on a gentle slope. This lets water flow away from your tent naturally.
Use strong knots like taut-line or bowline for guy lines. Tight lines stop the tarp from sagging. Choose waterproof tarp material. It keeps moisture out and your gear dry.
In heavy rain or storms, add extra overhangs or small channels to direct water. After bad weather, check the tarp and tighten or adjust it. This keeps the slope right and water moving away.
Good drainage keeps you dry and your gear safe.
Frequently Asked Questions
Can I Use a Tarp With Any Type of Tent?
A tarp works well with many types of tents. Check the tarp size and material to fit your tent. A good fit keeps rain and wind out. Set up the tarp tight and high for best shelter. Use ropes and stakes to secure it well. This helps keep you dry and comfortable during camping. Many campers use tarps to add extra protection. They can also create shade or a dry area outside the tent. Choose a tarp that matches your tent’s shape and size for the best results.
How Do I Clean and Maintain My Tarp?
Shake dirt off your tarp before cleaning. Use mild soap and warm water to wash it gently. Rinse well to remove all soap. Let the tarp dry fully in the air. Check your tarp often for tears or holes. Fix small rips quickly to stop bigger damage. Clean and care for your tarp regularly to keep it strong. A well-kept tarp lasts many seasons outdoors. Easy care saves money and keeps gear safe.
What Size Tarp Is Best for My Tent?
Pick a tarp larger than your tent by at least 0.5 meters on each side. This size gives good coverage and stops water from reaching your tent. A bigger tarp also protects your gear and creates a dry area outside. Make sure the tarp has enough extra space to cover the tent’s shape well. This helps during rain or wind. A tarp too small leaves parts of your tent exposed to bad weather. Choose a tarp size that fits your tent’s footprint plus about one meter in length and width for best protection.
Can I Set up a Tarp Alone?
Setting up a tarp alone is possible with the right steps. Use strong knots to secure guylines tightly. Adjustable poles help keep the tarp stable and upright. Pull the tarp tight to stop it from flapping in the wind. A well-set tarp keeps rain and wind out. Many solo campers use these tips for safe shelter. Practice makes the process faster and easier each time.
How Do I Store My Tarp After Use?
Clean your tarp well after use. Fold it carefully to stop creases. Use breathable bags for storage. Keep the tarp dry and off the ground. This stops damage and mold. Proper storage makes tarps last longer. It saves money and time. Store tarps in a cool, dark place. Avoid direct sunlight to keep material strong. Check your tarp now and then. Make sure it stays dry and clean. Good care helps your tarp work better next time.
Conclusion
Setting up a tarp over your tent creates a strong shield against rain and sun. This simple cover keeps water from pooling on your tent’s roof. It also blocks harsh sunlight, making your camp cooler. You can use ropes and stakes to tie the tarp tightly above the tent. Make sure the tarp is slanted so water runs off easily. A well-set tarp gives you extra space to sit or store gear. Practice makes perfect. Soon, you will quickly set up a tarp that makes your campsite cozy and dry. This small step improves your outdoor comfort a lot.